Amazon Virtual Private Cloud (Amazon VPC)
Amazon VPC Management, in this Tutorial one, you can learn About Amazon VPC Management. Are you the one who is looking for the best platform which provides information about Amazon VPC Management? Or the one who is looking forward to taking the advanced Certification Course from India’s Leading AWS Training institute? Then you’ve landed on the Right Path.
The Below mentioned Tutorial will help to Understand the detailed information about Amazon VPC Management, so Just Follow All the Tutorials of India’s Leading Best AWS Training institute and Be a Pro AWS Developer.
Amazon Virtual Private Cloud (Amazon VPC) powers you to launch AWS resources into a virtual network that you’ve defined. This virtual network closely resembles a traditional network that you’d operate in your own data center, with the benefits of using the scalable infrastructure of the AWS cloud.
Amazon VPC is the networking layer of the OSI model for Amazon EC2.
This tutorial will help you to get an overview that how to design infrastructure or your own private network for your organization.
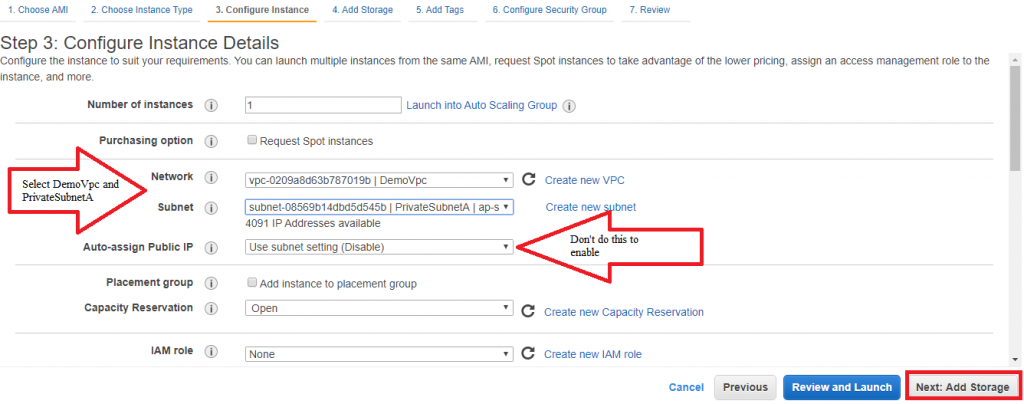
To design a VPC to secure your data, first, we are going to create a DemoVPC (10.0.0.0/16)
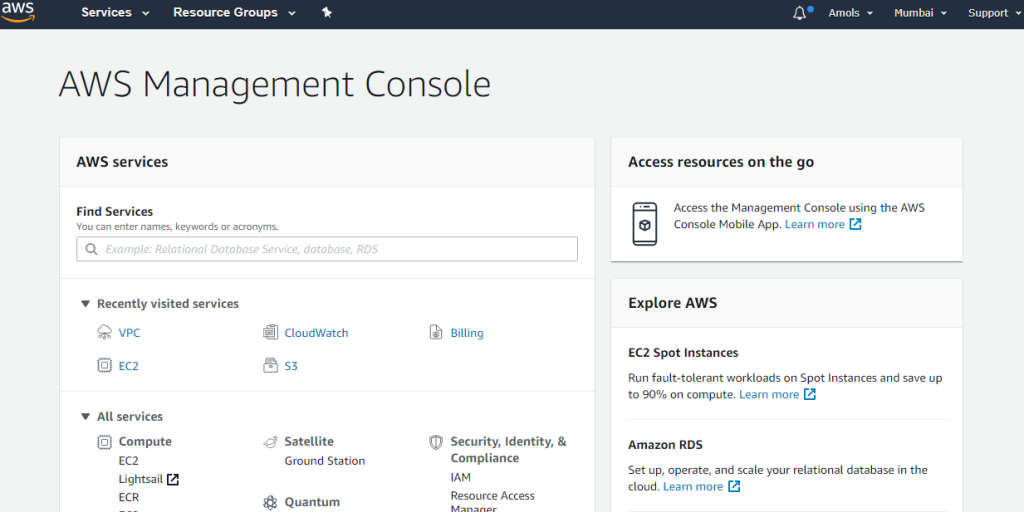
So, sign in to console in your AWS account and search in the dashboard for VPC. Look at the image given below:
Click on VPC it will redirect you on VPC dashboard.
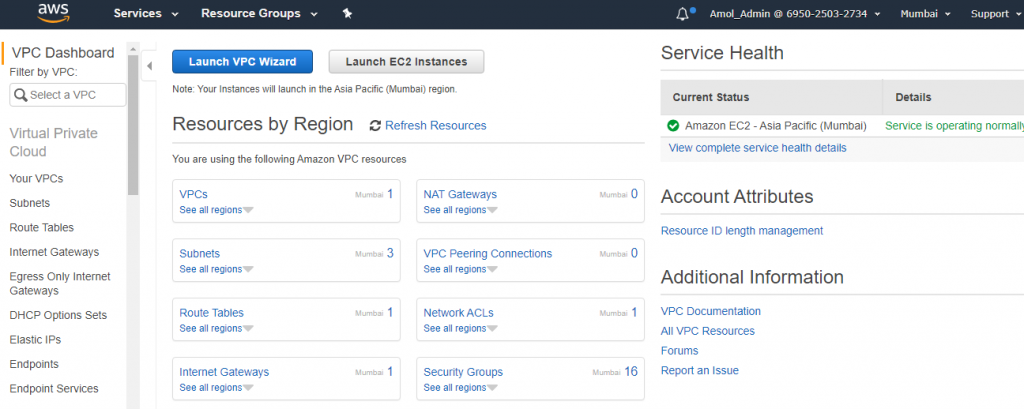
You can see there a default VPC available.

You have to create your own custom VPC and give some name. Here in this tutorial I have given the name as DemoVpc. Give CIDR range to restrict access for unauthorized request.
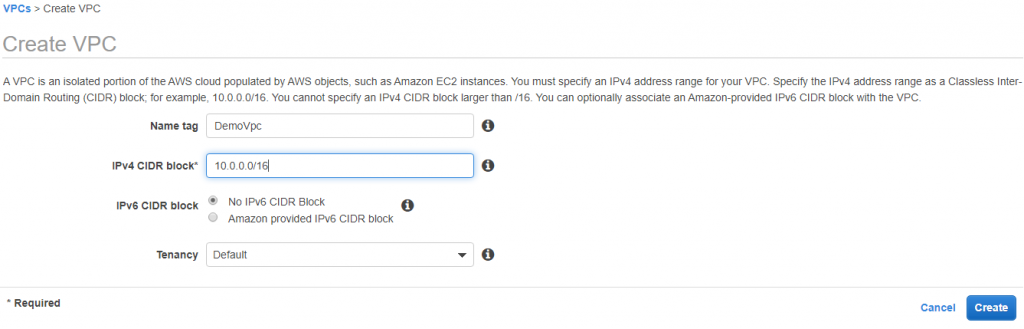
You can see in below image Demovpc created.

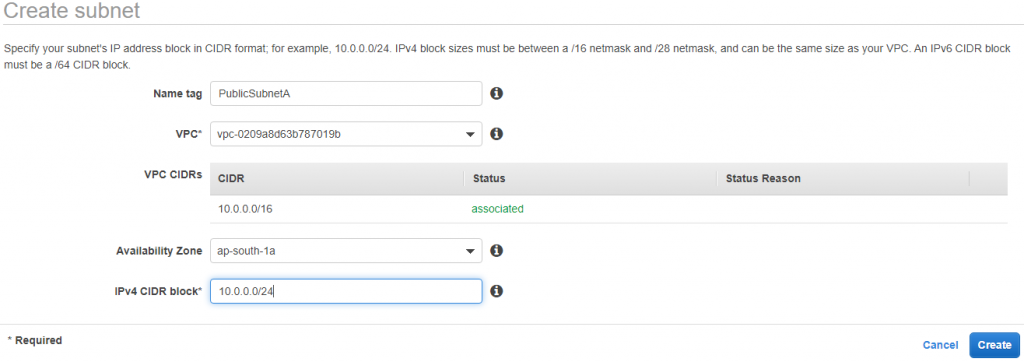
2) Once you create a DemoVpc, create four Subnet under DemoVPC by default there also default subnets available you can see:

PublicSubnetA (10.0.0.0/24) – AZ 1a
Select in VPC a newly created VPC, I select a Dmovpc
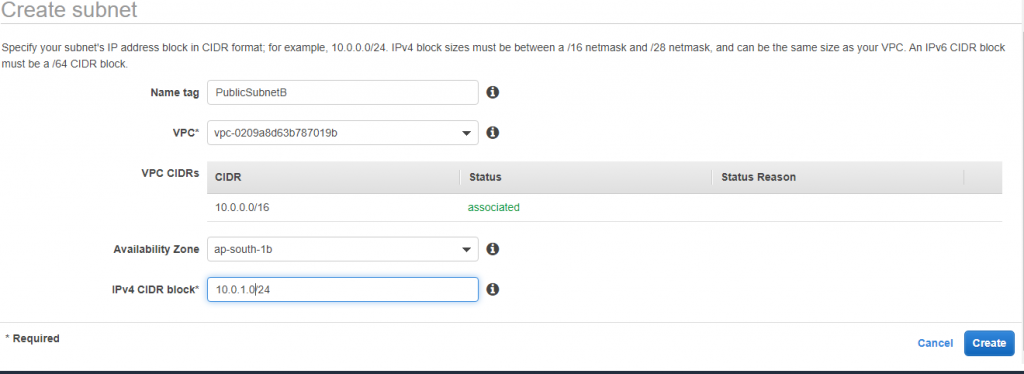
Follow the same step for PublicSubnetB
PublicSubnetB (10.0.1.0/24) – AZ 1b
Follow the same steps for PrivateSubnetA and PrivateSubnetB
PrivateSubnetA (10.0.16.0/20) – AZ 1a
and
PrivateSubnetB (10.0.32.0/20) – AZ 1b
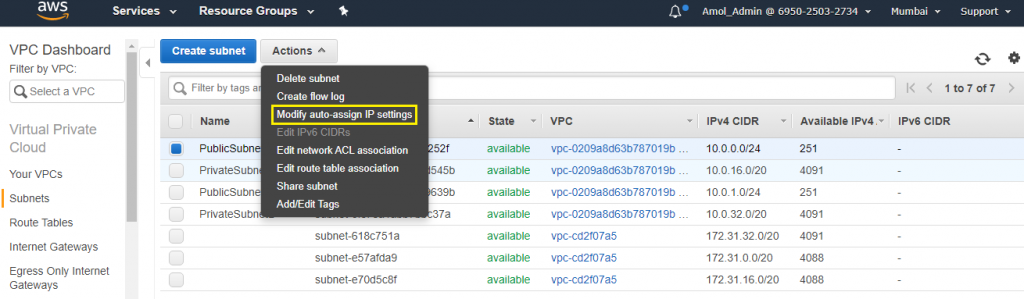
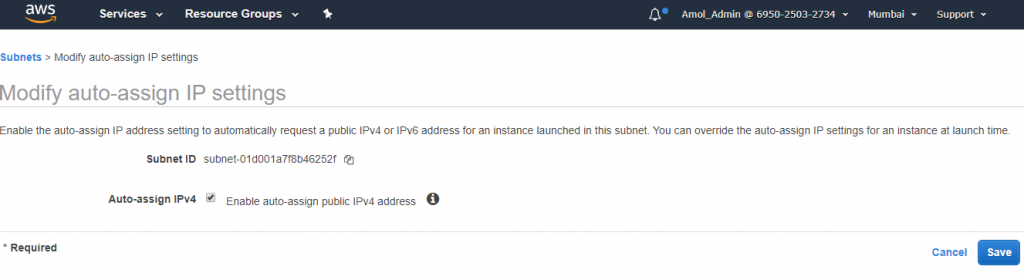
3) Enable auto assign public IP to true for both the publicSubnet.
Do this setting to enable for both public subnets A and B
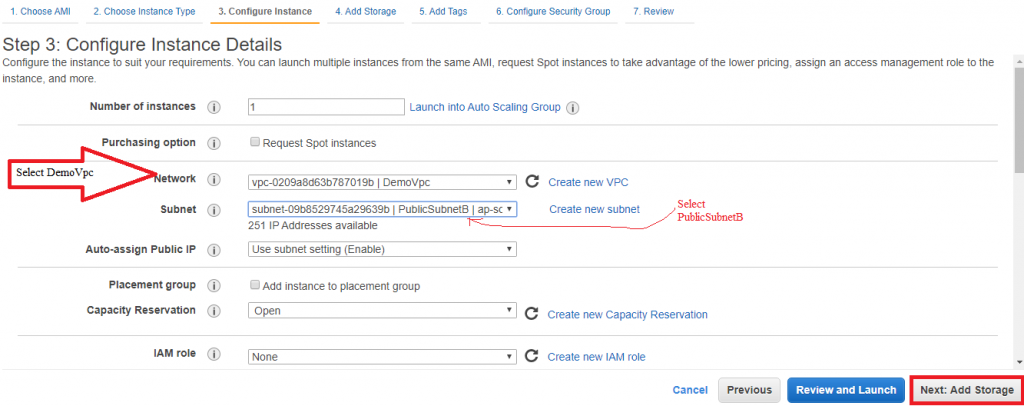
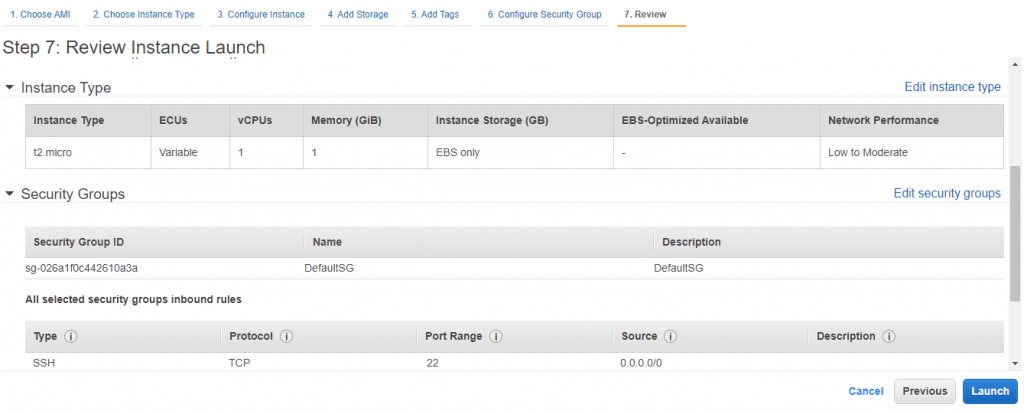
4) In this tutorial considering that you have the prior knowledge of EC2. Launch a new instance into publicSubnetA. (SSH from anywhere 0.0.0.0./0)
I mention some important steps during instance launching:
You can see third step I mentioned below, you can take any OS/AMI to launch. I took her Amazon Linux OS.
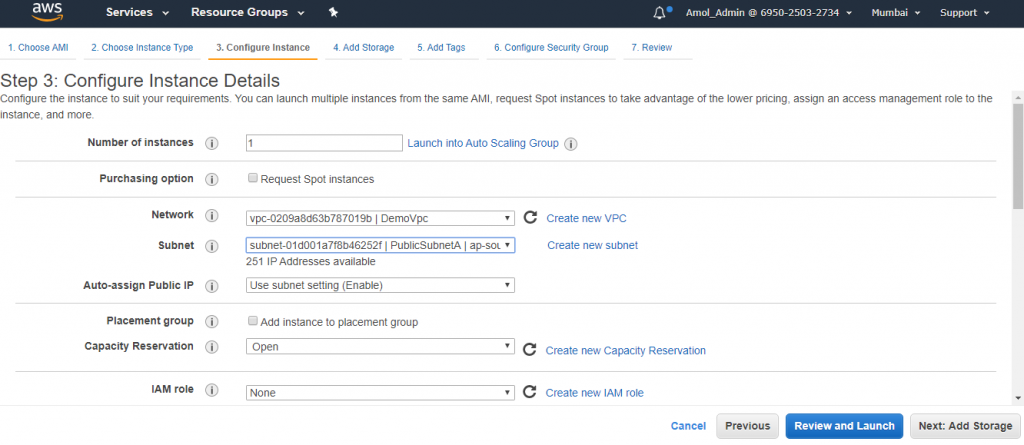
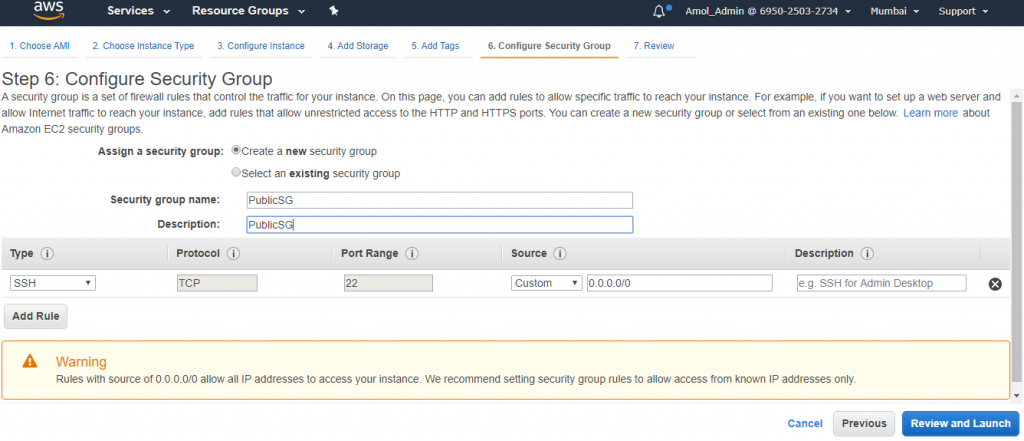
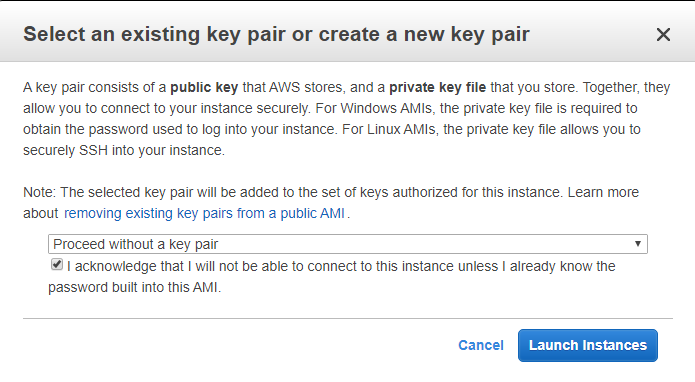
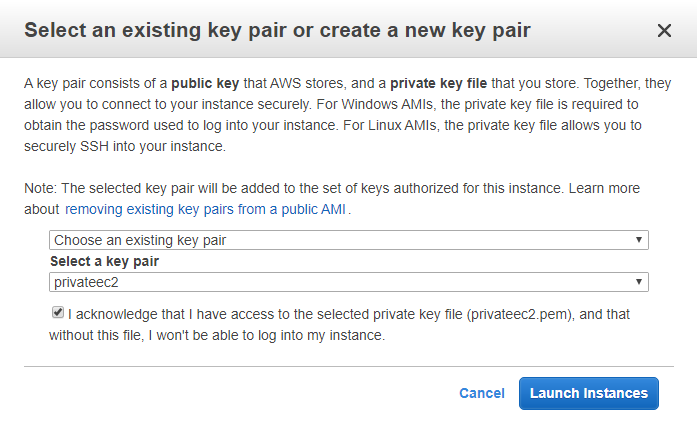
Launch your public EC2 instance with existing key pair or with new key pair to connect it later.
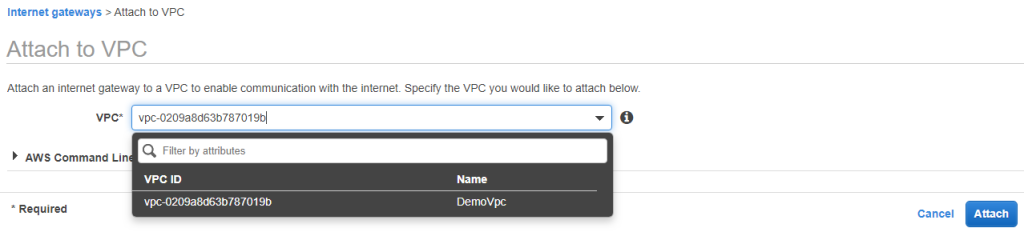
5) Then next step is to create an Internet Gateway, there is also a default an internet gateway.

You have to create a new igw, for this click on it available on left pane.
Create a DemoIGW and attach it to DemoVPC. This will have used to move internet traffic in/out VPC.

Attach to VPC
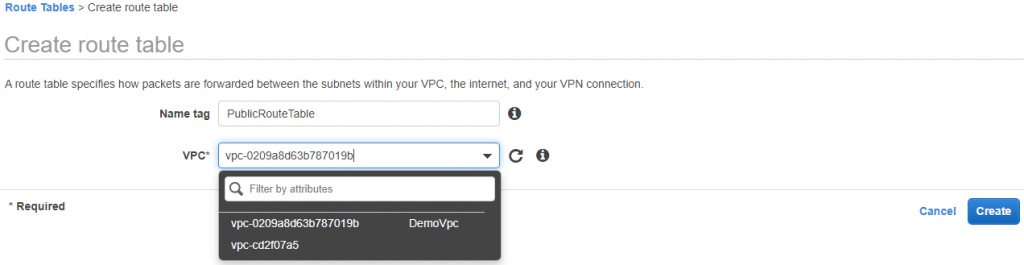
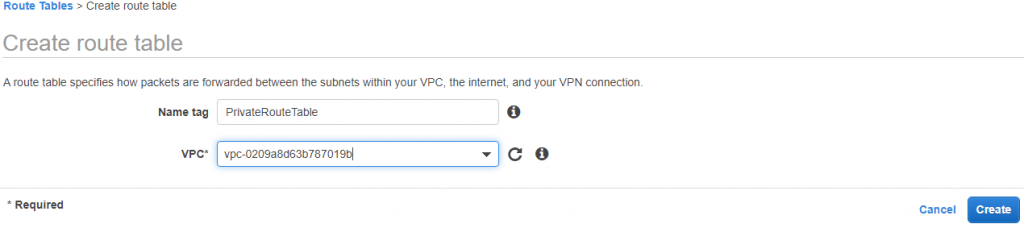
6) Go to Route Table:
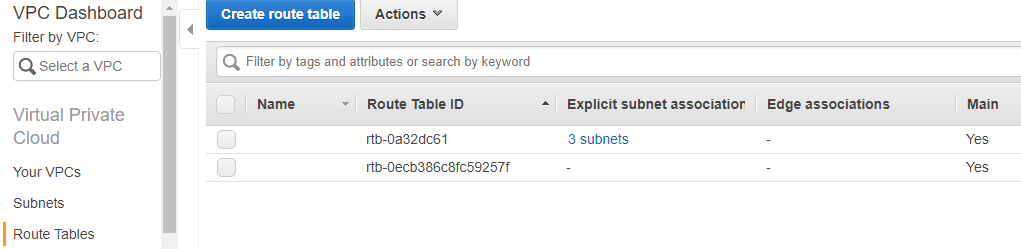
Create two route tables Public and Private and attach DemoVpc to both.
And PrivateRouteTable
7) Associate public and private subnets with corresponding Route tables.
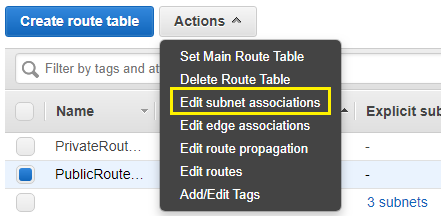
Attach both public subnet to PubliRoute Table.
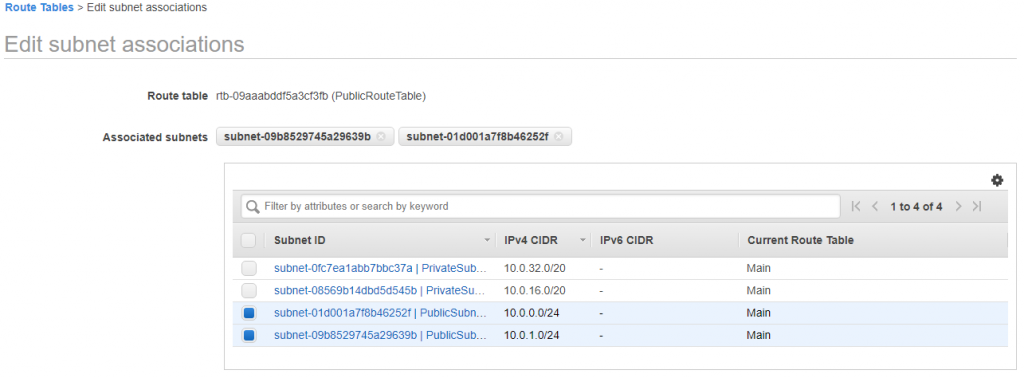
Do the same steps for PrivateRouteTable and attach two privatesubnet to it.
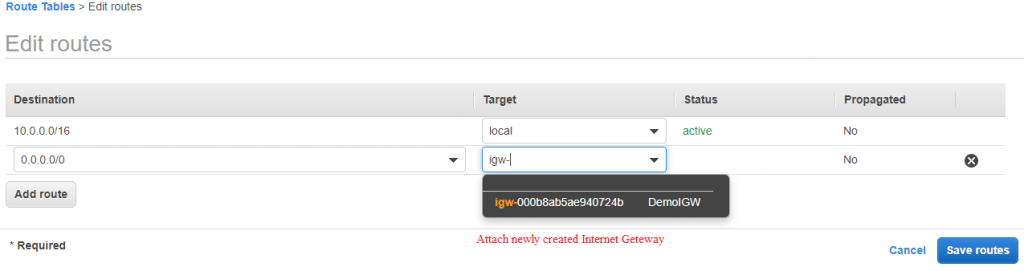
8) Edit PublicRoute Table and add new route to 0.0.0.0/0 to DemoIGW.
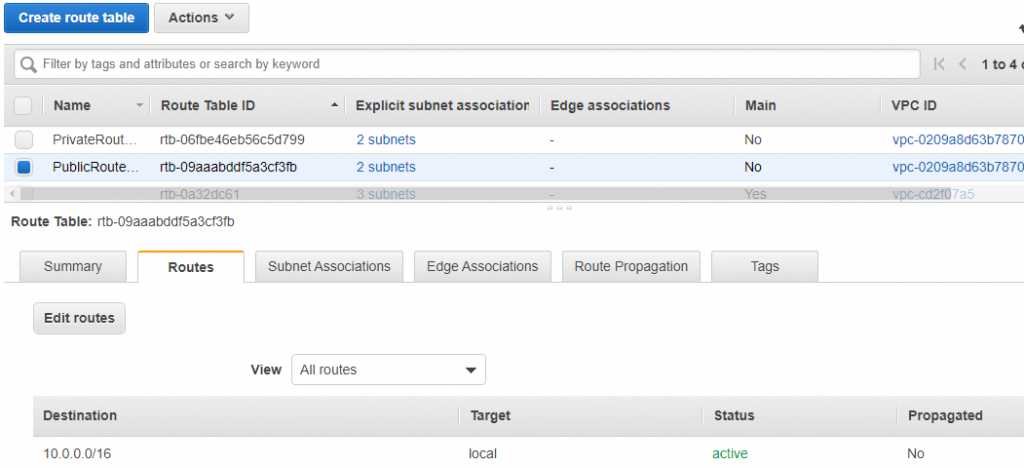
Click on Edit routes
9) Now we want to connect private instance to internet, so we will create a NAT.

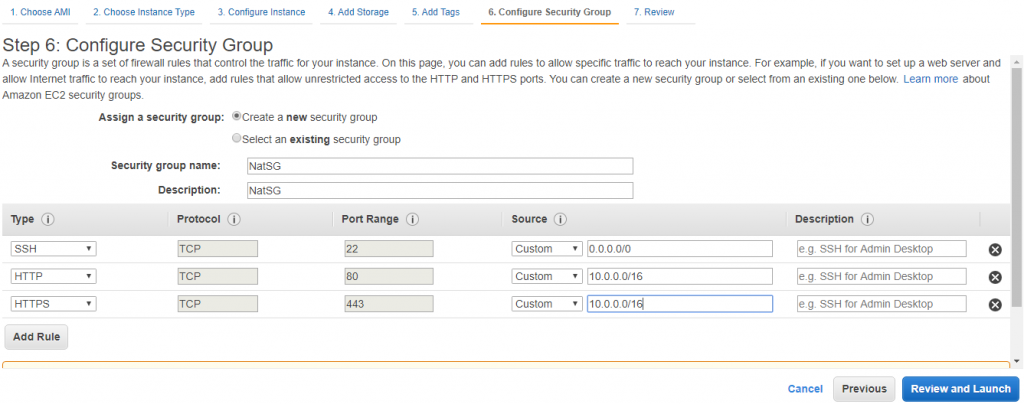
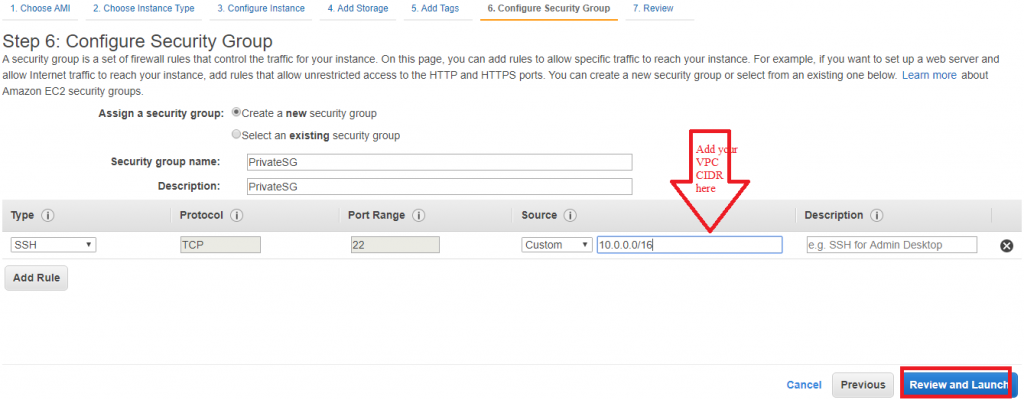
9) Launch a NAT Instance into publicSubnetB (SSH 0.0.0.0/0, HTTP 10.0.0.0/16, HTTPS 10.0.0.0/16)
10) Now launch a private instance into privateSubnetA (SSH 10.0.0.0/16) with a new key pair.
Then launch your private EC2 instance with exsting or create key pair and Launch the instance.
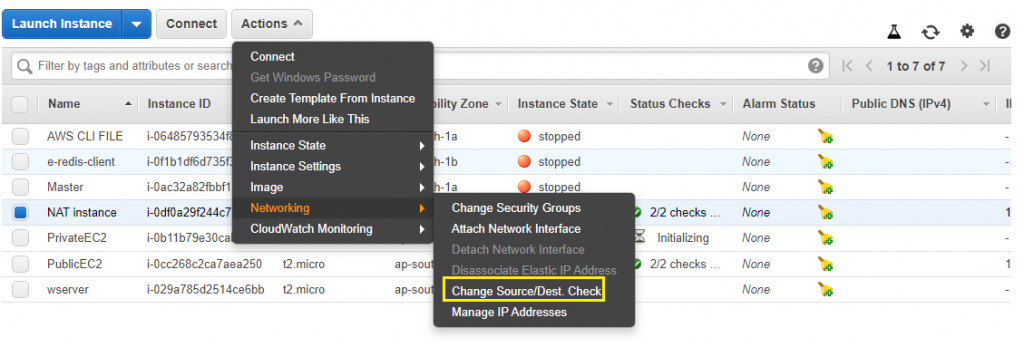
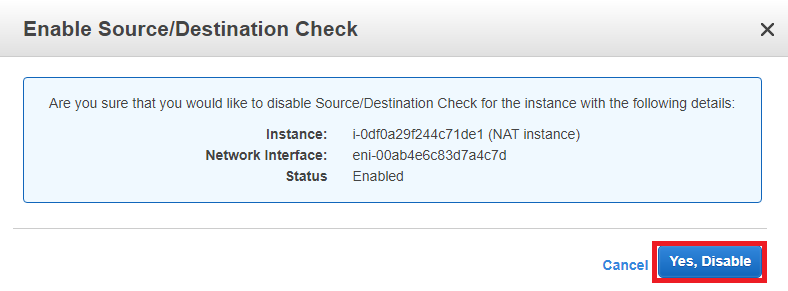
11) For NAT to work, disable Source/Disable destination check.
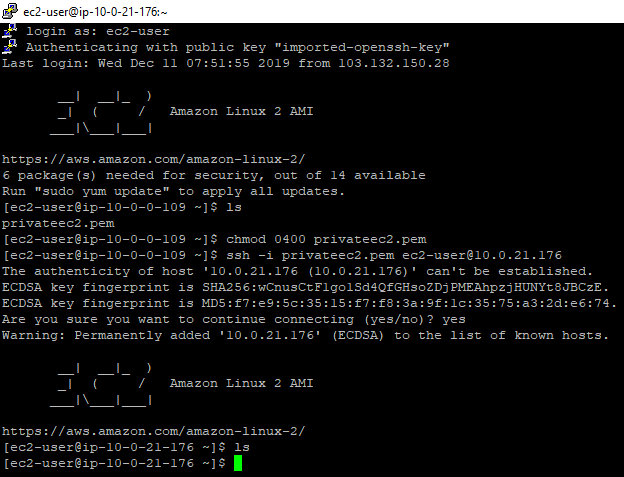
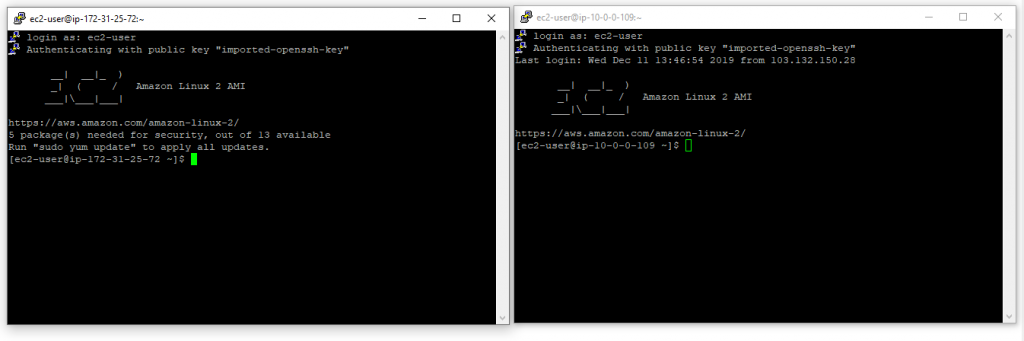
12) Now SSH into your private instance from the public instance with new key.
Connect to pubic instance first, here I am using putty to connect by using my private key of public Ec2 instance.
Place in Hostname of putty your IPv4 Public IP of public Ec2 instance, it will connect by entering ec2-user or your username of respective os you are using.

13) On Private instance internet won’t work, for that add below in privateRoute table.
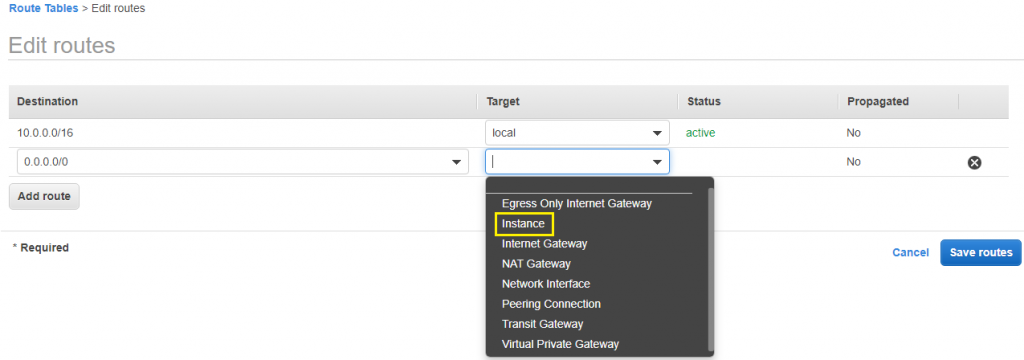
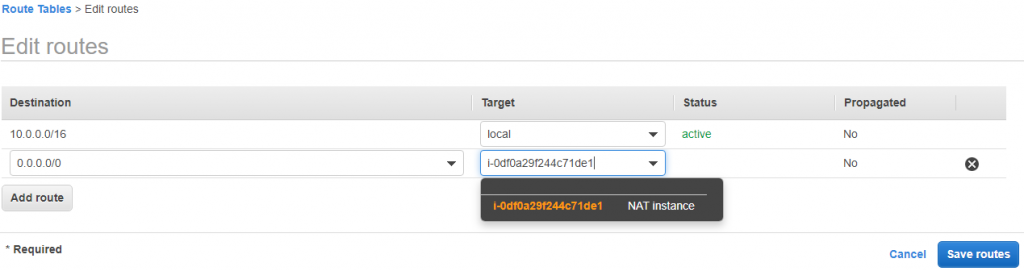
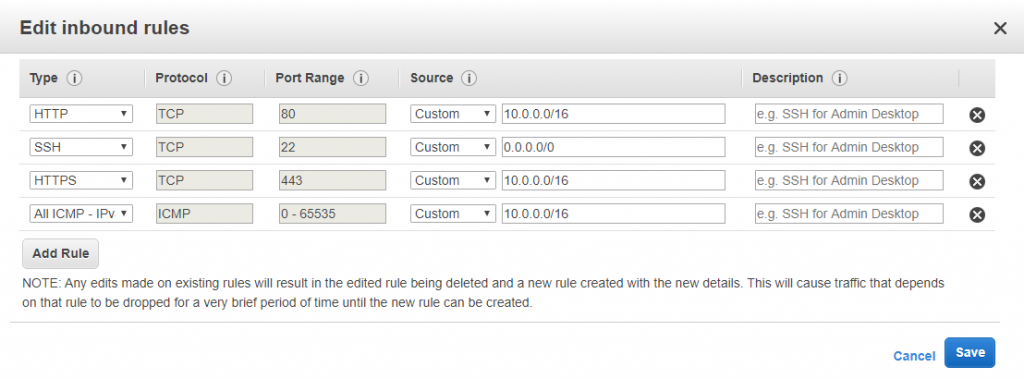
0.0.0.0/0 to NAT instance. Also in NAT security add All ICMPV4 inbound.
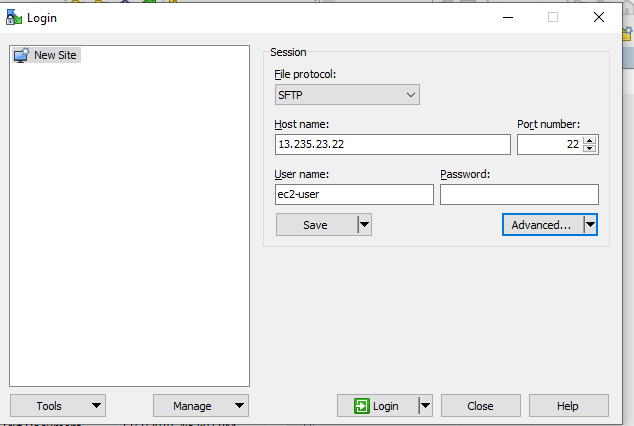
Go to winscp:
To transfer the. pemfile of private EC2 instance from local machine to public EC2 instance, put ip of public EC2 instance in hostname and username.
Click on Advanced and then click on authentication, choose private key of your public EC2 instance to connect using winscp.
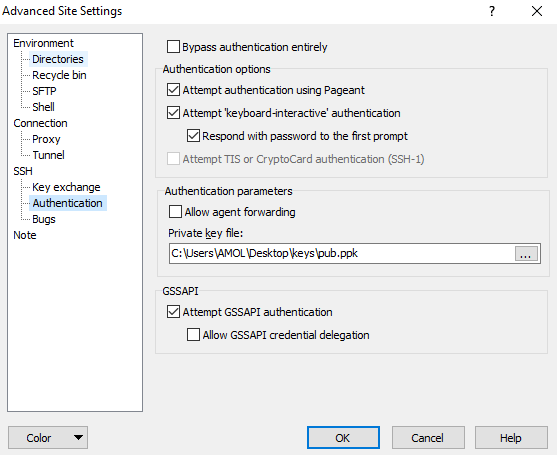
Follow the steps in an image given below:
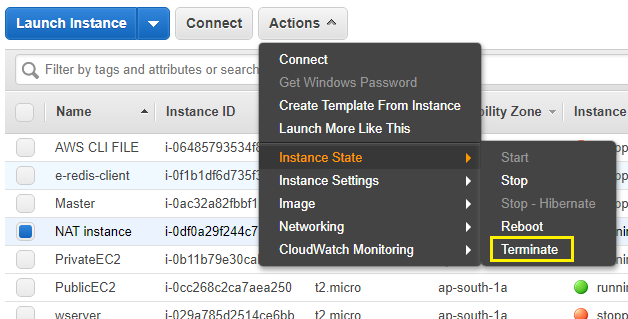
Terminate your NAT instance that you had launch in previous step
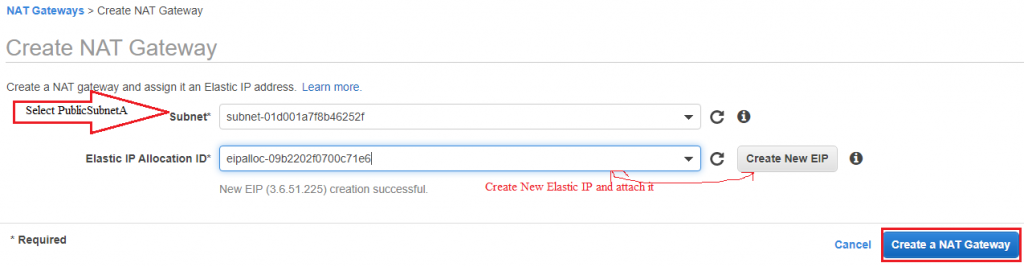
14) To replace NAT Instance create a NAT Gateway in PublicSubnetA and terminate NAT Instance.
Create NAT Gateway in PublicSubnetA

Create on NAT Gateway:
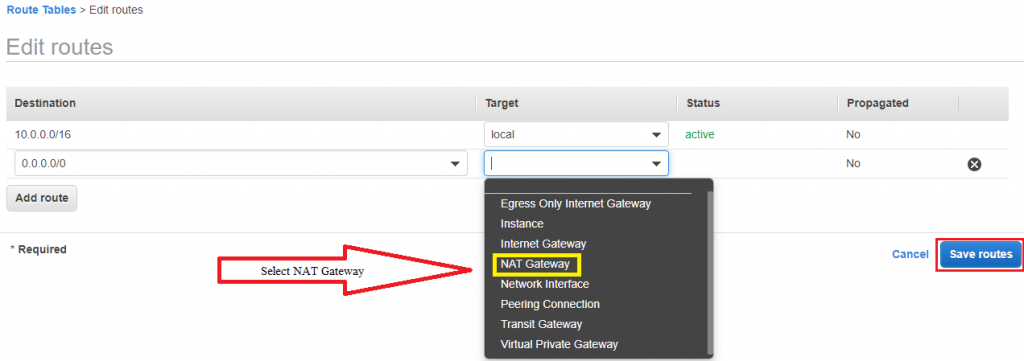
15) Go to PrivateRoute table and update route to NAT Gateway.
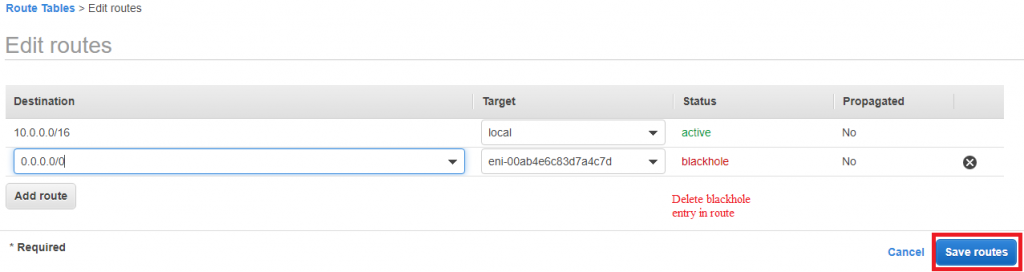
And attach NAT Gateway to PrivateRouteTable to provide internet access to private EC2 instance.
16) To Enable DNS public hostname goto DemoVPC and enable it.
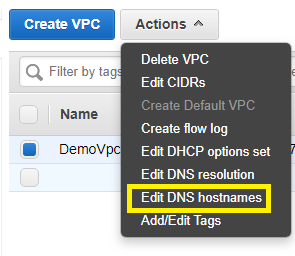
And enable it.

17) By default a NACL is already created for our DemoVPC (DemoNACL).

18) Default NACL inbound and outbound is allowed.
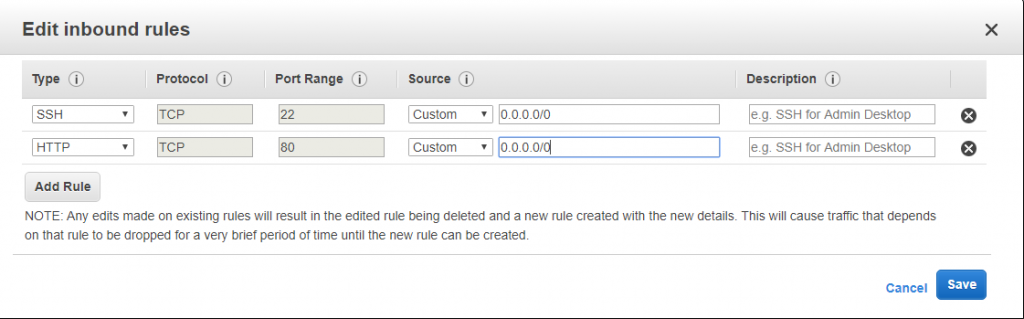
19) We will install an apache server (Hello World) on our public EC2, so edit the security group of public and add http to 0.0.0.0/0.
Installation HTTP server on Public EC2 Instance:
First switch to root user
$ sudo su
Now you will work as superuser or root user
Then update your instance with any latest update (Not mandatory, but keep your instance up to date with latest update)
# yum update -y
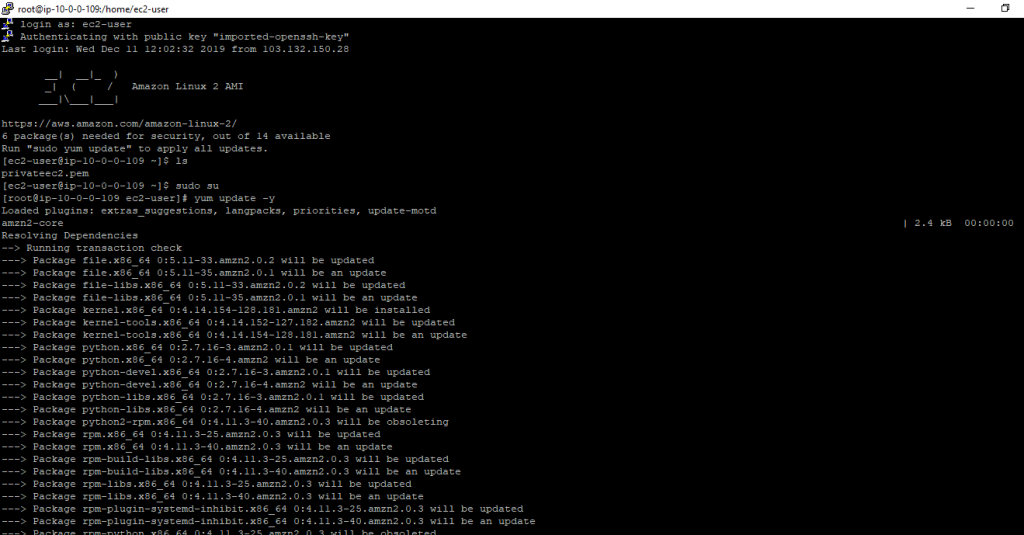
Now install http server on machine
# install –y httpd.x86_64

Click “y”

Once you install it, start the service.
# Systemctl start httpd.service

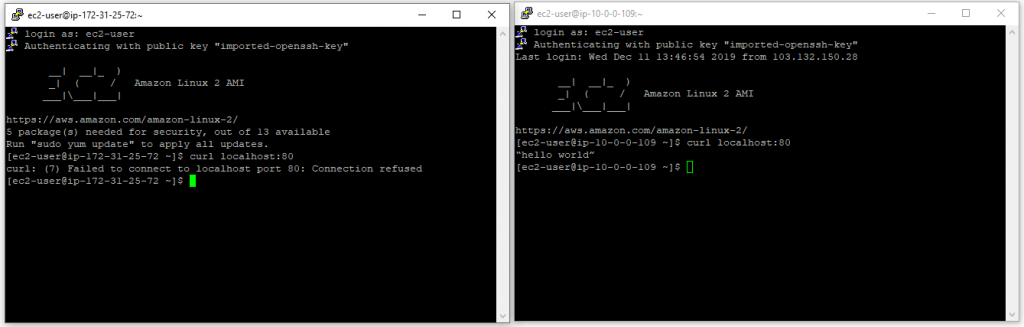
Just to ensure about proper http installation
# curl localhost:80

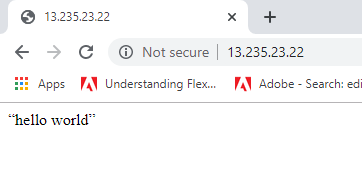
We also can add index.html file into the http directory as well.
# echo “hello world” > /var/www/html/index.html

You can see message “hello world” in the image given above.
20) Once apache will install we will hit from browser and will get it.
21) In NACL inbound add 80 to HTTP Deny, our request will not work.
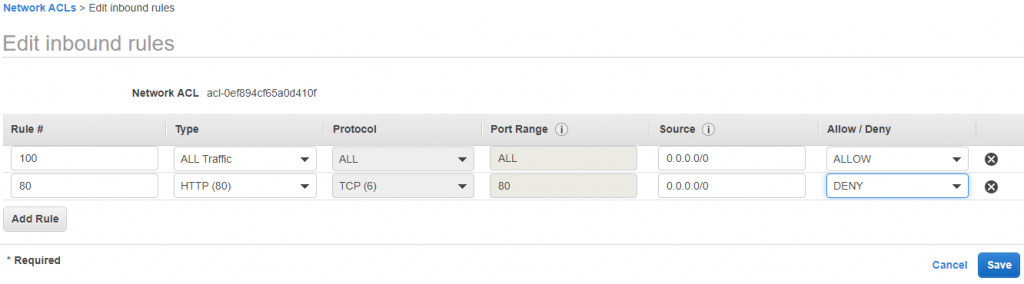
Again refresh in browser request will not work.
22) Change it to 110 and our page will work again.

Again refresh in browser request will work.
Note: Set the Network ACL as it is.
VPC Peering:
We will connect our default VPC to DemoVPC
24) Launch a new instance into defaultVPC (SSH 0.0.0.0/0)
Here in this tutorial I taken Amazon Linux Instance to launch and don’t change setting during launching leave as it is such vpc and subnet use default vpc and subnet.
I mention below some step
Now Default instance in default VPC is ready to connect using putty
![]()
Connect to instance of default VPC by using putty
25) Curl localhost:80 into public instance, it will work but same won’t work on default vpc instance.
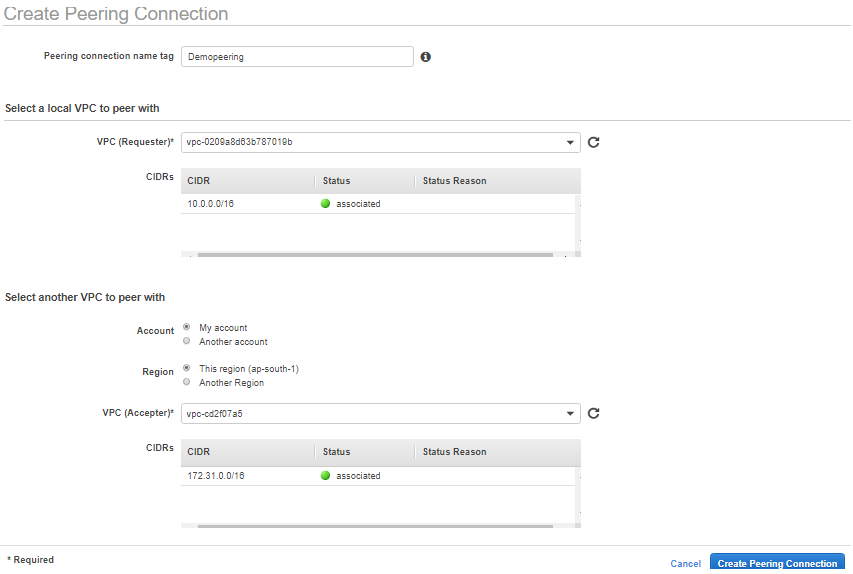
26) create a peering connection(DemoPeering)
Go to Peering Connections
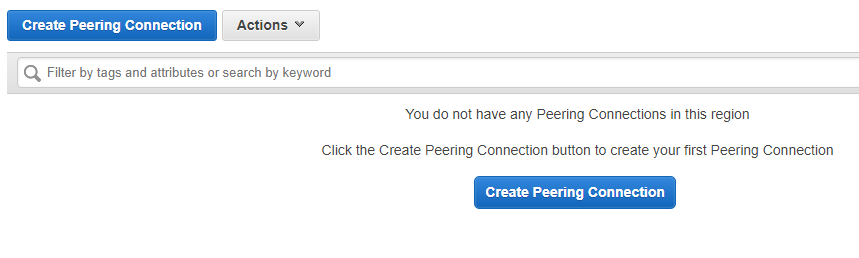
Click on create Peering Connections
Requestor you own DemoVPC
accpetor defaultVPC
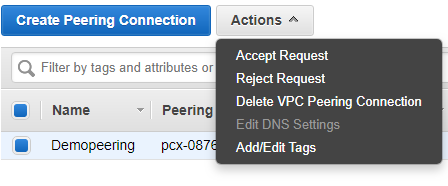
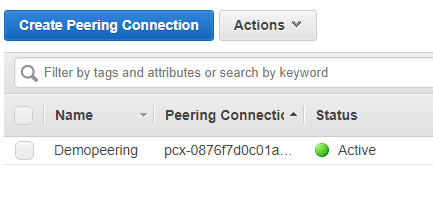
27) Accept the request
28) Goto PublicRoute Table and add a rule
defaultVPC CIDR to pcx
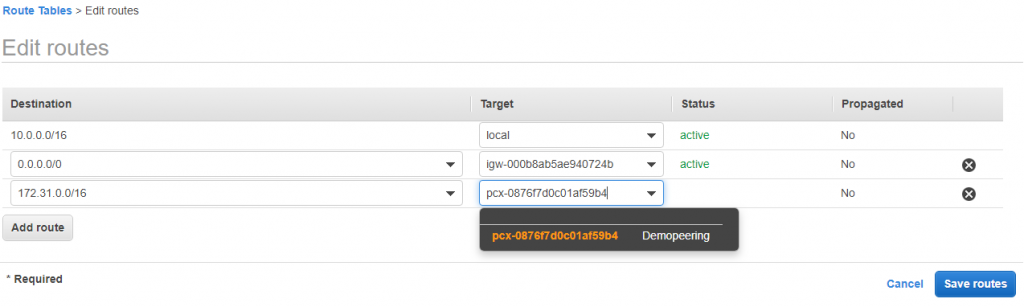
29) Also do the same for Default RouteTable as well.
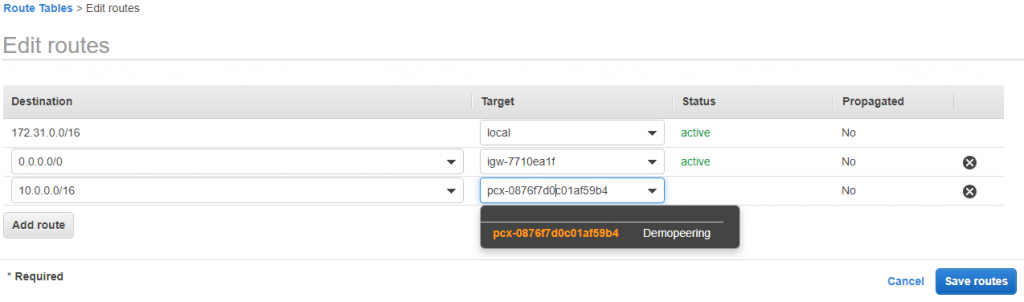
DemoVPC(10.0.0.0/16) CIDr to pcx. It will work.
#Last but not least, always ask for help!

