How to Create an Amazon RDS DB Instance?
Creating Amazon RDS DB Instance, in this Tutorial one, you can learn Creating Amazon RDS DB Instance. Are you the one who is looking for the best platform which provides information about Creating Amazon RDS DB Instance? Or the one who is looking forward to taking the advanced Certification Course from India’s Leading AWS Training institute? Then you’ve landed on the Right Path.
The Below mentioned Tutorial will help to Understand the detailed information about Creating Amazon RDS DB Instance, so Just Follow All the Tutorials of India’s Leading Best AWS Training institute and Be a Pro AWS Developer.
The easiest way to create a DB instance or accessing Amazon RDS is to use the AWS Management Console. Once you have created the DB instance, you can use standard MySQL utilities or software such as MySQL Workbench to connect to a database on the DB instance. Creating a MySQL DB can be done in three ways, using AWS management console, AWS CLI or AWS API. (You can use another database also as per your requirement which is listed in Amazon RDS)
Important
Before you create MySQL DB instance on Amazon RDS, you must have a VPC with both public and private subnets, and corresponding security groups.
AWS Management Console for RDS
AWS management console is the most convenient way to get started with RDS without a programming interface. You can log in to the AWS console using your AWS account details, locate the RDS service and then follow the steps shown below to create MySQL DB instance.
To launch a MySQL DB instance:
- Sign in to the AWS Management Console and open the Amazon RDS console at https://console.aws.amazon.com/rds/.
- In the top-right corner of the AWS Management Console, click on AWS Region then select the particular one in which you want to create the DB instance. This example uses the Asia Pacific Mumbai) region.
- In the navigation pane, select Databases.
If the navigation pane is closed, click on the menu icon at the top left to open it.
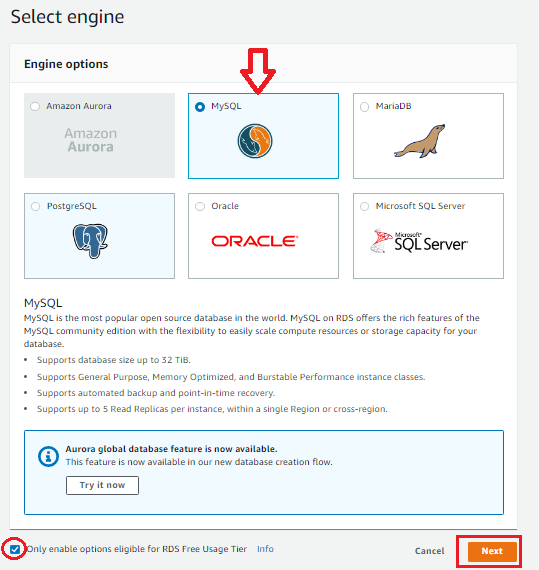
- Click on Create database button to open the Select engine
- On the Select engine page, shown following, select your database which you want to create (here in this example) I choose MySQL, and then choose Next.
Step-1
Select the MySQL DB Engine from the console.
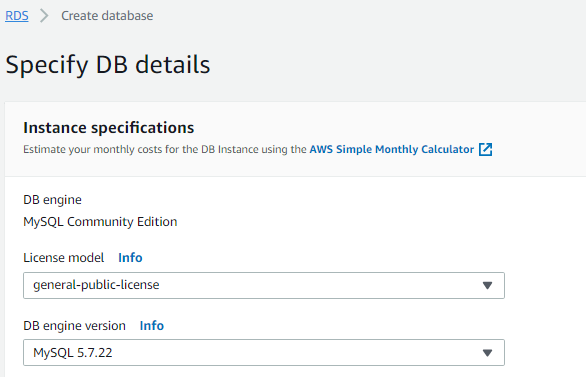
Step-2
Specify the required DB details.
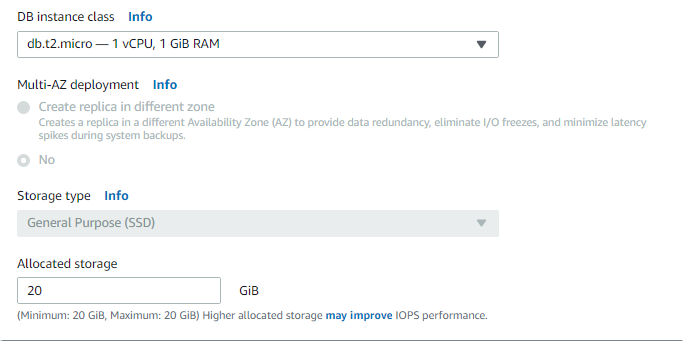
Step-3
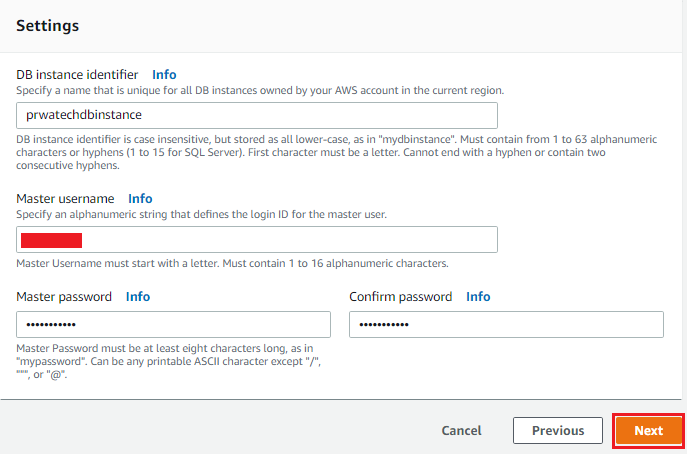
In this step you have to configure the DB instance class, the amount of storage allocated also set the master password along with few other details.
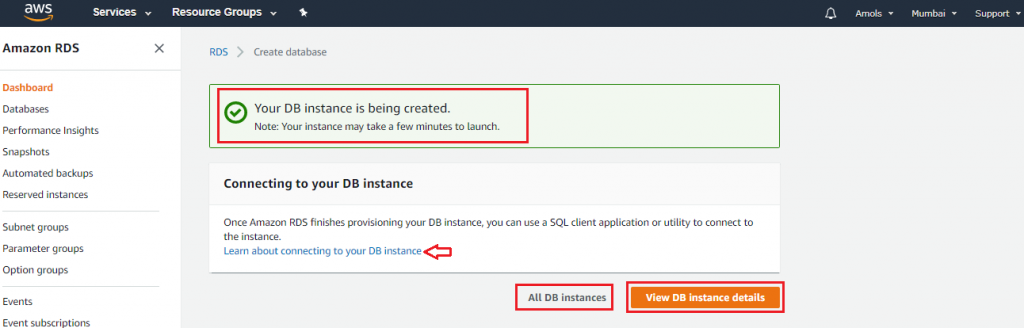
You can check your DB Instance details by click on view DB Instance details:
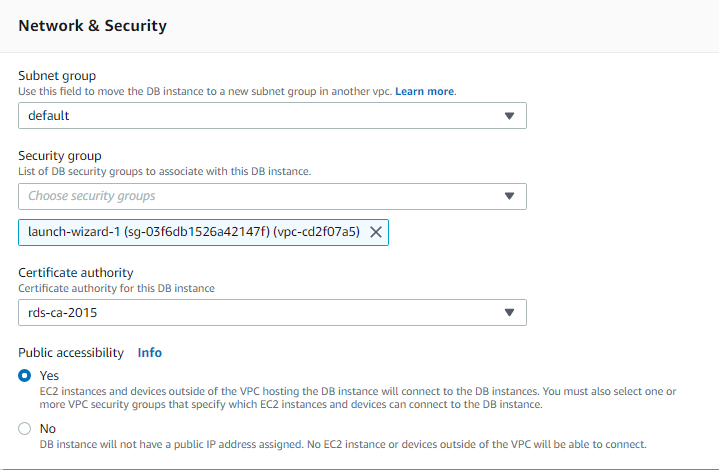
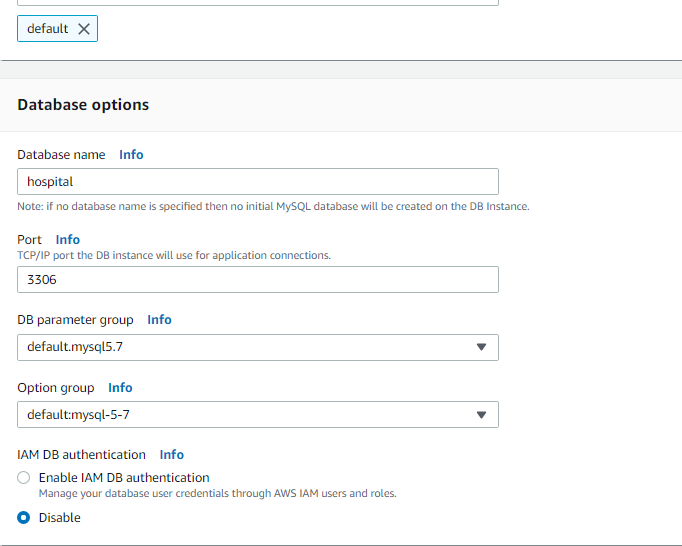
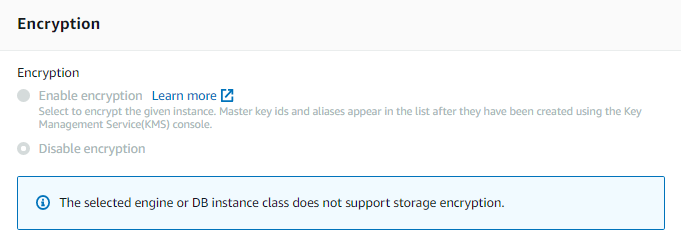
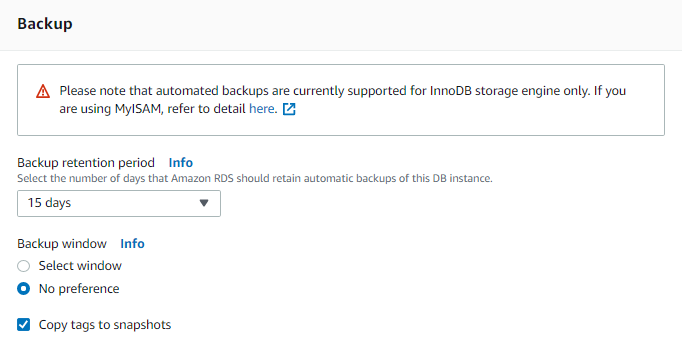
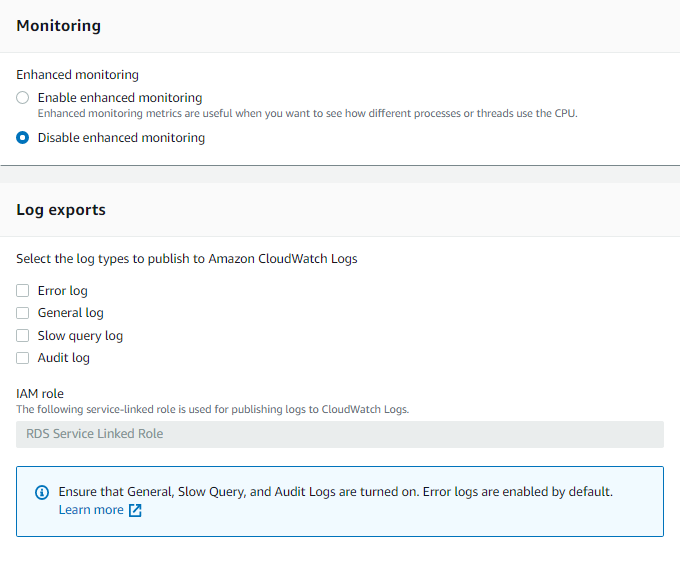
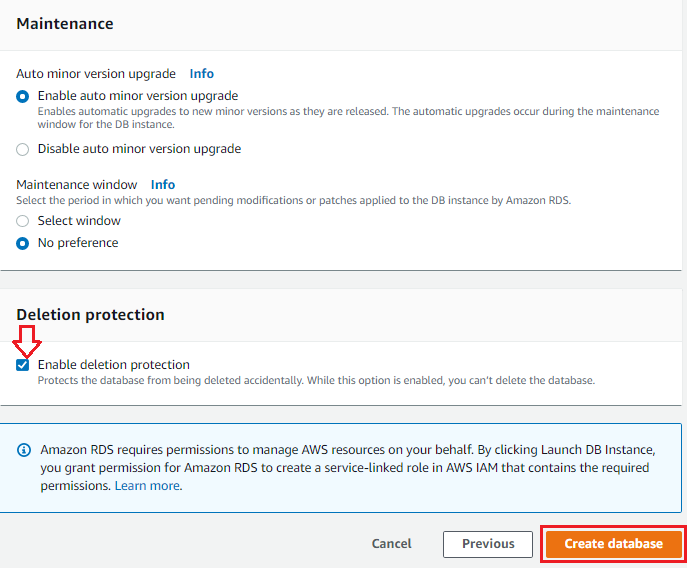
Step-4
This is the final step when you mention the VPC and security settings, encryption, backup options, and log export, etc. The screenshot has been shortened showing only the important details.
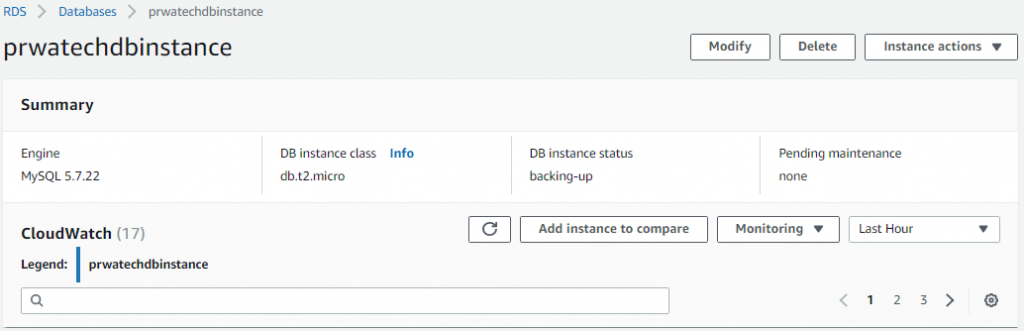
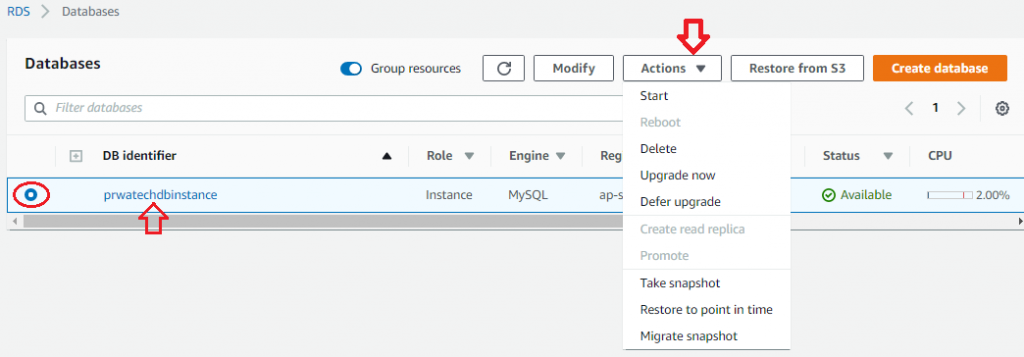
To start and stop Available/Stopped DB Instance click on radio button in front of your DB Instance Name, Actions button will active, then choose from different options available.
I hope you have learned that “How to Create Amazon RDS DB Instance” in (free tier) with MySQL DB Instance.
Note:
♦ You can create your own DB Instance as per your requirement selecting from the available list at Amazon RDS service.
♦Make note of the endpoint (DNS address) and port for your DB instance. You will have to use this parameter to connect your webserver to your RDS DB instance.
♦You can use the database products you are already familiar with: MySQL, MariaDB, PostgreSQL, Oracle, and Microsoft SQL Server.
♦In addition to the security in your database package, you can help control who can access your RDS databases by creating AWS Identity and Access Management (IAM) user to define users and permissions. You can also help protect your databases by putting them in a virtual private cloud for next-level security to your databases.

