Create An AWS Account
Steps to create a free AWS account
Steps to create a free AWS account, in this Tutorial one can learn how to create a free AWS account. Are you the one who is looking for the best platform which provides information about Steps to create a free AWS account? Or the one who is looking forward to taking the advanced Certification Course from India’s Leading AWS Training institute? Then you’ve landed on the Right Path.
The Below mentioned Tutorial will help to Understand the detailed information about Steps to create a free AWS account, so Just Follow All the Tutorials of India’s Leading Best AWS Training institute and Be a Pro AWS Developer.
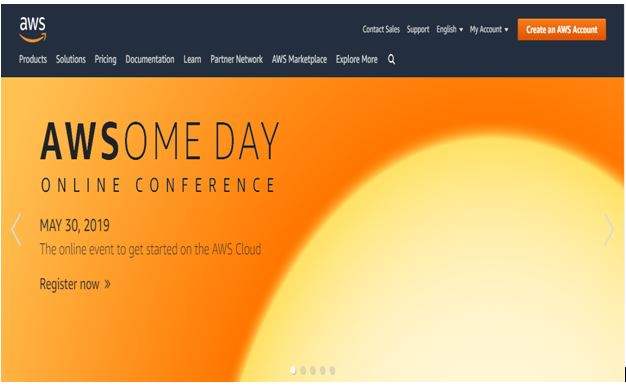
Step 1: First open your web browser and navigate to
https://aws.amazon.com
AWS offers 12 months of Free Tier on new accounts. So, you will be able to play with most of the services for free. If you don’t have an account already then continue with the process. For this, you would need your Credit/Debit Card details (because instances will be charged based on the usage, we are just using free tier) and a valid phone number. We’re going to be using a free offering
Step 2: Sign Up AWS:
Click on create an AWS account button, by clicking on it the sign-up page will open
Note: If you already have an account, then you can sign-in using the existing AWS password.

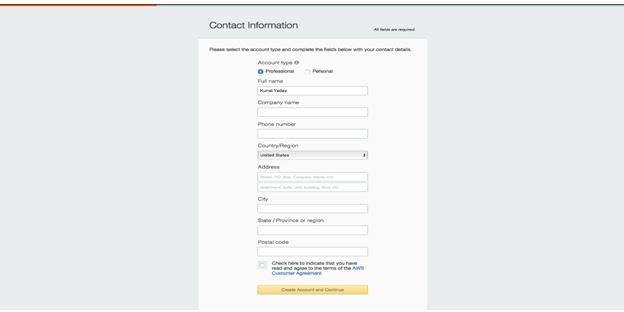
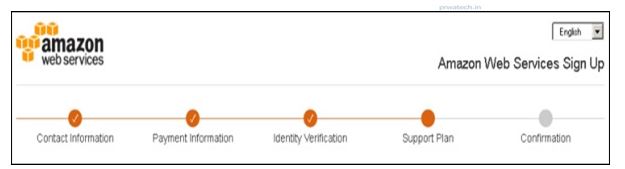
Step 3 Contact Information:
After providing an Email-address, Password and Account Name complete this form. Amazon uses this information for billing, invoicing and identifying your account. After you create the account, sign-up for the services needed.
Step 4 Payment Information:
To sign-up for the services, enter the payment information. To use AWS you just have to enter your Debit or Credit card details. Amazon charges a minimal amount of transaction against the card on the file to check that it is valid. This charge varies with the region.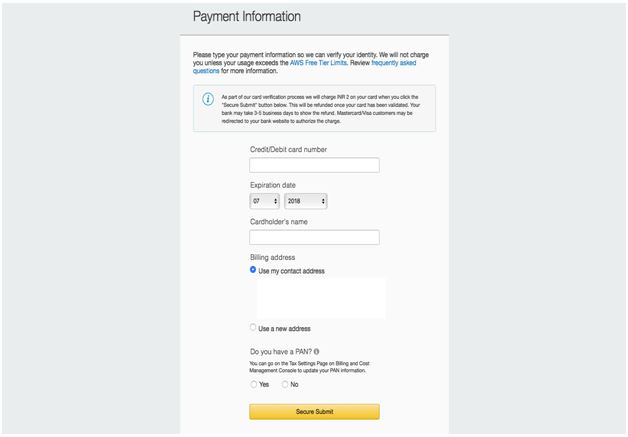
Step 5 Identity Verification:
Next, is identity verification. Amazon does a call back to verify the provided contact number or OTP.
Step 6 Support Plan:
Choose a support plan. Subscribe to one of the plans like Basic, Developer, Business, or Enterprise. The Basic Plan costs nothing and has limited resources, which is good to get familiar with AWS Services. This plan includes free AWS Services from which you can select a particular service as per your requirement and provides free access to AWS Services.
Step 7 Confirmation:
The final step is confirmation. By clicking on a link to login again, it redirects you to the AWS management console.
Now, the AWS Account (free tier) is created and can be used to avail AWS services.
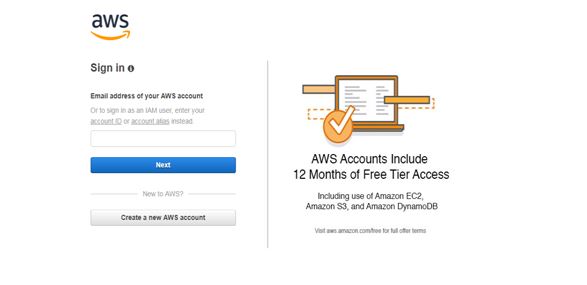
Login To AWS Account:
After creating AWS Account, now you can log in to your account for these steps are:
♦ Go to https://aws.amazon.com link
Click on My Account Button
♦ Select the AWS Management Console
The Sign In page will appear, enter the credentials like E-mail Address and click on next and enter Password.
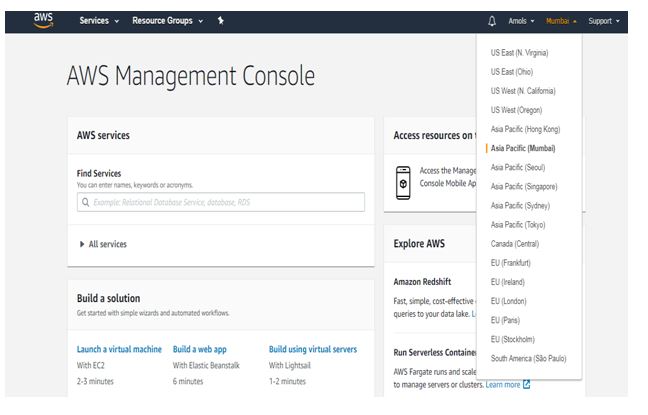
After login successfully then the next step is to select a region from the available list of the region at the top right corner of your window. Then select Asia Pacific Region (Mumbai) from the drop-down list.
After selecting the Asia Pacific Region (Mumbai) AWS Management Console will start from this console you can launch as well as start the services like EC2 instance.