Get started with Amazon DynamoDB
Create Table With Amazon DynamoDB, in this Tutorial one, you can learn Steps Create Table With Amazon DynamoDB. Are you the one who is looking for the best platform which provides information about Create Table With Amazon DynamoDB? Or the one who is looking forward to taking the advanced Certification Course from India’s Leading AWS Training institute? Then you’ve landed on the Right Path.
The Below mentioned Tutorial will help to Understand the detailed information about Create Table With Amazon DynamoDB, so Just Follow All the Tutorials of India’s Leading Best AWS Training institute and Be a Pro AWS Developer.
To get started with the DynamoDB console:
1) Go to the DynamoDB homepage, and choose to Get started with Amazon DynamoDB. (If you haven’t already set up an AWS account, choose to Create an AWS Account, and you will be guided through the process of setting one up.)
2) Sign in to the AWS Management Console, and then click on services –> Dashboard will open with various Amazon Services –> choose DynamoDB under Database –> the DynamoDB console will open.
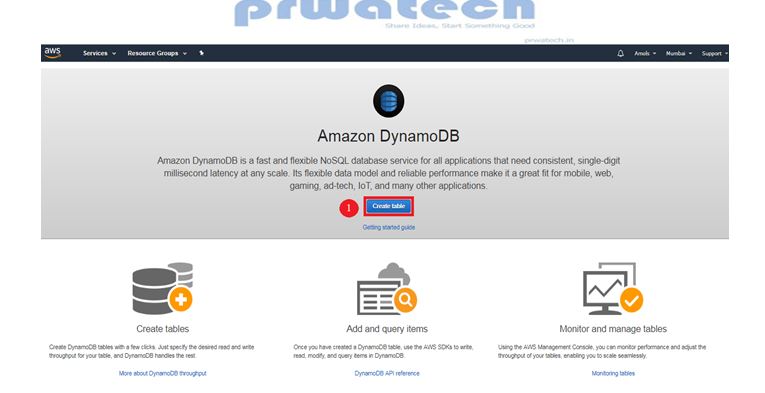
If this is your first time on the DynamoDB console, you see a Welcome page that displays information about DynamoDB and how you can use it. The Welcome page offers three options to performing common operations then select create table as shown below:
Create tables
Add and query items
Monitor and manage tables
Let’s find out how to create a table in DynamoDB.
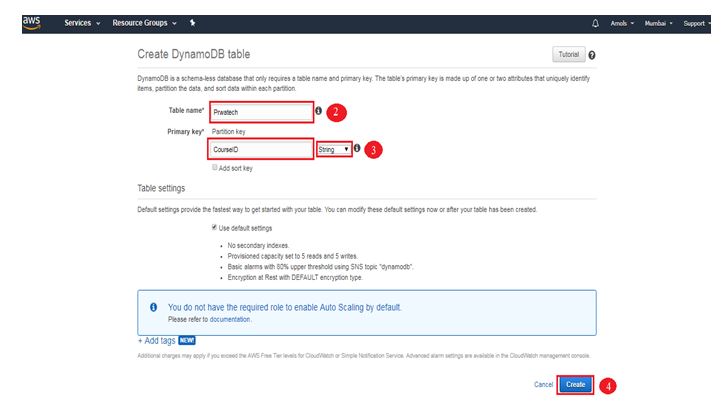
Step 1: Navigate to the DynamoDB section in AWS then Select “Create Table” as given below:
Step 2: Fill in with the necessary details and click on “Create”.
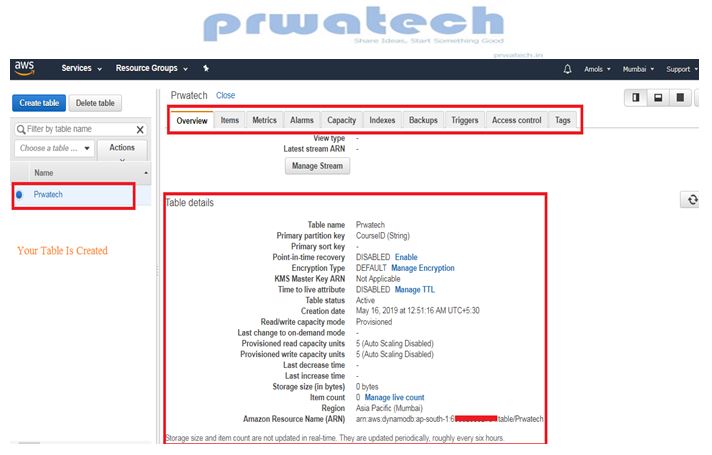
♦Step 3: You can view your table being create. By click on “Overview” you can understand your table, click on “Items” to edit, insert and query on the table. There are many more options you can use to understand your table in a better way.
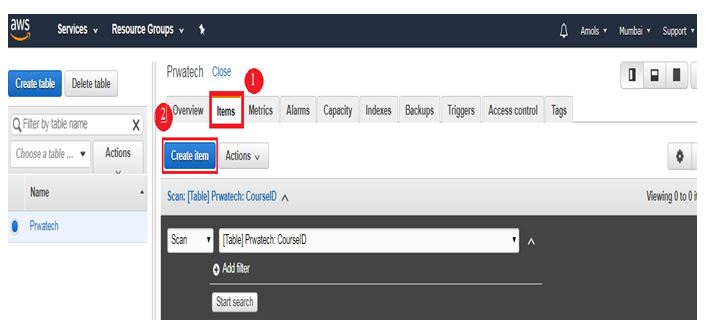
Now that you have created a table, let’s go ahead and insert a few items and understand how NoSQL works.
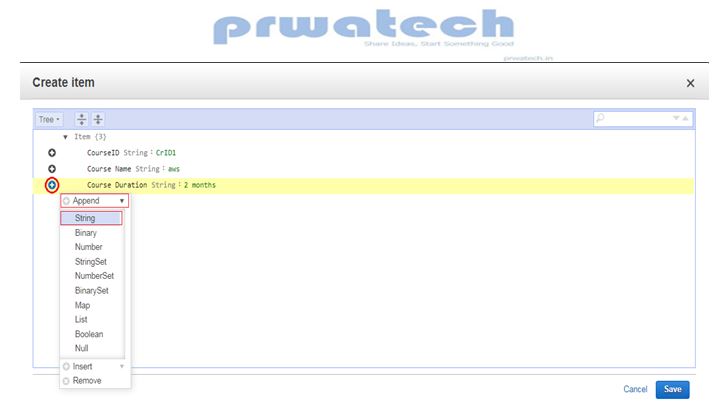
Step 1: Navigate to “Items” and click on “Create item”.
Step 2: It will open a JSON file where you can add different items. Click on the “+” symbol and select “Append” and select what data type you want to enter.
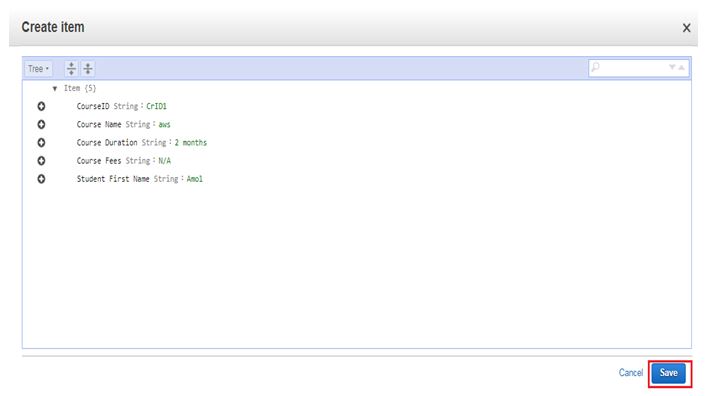
Step 3: This is what it looks like after adding multiple columns to your table. Click on “Save”.
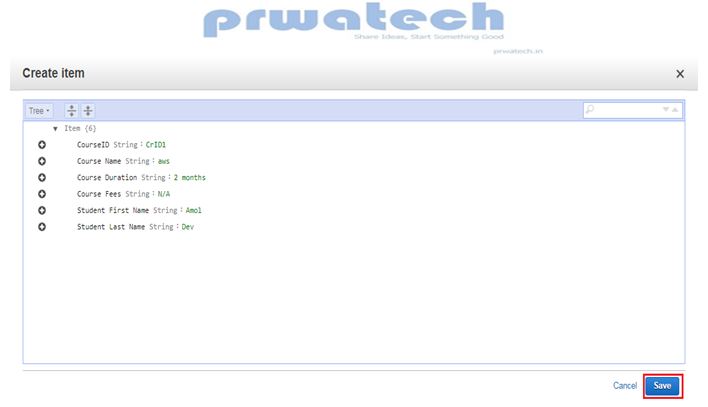
Step 4: Since it is a NoSQL architecture, you can play around with the columns you add to the table. E.g. “Student Last Name”
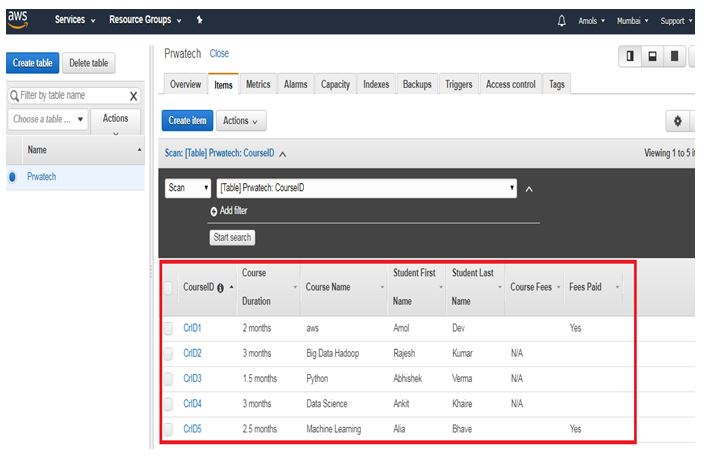
Step 5: This is how your table will look like once you have inserted the data.
Now that we have a table ready, let’s go ahead and look at some basic queries.
Step 1: Here you can frame your query and click on “Start Search” to get the desired result.
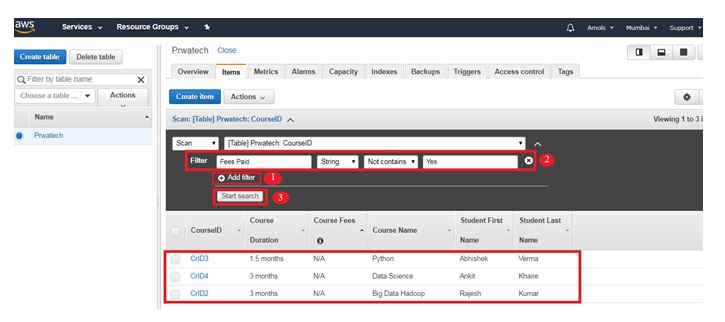
E.g. I am searching for Student Names who have not paid the fees yet.
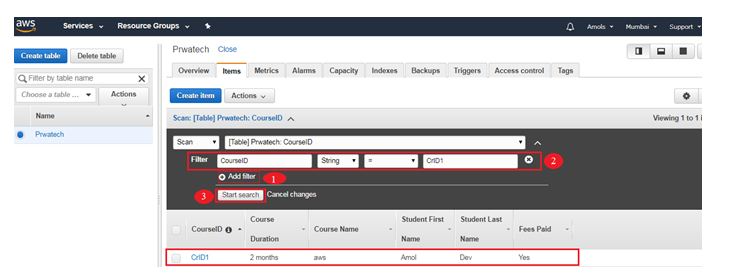
Step 2: Here, I am searching for the record which has CourseID as “CrID1”
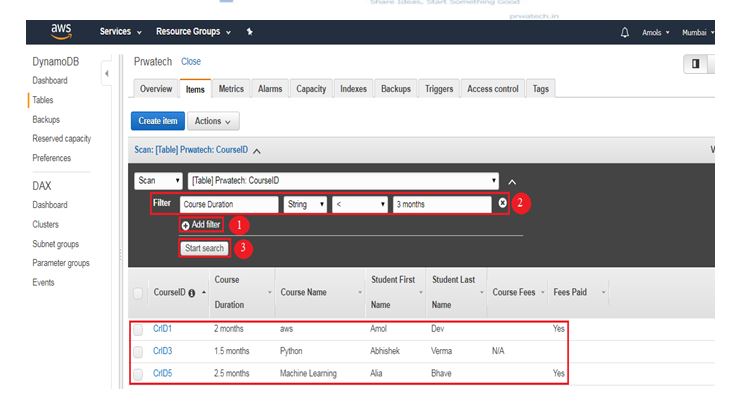
#Step 3: I am searching for Course Duration < 3 months in the filter after start search it will give output all details regarding that course.
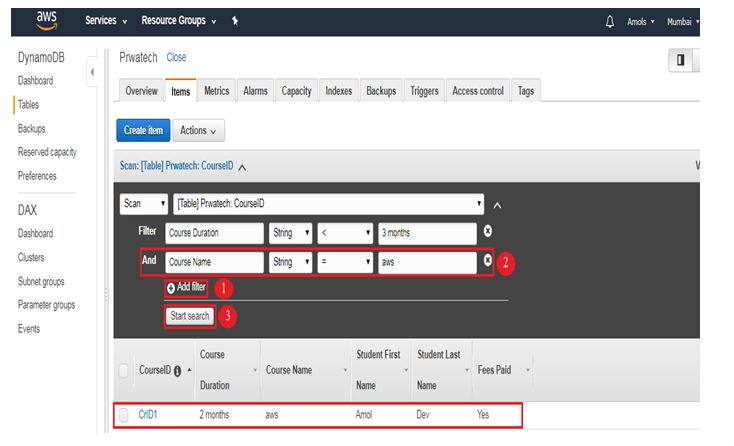
Step 4: You can run another query by click on Add Filter; here I am searching the details for item i.e. Course Name and by giving its value.
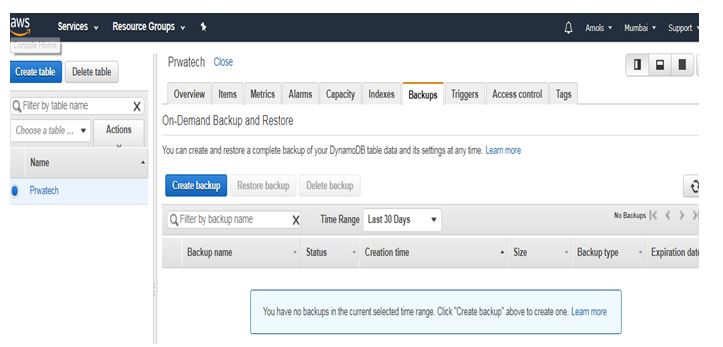
Backups:
In addition to the Backups tab, the DynamoDB console provides access to a separate Backups page, from which you can create on-demand backups.
Note: If you create backups using the Backups section in the navigation pane, the table isn’t preselected for you. You have to manually select the source table name for the backup.
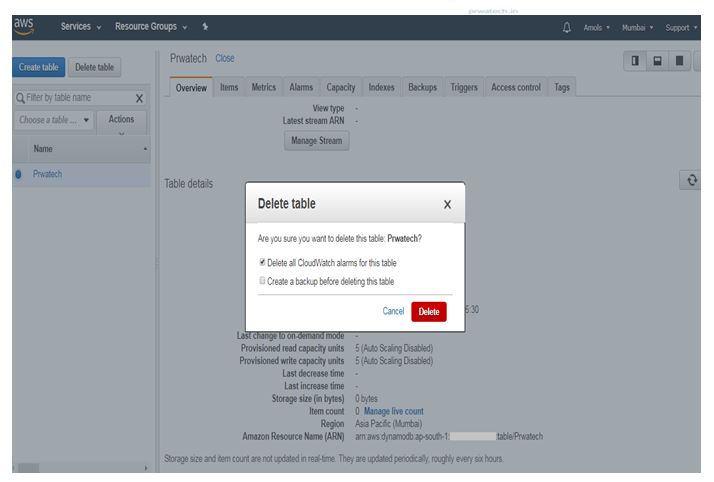
How to delete a Table:
1) Choose Delete table on the Tables page of the console.
2) A pop-up window asks you to confirm your choice with two options: Delete all CloudWatch alarms for this table (chosen by default) and create a backup before deleting this table. Enabling the latter option is useful in situations where data from a deleted table must remain available. If you choose the latter option, you will have a backup of the deleted table on the Backups page of the console.
3) Choose Delete to complete the deletion of the table.
I hope you have learned how to Creating, Inserting and Querying a Table and delete a table in DynamoDB
# Last but not least, always asks for help!

