Getting Started With Amazon Route 53
Getting Started With Amazon Route 53, in this Tutorial one, you can learn about Getting Started With Amazon Route 53. Are you the one who is looking for the best platform which provides information about Getting Started With Amazon Route 53? Or the one who is looking forward to taking the advanced Certification Course from India’s Leading AWS Training institute? Then you’ve landed on the Right Path.
The Below mentioned Tutorial will help to Understand the detailed information about Getting Started With Amazon Route 53, so Just Follow All the Tutorials of India’s Leading Best AWS Training institute and Be a Pro AWS Developer.
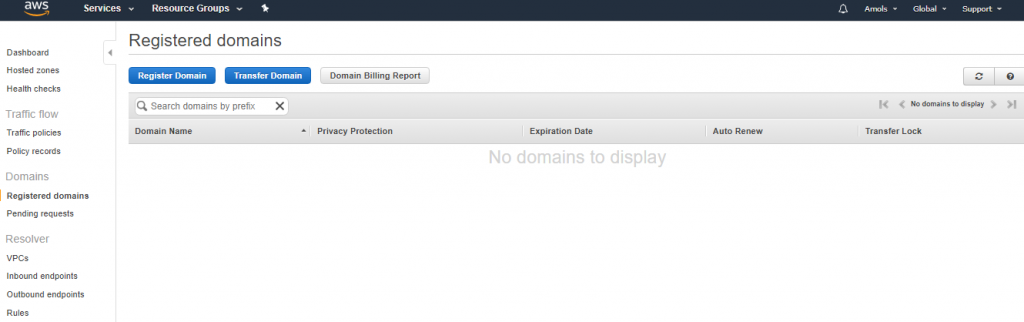
Step 1:
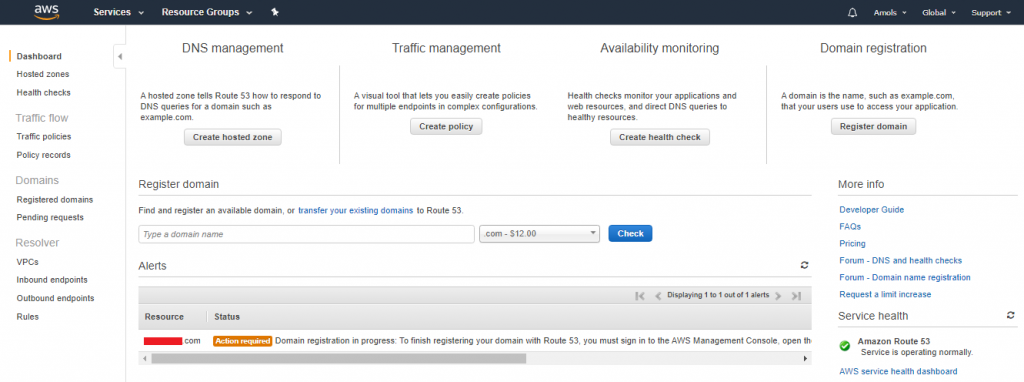
To registered domain please go to Amazon Route 53 dashboard and click on “Registered Domain”.
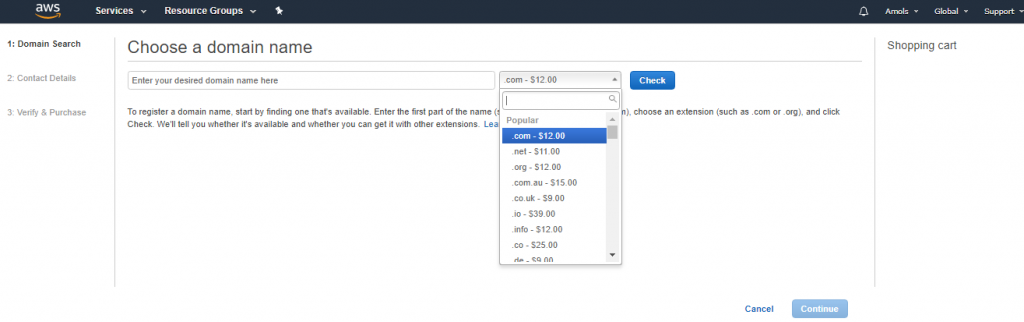
Step 2: Choose a desired domain name which you want and check pricing for a year e.g. .com domain will charge you $12 for a year and click on Check button and you can see on next page available domain name, from which you can add to your cart.
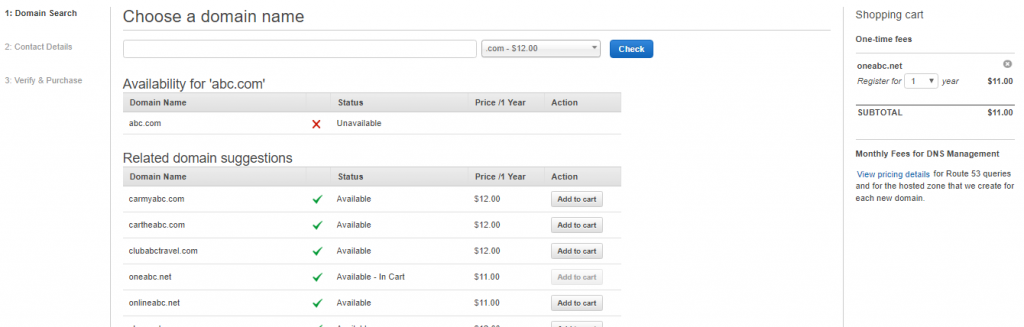
Step 3:
Now, you can see list of available domain name with available status you can directly add to your cart.
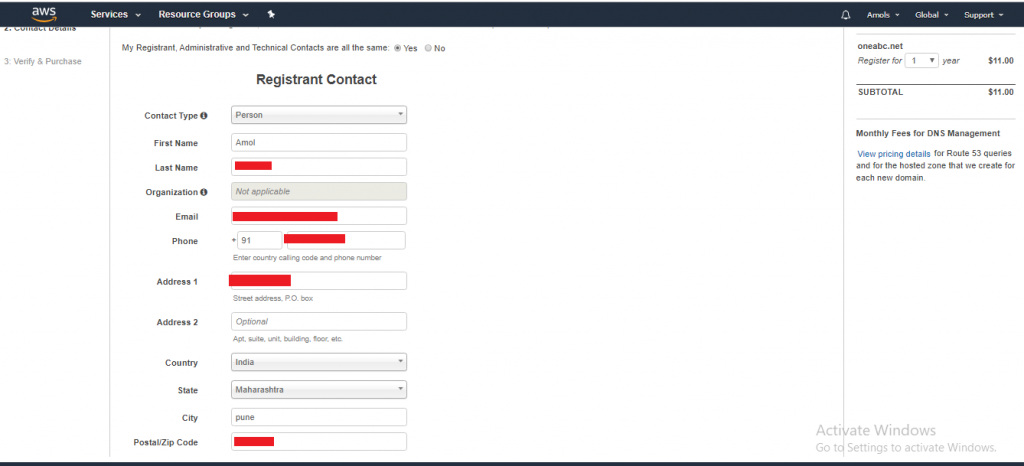
Step 4: Once you add a domain to your cart, then the next page will appear by click on continue button,
Below image you can see the registration form in which you require to fill domain owner details.
Step 5: Then go to the next page in which you need to accept the terms and conditions and also there is also available options enable/disable to make auto-renewal your domain name after one year, choice is your’s to renew or not.
Then, you will a get a notification containing a message that your name is successfully registered. Once you get registered you can see a notification on dashboard to verify payment .
After registered a domain, between 2-3 hrs you will get a notification to verify the payment on the dashboard.
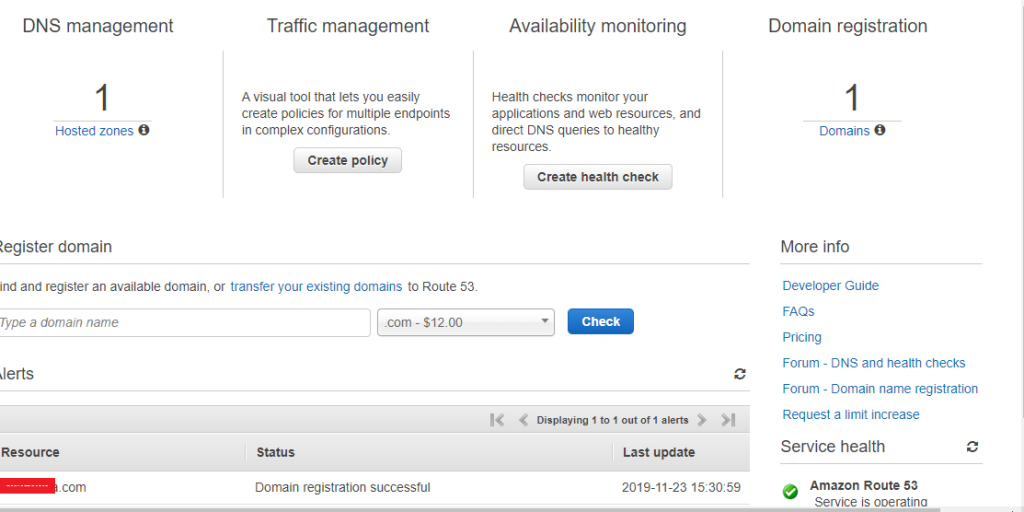
After paying the bill for a domain you had choose in previous step, after a while you will see the status of domain registration successful.
Now, you can use the hosted zone. Then click on that Hosted Zone
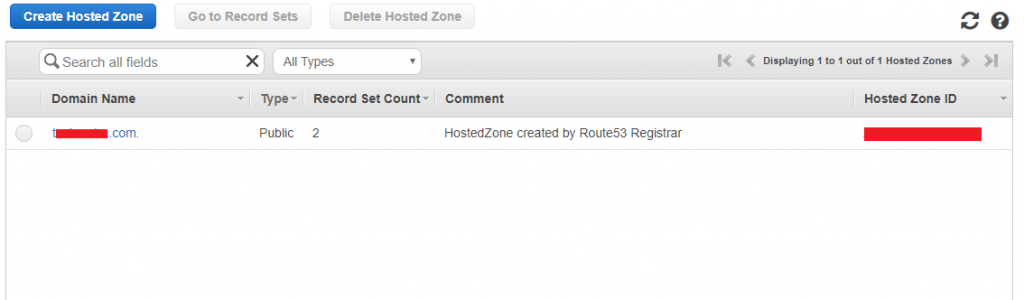
Step 6 : By clicking on domain name you will get next page appears to create record set, test record set and delete record set.
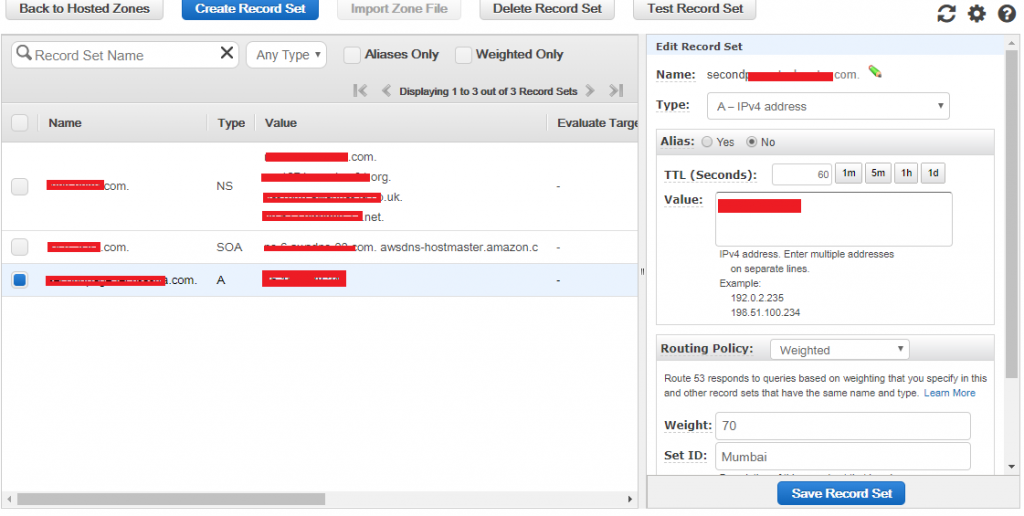
You can see in below page with simple latency appear by default, if you want to apply weighted Routing Policy. Then you have to click on Create Record Set and Click on Routing policy drop-down list, you can see the following policies:
- Simple Routing
- Weighted Routing
- Latency Routing
- Failover Routing
- Geolocation Routing
- Multivalue Answer Routing

Step 7.
Weighted routing Policy-It Controls the workloads of requests that goes to specific endpoint. It is helpful to split traffic between regions and can be associated with health checks.
In the below 2 images we can see the weighted routing policy.
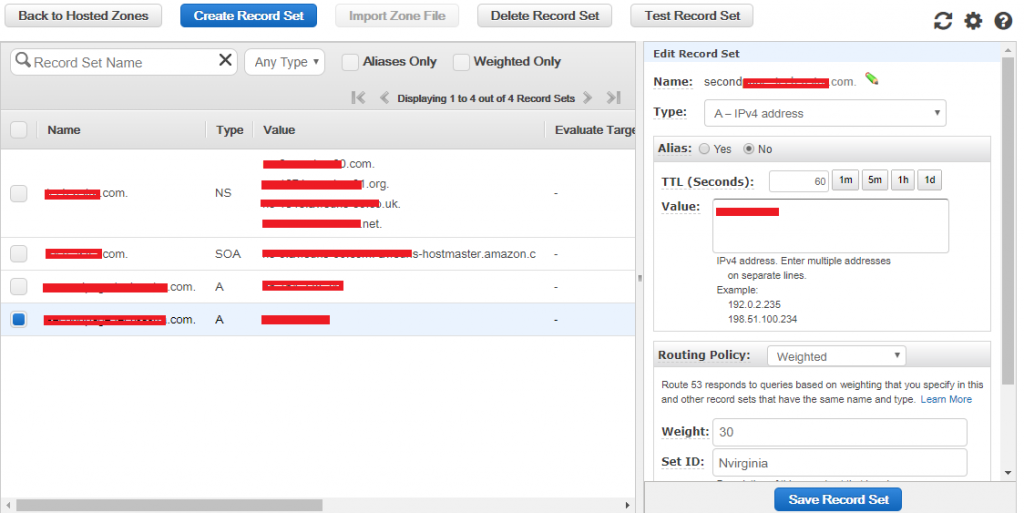
Step 8.
First of all, we create number of instance in different region in EC2 for example we created 2 instance name as Mumbai, nvirginia in 2 different regions and then we have given weight to Mumbai 70% and 30% to nvirginia, it will split the traffic between two regions.

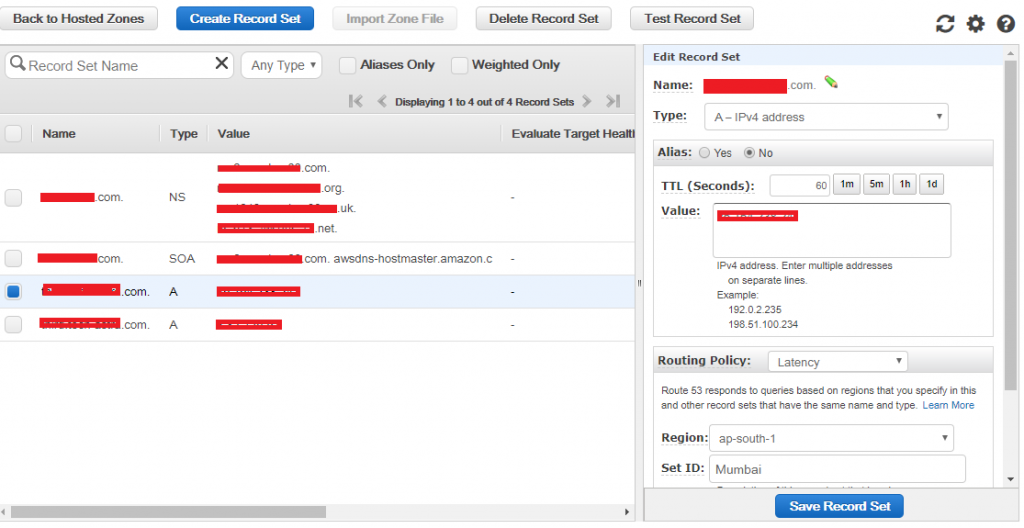
Latency routing Policy-It redirects to the server that has the latest latency close to us. Latency is evaluated in terms of users to designated AWS regions. Super helpful when latency of users is priority.
In the below 2 images we can see the latency routing policy.
As we have already created the 2 instance name as Mumbai, nvirginia in 2 different regions. In latency policy it redirects to the server that has the latest latency close to us.
Cname & Alias
AWS resources (Load Balancer) usually expose an AWS URL: (eg. TestRoute 53-212345676.ap-south-1.elb.amazonaws.com)
But what we want standard form which we provide to end user like this- myapp.xyz.com
For that we have two options
CNAME – a URL to any other URL
Only for Non Root Domain (myapp.xyz.com and it shouldn’t be xyz.com
Alias -a URL to an AWS resources
For both Root & NonRoot Domain.(xyz.com and myapp.xyz.com)
CNAME and Alias –
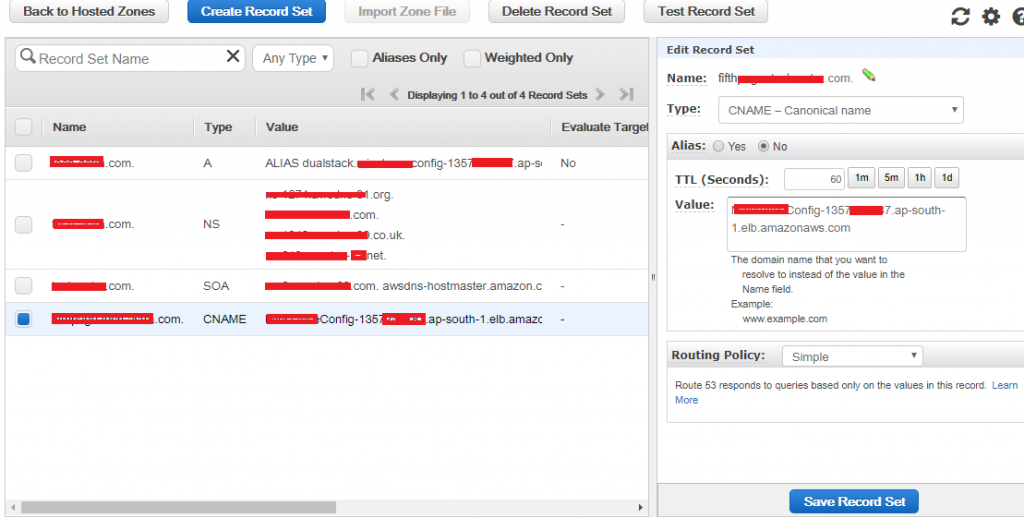
For CNAME-
Let’s create a new RecordSet and Choose types as CNAME(myapp.xyz.com)
Now copy the DNS name from the Load Balancer and paste it into the value.
if we try to access the above URL(myapp.xyz.com), we will get the response which is directly coming from EC2 via Load Balancer.
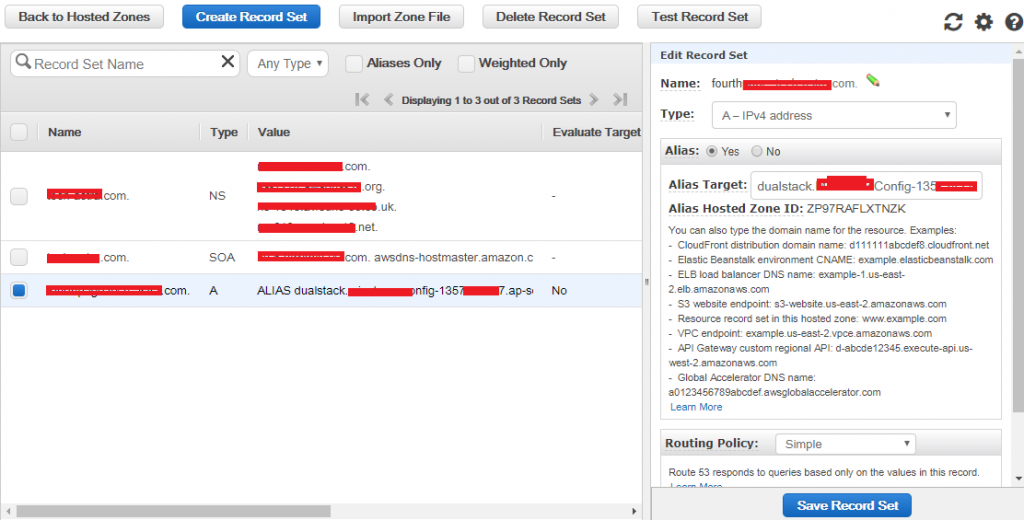
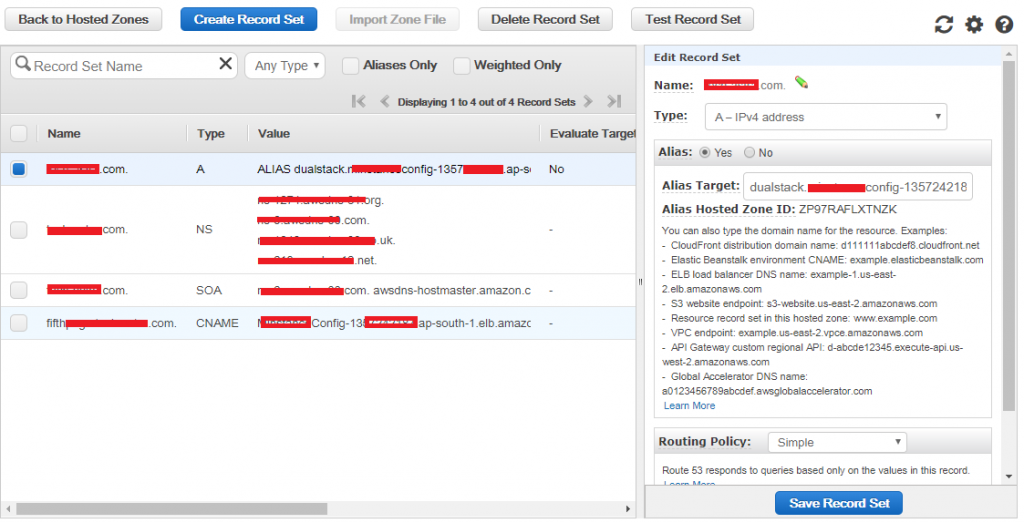
Now for Alias-
Create a new Recordset for Alias this time (click Alias Yes), select our ELB for the Target.
create a new record set for Alias by without giving the appname and provide ELB into value. Try to access it will allow you.
#Last but not least, always ask for help!

