Steps To Launch An Amazon EC2 Instance
Steps To Launch An Amazon EC2 Instance
Steps To Launch An Amazon EC2 Instance, in this Tutorial one can learn Steps To Launch An Amazon EC2 Instance. Are you the one who is looking for the best platform which provides information about Steps To Launch An Amazon EC2 Instance? Or the one who is looking forward to taking the advanced Certification Course from India’s Leading AWS Training institute? Then you’ve landed on the Right Path.
The Below mentioned Tutorial will help to Understand the detailed information about Steps To Launch An Amazon EC2 Instance, so Just Follow All the Tutorials of India’s Leading Best AWS Training institute and Be a Pro AWS Developer.
If you’ve already signed up for Amazon Web Services (AWS), you can start using Amazon EC2 immediately.
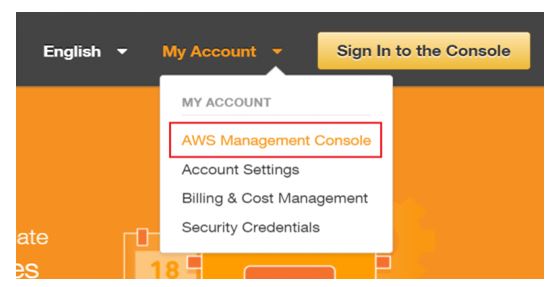
Login to AWS Management Console
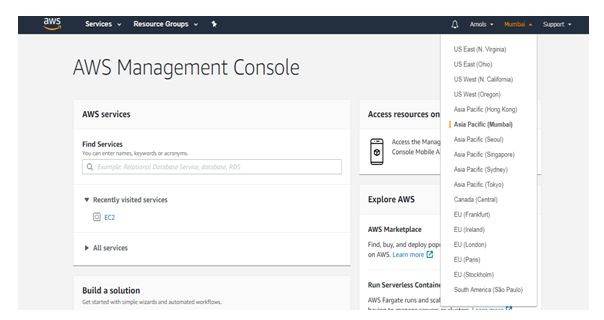
Select your preferred Region
You can open the Amazon EC2 console, by clicking on services button available at the upper left corner of your window after login
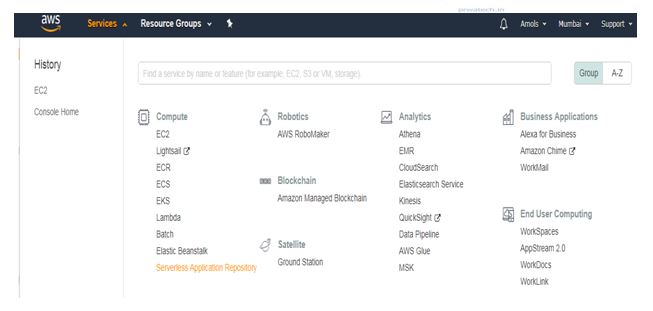
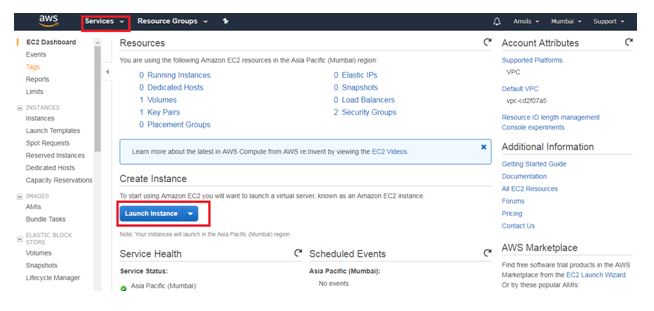
Choose EC2 under Compute this will take you to EC2 Dashboard
From the console dashboard, choose Launch Instance as given below:
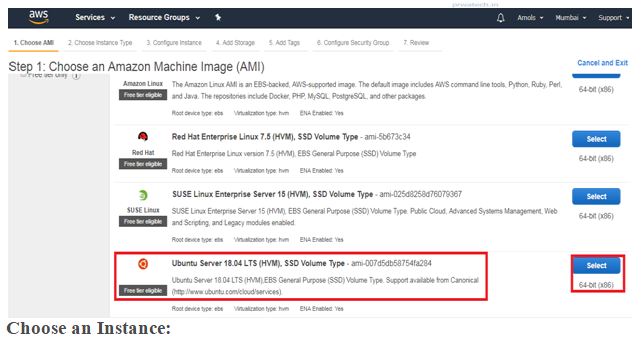
Select an AMI (Amazon Machine Image): Because you require a Linux Instance, listed in the row for the basic 64-bit Ubuntu AMI, click Select. I choose here, Ubuntu server 18.04 LTS (HVM), SSD Volume Type.
Notice that this AMI is marked as “Free tier eligible”.
Select t2.micro instance, which is free tier eligible.
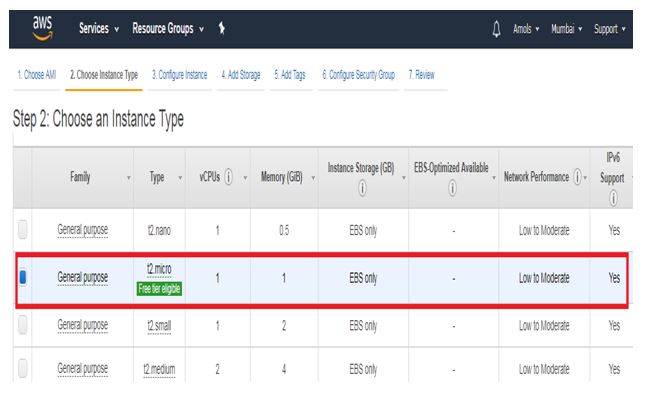
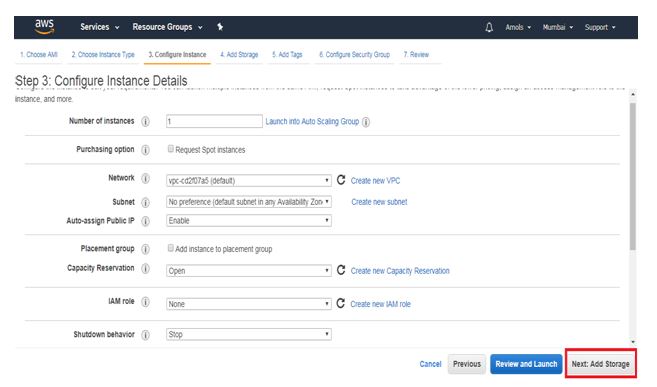
Click On Next: Configure Instance Details
Configure all the details and then click on add storage
Click On Add Storage
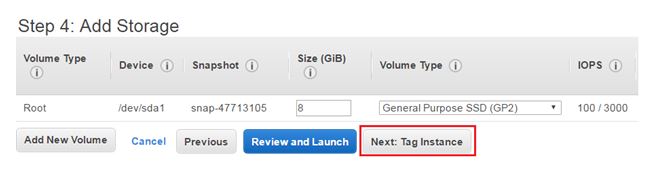
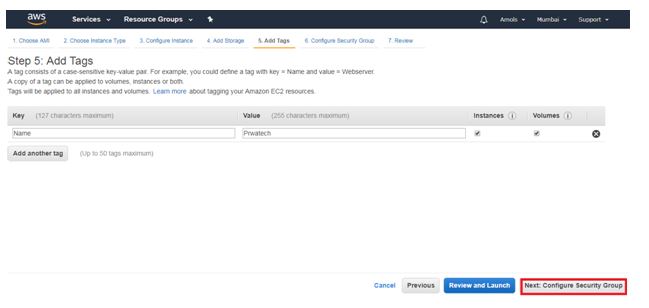
Click on Tag Instance button given above
Next Click on Add Tag button in Add Tags window given below:
Type Name in the box below Key and Web server Name should be in character (logical name) in the box below Value.
Create a Security Group:
Add Rules: SSH, HTTP, HTTPS, ALL ICMP-IPV4, ALL TCP ports one by one (SSH is by default port) and set source as anywhere.
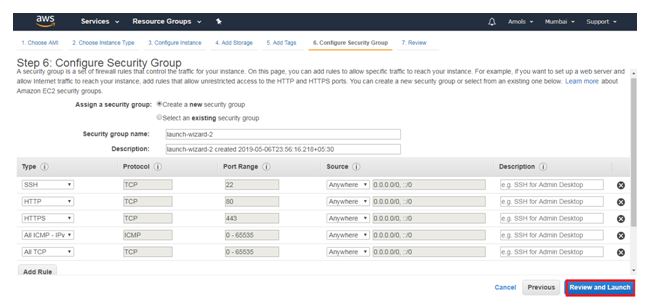
Next, Click On Review and Launch an Instance
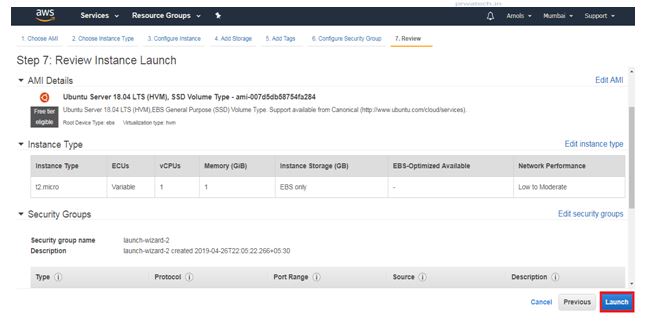
Verify the details that you have configured to launch an instance.
Review Instance Launch
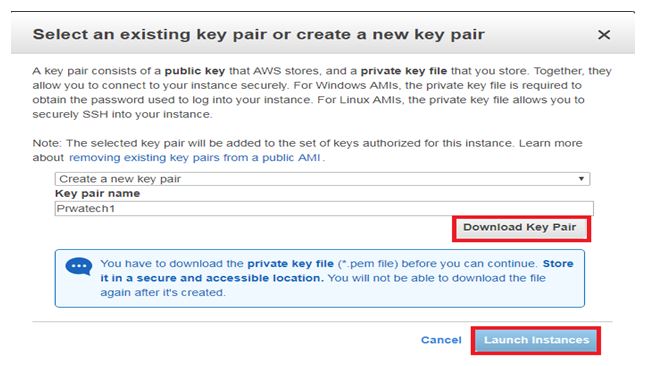
Create a Key Pair & launch an Instance
Select the option ‘Create a new key pair’ and give the name of a key pair. After that, download it in your system and save it for future use.
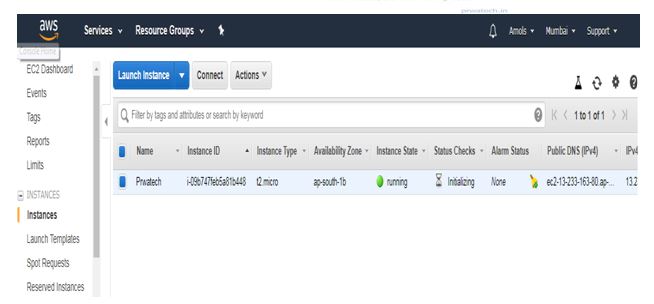
Check the details of a launched instance.
Now Instance starts in running status, you can see as given below:
Note: Mac and Ubuntu user don’t need putty software
Below step is only for window user
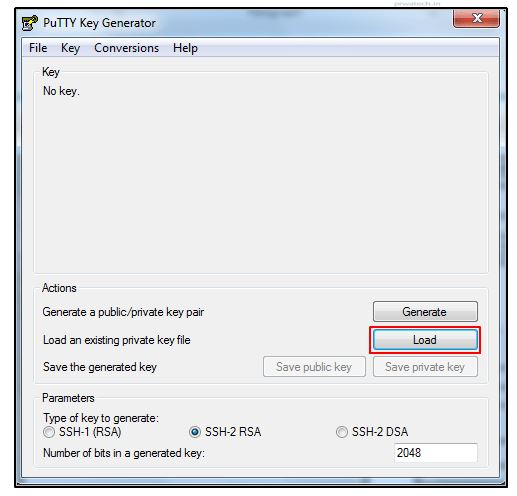
To Convert Your Private Key Using PuTTYgen:
1. PuTTY doesn’t natively support the private key format (.pem) which is generated by Amazon EC2. PuTTY has software called PuTTYgen, which can convert keys to the required PuTTY format (.ppk). You have to convert your private key into this format (.ppk) before connecting to your instance using PuTTY, .ppk file long-form is PuTTY private Key file and it is used to store the private file.
2. Click Load. By default, PuTTYgen displays you only files with the extension .ppk (PuTTY Private Key) file. To locate your .pem (Privacy Enhanced Mail) file, select the option to display files of all types.
3. Select the .pem file for the key-value pair that you specified when you launch your instance, and then click on Open. Click on OK to dismiss the confirmation dialog box.
4. Click to save the private key to save the key in the format that PuTTY can use. PuTTYgen displays a warning about saving the key without a passphrase. Click Yes.
5. Specify the same name for the key that you used for the key pair (for example, prwatech1-key-pair). PuTTY can automatically add . PPK file extension then key pair for connecting instance.
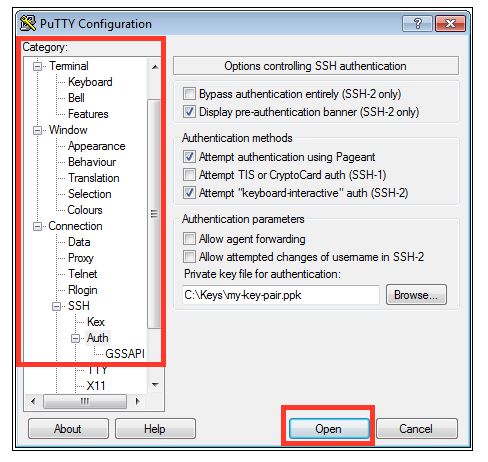
Steps To Connect EC2 instance using SSH and PuTTY
1. Open PuTTY.exe
2. In the Host Name box, enter the Public IP of your instance.
3. In the Category list, click on “+” to expand SSH
4. Click on Auth (don’t expand it).
5. In the Private Key file for authentication box, browse to the PPK file that you downloaded and double-click it.
6. Click Open.
If this is your first time when you have connected to this instance, PuTTY pop-up a security alert dialog box that asks for permission, whether you trust the host you are connecting to. Choose Yes. A window will open and you are connected to your instance.
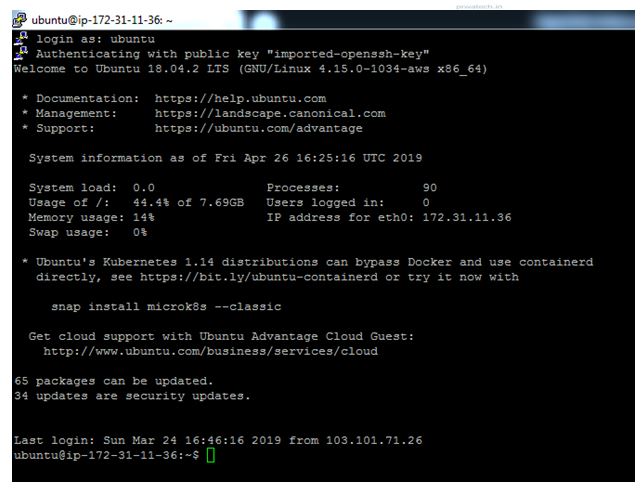
Type in the terminal login as ubuntu when prompted for a login ID
Congratulations! You have launched an Ubuntu Instance by using EC2 successfully.