Steps For Single Node Cluster With Hadoop on AWS
Steps For Single Node Cluster With Hadoop on AWS, in this Tutorial one, you can learn Steps For Single Node Cluster With Hadoop on AWS. Are you the one who is looking for the best platform which provides information about Steps For Single Node Cluster With Hadoop on AWS? Or the one who is looking forward to taking the advanced Certification Course from India’s Leading AWS Training institute? Then you’ve landed on the Right Path.
The Below mentioned Tutorial will help to Understand the detailed information about Steps To Launch An Amazon EC2 Instance, so Just Follow All the Tutorials of India’s Leading Best AWS Training institute and Be a Pro AWS Developer.
To set up a single node cluster with Hadoop in EC2 instance on AWS, we have to first login to EC2 instance in AWS Management Console by using Login Id and Password
After login to EC2 click on Instances option available at the left side of the dashboard, you will see an instance state in stopped mode
Start instance by right-clicking on stopped instance > instance state > start > pop-up will appear asking for to start to click YES
After clicking Yes instance state will start and in running state
Open PuTTY tool where you saved and run it, PuTTY Configuration window will open as given below:
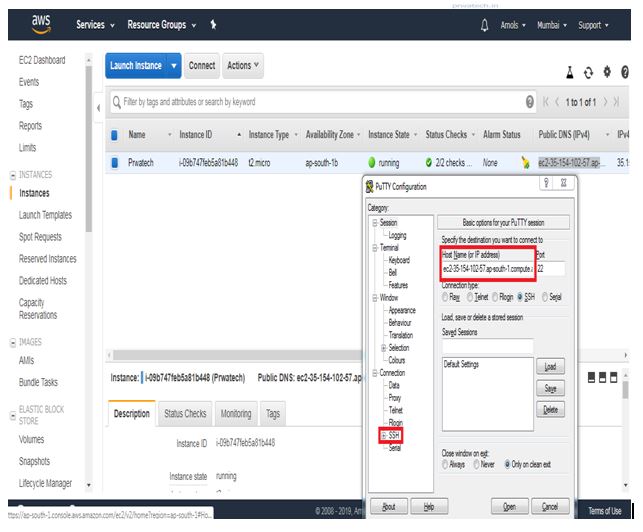
- Copy Public DNS address in the Host Name field
- Expand SSH > click Auth > Browse for .ppk file > click open
- The pop-up will appear to ask permission click, yes, then you will get in Ubuntu Linux instance window in EC2
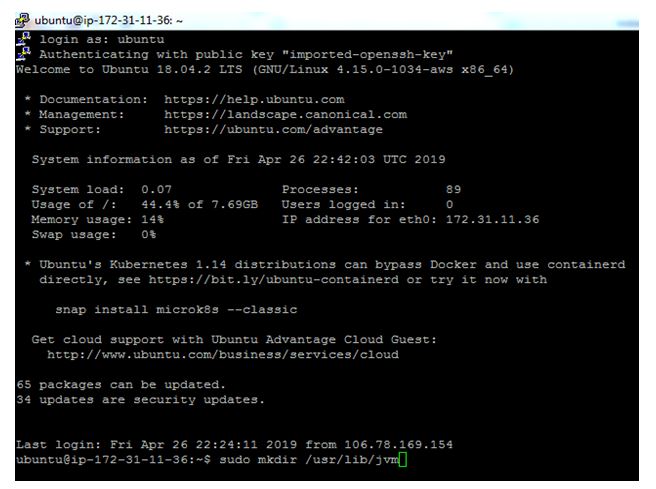
Type ubuntu > Enter![]()

Now start to set up a single node cluster by downloading Jdk 1.8.0 and Hadoop 2.9.0 version
Log in as the root user to install base packages
sudo su
sudo apt-get update
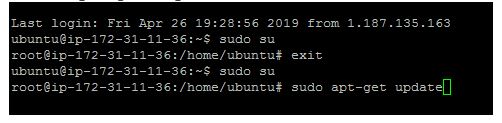
Type exit from root user in the terminal and Enter ![]()
Download jdk 1.8.0 using wget command
wget -c –header “Cookie: oraclelicense=accept-secure backup-cookie” http://download.oracle.com/
Untar downloaded file(tar.gz) format by using
tar -xvf jdk-8u131-linux-x64.tar.gz
Download the latest stable Hadoop using wget from one of the Apache mirrors.
wget https://archive.apache.org/dist/hadoop/core/hadoop-2.9.0/hadoop-2.9.0.tar.gz
After download untar Hadoop-2.9.0-tar.gz
tar -xvf hadoop-2.9.0.tar.gz
Create a dir for Hadoop and jdk using below command :
$sudo mkdir /usr/lib/hadoop

$sudo mkdir /usr/lib/jvm
Move extracted hadoop and jdk folder to newly created dir :
$mv hadoop-2.9.0 /usr/lib/hadoop
$mv jdk-1.8.0_131 /usr/lib/jvm
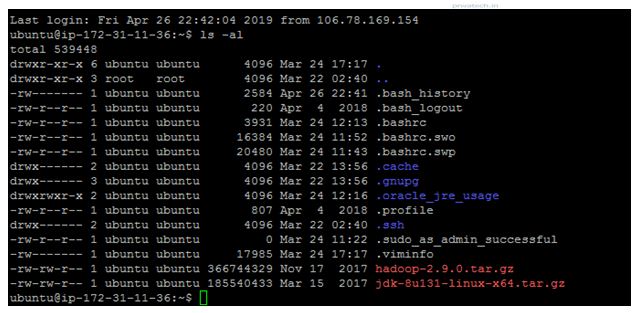
Set jdk and hadoop path in .bashrc file, which is present at /home/ubuntu dir :
$ls –al
$vi .bashrc
After opening .bashrc file press ESC button
To edit .bashrc file press i to INSERT
After configure .bashrc file press : (colon) and wq! To save,quit and overwrite

Execute .bashrc using below command:
$. .bashrc
Check java and hadoop version :
$java -version
$hadoop version
Go to hadoop sbin dir :
$cd $HADOOP_HOME/sbin
$ls –lrt

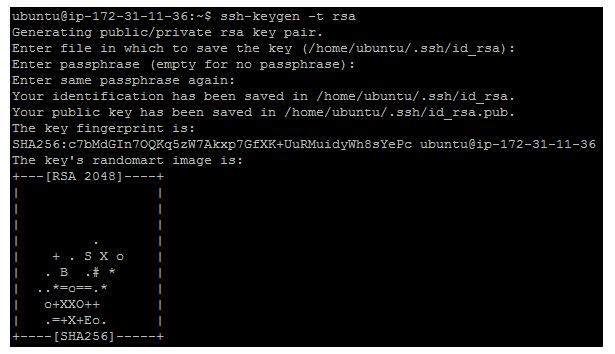
Setting a hadoop environment for passwordless ssh access. Passwordless SSH Configuration is a mandatory installation requirement for a single node cluster. However, it is more useful in a multi-node cluster environment.
Enter command $ssh-keygen -t rsa
$ ls –alr
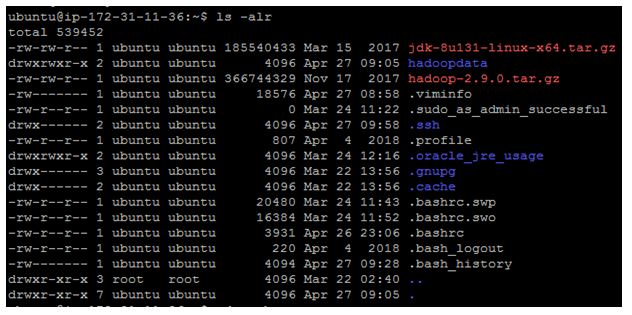
$ls –lrt

cat .ssh/id_rsa.pub >> .ssh/authorized_keys

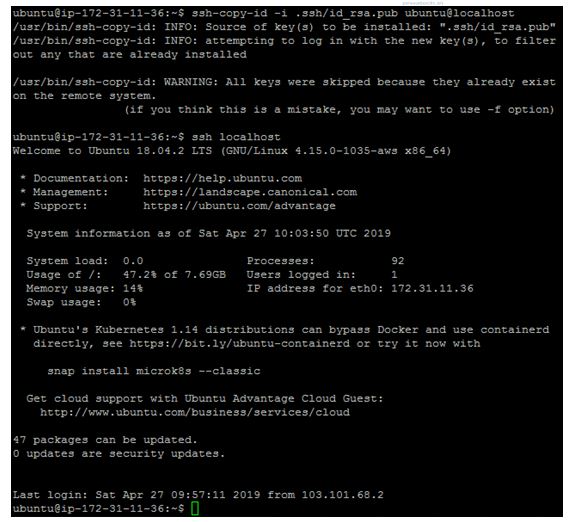
ssh-copy-id -i .ssh/id_rsa.pub ubuntu@localhost
-
check password less ssh access to localhost
$ ssh localhost
Exit from inner localhost shell by using below command:
$exit
Set the Hadoop config files for a single node cluster. We need to set the below files in order to Hadoop a single node cluster to function properly.
♦ core-site.xml
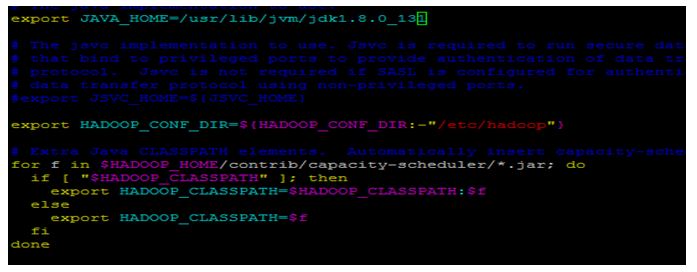
hadoop-env.sh
♦ yarn-site.xml
hdfs-site.xml
♦ mapred-site.xml
Create a directory where the Hadoop will store its data. We will set this directory path in hdfs-site.
$mkdir hadoopdata

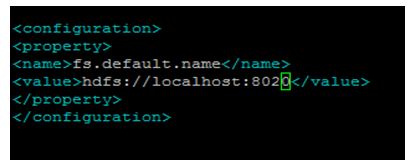
To Configuration in core-site.xml
The command is $ vi core-site.xml
vi hadoop-env.sh
$ vi yarn-site.xml

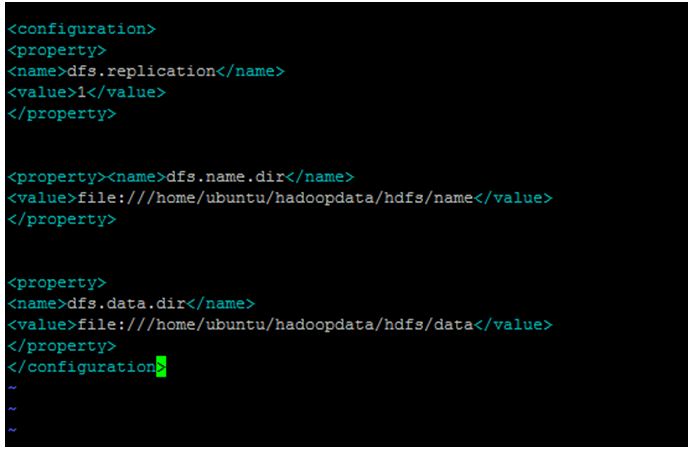
vi hdfs-site.xml
NOTE: Make mapred-site.xml file from mapred-site.xml.template.
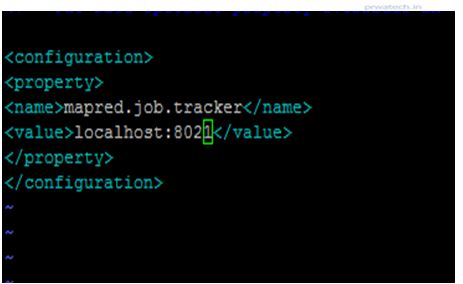
$ mapred-site.xml
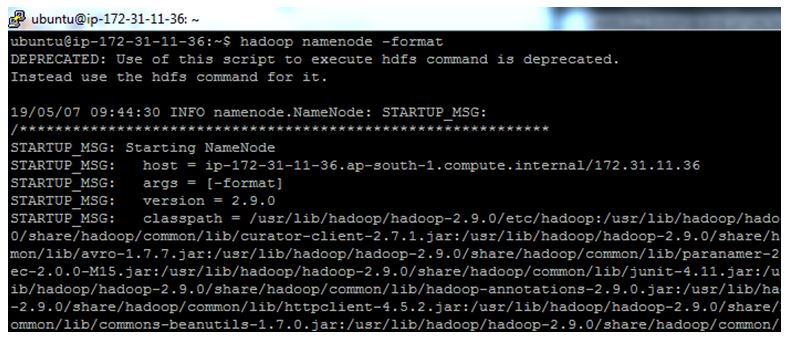
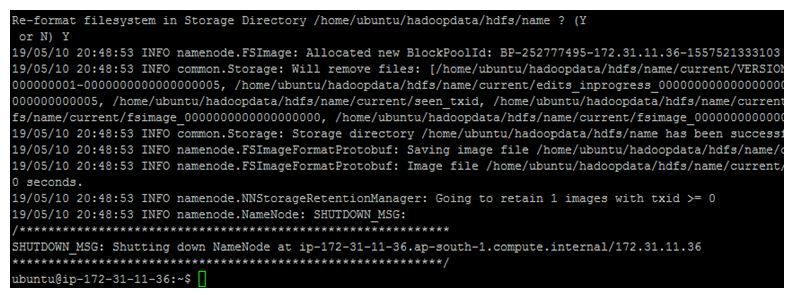
► Formatting the HDFS file system via NameNode (after installing Hadoop, for the first time we have to format the HDFS file system to make it work)
Enter the command as given below:
$hadoop namenode –format
Go to sbin directory of hadoop :
$cd $HADOOP_HOME/sbin
$ls –lrt
►Start One service at a time :
$hadoop-daemon.sh start namenode

Start service from HDFS components :$start-dfs.sh

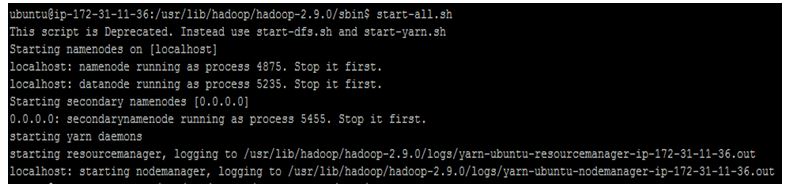
Start all service:
$start-all.sh
►Check for Hadoop processes /daemons running on Hadoop with Java Virtual Machine Process Status Tool.
$jps

Port number of Hadoop-daemons given below:
NameNode – localhost: 50070
DataNode – localhost: 50075
SecondaryNameNode – localhost: 50090
ResourceManager – localhost: 8088
# Single Node Cluster with Hadoop in EC2 Instance on AWS setup here successfully, now you can Copy file from LFS to HDFS and HDFS to LFS by using various Hadoop commands like:
► Following commands are used for copy files from local file system to Hadoop distributed file system:
$hadoop fs -copyFromLocal LFS HDFS Or
$hadoop fs -put LFS HDFS
mkdir dir_name
► Following commands are used for Hadoop distributed file system (HDFS):
$hadoop fs -mkdir /dir_name
hadoop fs -cp src dst
$ hadoop fs -mv src dst

