Getting Started with Amazon ElastiCache for Redis
This tutorial will guide you that how to create, granting access to, connect to, and finally delete a Redis (cluster mode disabled) cluster using the ElastiCache Management Console
Amazon ElastiCache supports high availability through the use of Redis replication groups.
Starting with Redis version 5.0.5, ElastiCache Redis supports partitioning your data across multiple node groups, with each node group implementing a replication group. This tutorial creates a standalone Redis cluster.
Steps to Create Amazon ElastiCache for Redis Cluster
Determine Requirements
Setting Up
Step 1: Launch a Cluster
#Step 2: Authorize Access
Step 3: Connect to a Cluster’s Node
#Step 4: Delete Your Cluster (To avoid Unnecessary Charges)
Determine Requirements
Before you create a Redis cluster or replication group, you should always determine the requirements for a cluster or replication group so that when you create it, it will meet your business needs and not need to be redone. Because in this exercise we will largely accept default values for the cluster, we will dispense with determining requirements.
Setting Up
Following, you can find topics that describe the one-time actions you must take to start using an ElastiCache.
Topics
Create Your AWS Account
Set Up Your Permissions (New an ElastiCache Users Only)
Create Your AWS Account
To use an Amazon ElastiCache, you must have an active AWS account and permissions to access ElastiCache and other AWS resources.
If you don’t already have an AWS account, create one now. AWS accounts are free. You will not charge for signing up for an AWS service, only for using AWS services.
Set Up Your Permissions (New ElastiCache Users Only)
Amazon ElastiCache creates & uses service-linked roles to provision resources and access other AWS resources and services on your behalf. For ElastiCache to create a service-linked role for the user, use the AWS-managed policy named AmazonElastiCacheFullAccess. This role comes pre-provisioned with permission that the service to create a service-linked role on your behalf.
You might decide not to use the default policy and instead to use a custom-managed policy. In this case, make sure that you have either permissions to call iam:createServiceLinkedRole or that you have created an ElastiCache service-linked role.
Using the following
Creating a New Policy (IAM)
AWS-Managed (Predefined) Policies for Amazon ElastiCache
Using Service-Linked Roles for Amazon ElastiCache
Step 1: Launch a Cluster
The cluster you’re about to launch will be live, and not running in the sandbox. You will incur the standard ElastiCache usage fees for the instance until you delete the cluster. The total charges will be minimum (typically less than a dollar) if you complete the exercise described herein one sitting and delete your cluster when you are finished.
Important
Your cluster is launched in an Amazon VPC. Before you start creating your cluster, you need to create a subnet group for the cluster.
To create a standalone Redis (cluster mode disabled/single node) cluster
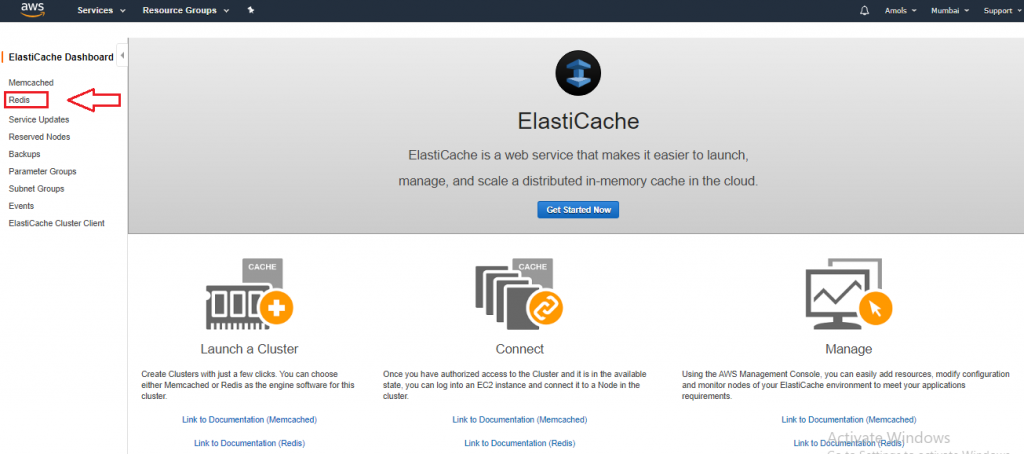
- Sign in to the AWS Management Console and open the Amazon ElastiCache console at https://console.aws.amazon.com/elasticache/.
- Choose to Get Started Now.
If you already have an available cluster, select Launch Cluster.
- From the list in the upper right corner, choose the AWS Region that you want to launch this cluster in.
- For Cluster engine, choose Redis.
- Make sure that Cluster-Mode enabled (Scale-Out)is not selected.
- Complete the Redis cluster settings section as follows:
- For Name, type a name for your cluster.
Cluster naming constraints are as follows
Must contain 1 to 40 alphanumeric characters or hyphens.
Must begin with a letter.
It can’t contain two consecutive hyphens.
Can’t end with a hyphen.
From the Engine version compatibility list, choose the Redis engine version you want to run on this cluster. Unless you have a specific reason to run an older version, we recommend that you choose the latest version.
In Port, accept the default port, 6379. If you have a reason to use a different port, enter the port number.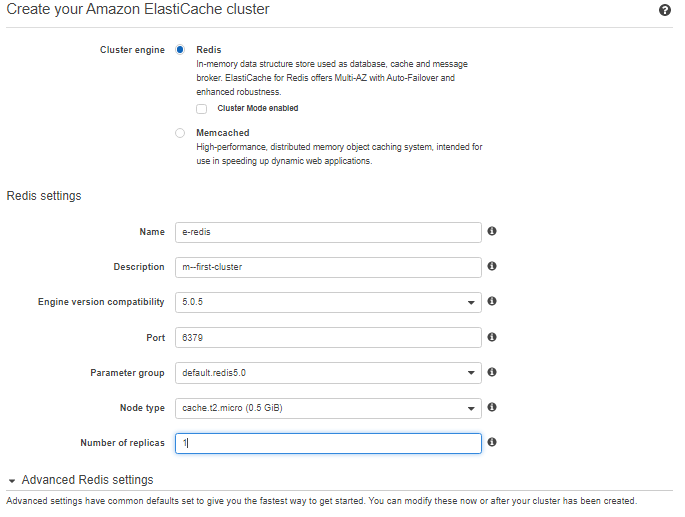
- From the Parameter group, choose the parameter group you want to use with this cluster, or choose “Create new” to create a new parameter group to use with this cluster. For this exercise, accept the default parameter group.
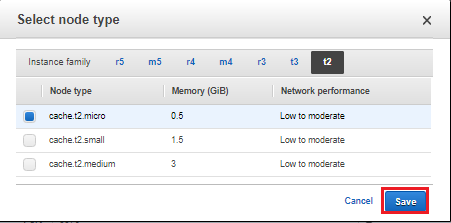
- For Node type, choose the node type that you want to use for this cluster. For this exercise, above the table choose the t2instance family, choose t2.micro, and finally choose Save.
- From the Number of replicas, choose the number of reading replicas you want for this cluster. Because in this tutorial we’re creating a standalone cluster, choose None.
When you select None, the Replication group description field disappears.
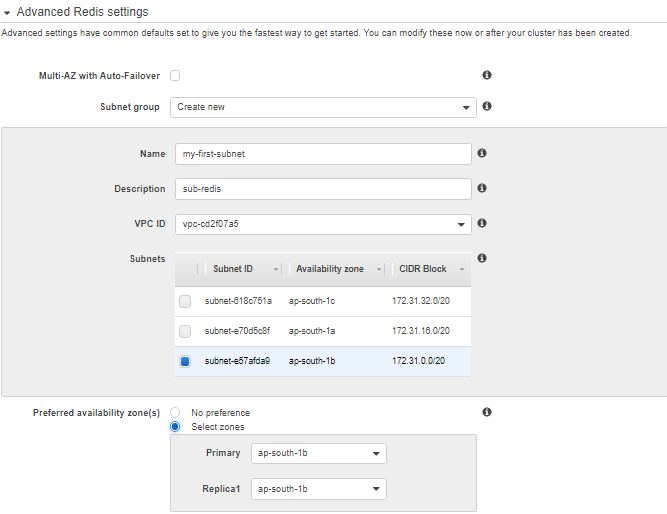
- Choose Advanced Redis cluster settings and complete the section as follows:
Note
The Advanced Redis cluster settings details are slightly different if you are creating a Redis (cluster mode enabled) replication group.
From the Subnet group list, select the subnet you want to apply to this cluster. For this exercise, choose default.
- For the Availability Zone(s), you have two options.
- No preference: ElastiCache chooses the Availability Zone.
- Specify availability zones: You specify the Availability Zone for your cluster.
For this exercise, select Specify availability zones and then choose an Availability Zone from the list below Primary.
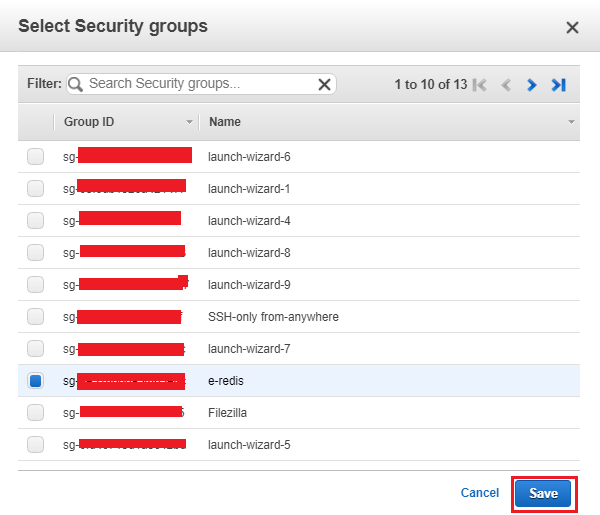
- From the Security groups list, select the security groups that you want to use for this cluster. For this exercise, choose default.
- If you are going to seed your cluster with data from a.RDB file, in the Seed RDB file S3 location box, enters the Amazon S3 location of the.RDB file.
- Because this is not a production cluster, clear the Enable automatic backups checkbox.
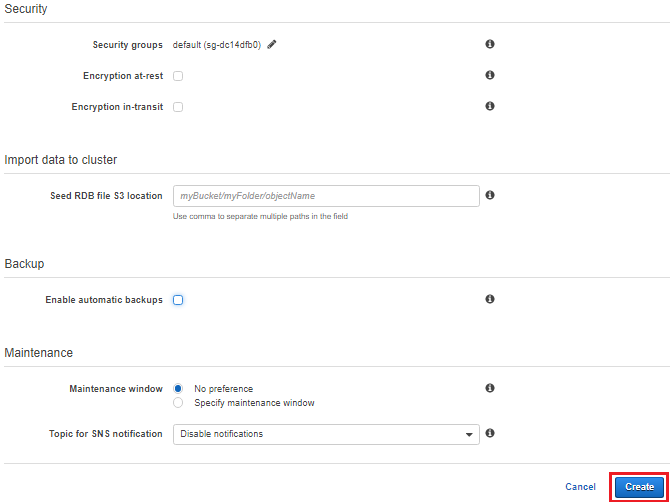
- The Maintenance window is the time, generally an hour, each week where ElastiCache schedules system maintenance on your cluster. You can allow ElastiCache to specify the day and time for your maintenance window (No preference), or you can specify the day and time yourself (Specify maintenance window. If you select Specify maintenance window, specify the Start day, Start Time, and Duration (in hours) for your maintenance window. For this exercise, choose No preference.
- For Notifications, leave it as Disabled.
- Choose Create cluster to launch your cluster, or Cancel to cancel the operation.

Step 2: Authorize Access
This section considers that you are familiar with launching and connecting to Amazon EC2 instances.
All ElastiCache clusters are designed to be accessed from an Amazon Elastic Compute Cloud (EC2) instance. The most common scenario is to access an ElastiCache cluster from an Amazon Elastic Compute Cloud EC2 instance in the same Amazon Virtual Private Cloud (Amazon VPC). This is the scenario covered in this topic.
The steps required depend upon whether you launched your cluster into EC2-VPC or EC2-Classic.
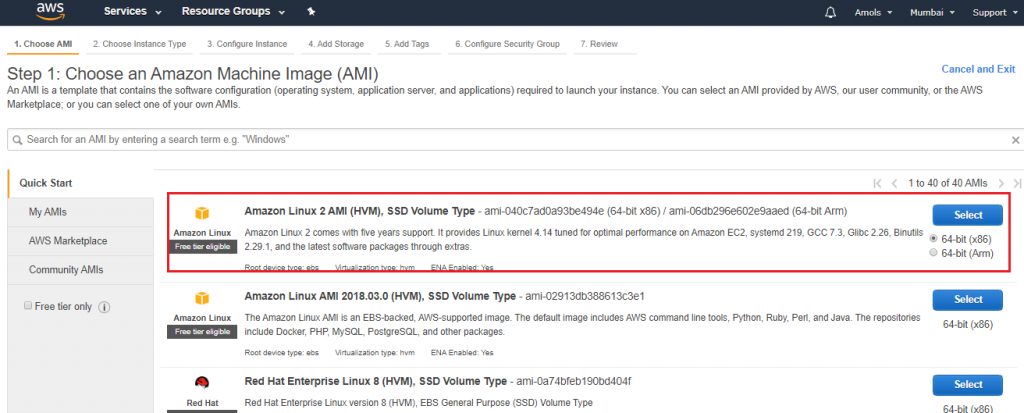
Here I choose Amazon Linux 2 AMI under free tier eligible.
Go to EC2 Dashboard choose AMI
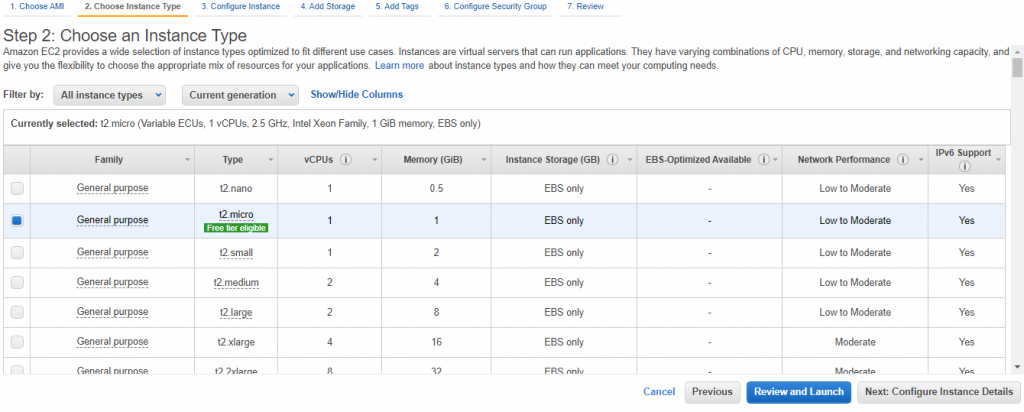
Select the type of instance and click NEXT
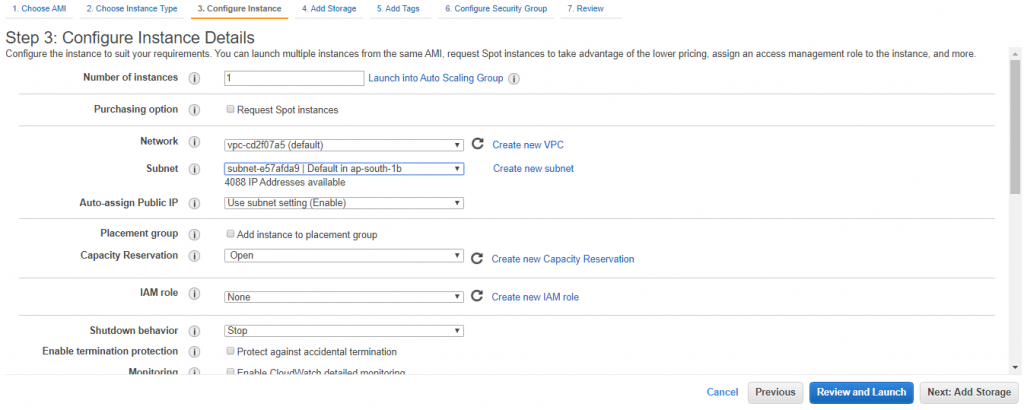
Choose subnet which you have configured in previous steps for Radis cluster and default vpc.
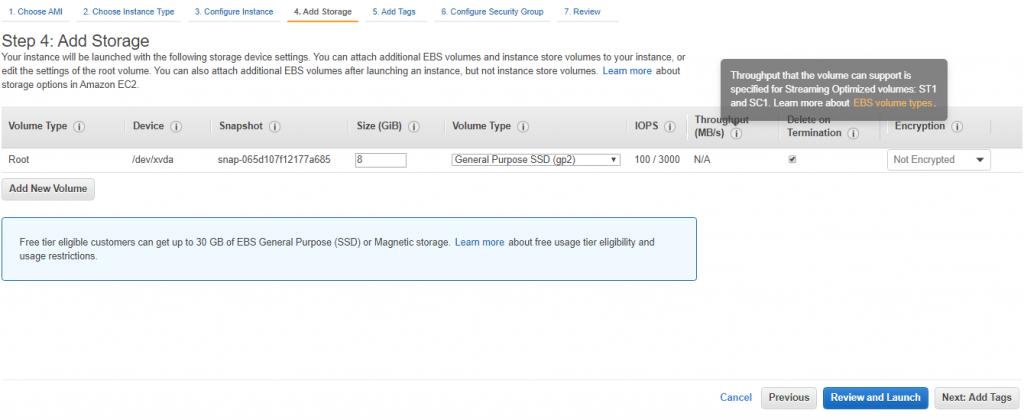
NEXT and add storage
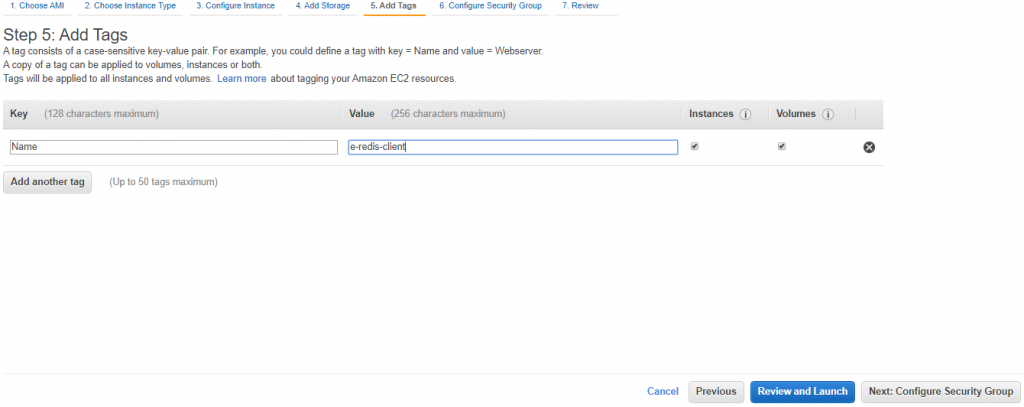
Choose NEXT to add a tag for your EC2 instance
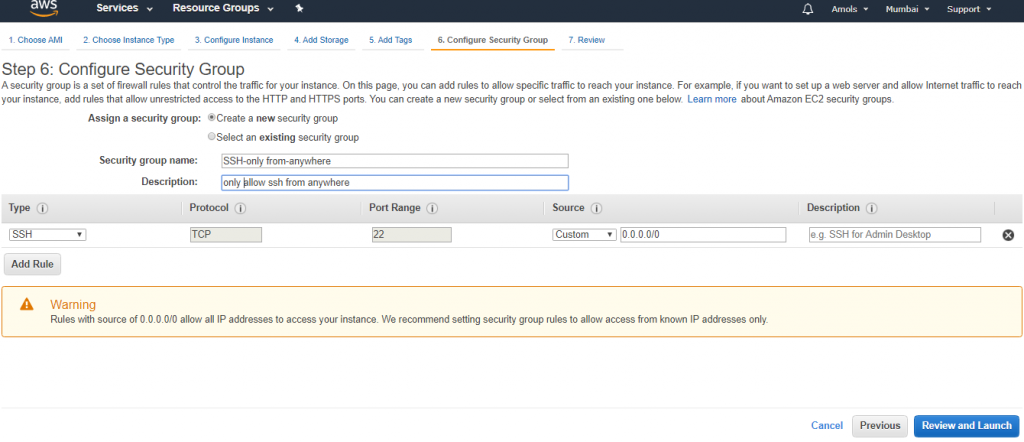
Configure security group for SSH only from access anywhere.
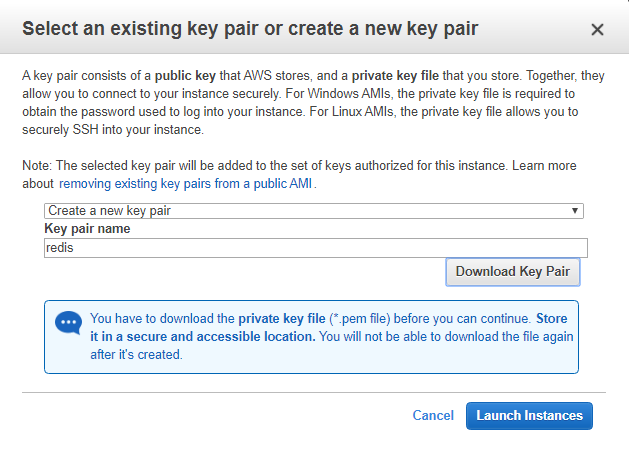
Review and Launch cluster and download key pair
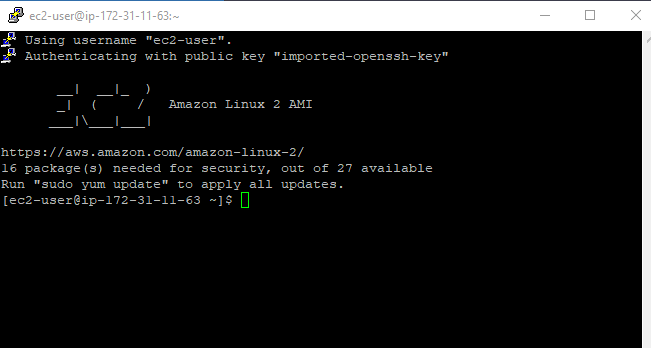
Now connect using your private key. PPK through Putty.exe (for windows user only)
For Linux/ Mac user doesn’t need putty to connect
Now Ec2 instance is running to use for Redis cluster

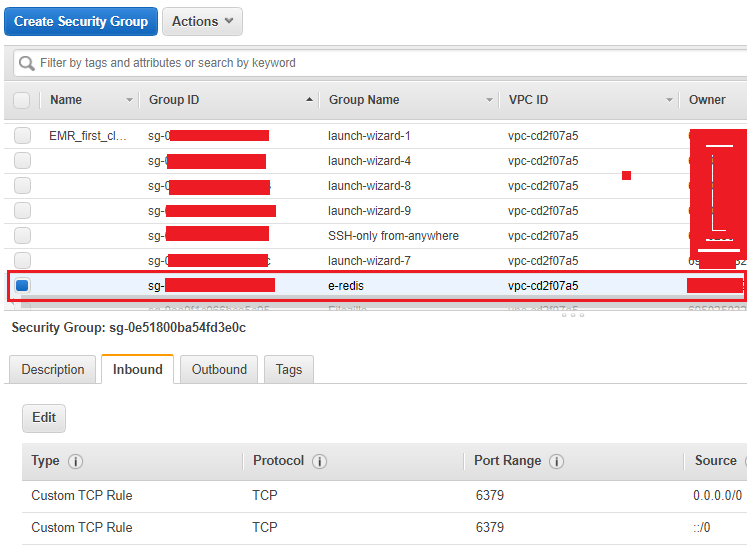
Redis engine port number is 6379 and to run Redis cluster properly
Set it in the inbound rule under a security group of Redis cluster
Step 3: Connect to a Cluster’s Node
To connect Redis cluster you have to Authorize Access.
This section considers that you’ve created an Amazon EC2 instance and can connect to it.
An Amazon EC2 instance can connect to a cluster node only if you have authorized it in the previous step
Step 3.1: Find your Node Endpoints

When your cluster is in the available state and you’ve authorized access to it (Step 2: Authorize Access), you can log in to an Amazon EC2 instance and connect to the cluster. To do so, you must first find the endpoint.
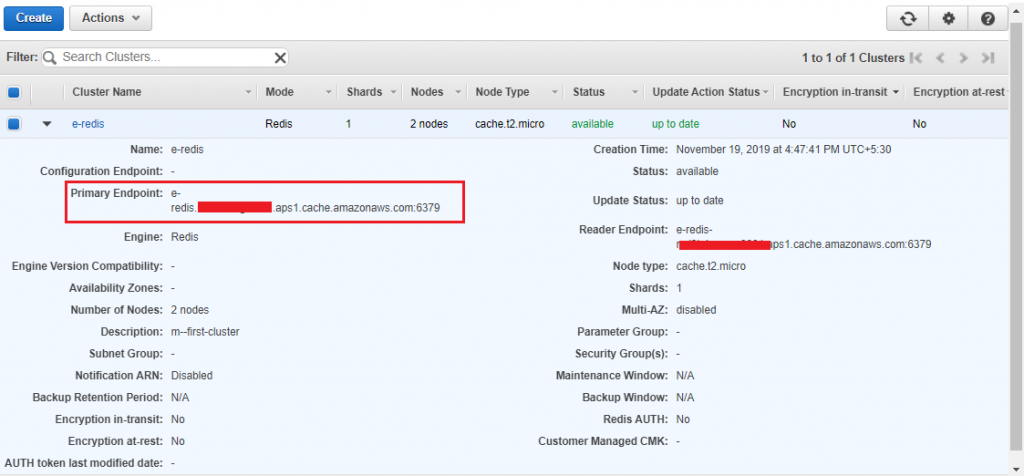
When you find the endpoint you require, copy it to your clipboard for use in Step 3.2.
Finding Connection Endpoints
Redis (Cluster Mode Disabled) Cluster’s Endpoints (Console): You need the primary endpoint of a replication group or the node endpoint of a standalone node.
Finding Endpoints for a Redis (Cluster Mode Enabled) Cluster (Console): You need the cluster’s Configuration endpoint.
Endpoints (AWS CLI)
Finding Endpoints (ElastiCache API)
Step 3.2: To Connect to a Redis Cluster or Replication Group
Now that you have the endpoint you need, you can log in to an EC2 instance and connect to the cluster or replication group.
In the following example, you use the redis-cli utility to connect to a cluster that is not encryption enabled and running Redis.
To connect to a Redis cluster that is not encryption-enabled using redis-cli utility
- Connect to your Amazon EC2 instance using the connection utility of your choice.
- Download and install the GNU Compiler Collection (GCC).
At the command prompt of your EC2 instance, type the following command then, at the confirmation prompt.
sudo yum update
type y
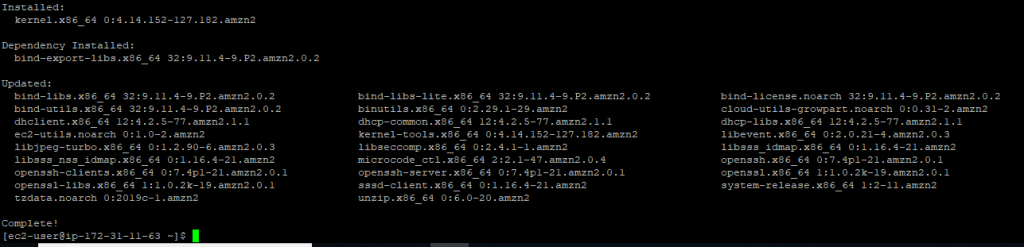
Doing this produces output similar to the following
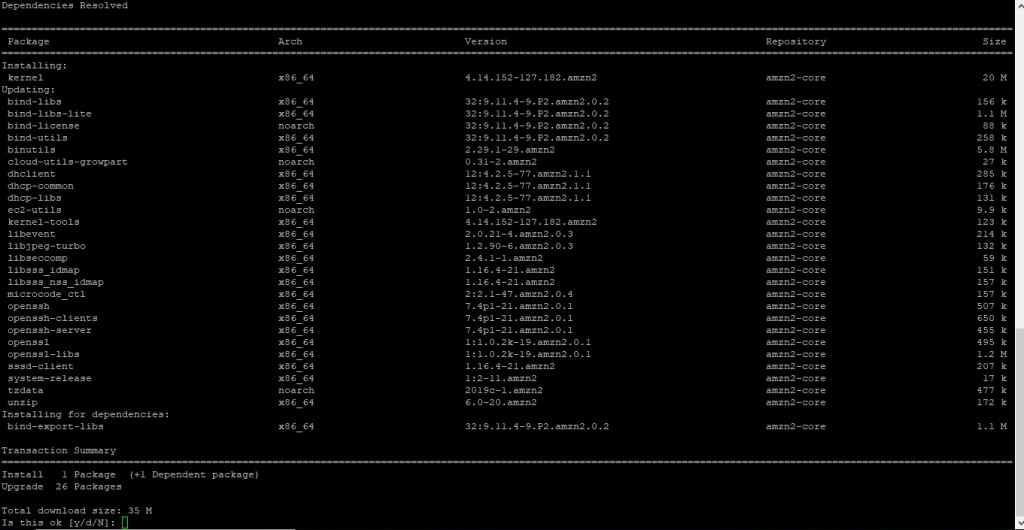
Type y
- Download and compile the redis-cli This utility is included in a Redis software distribution.
At the command prompt of your EC2 instance, type the following commands:
India’s Leading Training institute
Sudo yum install redis
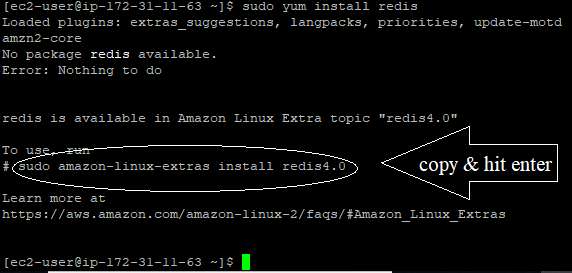
Then type y and hit Enter
Use redis cli command to ping between EC2 instance and Redis cluster to check the connection
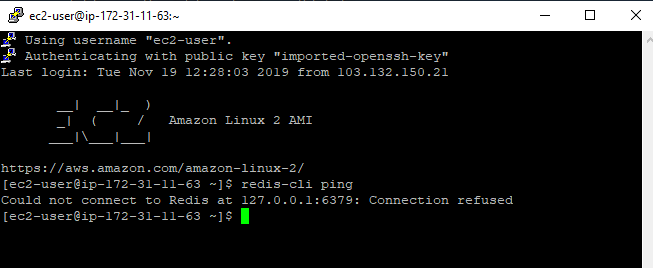
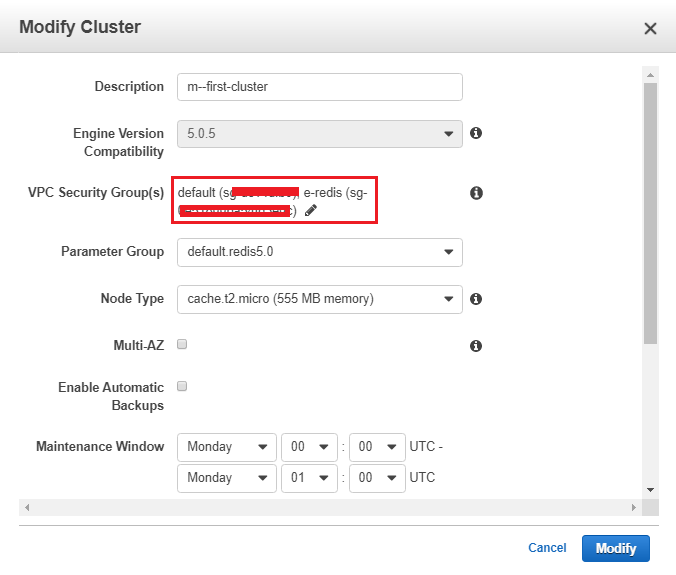
To happen connection, add security group created during redis cluster in the default security group.
For that, you have to modify the cluster

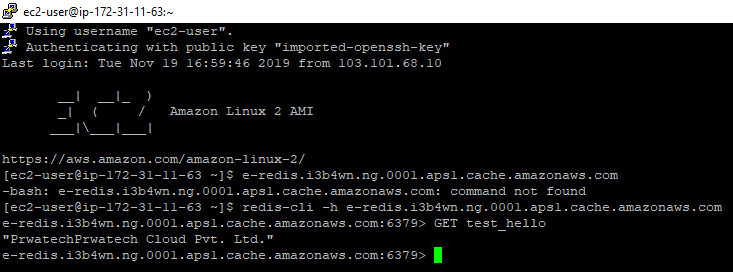
- At the command prompt of your EC2 instance, type the following command, substituting the endpoint of your cluster and port for what is shown in this example.

This results in a Redis command prompt similar to the following.
- Run Redis commands.
You are now connected to the cluster and can run Redis commands
You can find this on google search for it redis command cheat sheet
Find basic redis command
Type the command similar to the following.
![]()
// Set KEY “test_hello” with a string value and no expiration
// Get value for KEY ” test_hello”

You can append KEY and can list all key available
By using the command KEYS_*
quit // Exit from redis-cli
You can monitor metrics of redis cluster for CPU utilization engine CPU utilization and swap usage, etc
Step 4: Delete Your Cluster (To Avoid Unnecessary Charges)
Important
It is almost always a good idea to delete clusters that you are not actively using. Until a cluster’s status is deleted, you continue to incur charges for running clusters.
To delete a cluster
- Sign in to the AWS Management Console and open the Amazon ElastiCache console at https://console.aws.amazon.com/elasticache/.
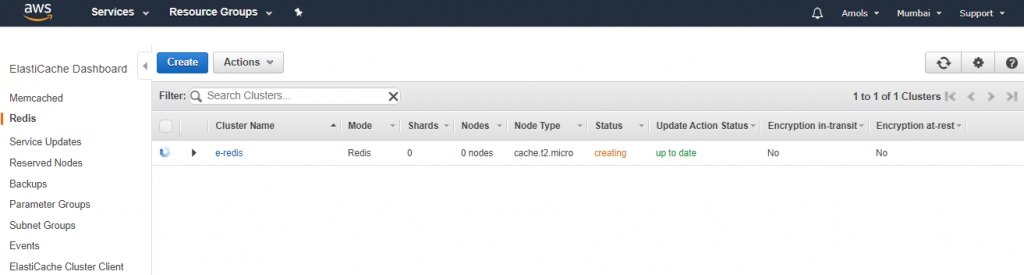
- To see a list of all your clusters running Redis, in the navigation pane, choose Redis.
- To select the cluster to delete, select the cluster’s name from the list of clusters.
- For Actions, choose Delete.
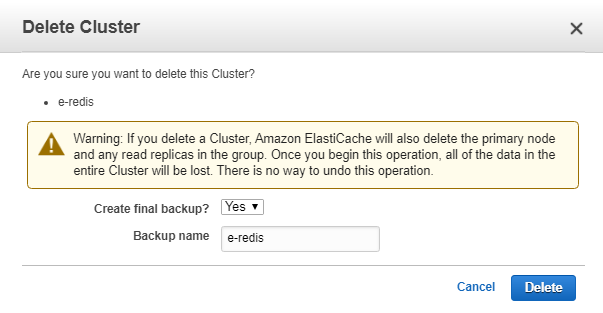
- In the Delete Clusterconfirmation screen, choose Delete to delete the cluster, or Cancel to keep the cluster.
If you choose Delete, the status of the cluster changes to deleting.
As soon as your cluster is no longer listed in the list of clusters, you stop incurring charges for it.
Now you have successfully launched, authorized access to, connected to, viewed, and deleted an ElastiCache for Redis cluster.
# Last but not least, always ask for help!