Getting Started with Microsoft Power BI Desktop
Getting Started with Microsoft Power BI Desktop
Utilizing Microsoft Power BI Desktop for data visualization purposes calls for an initial download and installation process on your personal computer system first and foremost. Easily obtainable through direct downloads via the company’s webpage or opt for one-click access via the pre-installed version found within the popular app marketplace — The Windows Store — this will set you up with full access straight away – With no other installation processes necessary! All necessitated downloads will require only that mentioned above itself exclusively as well.
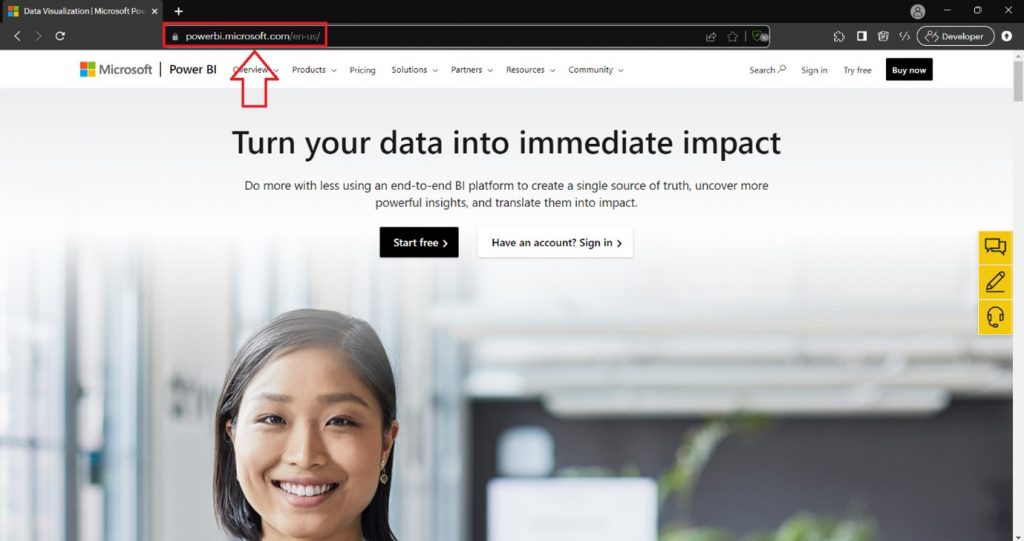
To get started out right away then input this URL link into any major internet browser- https://powerbi.microsoft.com/.

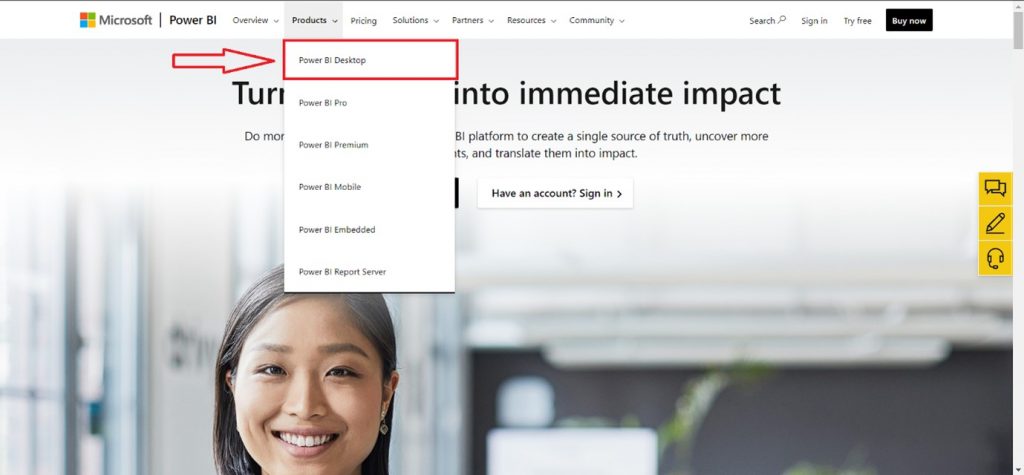
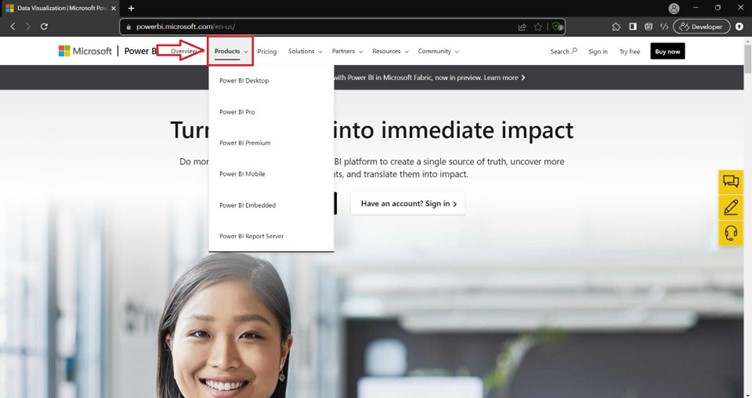
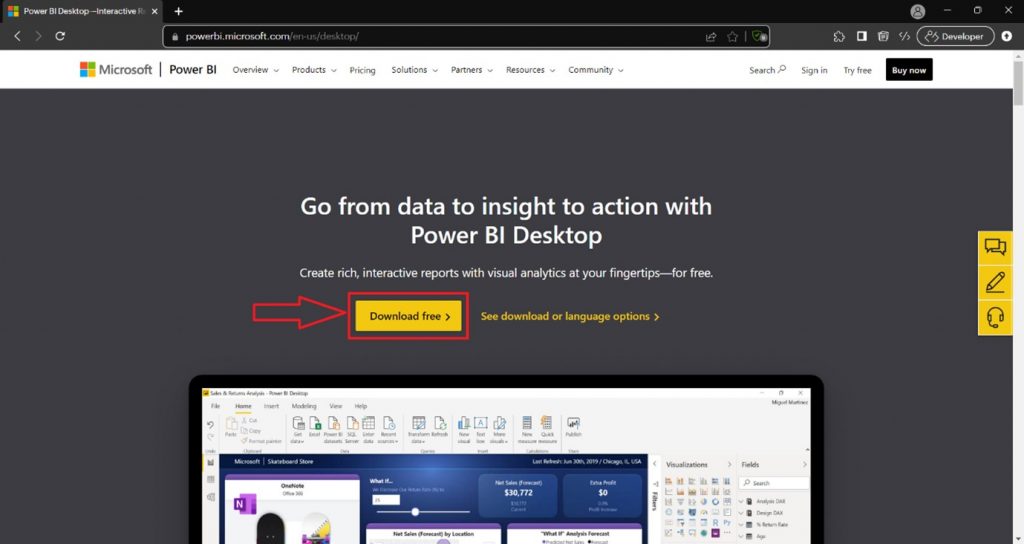
Click on the “Products” tab in the top navigation bar of the official Power BI website.
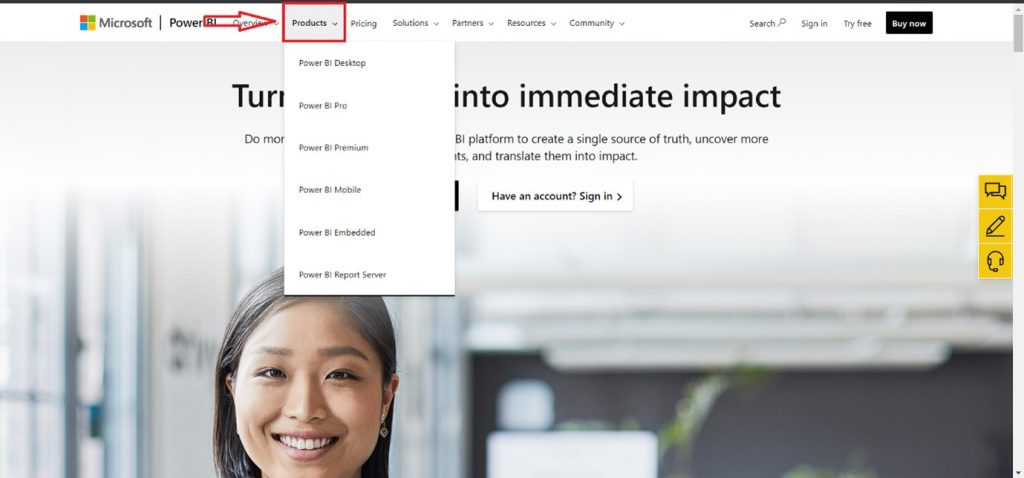
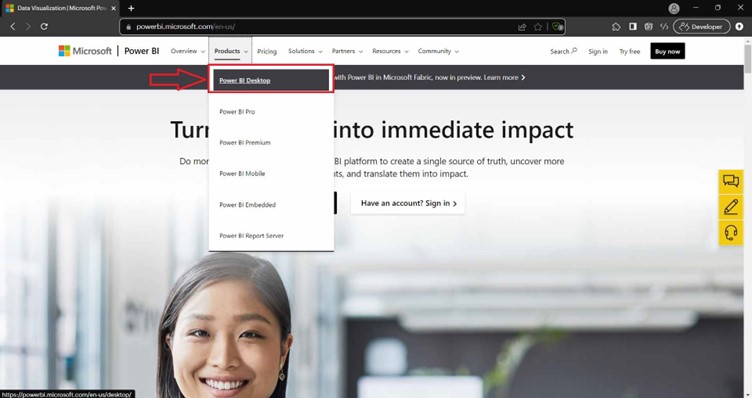
To gain entry to the Power BI Desktop locate and choose “Power BI Desktop” from the dropdown menu. From there you will be guided to its designated page.
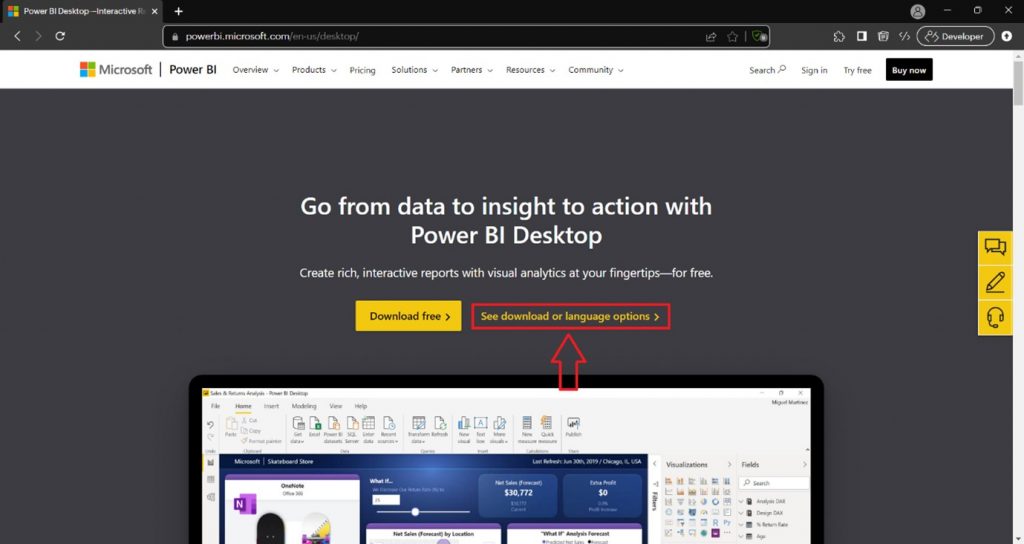
On the Power BI Desktop page, click on the “See download or language options” Link. This will take you to the Download Center page.
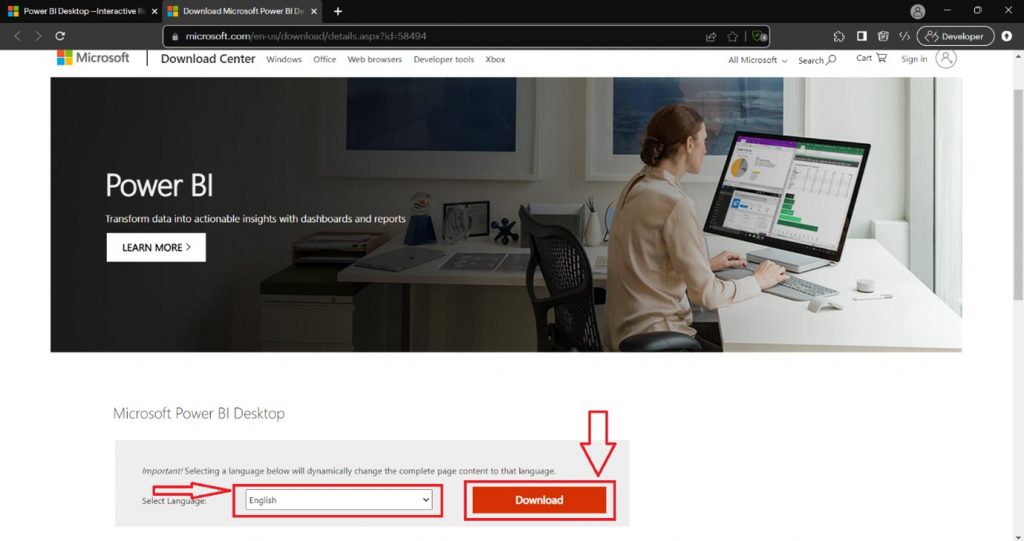
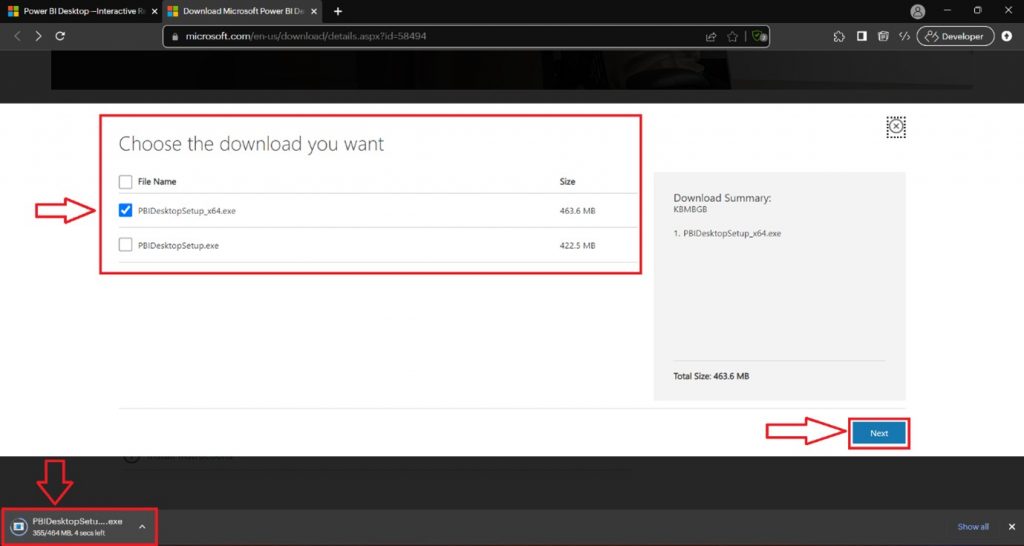
Choose your desired language from the dropdown menu and click on the “Download” button.
After clicking on the “Download” button it will ask for the Windows version which is 64 or 32. Select according to your Windows version and click the “Next” button. This will start downloading the Power BI Desktop installer file.
After Downloading the Power BI Desktop installer file.
First things: locate the downloaded software file and open it – this will activate an installation wizard that’s needed to set up Power BI Desktop.
Click “Next” within this wizard interface (once opened) and indicate acceptance of all presented licensing terms through relevant checkboxes before moving forward via clicking on “Next”.
Customizing features of software suite becomes possible during following stage – so feel free to check/uncheck as per requirements at this point too. Once you’ve made your choices click on “Next”.
After ensuring all prefer options have been select carefully review the installation summary before initiating the actual install process by clicking “Install”. Wait for a few minutes till process completes successfully before accepting confirmation through clicking “Finish.”
Install Microsoft Products from the Microsoft Store.
Open a web browser and go to the official Power BI website:
Click on the “Products” tab in the top navigation bar.
Select “Power BI Desktop” from the dropdown menu. This will take you to the Power BI Desktop page.
On the Power BI Desktop page, click on to the “Download free” section.
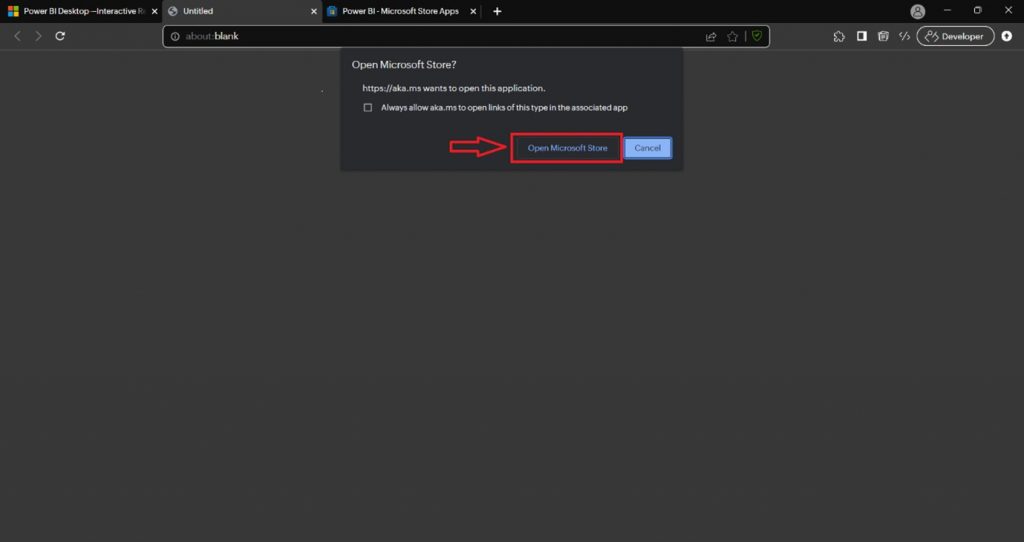
Click on the “Open Microsoft Store” button. This will redirect you to the Power BI Desktop page on the Microsoft Store.
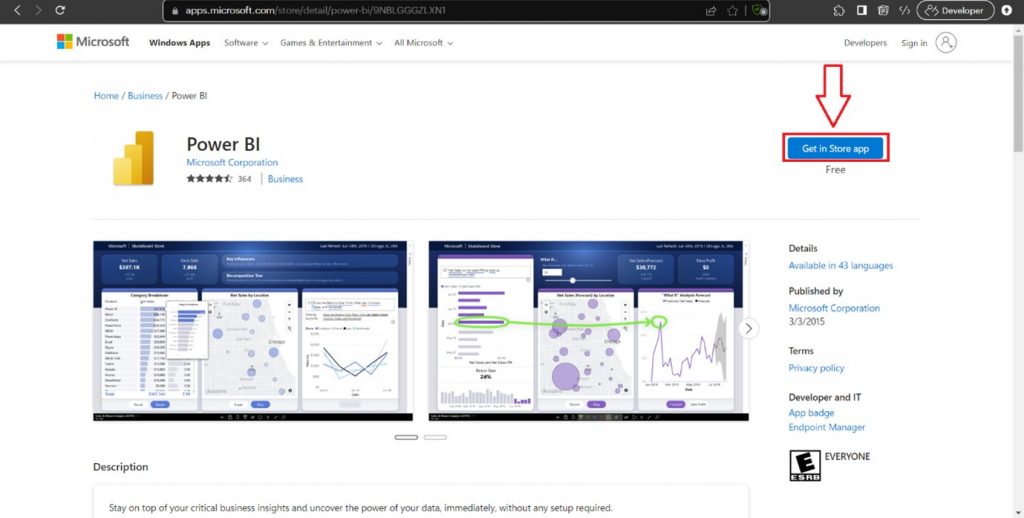
The Microsoft Store app will open, and you will see the Power BI Desktop page. Click on the “Get” button.
Installing Power BI Desktop via Microsoft Store takes some time; however, it’s worth every minute! Make sure not to navigate away from this critical process until everything has completed successfully since even one unchecked step could result in significant errors down the road. Following completion of both download and installation processes by MS store —a popup notifying confirmation arrives on screen telling users they’re good to go with their new software!
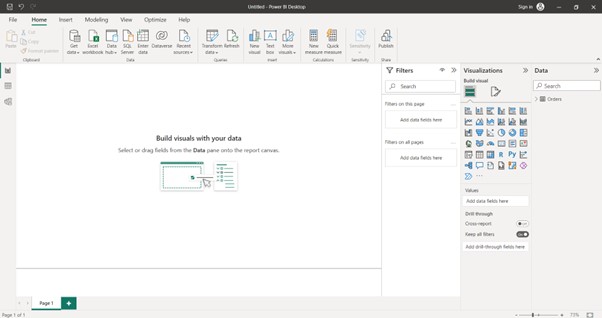
Launch Power BI after installing it, then login in with your Microsoft account. The user interface of the Power BI Desktop is show in the below image.
Getting Started with Microsoft Power BI Desktop