Before You Configure Load Balancer:
Elastic Load Balancer, in this Tutorial one, you can learn About Elastic Load Balancer. Are you the one who is looking for the best platform which provides information about Elastic Load Balancer? Or the one who is looking forward to taking the advanced Certification Course from India’s Leading AWS Training institute? Then you’ve landed on the Right Path. The Below mentioned Tutorial will help to Understand the detailed information about Elastic Load Balancer, so Just Follow All the Tutorials of India’s Leading Best AWS Training institute and Be a Pro AWS Developer.- Decide which two Availability Zones you will use for your EC2 instances. Configure your virtual private cloud (VPC) Network with at least one public subnet in each of these Availability Zones. These public subnets are used to configure the load balancer to distribute load among instances. You can launch your EC2 instances in other subnets of these Availability Zones instead.
- EC2 User Data:
We want to make sure that this EC2 instance has an apache HTTP server
Installed on it. We will be writing the user data script. This will get executed when instance will boot for the first time. Let’s terminate the old instance a new one. Launch the instance in the same way, but this time with the help of User Data and test same on the browser. #!/bin/bash sudo su yum update -y yum install -y httpd.x86_64 systemctl start httpd.service systemctl enable httpd.service EC2_AVAIL_ZONE=$(curl -s http://169.254.169.254/latest/meta-data/placement/availability-zone) echo "<h1>Hello World from $(hostname -f) in AZ $EC2_AVAIL_ZONE </h1>">/var/www/html/index.html To identify your instance, you have to add script in description at fourth step of launching your EC2 instance see for example given below fourth step of configuration: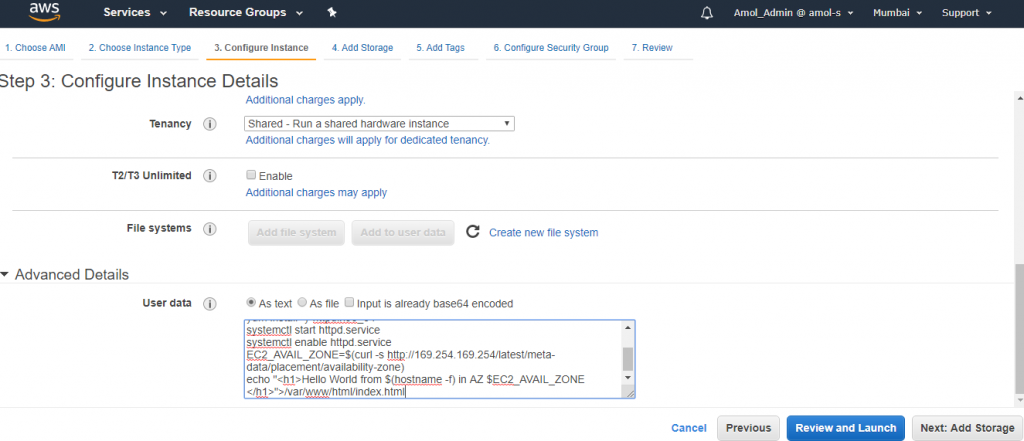 You can see I had launched the two EC2 instances one is launched in availability zone ap-south-1a and second one is launched in availability zone ap-south-1b:

- Launch at least one EC2 instance in each Availability Zone of region. Be sure to install a web server, such as Apache or Internet Information Services (IIS), on each EC2 instance. Ensure that the security groups for these instances allow HTTP access on port number 80.
- Open the Amazon EC2 console at https://console.aws.amazon.com/ec2/.
- On the navigation bar, select a region for your load balancer. Be sure to select the same region that you specified for your EC2 instances.
- On the navigation pane, under LOAD BALANCING, select Load Balancers.
- Choose Create Load Balancer.
- For Application Load Balancer, choose to Create.
To configure your load balancer and listener
- For Name, give a name for your load balancer.
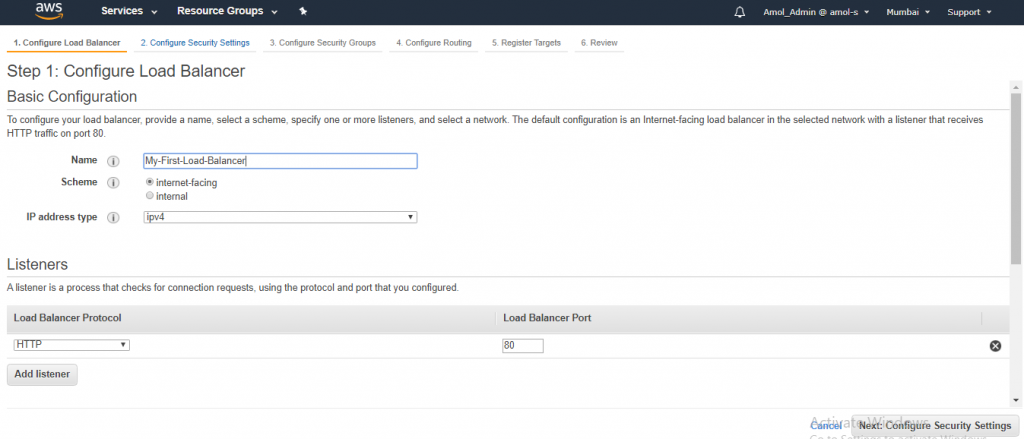
- For Scheme& IP address type, keep the default values.
- For Listeners, keep the default, which is a listener that accepts HTTP traffic on port number 80.
- For Availability Zones, select the VPC that you used for your EC2 instances. For each Availability Zone that you specified to launch your EC2 instances, select the Availability Zone ap-south-1a and then select the public subnet for that Availability Zone ap-south-1b.

- Choose Next: Configure Security Settings.
- For this tutorial, you are not creating an HTTPS listener.
- Choose Next: Configure Security Groups.
To configure a security group for your load balancer
- Select Create a new security group.
- Type a name & description for the security group, or keep the default name and description. This new security group contains a rule that allows traffic to the load balancer listener port that you selected on the Configure Load Balancer
 3. Select Next: Configure Routing.
 Step 4: To Configure Your Target Group
Create a target group, which is used in the request routing. The default rule for your listener routes requests to the registered targets in this target group. The load balancer checks the health of targets in this target group using the health check settings defined for the target group. On the Configure Routing page, complete the following procedure.
To configure your target group
- For Target group, keep the default setting, New target group.
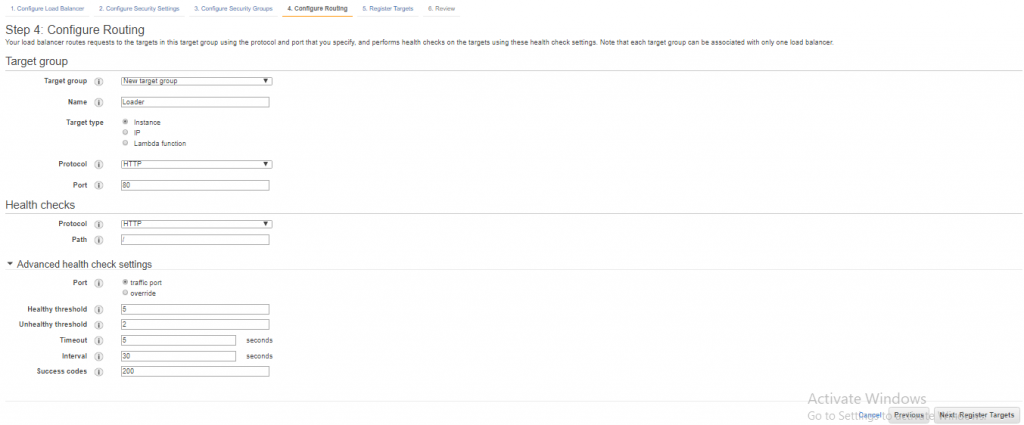 2. For Name, give a name for the new target group.
3. Keep the default target type (Instance), protocol (HTTP), and port (80).
4. For Health checks, keep the default settings.
5. Choose Next: Register Targets.
Step 5: Register Targets with Your Target Group
On the Register Targets page, complete the following procedure.
To register your instances with the target group
- For Instances, select one / more instances.
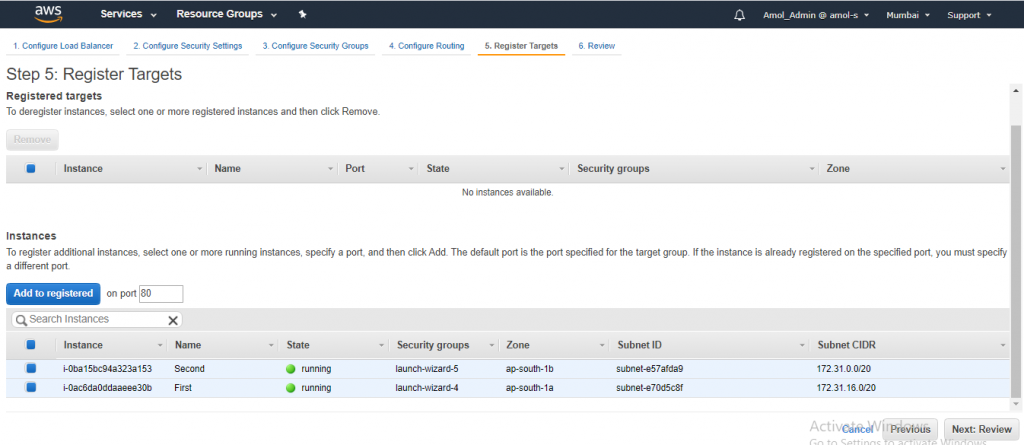 2. Keep the default port (80) and select Add to registered.
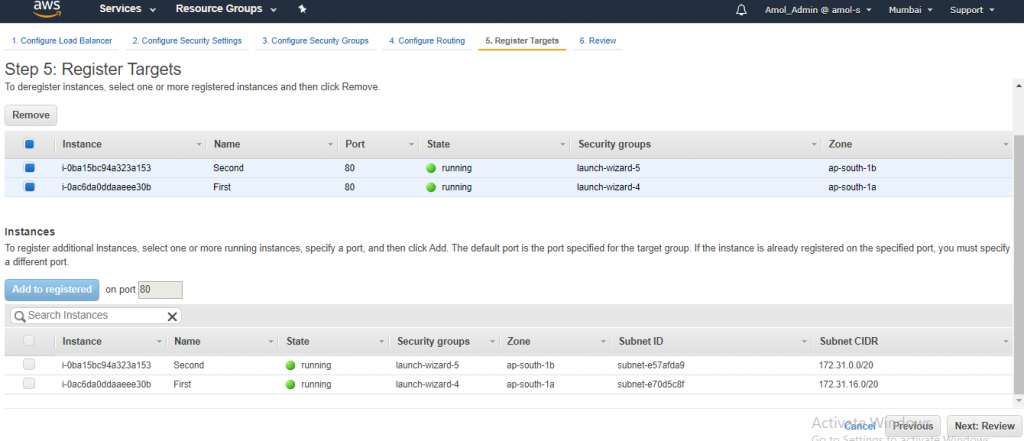
- When you have finished selecting instances, select Next: Review.
To create & test your load balancer
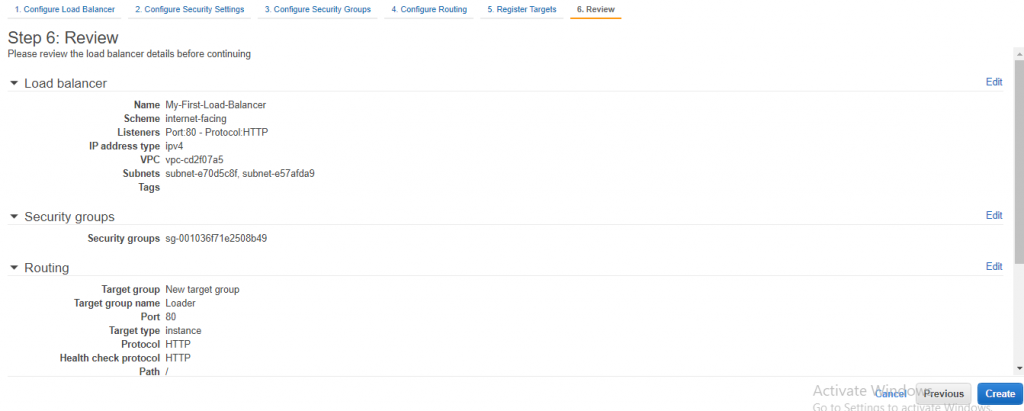
- On the Reviewpage, select Create.
- After you are notified that your load balancer was created successfully, select Close.
 After you successfully create Load Balancer it will take a moment to active once provisioning complete.


- On the navigation pane, under LOAD BALANCING, choose Target Groups.
- Select the newly created target group.
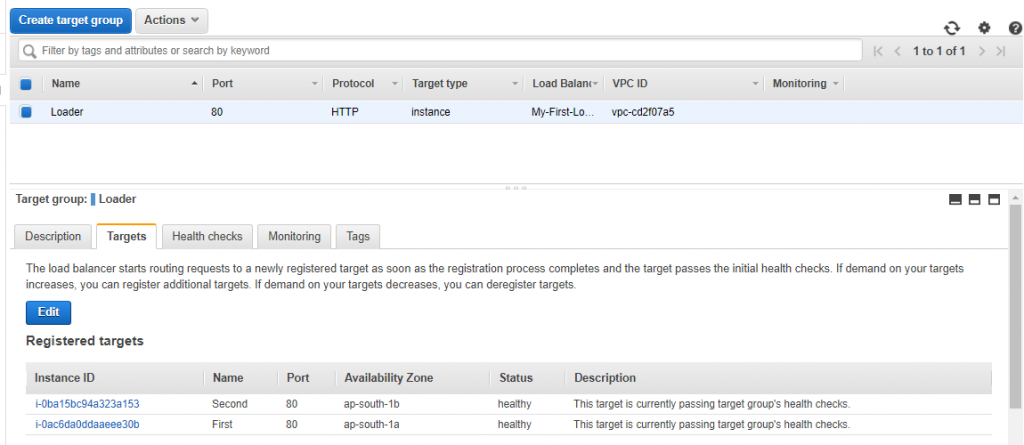
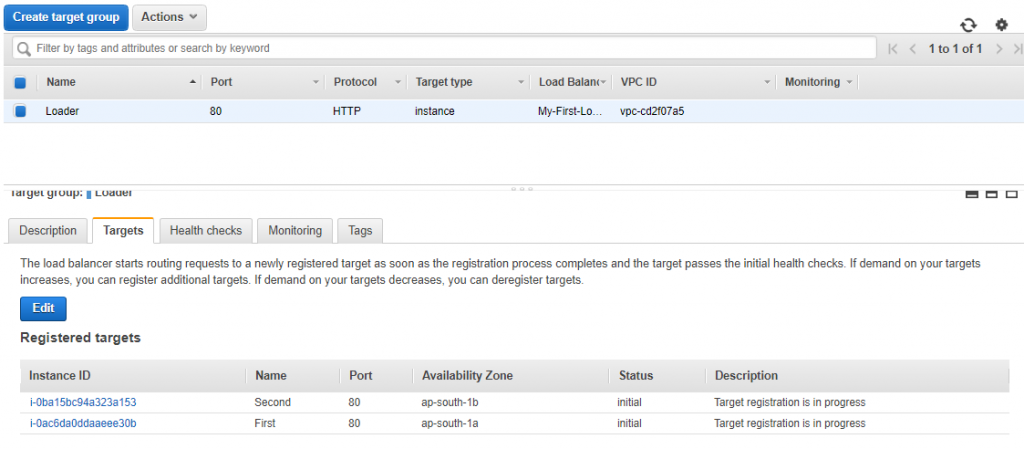 5. On the Targetstab, verify that your instances are ready means active. If the status of an instance is initial, it's probably because the instance is still in the process of being registered, or it has not passed the minimum number of health checks to be considered healthy.
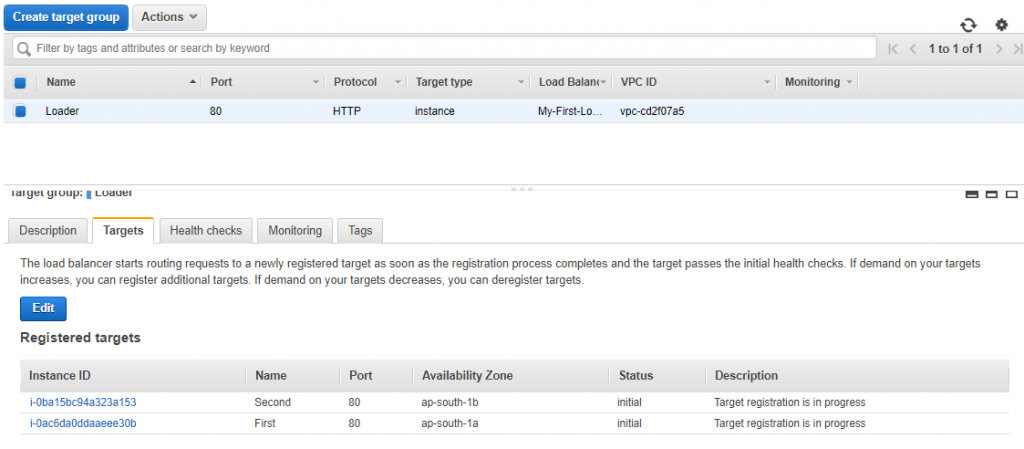 6. After the status of at least one instance is healthy, you can test your load balancer.
- On the navigation pane, under LOAD BALANCING, select Load Balancers.
- Select the newly created load balancer.
- On the Descriptiontab, copy the DNS name of the load balancer (for example, my-load-balancer-1234567890.us-west-2.elb.amazonaws.com). Paste the DNS name into the address field of an Internet-connected web browser. If everything is working, the browser displays the default page of your server.
 Refresh the browser then you can see AZ ap-south-1b

Step 7: Delete Your Load Balancer (Optional)
As soon as your load balancer becomes available, you are billed for each hour or partial hour that you keep it running. When you no longer need a load balancer, you can delete it. As soon as the load balancer is deleted, you stop incurring charges for it. Note that deleting a load balancer does not affect the targets registered with the load balancer. For example, your EC2 instances continue to run. To delete your load balancer- Open the Amazon EC2 console at https://console.aws.amazon.com/ec2/.
- On the navigation pane, under LOAD BALANCING, select Load Balancers.
- Select the checkbox for the load balancer, and then select Actions, Delete.
- When prompted for confirmation, select Yes, Delete.
# Last but not least, always ask for help!


