Blog

Storage account and container Hands on

How to create a Storage account and container, and upload the file into the container.

Step 1: login into the Azure portal and search Storage account.

Step 2: Click on Create and fill in the details

image

Step 3: Enter the Storage account name and select the Standard in performance.

Step 4: Click Review and Create.

Step 5: Click on “Go to resources”

image

Step 6: On the left side select container and Click +container to create a container.

image

Step 7: Enter a name and create

image

Step 8: Select the container after created and open it.

Step 9: Click upload and upload any files, In the advance option we see the tiers(hot, cool, archive) and click upload.


image

Step 10:  After the upload, if u want the change tier just select the container and click change access level in upside and you can change.


0
0

Azure Storage Redundancy(High Availability)

Azure Storage Redundancy(High Availability)


image


Azure Storage offers several redundancy options to ensure the high availability and durability of data. These redundancy options allow you to choose the level of redundancy based on your application’s requirements, balancing cost and resilience. Here are the primary redundancy options available in Azure Storage:


  1. Locally Redundant Storage (LRS):
  • LRS replicates your data within a single storage scale unit (rack) in a data center.
  • It provides at least three copies of your data within the same region but in different fault domains to protect against hardware failures.
  • LRS is the most cost-effective redundancy option but offers the lowest durability compared to other options.


  1. Geo-Redundant Storage (GRS):
  • GRS replicates your data synchronously to a secondary region hundreds of miles away from the primary region.
  • In case of a regional outage or disaster, your data remains available from the secondary region.


  1. Zone-Redundant Storage (ZRS):
  • ZRS replicates your data across availability zones within the same region.
  • Availability zones are physically separate data centers with independent power, cooling, and networking.
  • ZRS provides higher availability than LRS because it protects against data center failures within the region.


  1. Read-Access Geo-Redundant Storage (RA-GRS):
  • RA-GRS provides the same redundancy as GRS but also allows read access to data in the secondary region.
  • This allows you to access your data from the secondary region for read operations, providing additional redundancy and reducing latency for read-intensive workloads.


  1. Zone-Redundant Storage Plus (ZRS+):
  • ZRS+ is an extension of ZRS that also replicates data to a secondary region for added redundancy.
  • It combines the benefits of ZRS (high availability within the region) with the added protection of geo-redundancy.
  • ZRS+ is suitable for mission-critical applications that require both high availability and data protection across regions.
0
0

Azure Storage Types

Azure Storage Types


Azure provides several storage services that cater to different needs and scenarios. These services include:


image


  1. Azure Blob Storage:

    Blob storage is designed for storing large amounts of unstructured data, such as text or binary data. It is highly scalable and can store massive amounts of data, making it suitable for scenarios like backup and restore, serving images or documents to users, and storing logs.


  1. Azure Files:

    Azure Files offers fully managed file shares in the cloud, accessible via the standard Server Message Block (SMB) protocol. It enables you to create file shares that can be mounted as network drives on Windows, macOS, and Linux machines, making it easy to migrate applications that rely on file storage to the cloud.


  1. Azure Queues:

    Azure Queues provide a message queuing service for asynchronous communication between components of cloud applications. You can use queues to decouple application components, handle spikes in workload, and build resilient and scalable applications.


  1. Azure Tables: Azure Tables offer a NoSQL data store for storing structured data in the form of key-value pairs.


  1. Azure Disk Storage: Azure Disk Storage provides managed disk services for virtual machines and other compute resources.


  1. Azure Data Lake Storage: Azure Data Lake Storage is a scalable and secure data lake solution for big data analytics. It is optimized for storing large amounts of structured, semi-structured, and unstructured data and integrates with various analytics services such as Azure Databricks, Azure Synapse Analytics, and Azure HDInsight.


  1. Azure Backup

    : Azure Backup is a cloud-based backup service that provides reliable and cost-effective backup solutions for on-premises and cloud-based workloads.


Function of Azure Data Storage:

  1. Data Storage:

    Azure Storage allows you to store various types of data, including structured, semi-structured, and unstructured data. This includes documents, images, videos, logs, backups, and more.


  1. Scalability:

    Azure Storage is design to scale elastically to accommodate growing data requirements. It can automatically scale up or down based on demand, ensuring that you have the necessary storage capacity without over-provisioning.


  1. Durability and Availability:

    Azure Storage provides high durability and availability for your data by replicating it across multiple data centers within a region. This redundancy ensures that your data remains accessible even in the event of hardware failures or disasters.


  1. Security:

    Azure Storage offers robust security features to protect your data, including encryption at rest and in transit, role-based access control (RBAC), Azure Active Directory integration, and network security policies.


  1. Data Access:

    Azure Storage supports various access methods to retrieve and manipulate data, including REST APIs, SDKs for popular programming languages, command-line tools, and third-party tools. You can access your data from anywhere using standard protocols and interfaces.


  1. Blob Storage:

    Azure Blob Storage is specifically design for storing large amounts of unstructure data, such as text or binary data. It offers features like lifecycle management, tiered storage, versioning, and access control.


  1. Storage:

Azure Files provides fully managed file shares in the cloud, accessible via the standard Server Message Block (SMB) protocol. It enables you to create file shares that can be mount as network drives on Windows, macOS, and Linux machines.


  1. Queue Storage:

    Azure Queue Storage provides a message queuing service for asynchronous communication between components of cloud applications. It allows you to decouple application components, handle spikes in workload, and build resilient and scalable applications.


  1. Table Storage:

    Azure Table Storage is a NoSQL data store for storing structured data in the form of key-value pairs. It is suitable for scenarios that require fast storage and retrieval of semi-structured data, such as user profiles, device metadata, and session state.


  1. Disk Storage:

    Azure Disk Storage provides managed disk services for virtual machines and other compute resources. It offers different types of disks optimized for different workloads, such as Standard HDD, Standard SSD, Premium SSD, and Ultra Disk.

0
0

Virtual Network service endpoints

Service Endpoints


  • Provides secure and direct connectivity to Azure services
  • use optimized route over the Azure backbone network.
  • You can Azure service to only your virtual networks.
  • Service Endpoints enables private IP addresses in the VNet to reach tho endpoint of an Azure service without
  • needing a public IP address on the VNet.
Demo: Service Endpoints

Prerequisite: Storage account & Azure storage explorer concepts

image


Service Endpoint vs Private endpoint


  1. Access
    1. Service — It to be a ptb0cly routable
    2. Private — It is a private IP the space of the virtual Netcare where the private endpoint is corduroy.
    3. Both are made to let you control who comets to service. Without eTrac the internet. traffic between yournetwork and the service is routed through the Microsoft backbone network.
  2. Data protection
    1. Service Emmott — For exfiltration traffic must through MVA/Firewall.
    2. Private — It has built-in data protection system
  3. Complexity
    1. Service Endpoint — It’s a lot easier to implement, and it reduces the complexity architecture designed significantly.
    2. Private link — Anotherresource must managed.
  4. Cost
    1. Service endpoint — using VNet service comet at no extra cost,
    2. Private Link — Depending on total ingress and egress traffic as well as the link’s runtime, costs can quickly escalate.
  5. Availability
    1. Both services are not available for all resolves/services.
0
0

Azure Virtual Network Hands-on

Azure Virtual Network Hands-on


Now we will try to create a Virtual Network

Here you can see the UI of the Virtual Network

image


Now we will try to create a virtual network.

So, for that click on Create and enter the details as shown below, In this, we need to select the subscription and we need to enter the virtual network name.

image


Here you can review the details that we have entered.

image


Here you can see the virtual network that we have created now!

image


image

In this, we can create additional subnets if we want and also we can add address space.


Address space adding

Here we can add the additional address range

image


On this website, we can check the range and we can add

Website – CIDR

image


Here you can add the subnets if you want.

image


Enter the name of the subnet and click save.

image


Here you can see the subnet that we have created now

image


Now we will try to create the virtual machine and link this virtual network to it.

It’s the UI of the Virtual machine, just click on create to create a new VM

image


Here we need to Select the subscription and add the resource GRP name.

And mention the VM name.

Here we need to select the same region that we have selected for the virtual networks.

As I have selected central India in virtual networks, I have selected the same hereimage


Select the Windows image and add the username & password in the administrator account.

image


Let the disk session by default

image

In this network session, we need to select the virtual network which we have created.

As I have created VN I have selected that.

image


Now in the management session also it should be the default

image


In monitoring also it should be the default

image


In advance also it should be the default

image


Now, we can review the details and click on create

Here you can see we have created the virtual machine

In networks

image

0
0

Azure Virtual Network

Azure Virtual Network


  1. Your isolated network in Azure.
  2. The region can have multipleVNets but each VNetbelongs to the same Region
  3. Within a VNet, network traffic is isolated (not visible) from network traffic in all other Azure VNet.
  4. You maintain complete control over all traffic entering and leaving a VNet.
  5. IP Address is an address of resource that ensures the traffic gets to the right server on the internet
  6. Every resource gets its unique IP Address on that Vnet within the address space.
  7. Scaling – You can add more VNets or more addresses on existing VNet.
  8. Each kind of resource has distinct access requirements.
  9. Elastic Load Balancers that are publicly available are accessible through the internet (public resources)
  10. Databases and App Server instances should be inaccessible from the internet.
  11. Only apps running inside your VNet should be able to access them (private resources).
  12. How do you partition public and private resources inside a VNet?


Need for Azure Virtual Network


  1. In a corporate on-premises data center network:
    1. Nobody on the internet sees the data exchange between the application and the database.
    2. Nobody on the internet can directly connect to yourdatabase
    3. You must first establish a connection to your corporate network beforegaining access to your apps or databases.
  2. Corporate networks offer a secure internal network that safeguards yourresources, data, and communications from unauthorized access.
  3. How can you build your private cloud network?
    1. Azure Virtual Network


VNet Subnets

  1. Organize and group resources on subnets
  2. Separate public and private resources into distinct subnets
  3. Resources in a public subnet CAN be access from the internet
  4. Resources in a private subnet CANNOT be access from the internet, but resources in a public subnet can connect With resources in aprivate subnet.
  5. We can use network security groups to secure individual subnets
VNet Peering
  1. Connect VNets from the same or different regions (Global VNet peering)
  2. Allows for secure communication between VNets that are linked.
  3. Low Latency: Resources between differentVNets are connected using high bandwidth connections.
  4. Assemble them as though they were members of the same network
  5. Must not have CIDRs that overlap (IP address range)


0
0

Logic Apps

Logic Apps


  1. Quickly build powerful integration solutions
  2. Designed to automate business scenarios
  3. logic apps execute two workflows
  4. Workflow includes actions like data conversions and flow controls, such as conditional statements, switch statements, loops, and branching.
  5. Design using Visual Designer on the Azure portal or in Visual Studio
  6. Built from predefined logic blocks.
  7. More than 200 different connectors and processing blocks interact with different services.
  8. Starts with a trigger


Hands-on


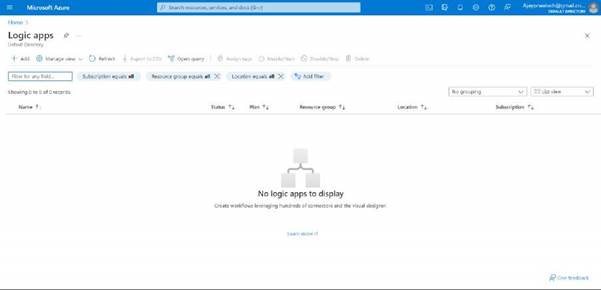
UI of the logic app, click on add to create a new logic app.

image

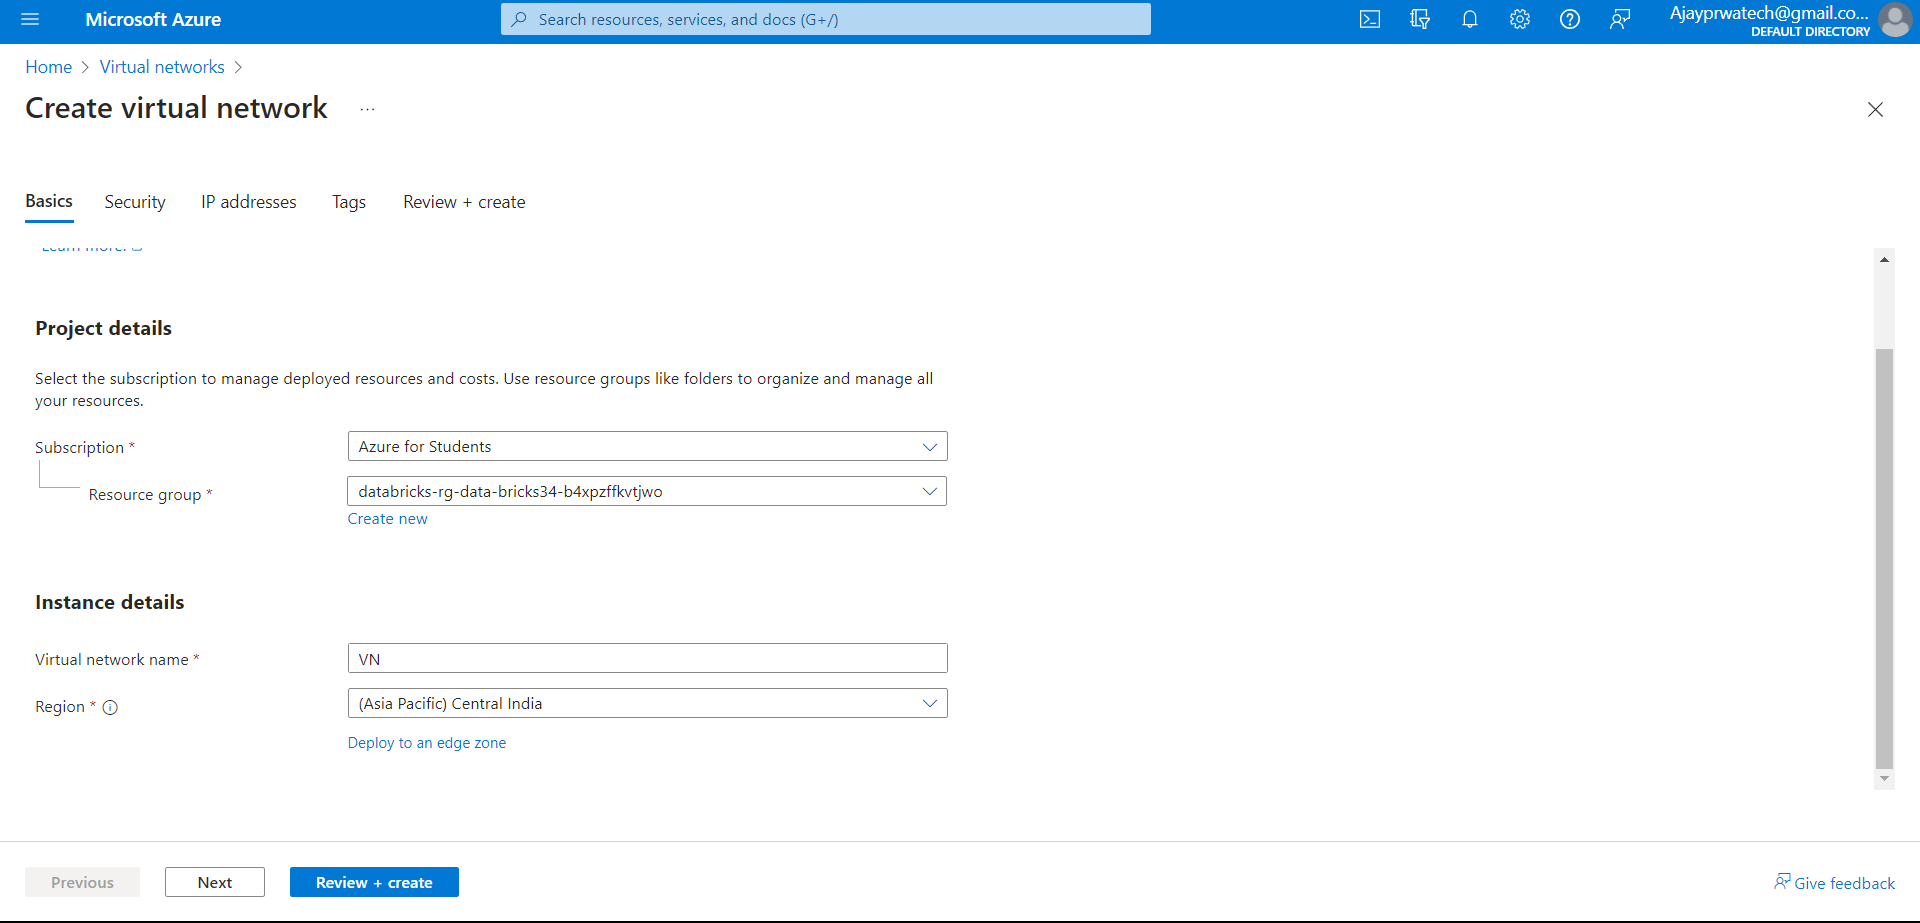
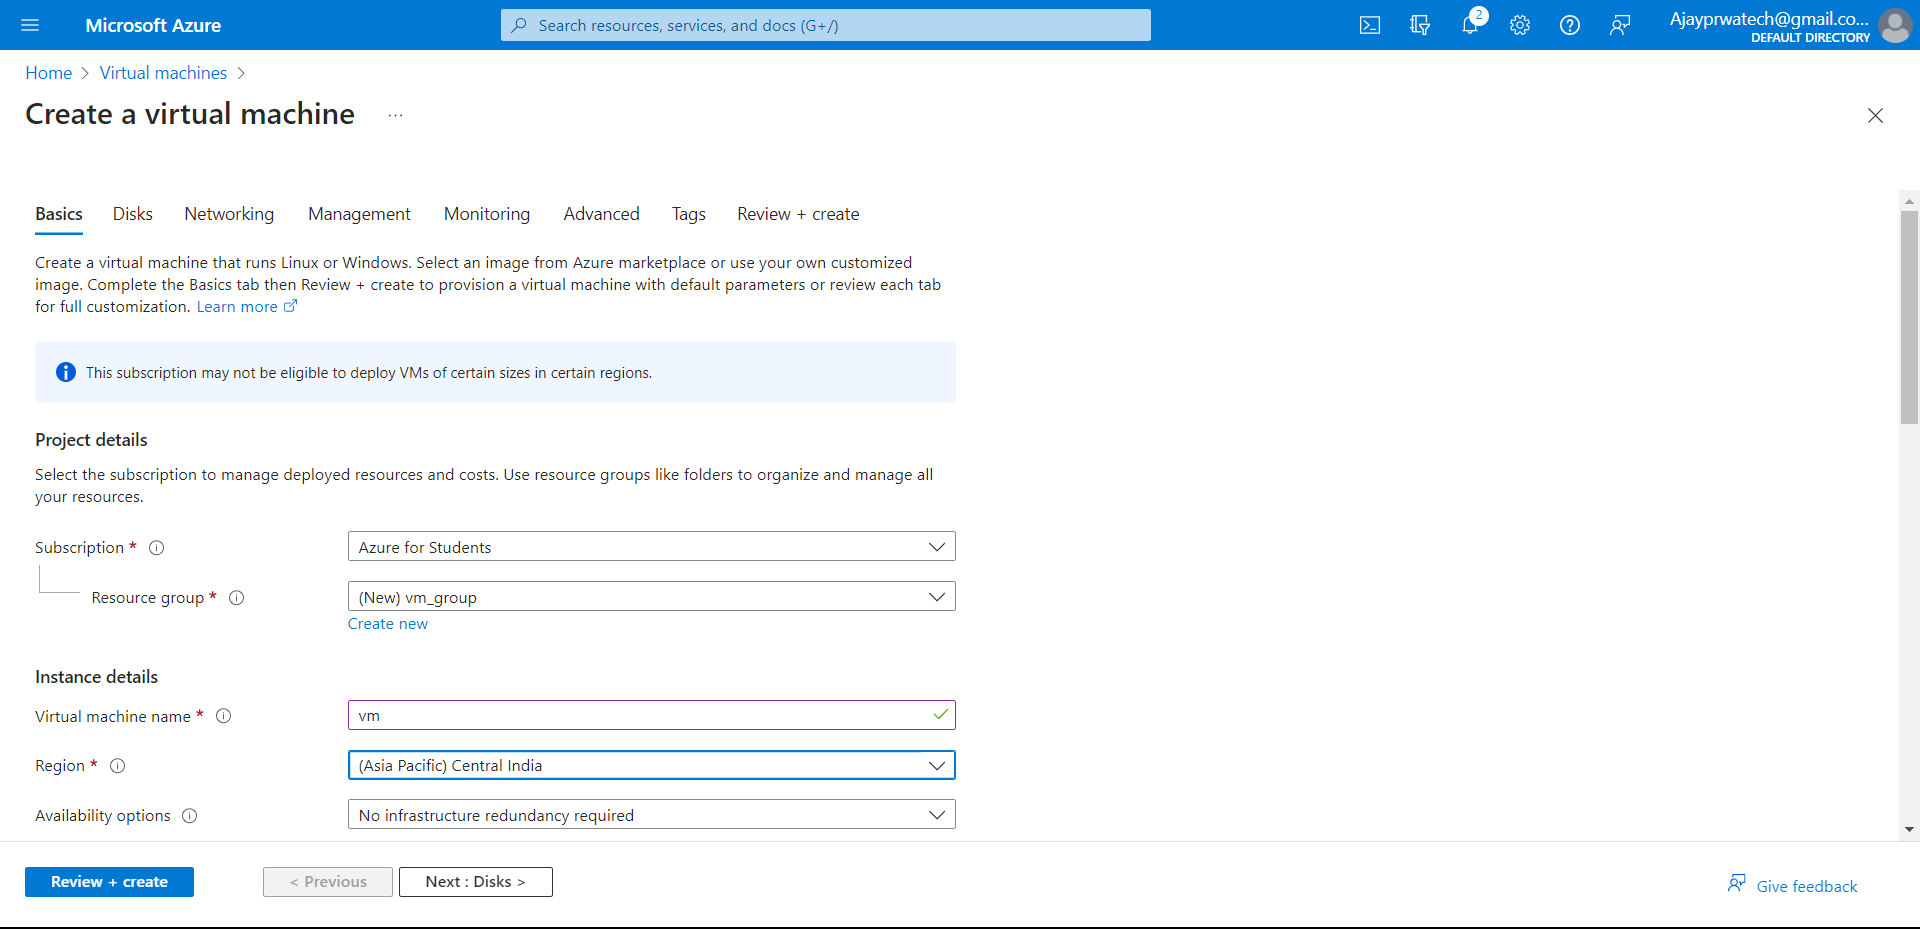
Select the subscription and create the resource group

Give the name to the logic app and select the region.

image

Try to select the plan as a consumption

image

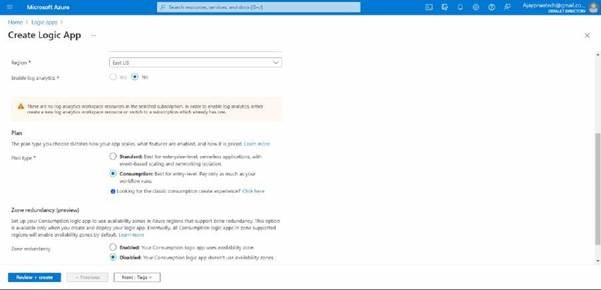
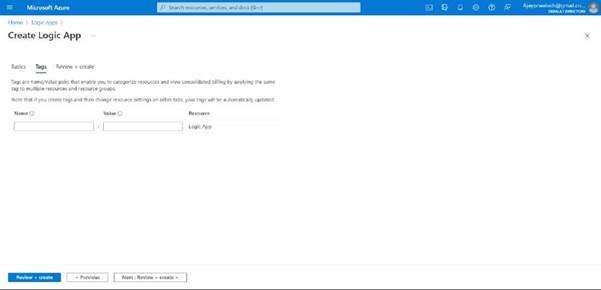
In tags session, no need to enter anything

image

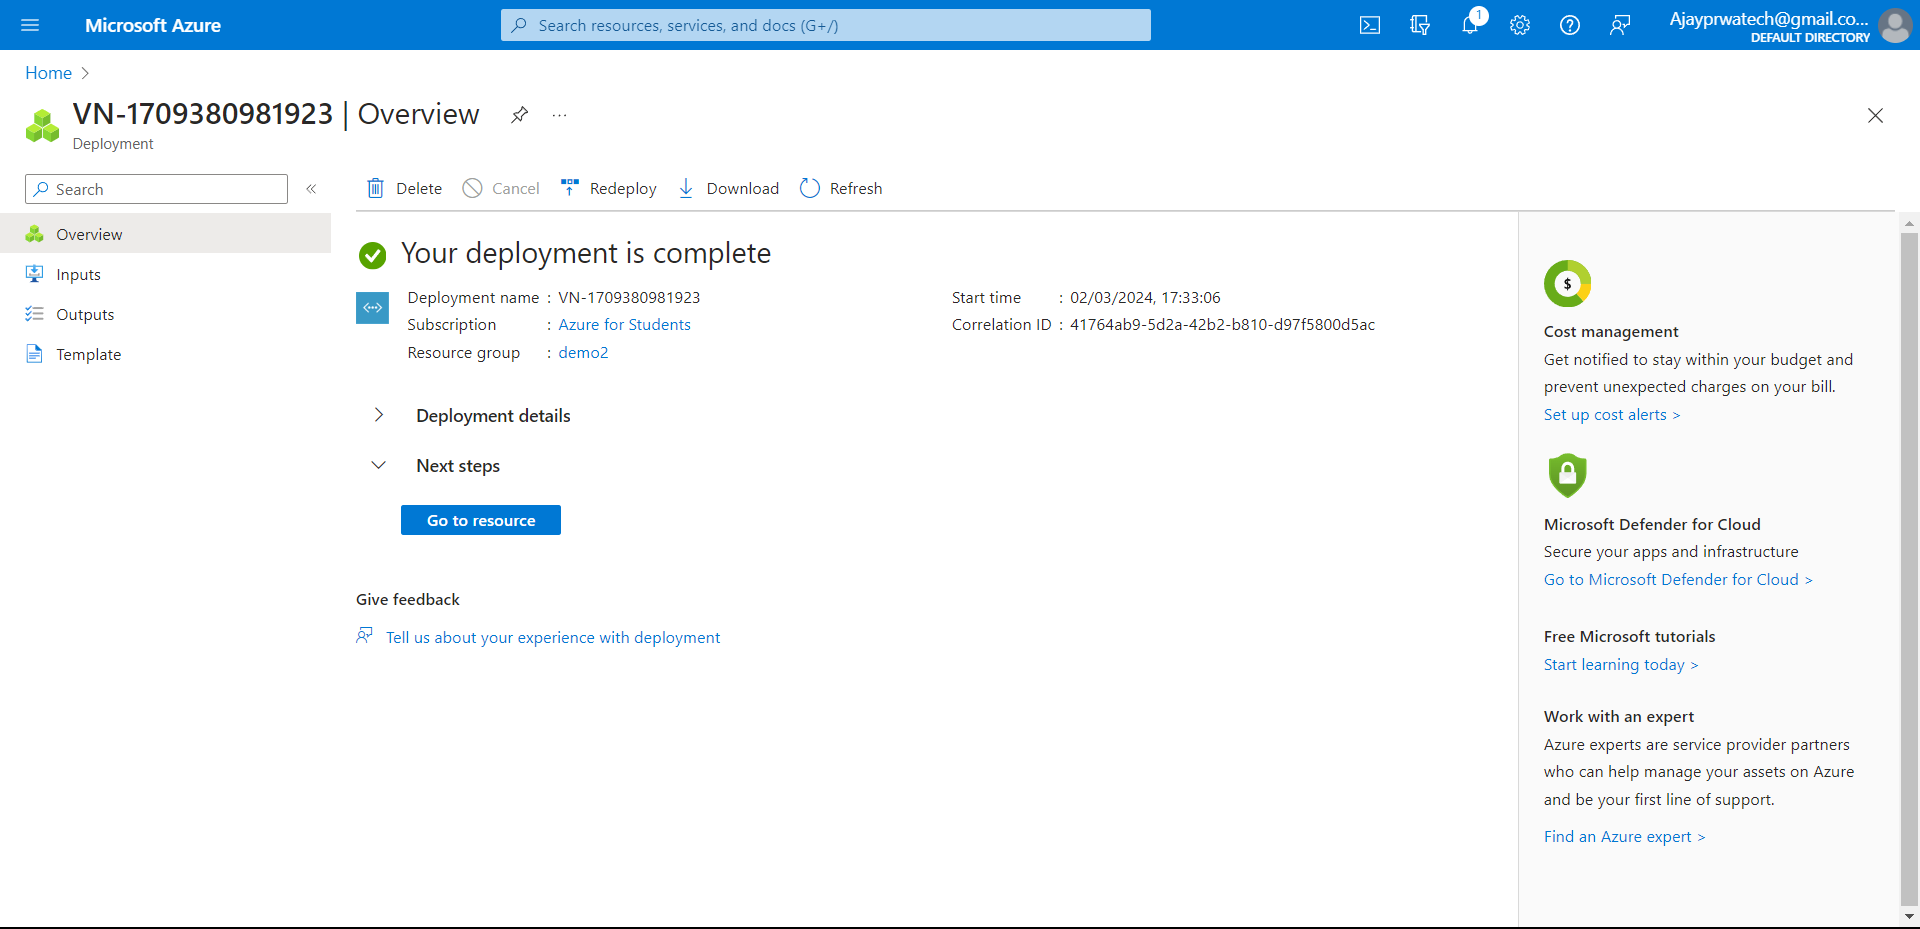
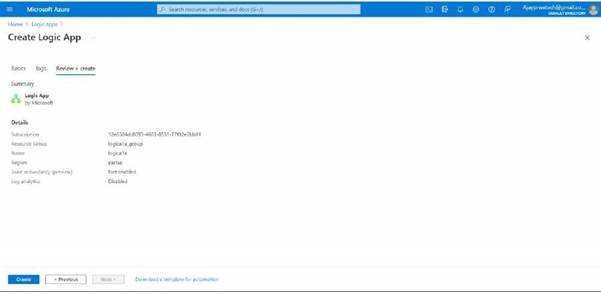
Now can review the details that we have entered and click on Create.

image

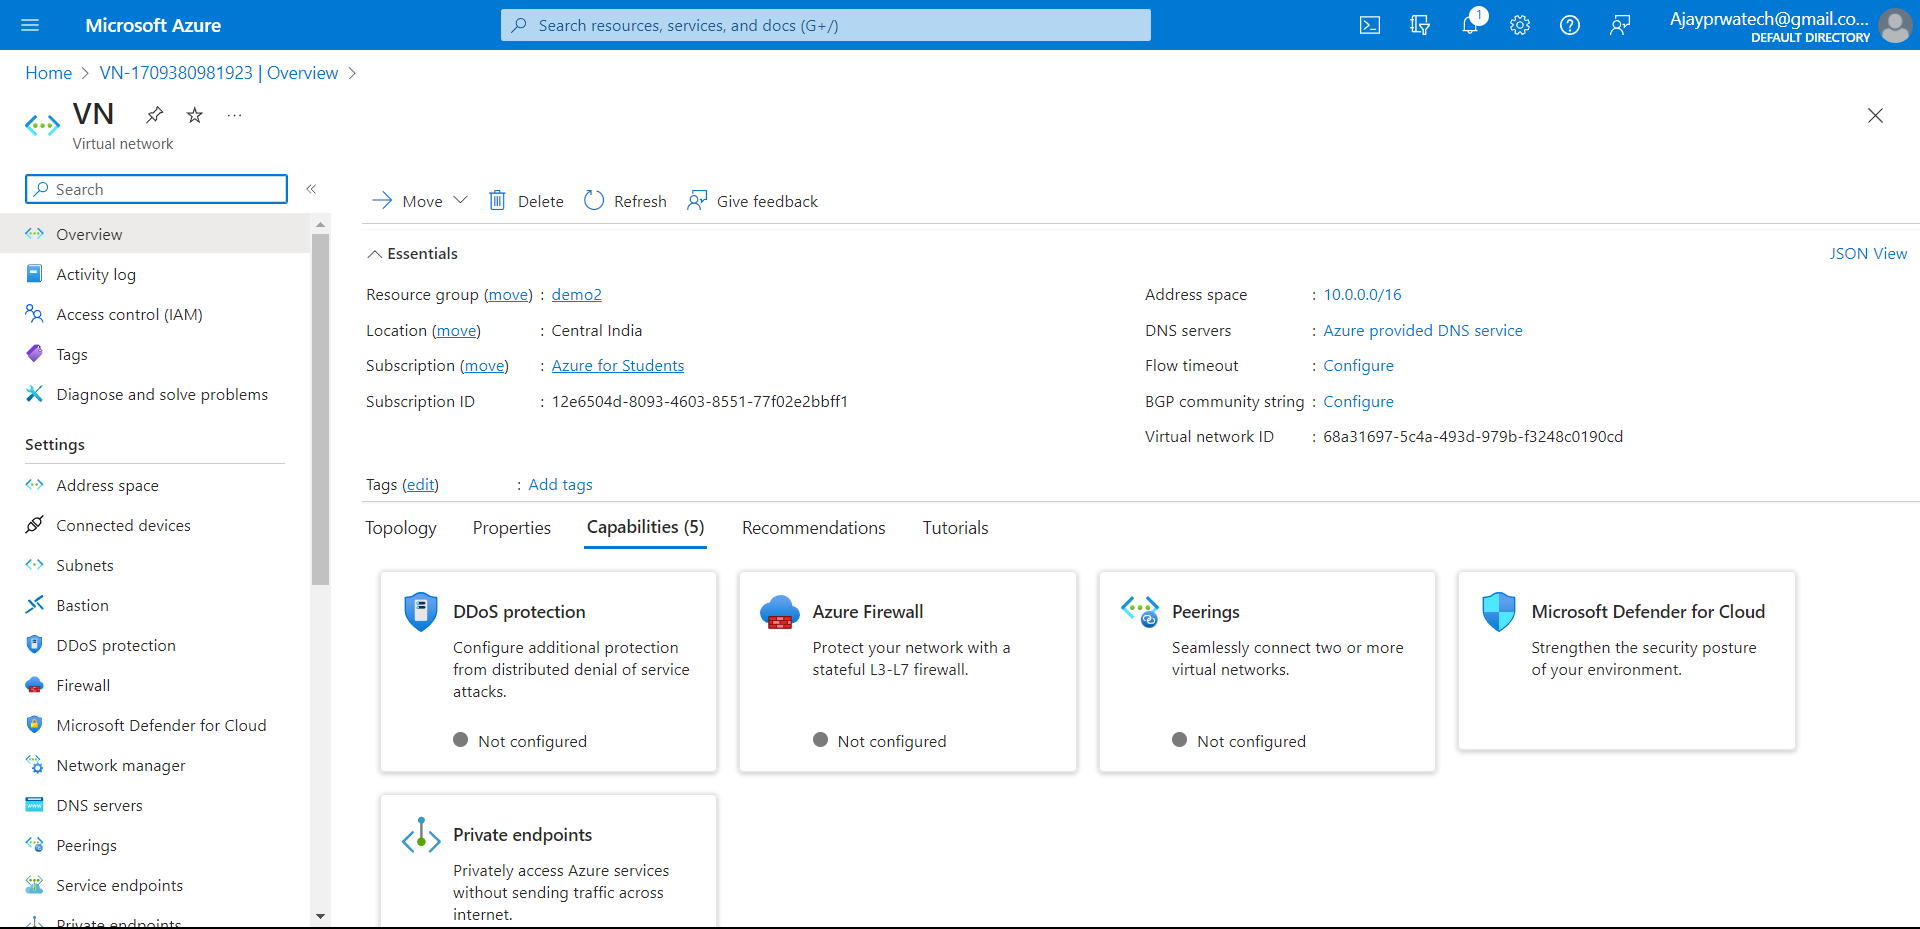
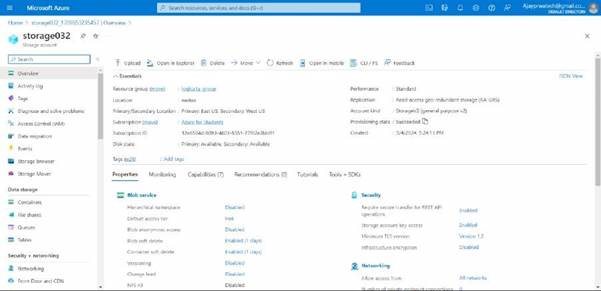
Here you can see the overview of the logic app

image

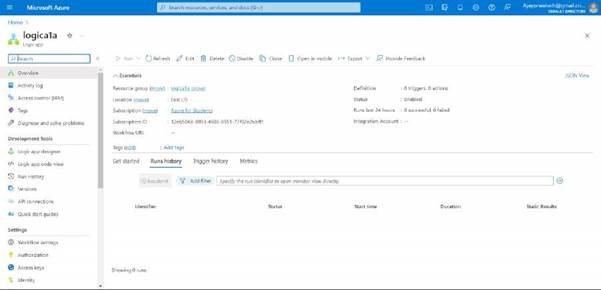
you can see the logic app designer on the left side, click on it.

image

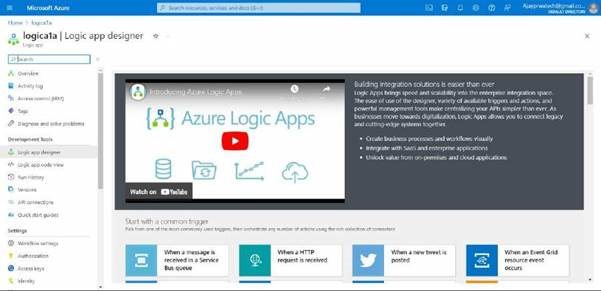
Here you can see the different types of templets

image

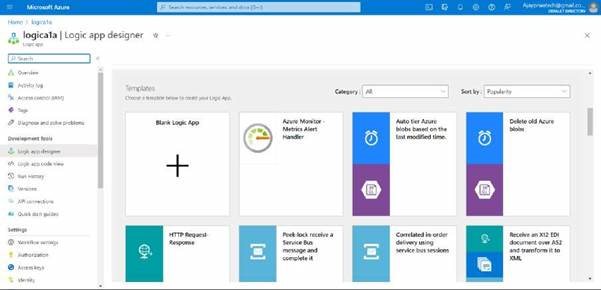
Now I’ll try to select the “Delete old Azure blobs” and click on Use template

image

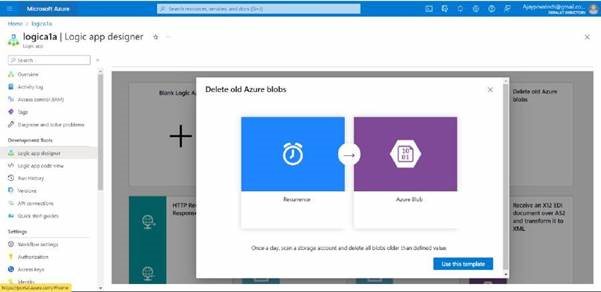
in this click on create

image

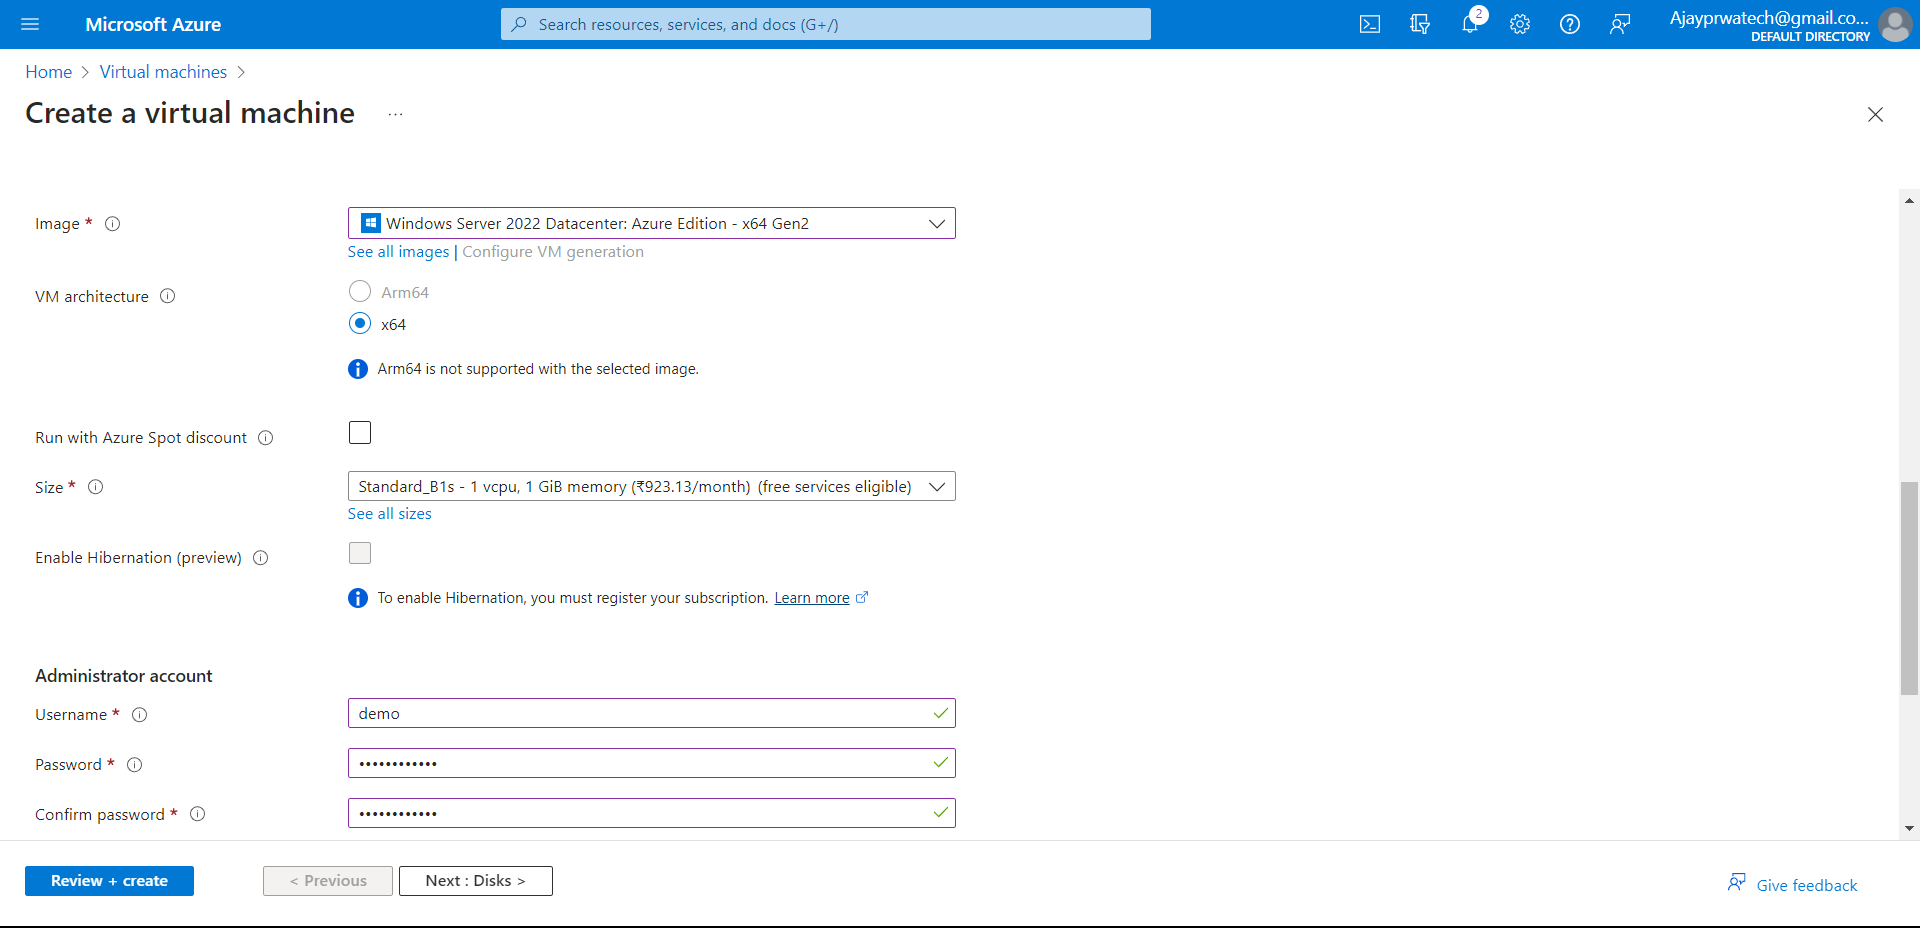
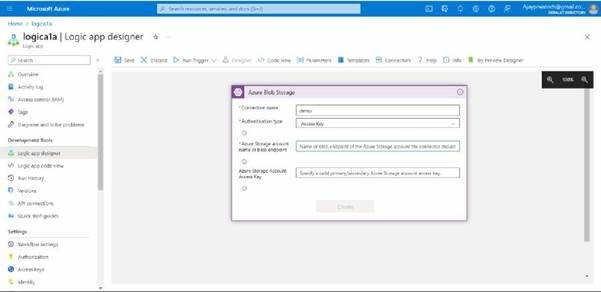
Here we need to add the details, I’ll give the name as a demo and I’ll select the access key as the authentication type for the storage account.

image

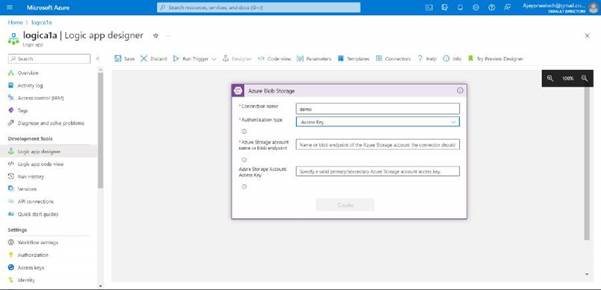
Now for this, we need to have a storage account, so we will create the storage account and files in it.

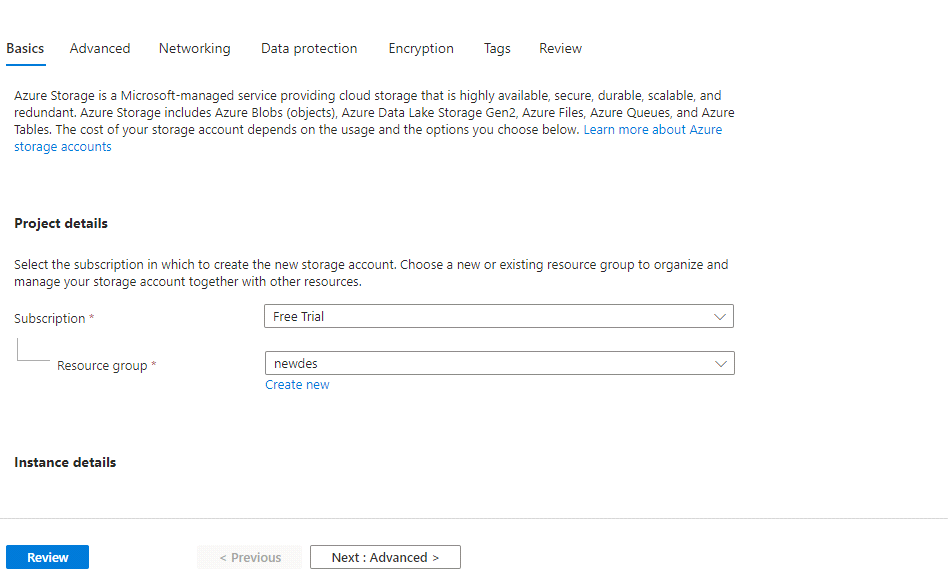
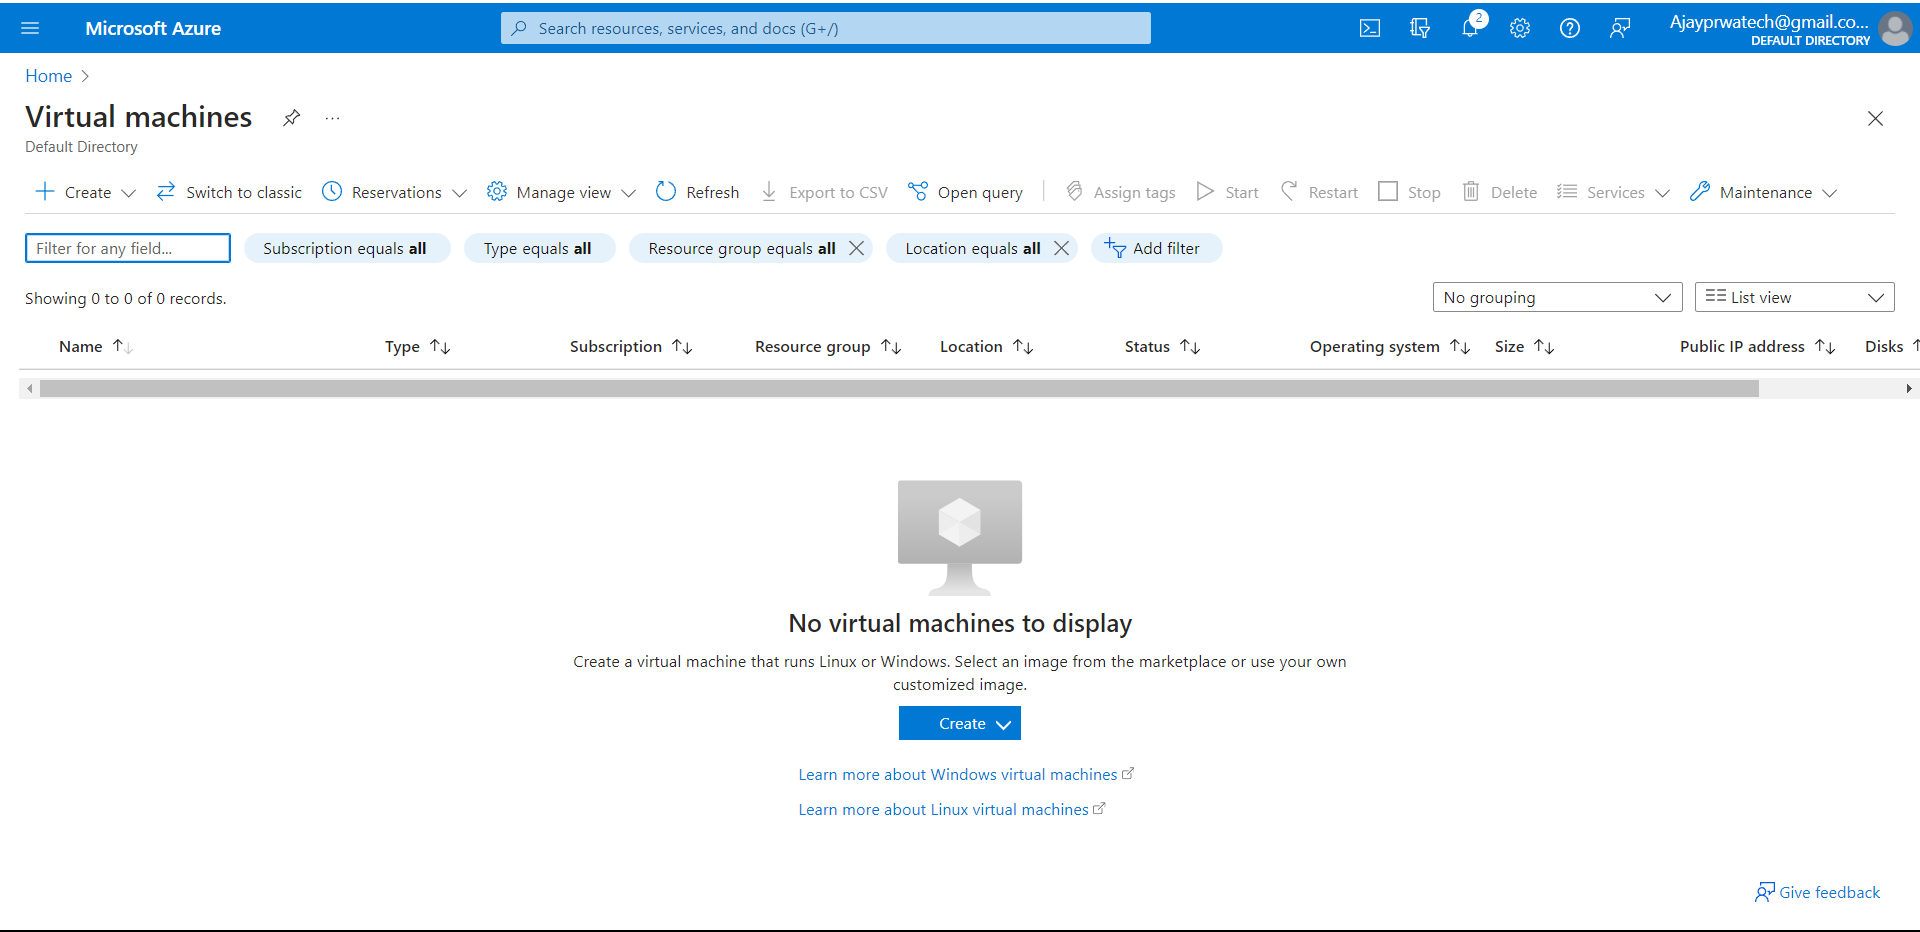
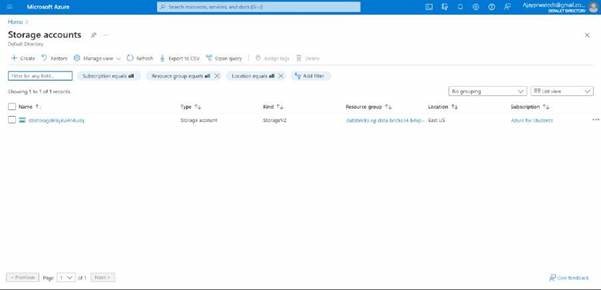
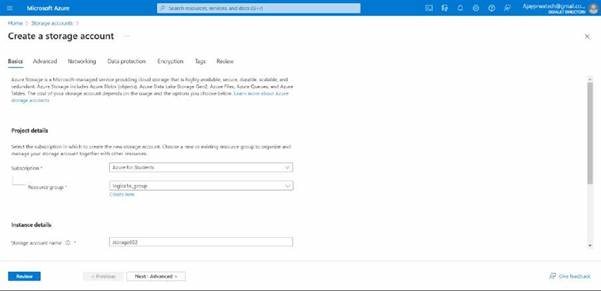
It’s the UI of the storage account. Click on Create.

image

Now we will try to select the subscription and we will create the resource group for that.

We will give a name for the storage account.

image

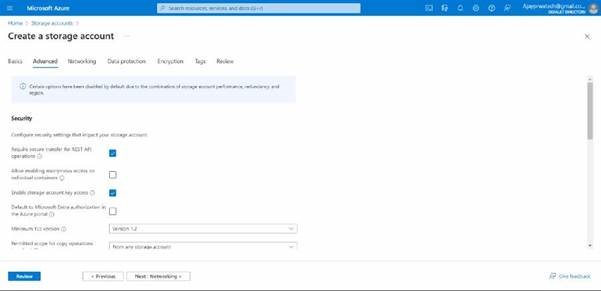
In advance let it be default

image

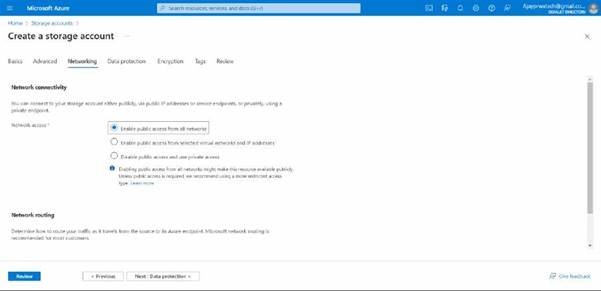
In the network also it should be the default

image

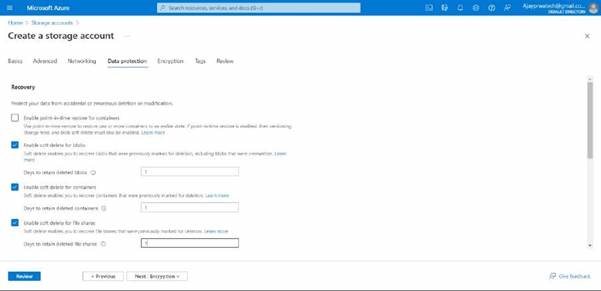
Here in data protection, we can give 1-365 days in all the options which are shown below, as I have given 1 day

image

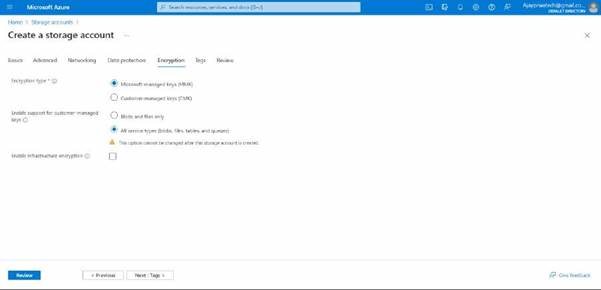
Here no need to change anything, if we want we can create CMK

image

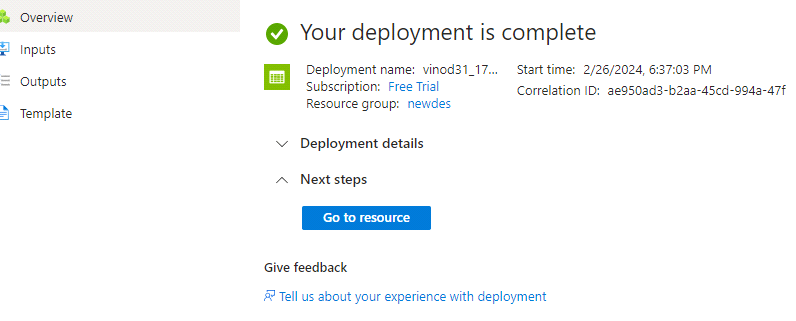
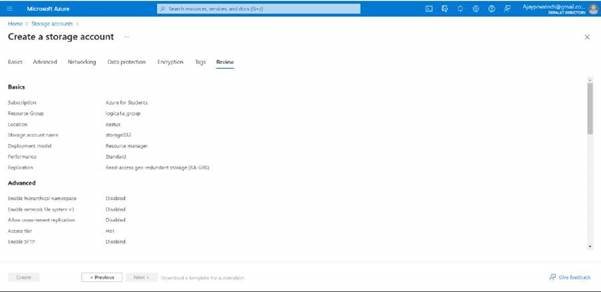
now you can review and click on create

image

here you can see we have created

image

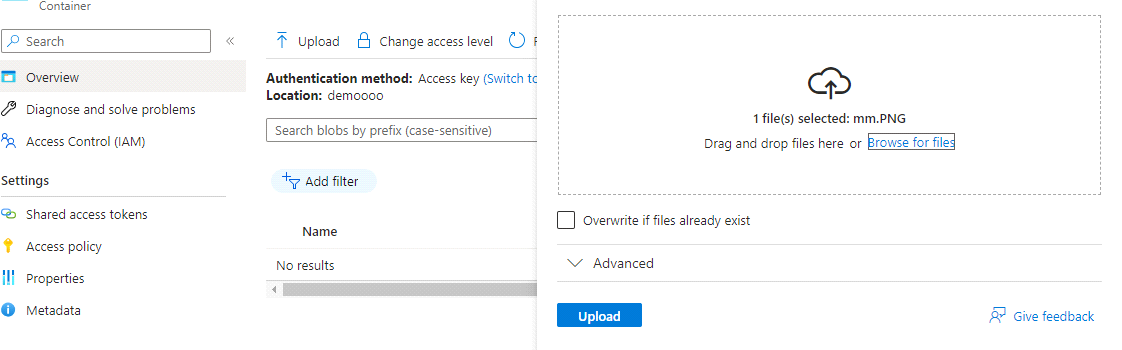
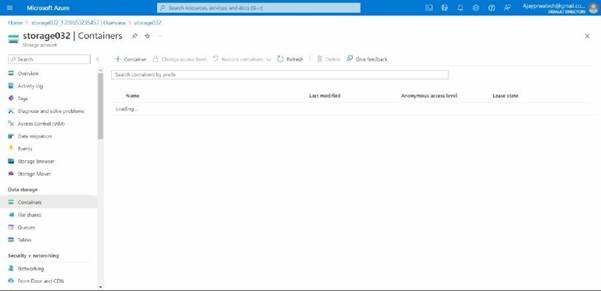
Now we will try to add the files to it.

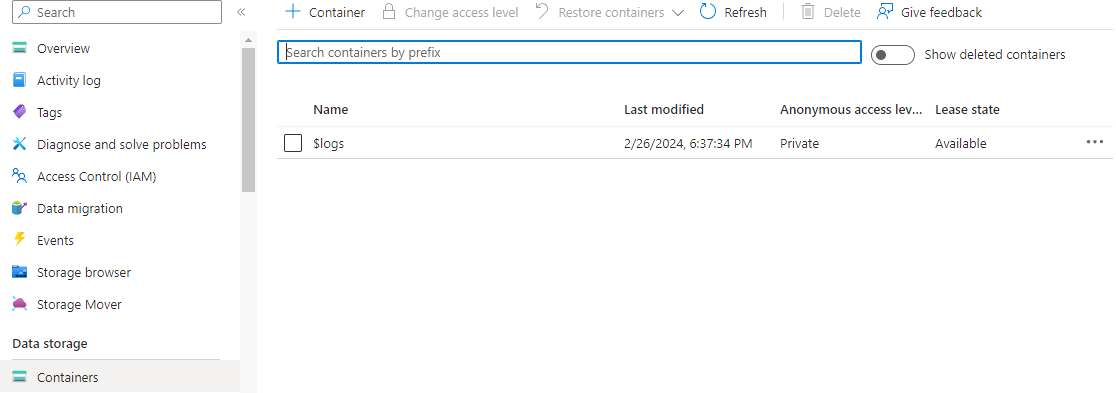
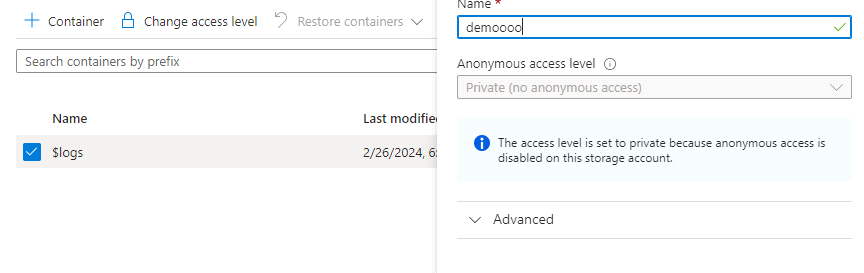
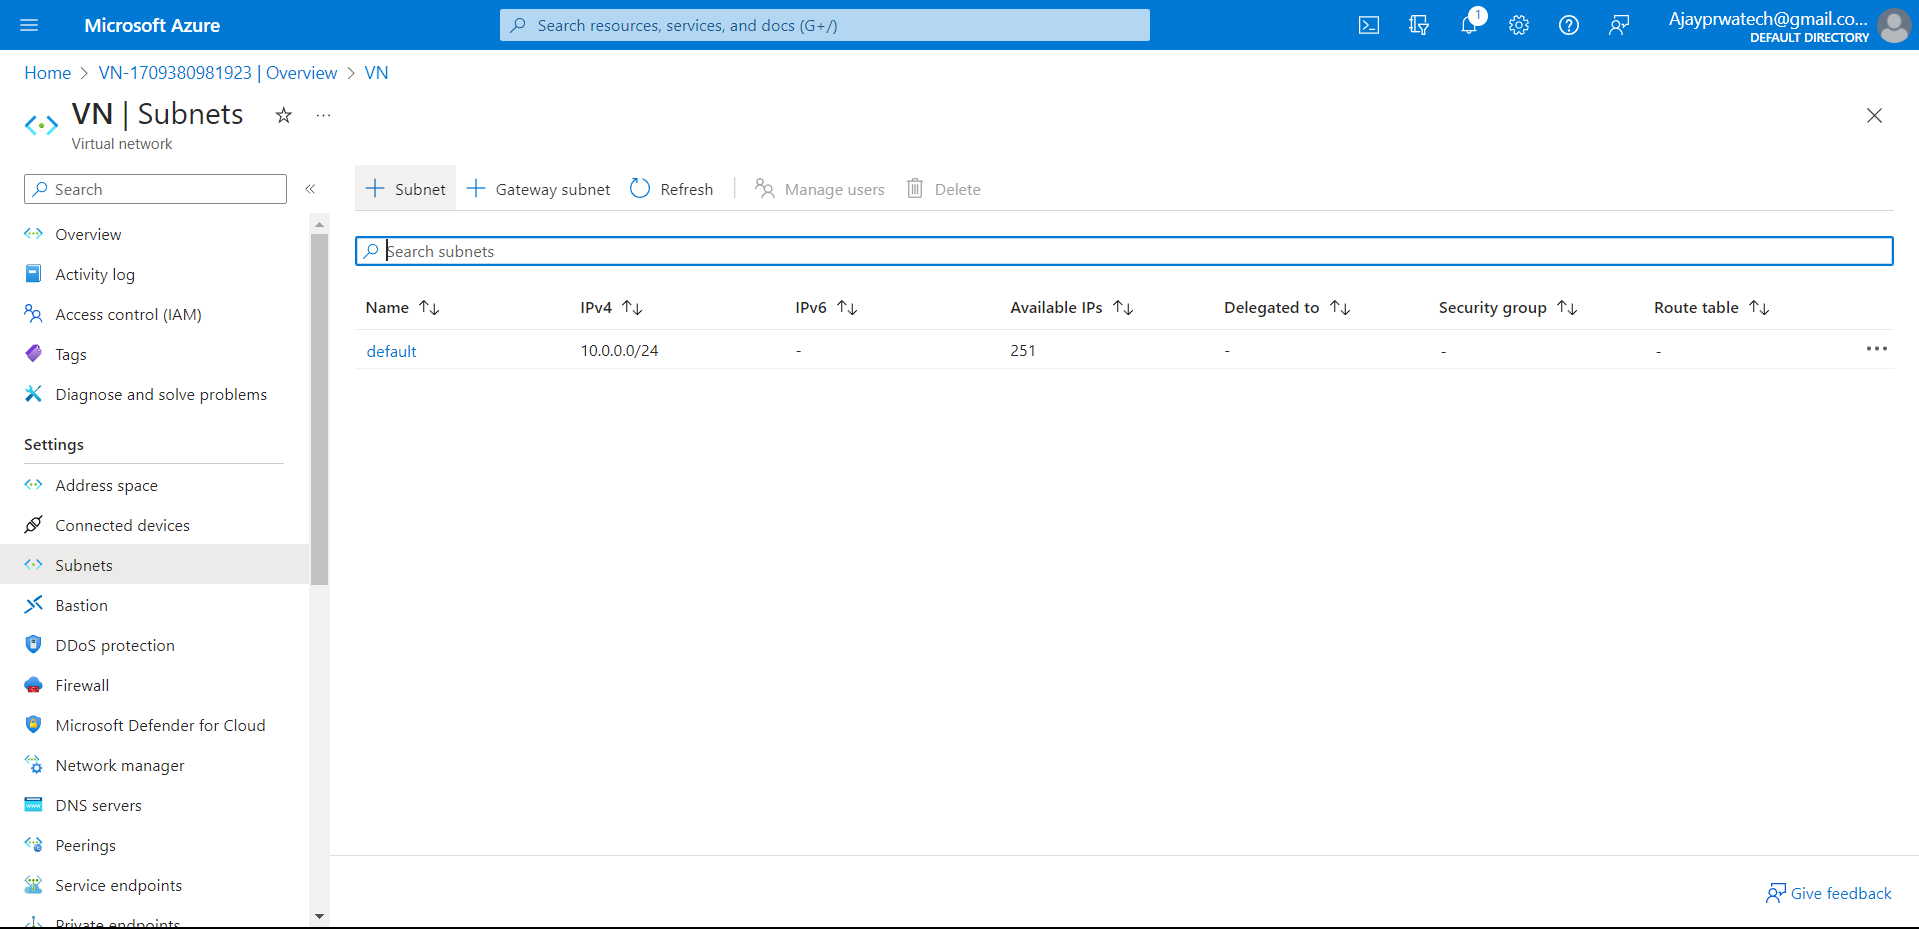
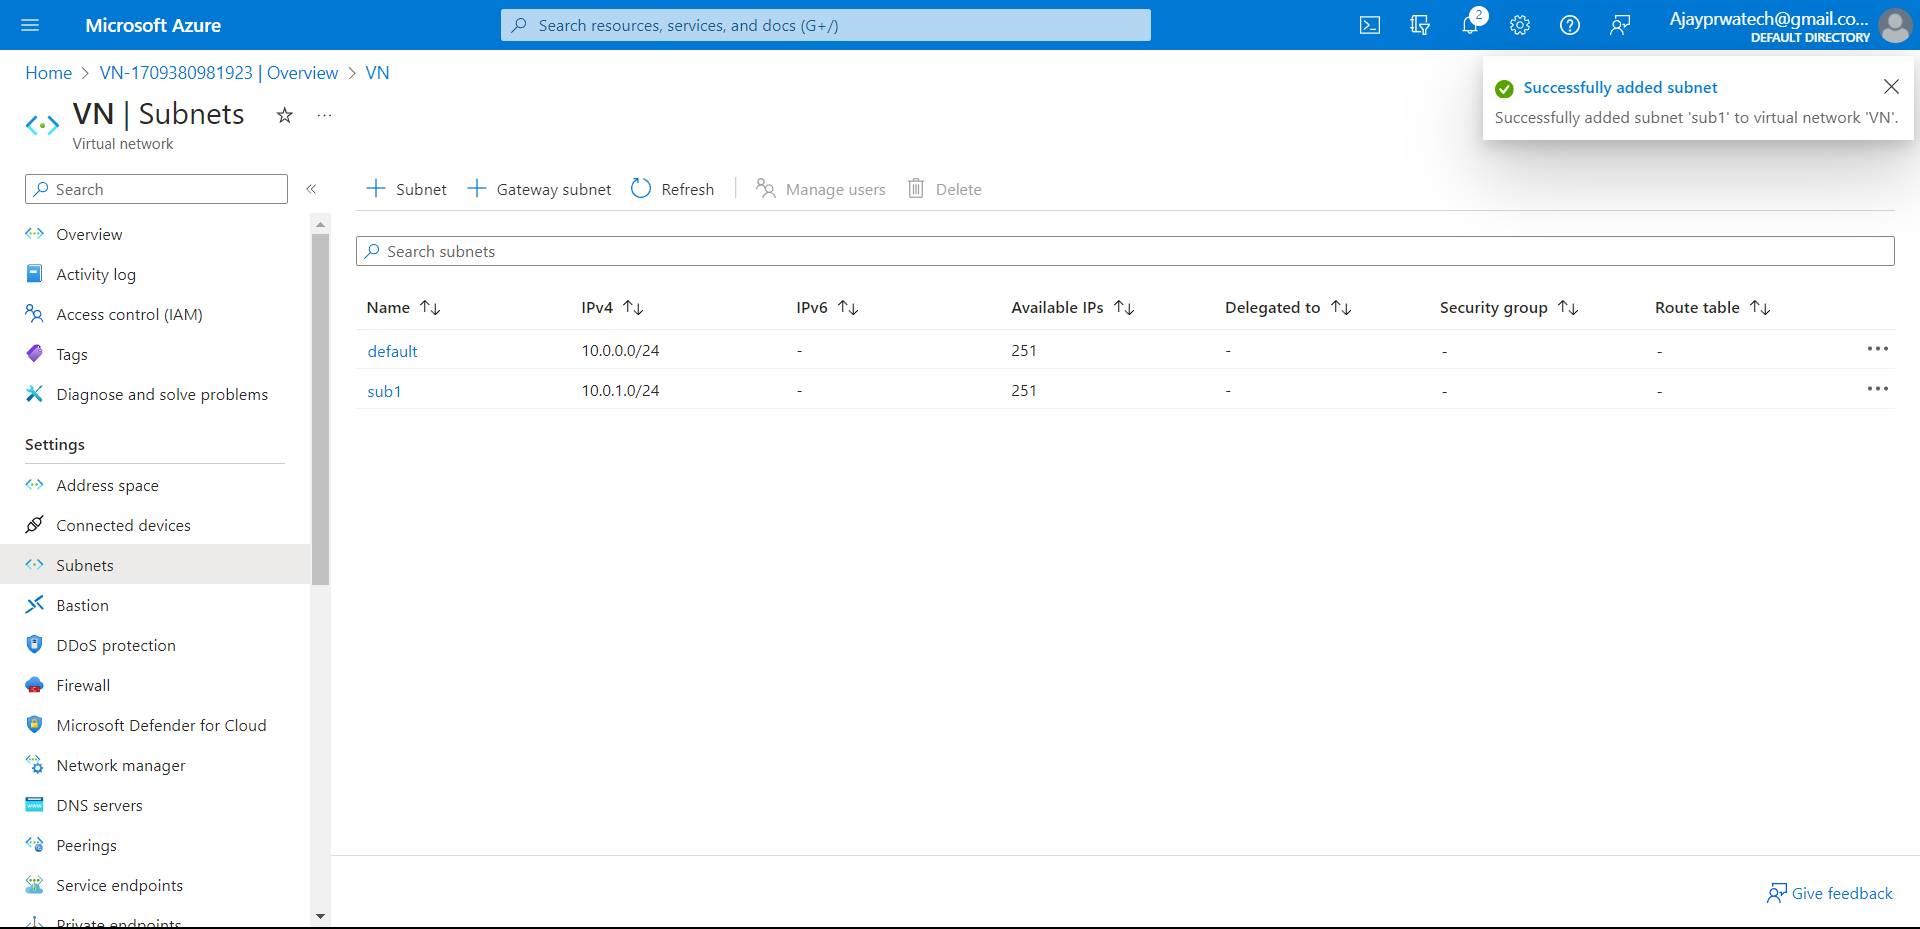
For that click on container and add files in it.

image

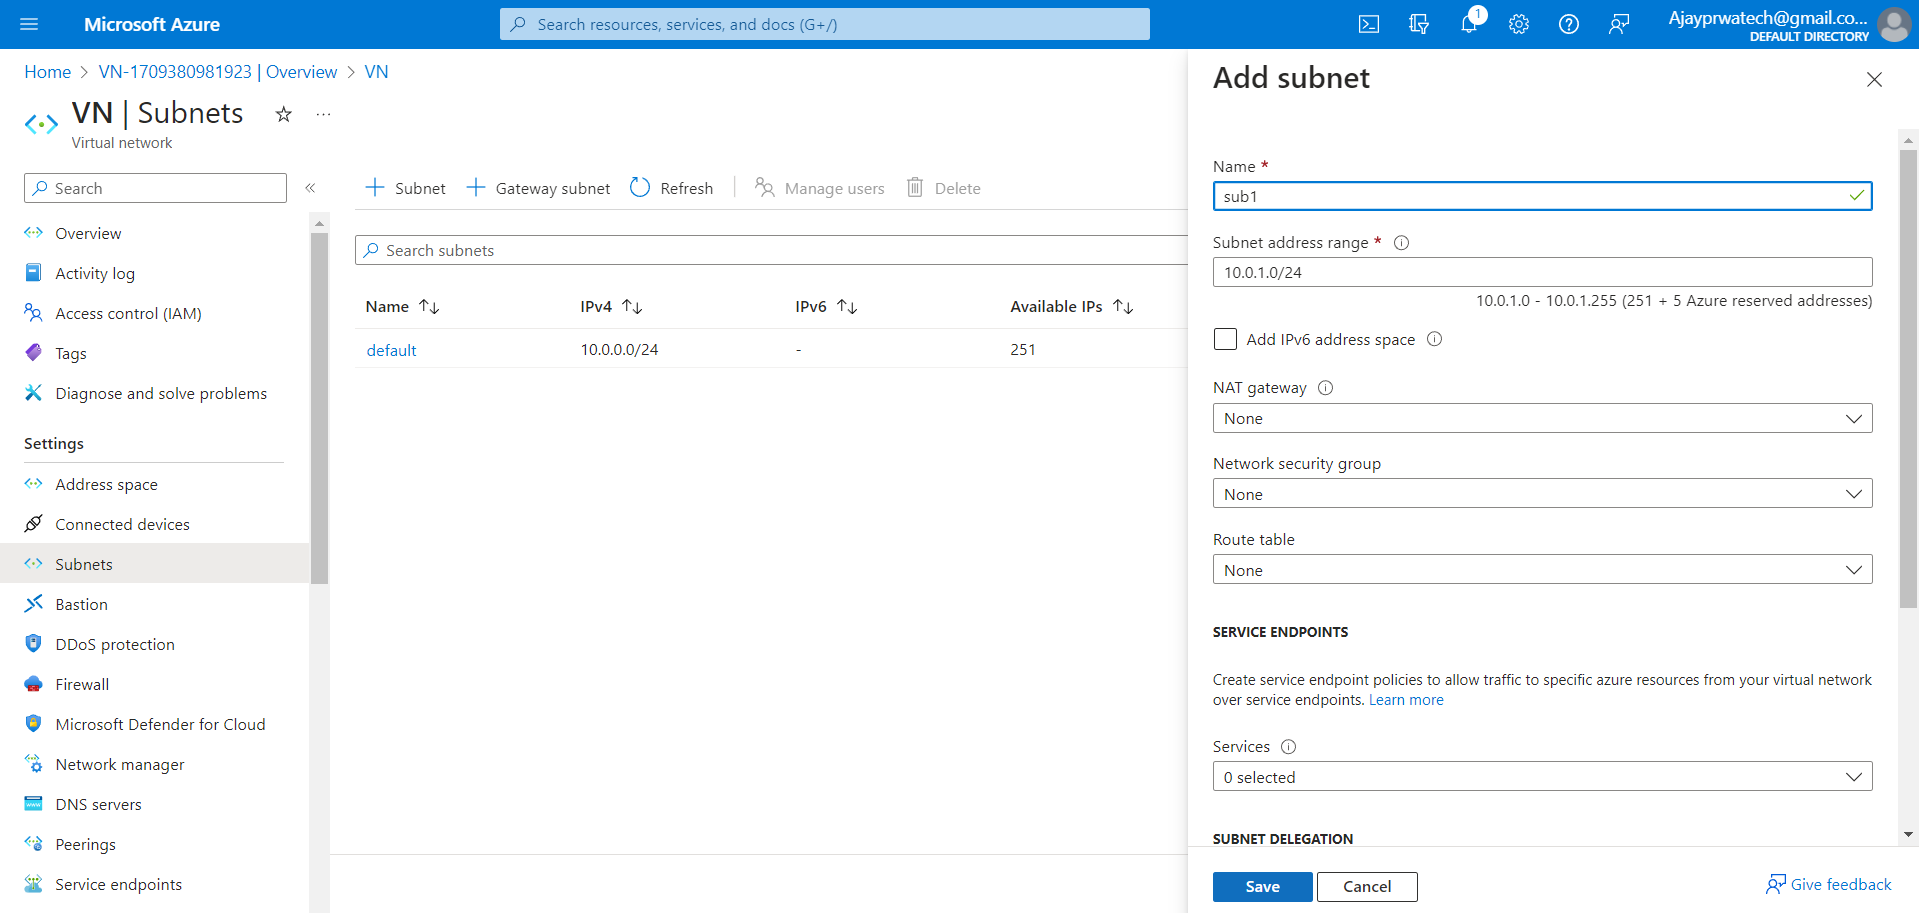
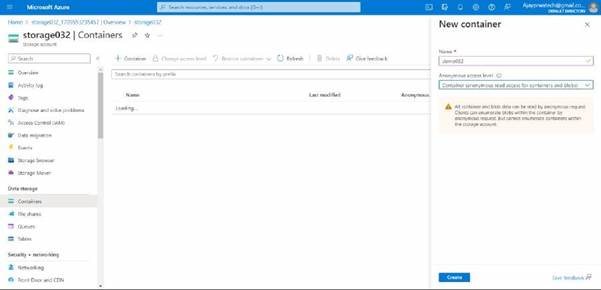
Here you can see, that we need to give a name to the container and select the anonymous access level

image

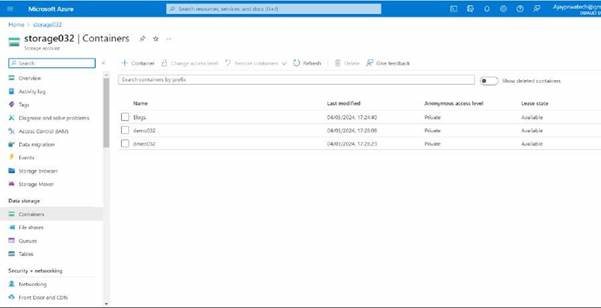
Here you can see we have created the container.

image

Now we will try to add this storage account ID and name to logic apps

For these fields

image

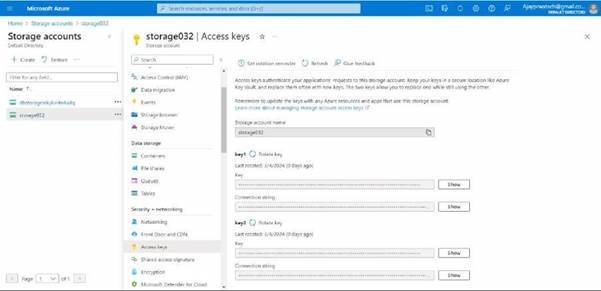
Here you can see the storage account access key and name.

Try to and copy paste it in to the logic app.

image

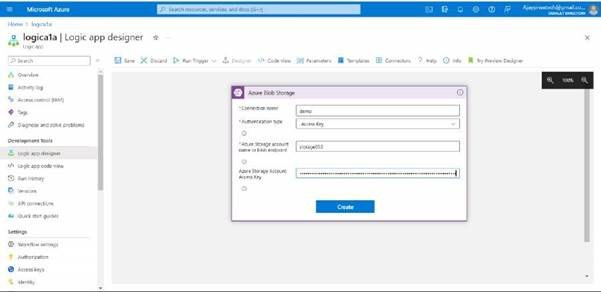
Here you can see I have copy pasted

image

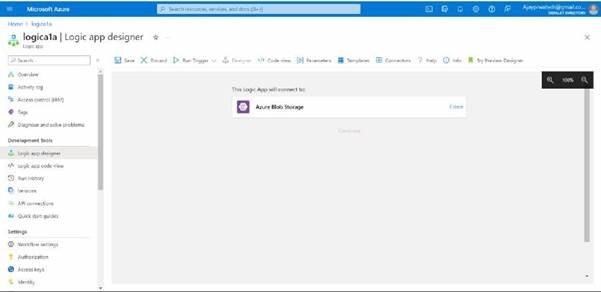
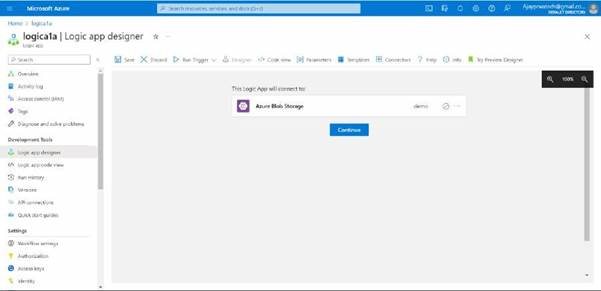
Here you can see it has been created, just click on continue to proceed.

image

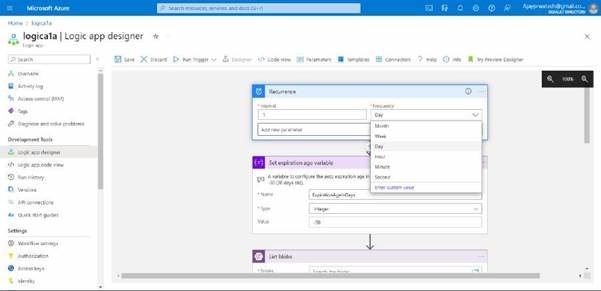
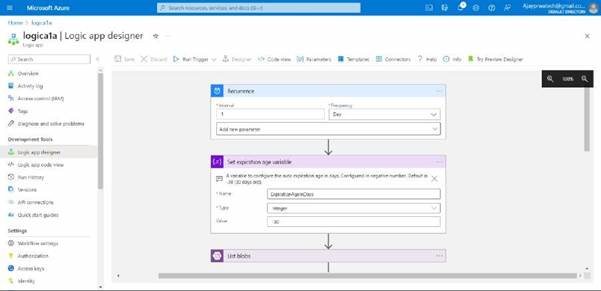
In this you can see we can change the interval and frequency based on our requirements
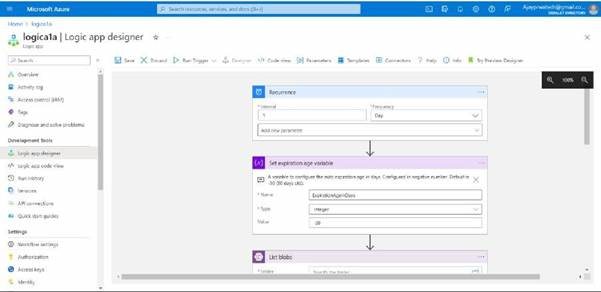
image

you can see.

image

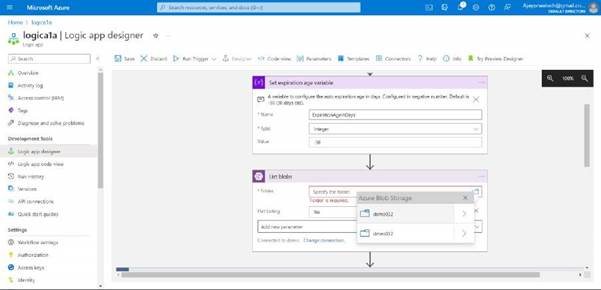
Here we need to select the folder

image

 you can add a condition, I’ll just leave it as it is and click on save

image

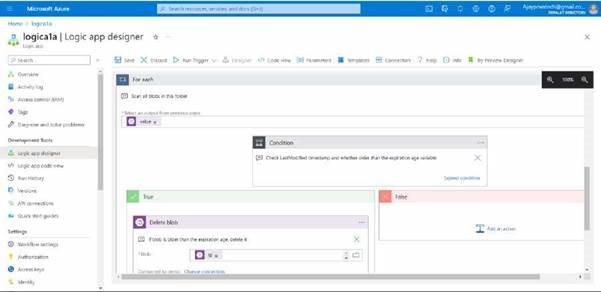
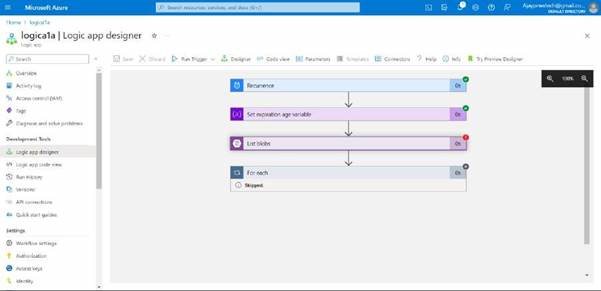
Here you can see it has been saved, now you can run trigger it, and see.

image

you can see it has been successfully executed, as we have not added the files so it’s showing an error in list blobs.

image

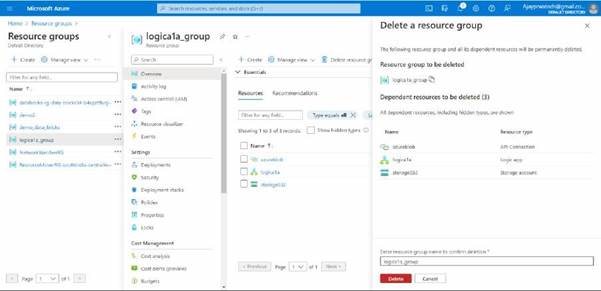
After these try to delete the resource groups and logic apps along with the storage account.

Deleting resource group.
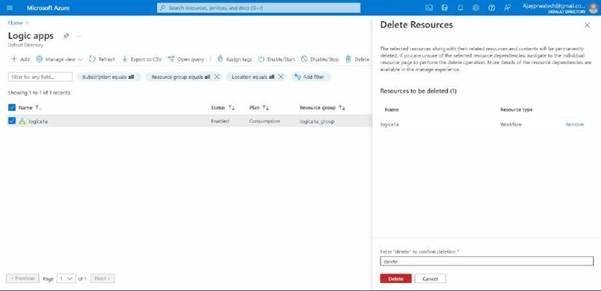
image

Delete logic app

image

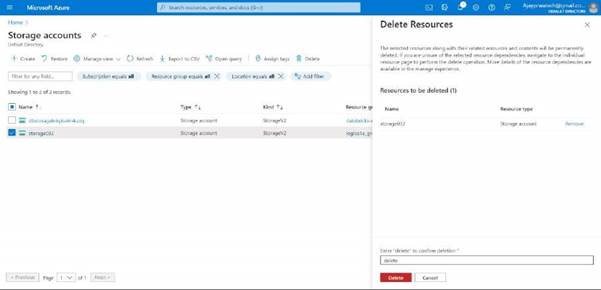
Delete storage account

image

0
0

Azure Function

Azure Function


  1. Azure Functions provides a serverless computing experience.
  2. It is a serverless platform
  3. Execute your code when needed
  4. Event-driven solution
  5. Execution of your code is triggered by a specific type of event.
  6. Pay only for the time spent running your code.
  7. No worry about configuration or management of the underlying physical and application infrastructure.
  8. Azure Functions can be triggered by various event types, including HTTP requests.
  9. Functions scale automatically based on demand
  10. Functions can be either stateless or stateful.
  11. Resilience: If one of your functions fails, it does not affect other functions.
  12. User Case:
  13. Process file uploads – Run code when a file is uploaded or changed in blob storage
  14. Build a web API – Implement an endpoint for your web applications using the
  15. HTTP trigger o Respond to database changes – Run custom logic when a document is created or updated in Cosmos DB

Azure function-Hands on  


It’s the UI of Azure Function App, click on create.


image

Now we will try to create a function app, by selecting the subscription and creating the resource group.

image

we need to select the runtime stack and version. By default,Linux will be selected for Python.

image

Now, in the storage session no need to change anything, it should be the default

image

in the network session also no need to change anything, it should be default.

image

Now, in the monitoring session also no need to change anything, it should be default.

image

in deployment session also no need to change anything, if we want to do any continuous deployment then we can enable it or else it should be default.

image

Now, in the tag session also no need to change anything, it should be default.

image

Here you can review the details that we have entered and click on Create.

image

 you can see the function app has been created.

image

Here you can see in the resource grp.

Now, we need to click on the create function which is show below in the fig.

image 


Now, we need to create a function, here in this, we need to select the template.

As I’ll be selecting HTTP Trigger.

image

Here you can see, that the function has been create

image

Now, we need to write the code and test it.

So for that click on Code + Test, which is show on the left side.

Here you can see the HttpTrigger1 overview.

image

,

By default you will get one code

image

Click on test/run, and you will get like this, we need to select post and you can see in the body session name that Azure has been give. click on run.

image

Here you can see it has been execute successfully.

image

If we want to run it in the browser, we can click on the get function URL, and copy past that URL in the browser.

image

Here you can see in the browser

image

When we pass the name in the query string we will get this

image

0
0

Serverless computing

Serverless computing


What is Azure Serverless Computing? How Does it Work


  1. Serverless computing is the idea that servers, infrastructure, or operating systems are behind the scenes, and for users, they do not exist.
  2. Infrastructure isn’t your responsibility.
  3. Scaling and performance are automatically taken care of.
  4. Azure takes care of the servers and how resources are allocated and deallocated.
  5. Micro-billing: Pay only for the time their code runs.
  6. For example, if the code runs once a day for two minutes, they’re charged for one execution and two minutes of computing time.
  7. There isn’t even a need to reserve capacity.
  8. Event-driven: Excellent fit for workloads that respond to incoming events. Events include triggers by:
  9. Timers, for example, if a function needs to run every day at 10:00 AM UTC.
  10. HTTP, for example, API and webhook scenarios.
  11. Queues, for example, with order processing.
  12. And much more.
  13. Azure has two implementations of serverless computing:
  14. Azure Functions: Functions can execute code in almost any modern language.
  15. Azure Logic Apps: Logic apps are designed by a web-based designer and can execute logic triggered by Azure services without writing any code.
0
0

App Service- Hands-on

App Service- Hands-on


  1. Search App Services
  2. Open app services,
    1. select a subscription, resource group
    2. give name, select runtime stack
    3. select os
    4. select the app service plan, explain different plans
    5. select Dev/test – free
    6. click next,
    7. click on create
  3. click on created app service, u will get the URL pasted in the browser
  4. In-App Service, go to Development Tools
    1. click on the app service editor
    2. click on Go
    3. create one html file, write anything
    4. save it
  5. Go back to the  URL
    1. In Url, at last, add the file name, like index. html
  6. Explain, that u can use an app service plan for multiple app services


Now we will try to do Hands-on


 Search App services,


Here you can see after clicking on create – we need to add the basic details like subscription we need to select and we need to create a resource group, and we need to add the name.


  1. Now we can select where we need to select code/Docker/Static web app, as I’ll be selecting code.
  2. In the runtime, stack I’ll try to select Python, but here you can see that it’s showing only Linux os


If I select other programming languages like eg: java, you can both Linux and Windows we can see.


Now in the database session, no need to create any datasets


In deployment also no need to change anything.


Now same in networking also, no need to change anything


In monitoring also no need to change


At last, you can review the details and click on create


Here you can see we have created the app service


Here you can see in the resources also.


By copy-pasting the domain which is shown in the above image, in the new browser we can deploy our code in this


Go to the deployment center which is shown below, on the left side


Here you can see, that, we need to add our source code


Here you can see that we can upload the source file from these which are shown below.


I’ll try to select external Git – where we need to add the repository link and branch name.


Click on save, which is shown above the settings


Here you can see I have saved.


Now we will try the o run it in the browser 


 At last, go try to delete the resources


0
0

Quick Support

image image