Getting Started With Amazon Redshift
Getting Started With Amazon Redshift, Are you the one who is looking for the best platform which provides information about Getting Started With Amazon Redshift? Or the one who is looking forward to taking the advanced Certification Course from India’s Leading AWS Training institute? Then you’ve landed on the Right Path. The Below mentioned Tutorial will help to Understand the detailed information about Getting Started With Amazon Redshift, so Just Follow All the Tutorials of India’s Leading Best AWS Training institute and Be a Pro AWS Developer. Step 1: Set Up Prerequisites Before you start to set up an Amazon Redshift cluster, make sure that you complete the following prerequisites in this section:- Sign Up for AWS And
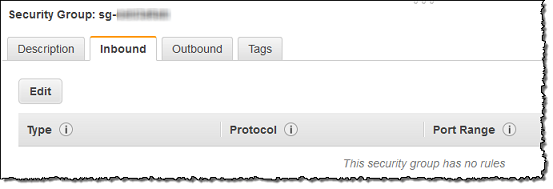
- Determine Firewall Rules
Sign Up for AWS
If you do not already have an AWS account, you must sign up for one. If you already have an account, you can skip this prerequisite and use your existing account. Check Firewall Rules If your client computer is behind a firewall, you need to configure an open port that you can use. This open port enables you to connect to the cluster from a SQL client tool and run queries during launching the redshift cluster, allow 5439 port in the firewall to access the cluster. In this step to make a proper connection, you have to add Amazon Redshift Port 5439 which is by default and add it in inbound rule in the security group. Step 2: Create an IAM Role For any operation that accesses data on another AWS resource, your cluster requires permission to access the resource and the data on the resource on your behalf. The COPY command is used to load data from Amazon S3. You have to provide those permissions by using AWS Identity and Access Management (IAM). You do so either through an IAM role that is attached to your cluster or by providing the AWS access key for an IAM user that has the necessary permissions. To best protect your sensitive data and to secure your AWS access credentials, we recommend creating an IAM role and attaching it to your cluster. In this step, you create a new IAM role that enables Amazon Redshift to load data from the path of an object in an Amazon S3 bucket. In the next step, you have to attach the role to your cluster.Steps to Create an IAM Role for Amazon Redshift
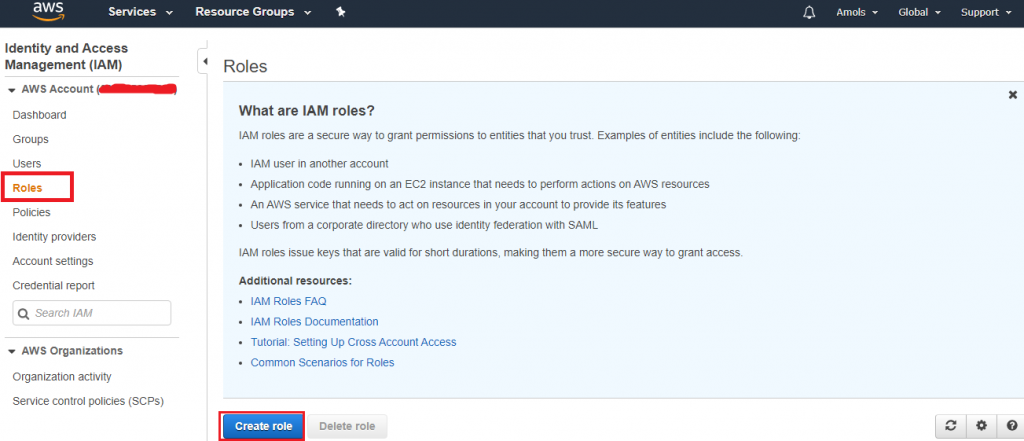
- Sign in to the AWS Management Console and open the IAM console at https://console.aws.amazon.com/iam/.
- In the navigation pane, choose Roles.
- Choose to Create role.
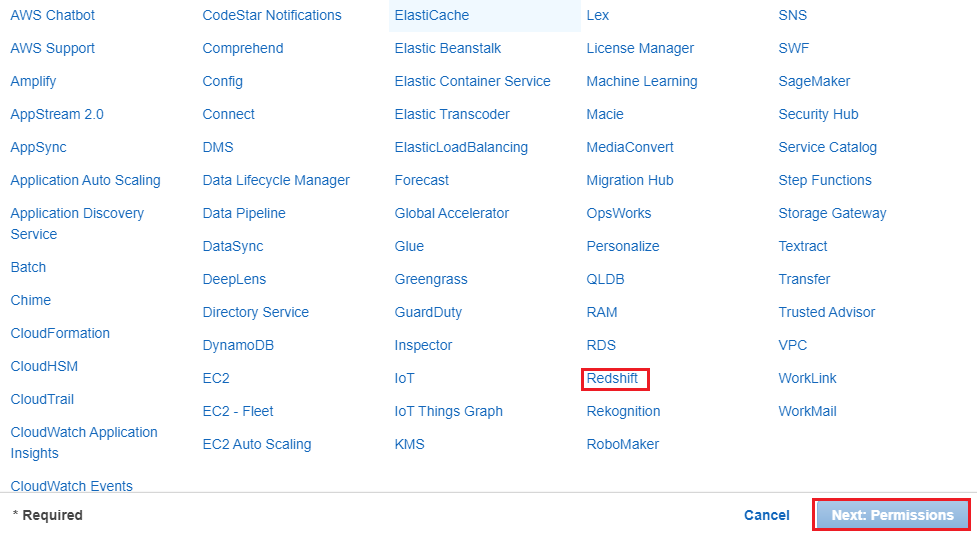
 4. In the AWS Servicegroup, select Redshift
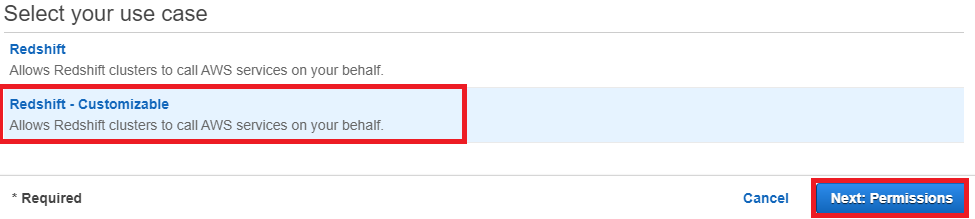
 5. Under Select your use case, choose Redshift - Customizablethen click on Next: Permissions.
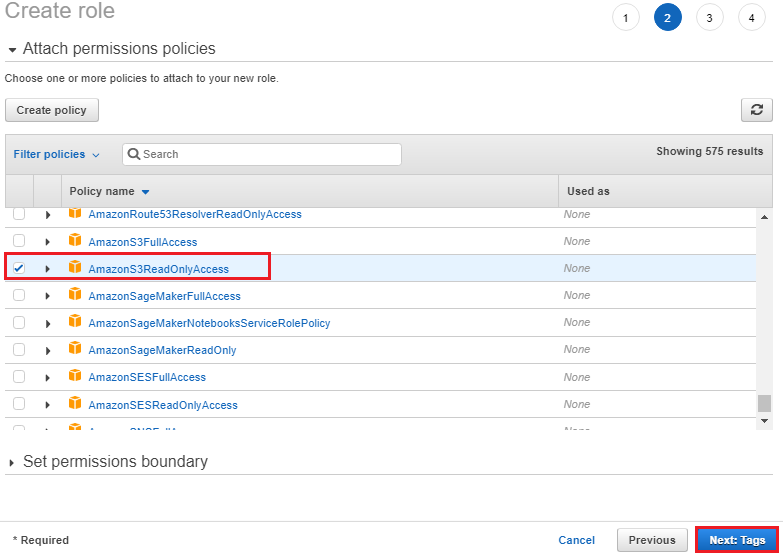
 6. On the Attach permissions policies page, choose AmazonS3ReadOnlyAccess. You can leave the default setting for Set permissions boundary as it is. Then choose Next: Tags.
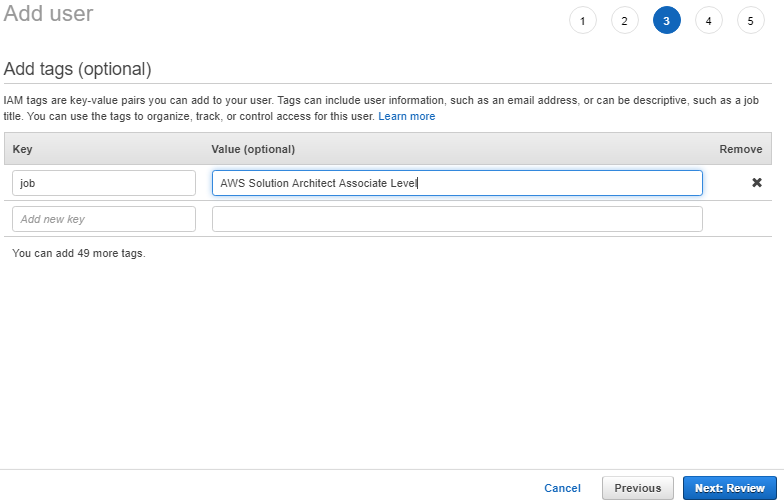
 7. The Add tags page appears. You can optionally add tags. Choose Next: Review.
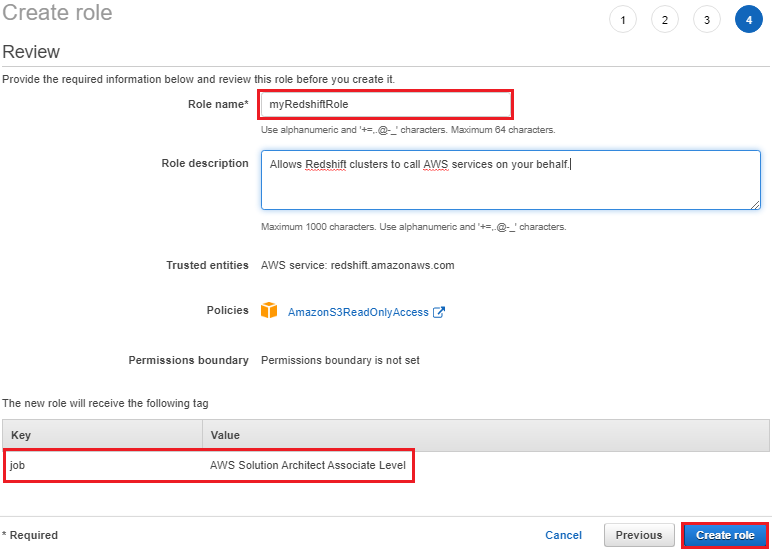
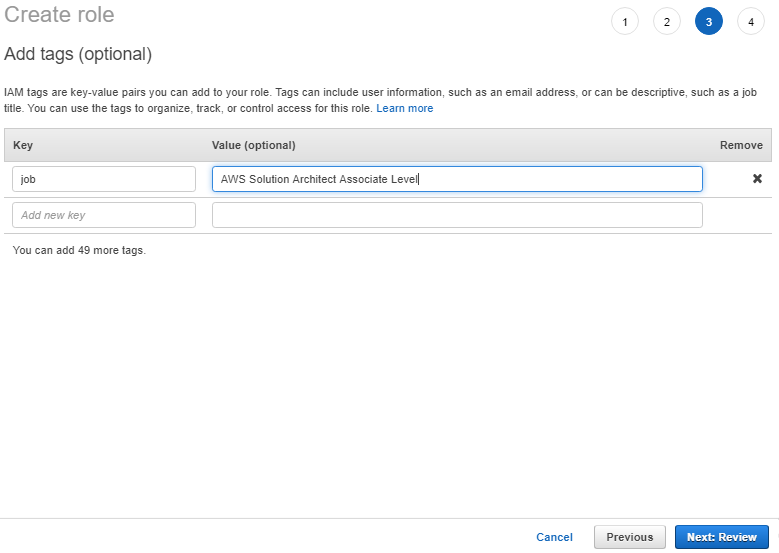 8. For Role name, enter a name for your role. For this tutorial, enter myRedshiftRole.
9. Review the information, and then select Create Role.
8. For Role name, enter a name for your role. For this tutorial, enter myRedshiftRole.
9. Review the information, and then select Create Role.
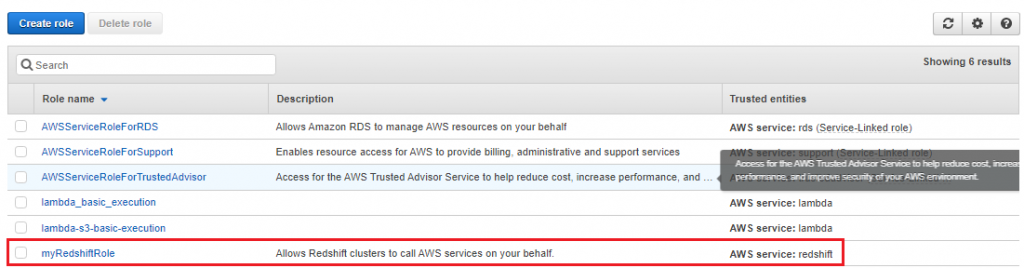
 10.Choose the role name of the role you just created.
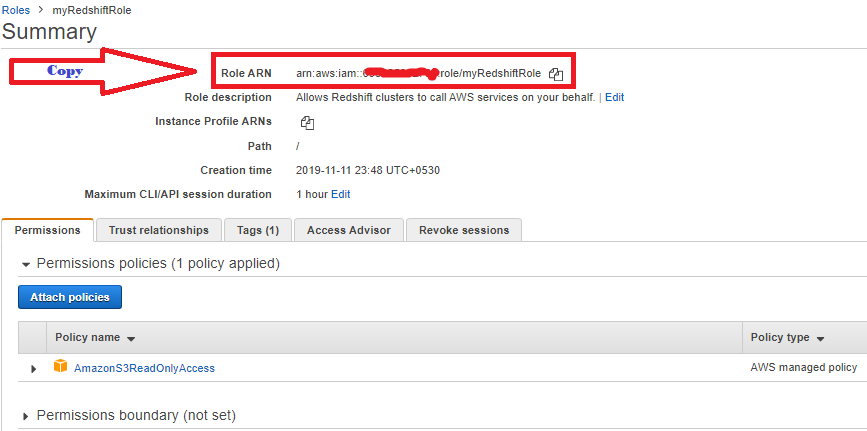
 11. Copy the Role ARNand save in secure place—this value is the Amazon Resource Name (ARN) for the role that you just created. You use that value when you use the COPY command to load data from Amazon S3.
 Once you create the new role, your next step is to attach it to your cluster. You can attach the role during launching a new cluster or you can attach it to an existing cluster. In the next step, you attach the role to a new cluster.
Step 3: Create a Sample Amazon Redshift Cluster
After completing prerequisites, you can launch your Amazon Redshift cluster.
Important
The cluster that you are about to launch is live. You incur the standard Amazon Redshift usage charges for the cluster until you delete it. If you complete the tutorial described herein one sitting and delete the cluster when you are finished the work, the total charges are minimal.
To launch an Amazon Redshift cluster
Once you create the new role, your next step is to attach it to your cluster. You can attach the role during launching a new cluster or you can attach it to an existing cluster. In the next step, you attach the role to a new cluster.
Step 3: Create a Sample Amazon Redshift Cluster
After completing prerequisites, you can launch your Amazon Redshift cluster.
Important
The cluster that you are about to launch is live. You incur the standard Amazon Redshift usage charges for the cluster until you delete it. If you complete the tutorial described herein one sitting and delete the cluster when you are finished the work, the total charges are minimal.
To launch an Amazon Redshift cluster
- Sign in to the AWS Management Console and open the Amazon Redshift console at https://console.aws.amazon.com/redshift/.
Important
If you use IAM user credentials, ensure that the IAM user has the necessary permissions to perform the cluster operations. In the main menu, select the AWS Region in which you want to create the cluster. For the purposes of this tutorial, select Asia Pacific (Mumbai Region).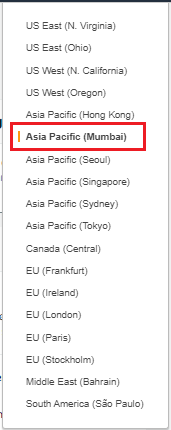
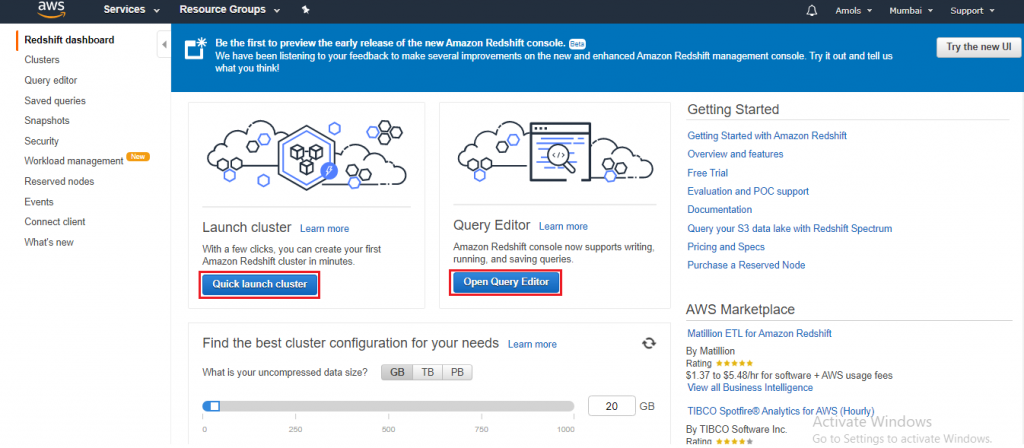
- On the Amazon Redshift Dashboard, click on the Quick launch cluster.
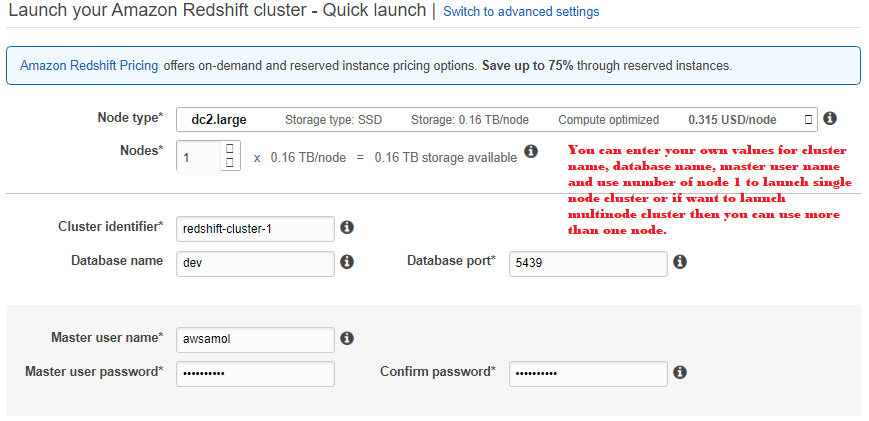
- On the Cluster specifications page, enter the following values and then choose Launch cluster:
- Node type: Choose largely.
- A number of compute nodes: Keep the default value of 1.
- Cluster identifier: Enter the value redshift-cluster-1.
- Master user name: Keep the default value of awsamol.
- Master user password and Confirm password: Enter a password for the master user account.
- Database port: Set the default value of 5439.
- Available IAM roles: Choose myRedshiftRole.
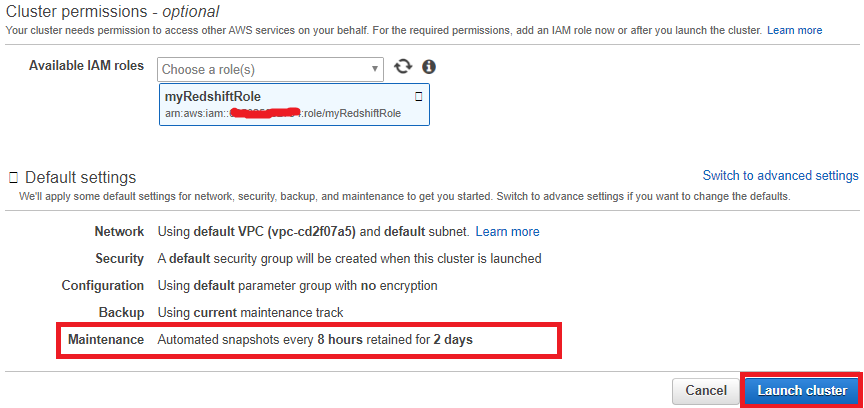
Note
Quick launch uses the default virtual private cloud (VPC) for your AWS Region. If a default VPC group doesn't exist, the Quick launch returns an error. If you don't have a default VPC group, you can use the standard Launch Cluster wizard to use a different VPC. A confirmation page appears and the cluster takes a few minutes to set up. Click on the Close button to return to the list of clusters.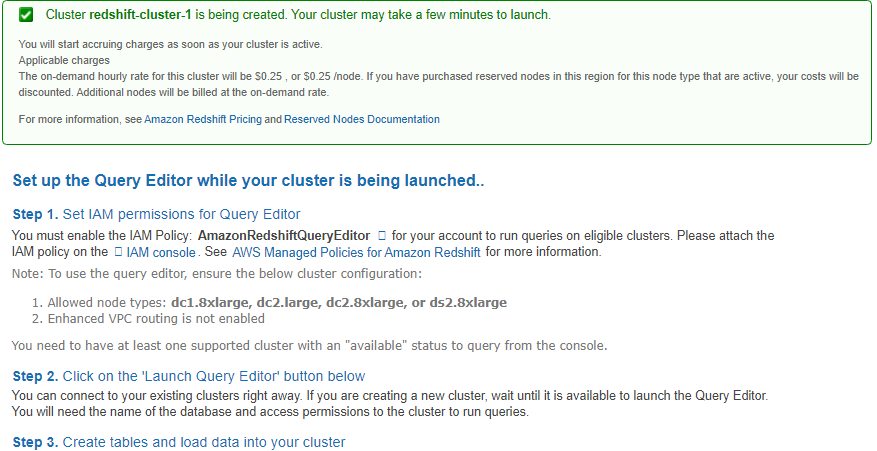
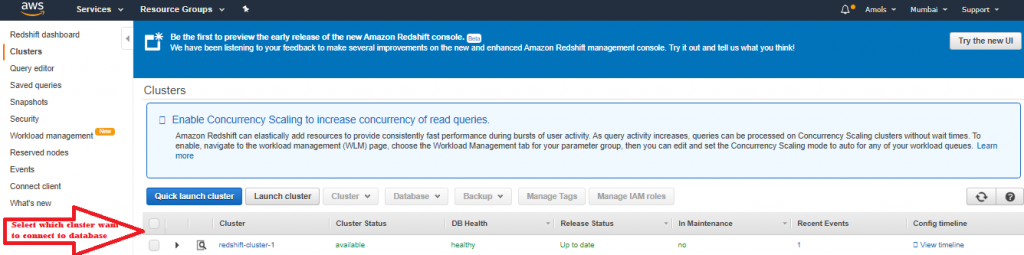
- On the Clusters page, choose the cluster that you just launched and review the Cluster Status Make sure that the Cluster Statusis available and the Database Health is healthy before you try to connect to the database later in this guide.
 5. The Clusters page, choose the cluster that you just launched, choose the Clusterbutton, then Modify cluster. Choose the VPC security groups to attach with this cluster, then choose Modify to make the association. Make sure that the Cluster Properties displays the VPC security groups you choose before continuing to the next step.
 Step 4: Authorize Access to the Cluster
Note
A new console is available for Amazon Redshift. Choose either the New or the Original Console instructions based guide on the console that you are using. In the earlier step, you launched your Amazon Redshift cluster. Before you can connect to the cluster, you need to configure a security group to authorize access to the cluster. To configure the VPC security group (EC2-VPC platform)- In the Amazon Redshift dashboard, in the navigation pane, choose Clusters.
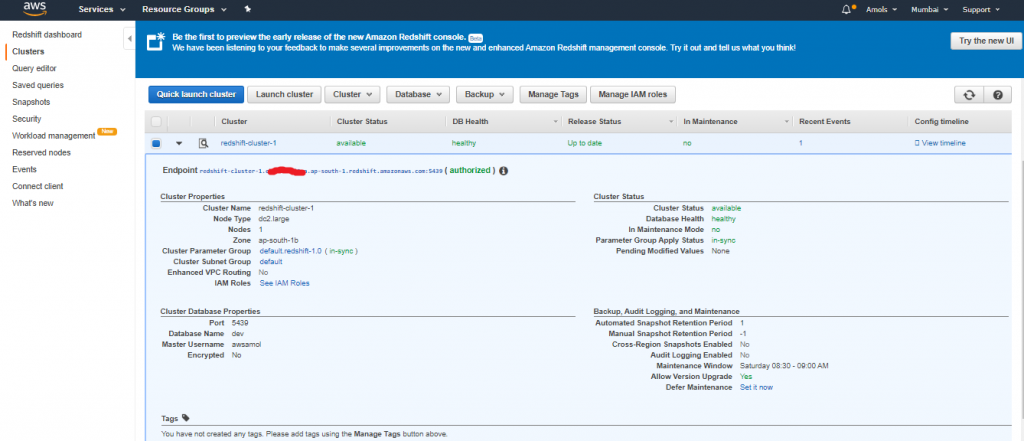
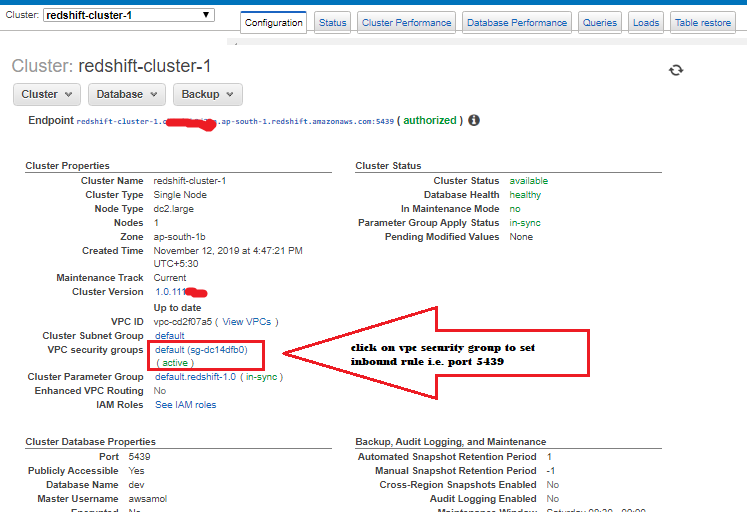
- Choose redshift-cluster-1to to open it, and make sure that you are on the Configuration
- Under Cluster Properties, for VPC Security Groups, choose your security group.
 4. After your security group opens in the Amazon EC2 console, choose the Inbound
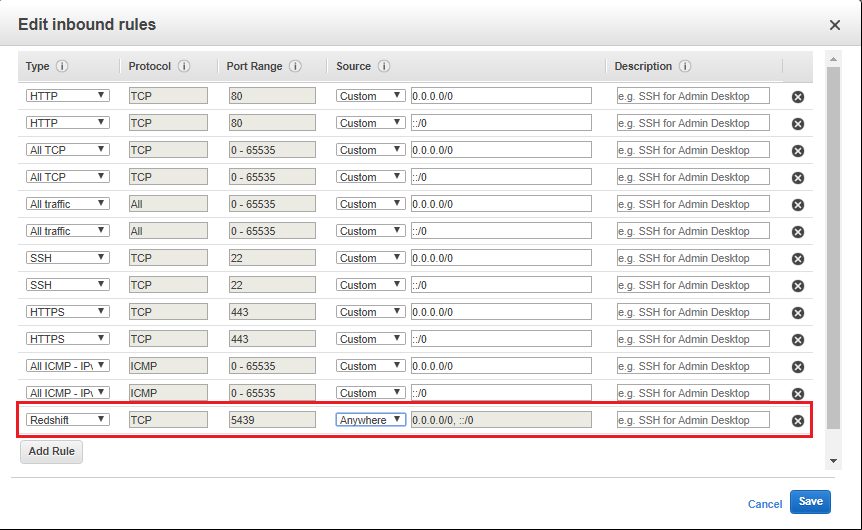
 5. Choose Edit, Add Rule, and set the following, then choose Save:
- Select: Redshift
- Protocol: TCP.
- Port Range: Enter the same port number that you used when you launched the cluster. The default port number for Amazon Redshift is 5439, but your port might be different.
- Source: Select Custom, then enter 0.0.0.0/0.
 Important
Using source to anywhere 0.0.0.0/0 means is not recommended for anything other than demonstration purposes because it allows access from any computer on the internet. In a real environment, you create inbound rules based on your own network settings.
Step 5: Connect to the Cluster and Run Queries
To query databases hosted by your Amazon Redshift cluster, you have two methods:
Important
Using source to anywhere 0.0.0.0/0 means is not recommended for anything other than demonstration purposes because it allows access from any computer on the internet. In a real environment, you create inbound rules based on your own network settings.
Step 5: Connect to the Cluster and Run Queries
To query databases hosted by your Amazon Redshift cluster, you have two methods:
- Connect to your cluster and run queries to databases on the AWS Management Console with the query editor.
- Connect to your cluster through an SQL client tool, such as SQL Workbench/J.
- Querying a Database by Using the Query Editor
- Querying a Database by Using a SQL Client
Querying a Database Using the Query Editor
Using the query editor is the easiest way to run queries on databases hosted by your Amazon Redshift cluster. After creating your cluster, you can immediately run queries using the console. The following cluster node types support the query editor:- 8xlarge
- large
- 8xlarge
- 8xlarge
- Run single SQL statement queries.
- Download result sets as large as 100 MB to a comma-separated value (CSV) file.
- Save the queries for reuse. You cannot save queries in the EU (Paris) Region or the Asia Pacific (Osaka-Local) Region.
Enabling Access to the Query Editor
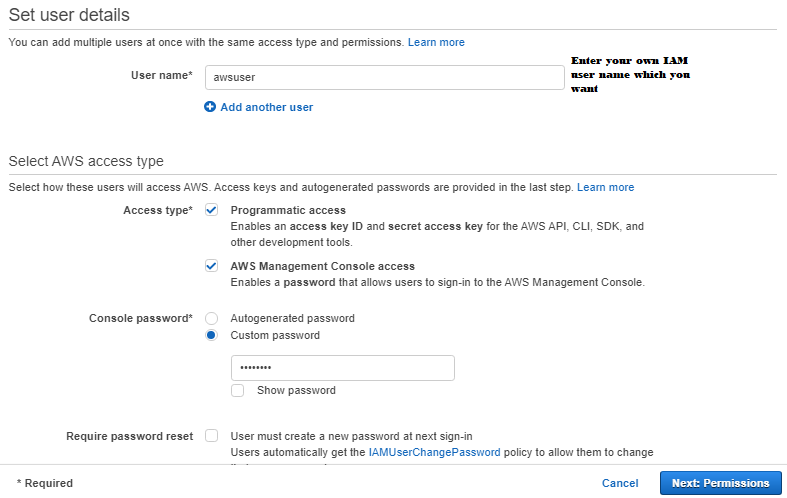
To use the query editor, you need permission. To enable access, attach the AmazonRedshiftQueryEditor and AmazonRedshiftReadOnlyAccess policies for AWS Identity and Access Management (IAM) to the IAM user that you use to access your cluster. If you have already created an IAM user to access the Amazon Redshift cluster, you can attach the AmazonRedshiftQueryEditor & AmazonRedshiftReadOnlyAccess policies to that user. If you haven't created an IAM user yet, create one and attach the policies to the IAM user.To attach the required IAM policies for the Query Editor
- Sign in to the AWS Management Console and open the IAM console at https://console.aws.amazon.com/iam/.
- Choose Users.
 3. Choose the IAM user that needs access to the Query Editor.
4. Click on Add permissions.
3. Choose the IAM user that needs access to the Query Editor.
4. Click on Add permissions.
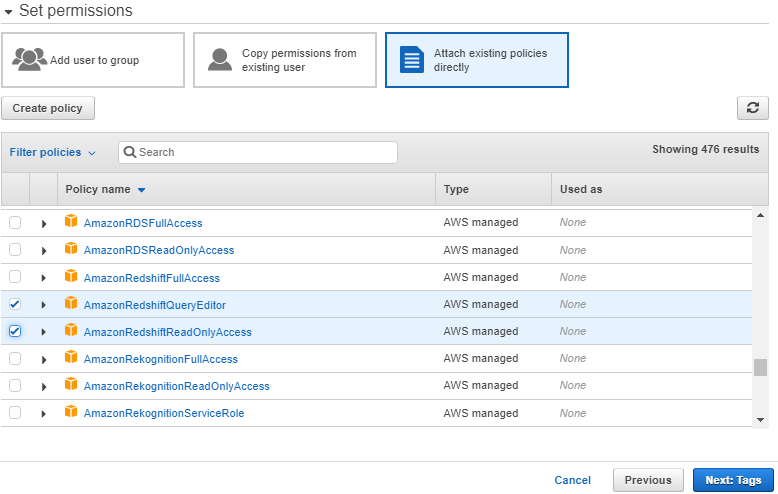 5. Click on Attach existing policies directly.
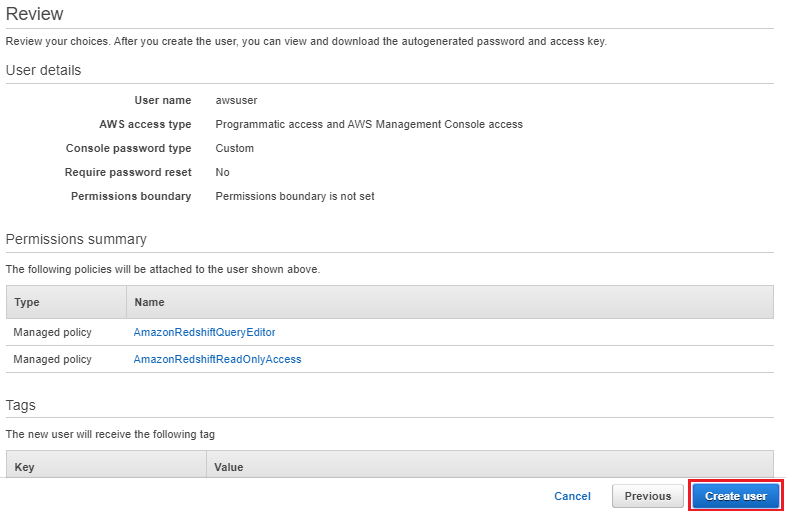
6. For Policy names, choose AmazonRedshiftQueryEditorand AmazonRedshiftReadOnlyAccess.7. Click on Next: Review.
5. Click on Attach existing policies directly.
6. For Policy names, choose AmazonRedshiftQueryEditorand AmazonRedshiftReadOnlyAccess.7. Click on Next: Review.
 8. Click on Add permissions.
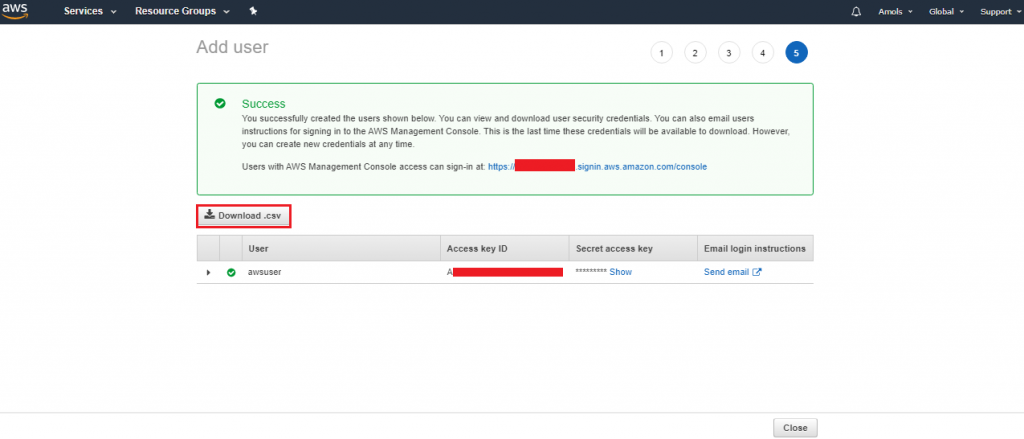
 9. Download the csv file before closing the window contains Access key and Secret access key will use while accessing the resources via programmatic access.
Using the Query Editor
In the following demo, you use the query editor to perform the following tasks:- To run SQL commands.
- View query execution details.
- To save a query.
- Download a query result set.
To use the query editor:
- Sign in to the AWS Management Console & open the Amazon Redshift console at https://console.aws.amazon.com/redshift/.
- In the navigation pane, click on Query Editor.
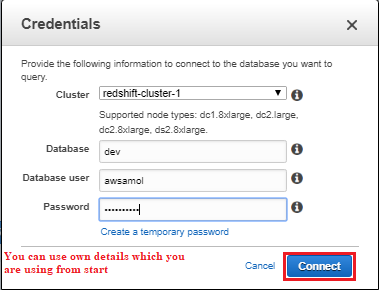
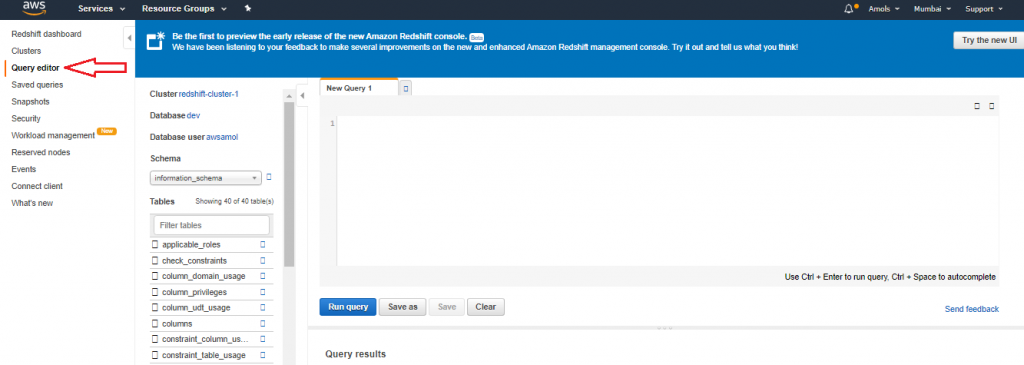 3. In the Credentialsdialog box, enter the following values and then click on Connect:
- Cluster: Type your cluster name here redshift-cluster-1.
- Database: dev.
- Database user: awsamol
- Password: Enter the password that you specified when you launched the cluster.
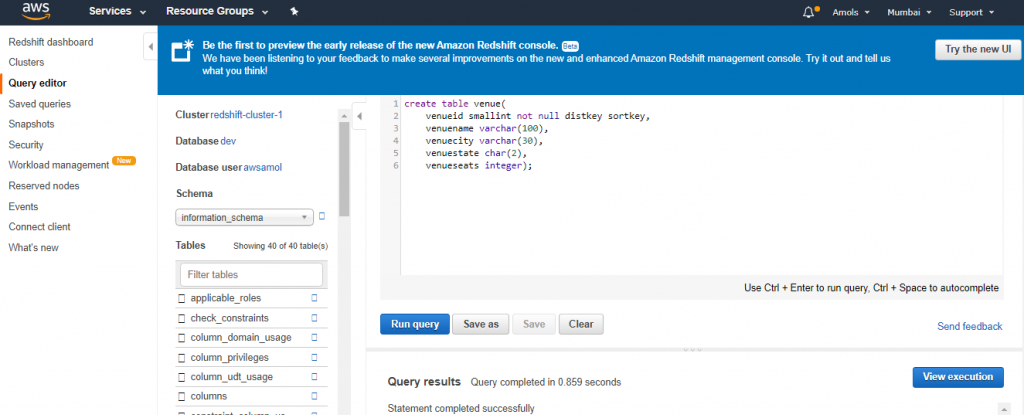
 4. For Schema, click on information_schema to create a new table based on that schema.
5. Enter the following in the Query Editor window & choose Run query to create a new table.
6. create table shoes(shoetype varchar (10), color varchar(10));
4. For Schema, click on information_schema to create a new table based on that schema.
5. Enter the following in the Query Editor window & choose Run query to create a new table.
6. create table shoes(shoetype varchar (10), color varchar(10));
 7. Choose Clear.
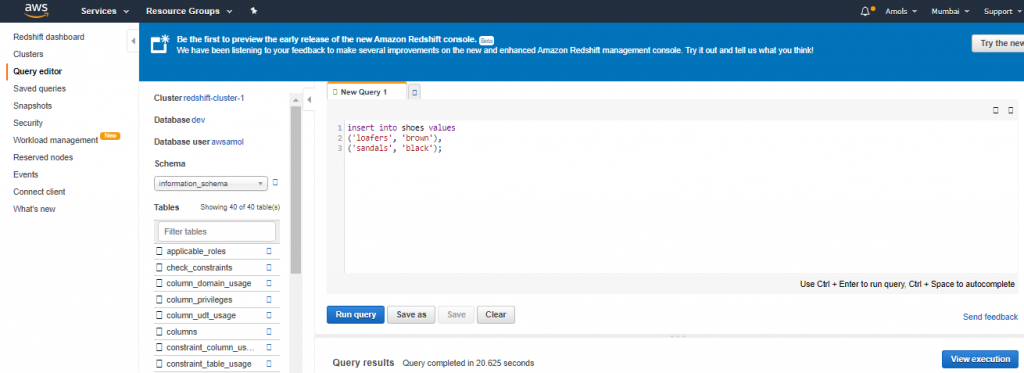
8. Enter the following command in the Query Editor window and choose Run query to add rows to the table.
9. insert into shoes values('loafers', 'brown'), ('sandals', 'black');
7. Choose Clear.
8. Enter the following command in the Query Editor window and choose Run query to add rows to the table.
9. insert into shoes values('loafers', 'brown'), ('sandals', 'black');
 10. Choose Clear
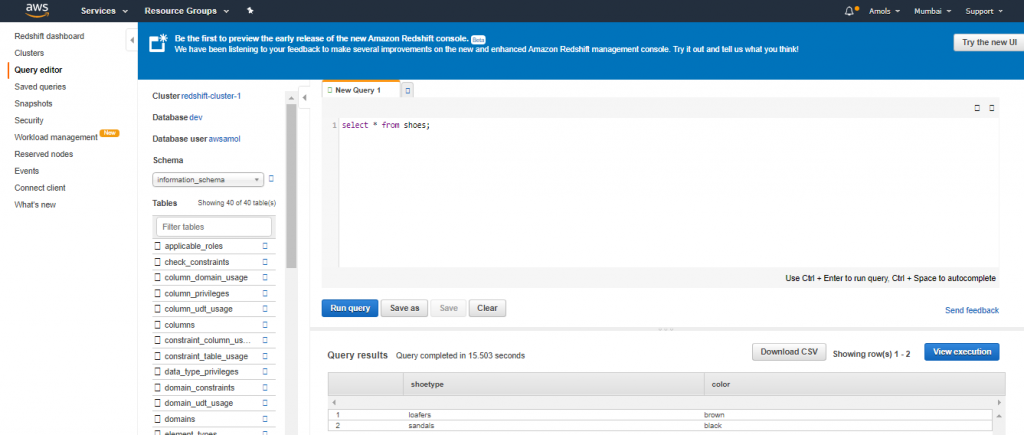
11. Enter the following command in the Query Editor window & choose Run query to query the new table.
select * from shoes;
You should see the following results.
10. Choose Clear
11. Enter the following command in the Query Editor window & choose Run query to query the new table.
select * from shoes;
You should see the following results.
 Step 6: Load Sample Data from Amazon S3 bucket
At this point, you have a database called dev & you are connected to it. Next, you create some tables in the database dev, upload data to the tables, and try a query. For your convenience, ensure the sample data to load is available in an Amazon S3 bucket.
Step 6: Load Sample Data from Amazon S3 bucket
At this point, you have a database called dev & you are connected to it. Next, you create some tables in the database dev, upload data to the tables, and try a query. For your convenience, ensure the sample data to load is available in an Amazon S3 bucket.
Note
If you're using a SQL client tool, check that your SQL client is connected to the cluster. To load sample data into tables from s3 bucket:- Create tables.
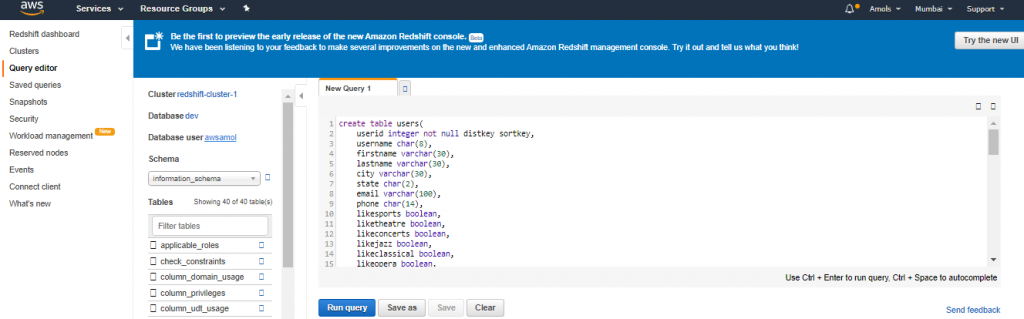 create table venue( venueid smallint not null distkey sortkey, venuename varchar(100), venuecity varchar(30), venuestate char(2), venueseats integer);
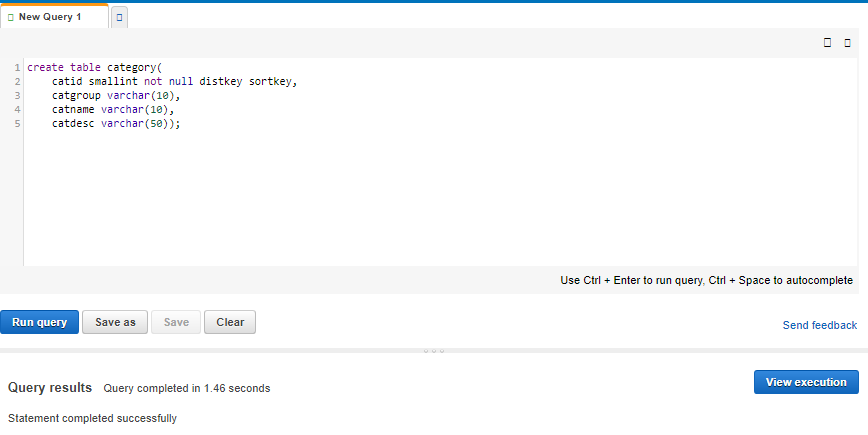
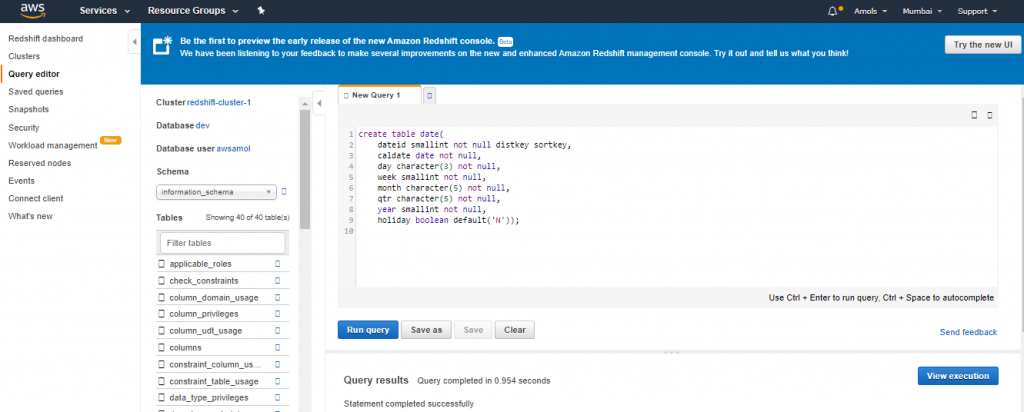
 create table category( catid smallint not null distkey sortkey, catgroup varchar(10), catname varchar(10), catdesc varchar(50)); create table date( dateid smallint not null distkey sortkey, caldate date not null, day character(3) not null, week smallint not null, month character(5) not null, qtr character(5) not null, year smallint not null, holiday boolean default('N'));
 create table event( eventid integer, not null dickey, venueid smallint not null, catid smallint not null, dateid smallint not null sortkey, eventname varchar(200), starttime timestamp);
 create table listing( listid integer not null distkey, sellerid integer not null, eventid integer not null, dateid smallint not null sortkey, numtickets smallint not null, priceperticket decimal(8,2), totalprice decimal(8,2), listtime timestamp);
 create table sales( salesid integer not null, listid integer not null distkey, sellerid integer not null, buyerid integer not null, eventid integer not null, dateid smallint not null sortkey, qtysold smallint not null, pricepaid decimal(8,2), commission decimal(8,2), saletime timestamp);
- Load the sample data from Amazon S3 by using the COPY
Note
If you have to load large datasets, then use COPY command into Amazon Redshift from Amazon S3 or DynamoDB Download file tickitdb.zip that includes individual sample data files. Unzip and load the individual files to a ticket folder in your Amazon S3 bucket in your AWS Region. Edit the COPY commands in this tutorial to point to the files in your Amazon S3 bucket. To upload data in Amazon S3:- Ready your sample data
- Browse it from the local machine
 3. Click on upload
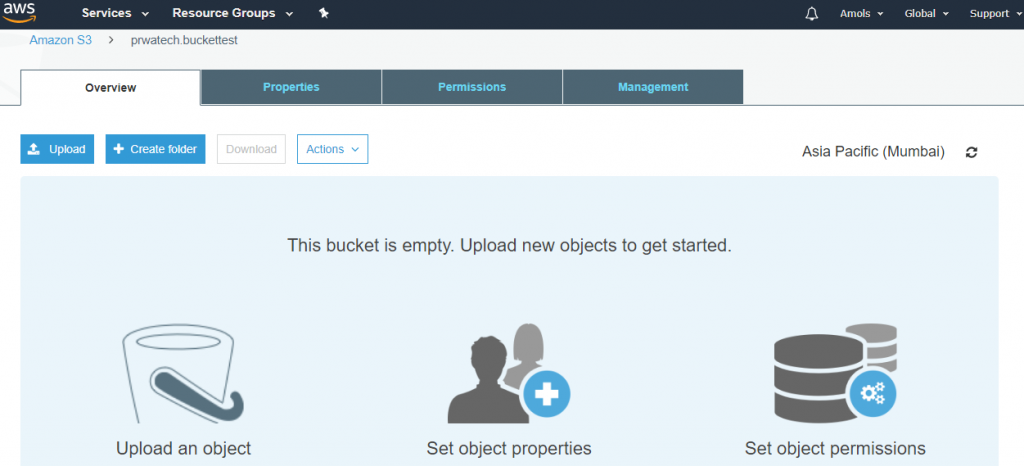
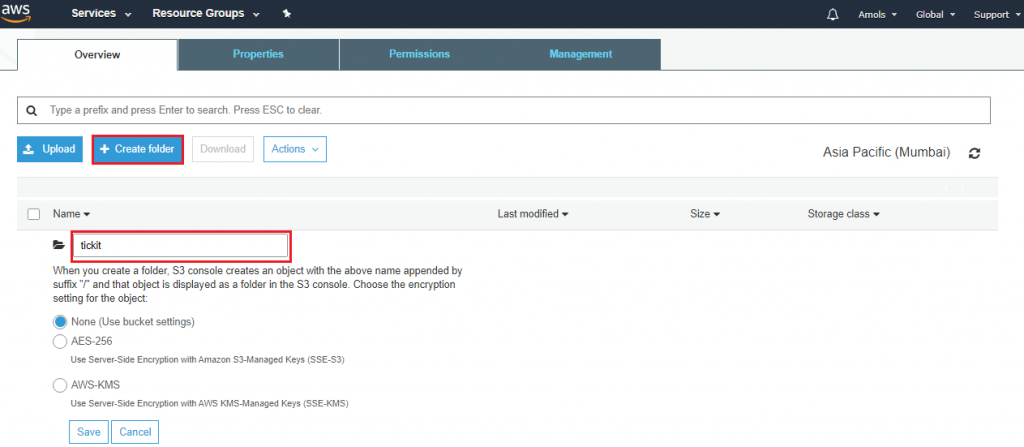
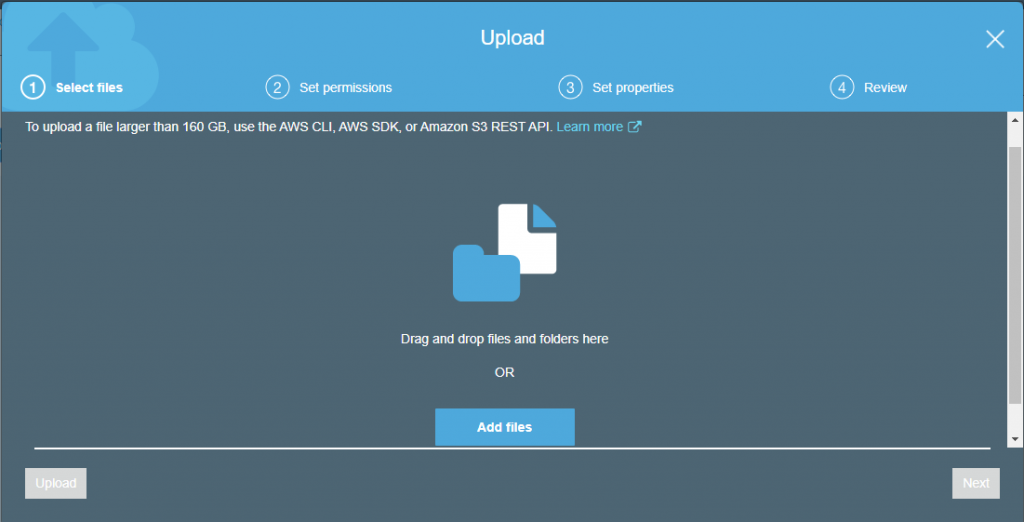 4. First, select the bucket in which you want to store data. Create a folder under which you have to store files called objects.
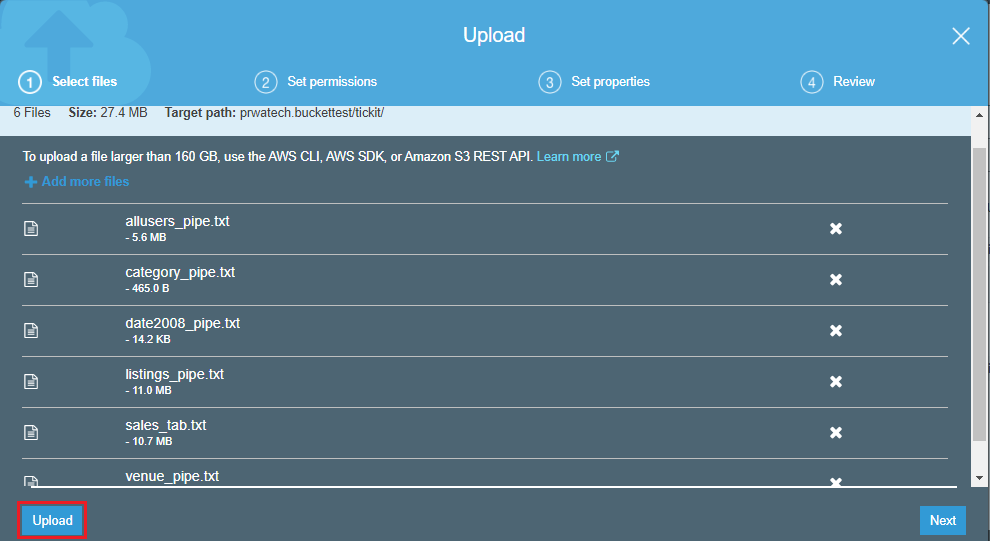
 5. Click on upload once you browse all the data.
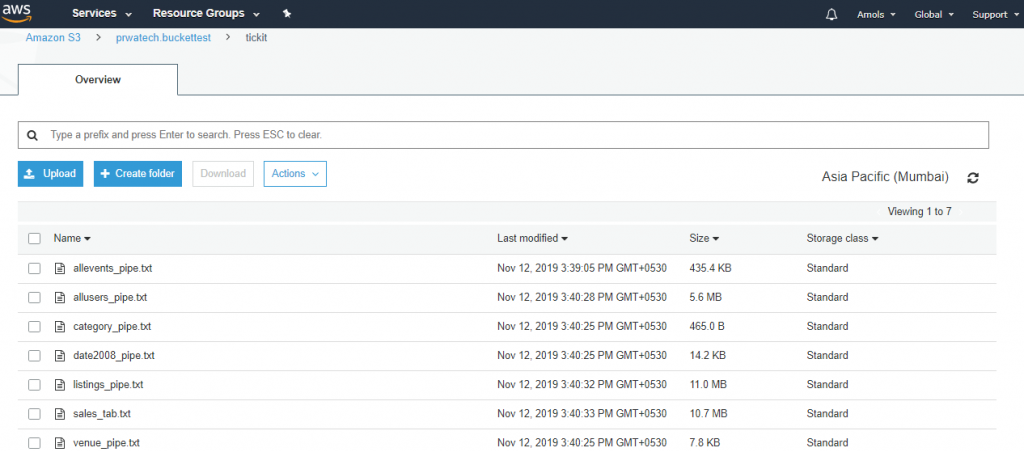
 6. Click on a bucket in which your data stored and check it.
 To load sample data, you must provide authentication for your cluster to access Amazon S3 object on your behalf. You can provide either role-based authentication or a key-based authentication method. We recommend using a role-based authentication method.
For this step, you provide authentication by referencing the IAM role that you created and then attached to your cluster in earlier steps.
Note
If you don't have proper permissions to access Amazon S3, you receive the following error message when running the COPY command: S3ServiceException: Access Denied.
The COPY commands include a placeholder for the Amazon Resource Name (ARN) for the IAM role, your bucket name, and an AWS Region, as shown in the following example.
copy users from 's3://<myBucket>/tickit/allusers_pipe.txt' credentials 'aws_iam_role=<iam-role-arn>' delimiter '|' region '<aws-region>';
To authorize access using an IAM role, replace <iam-role-arn> in the CREDENTIALS parameter string with the role ARN for the IAM role that you created in Step 2 while creating the IAM Role.
To load sample data, you must provide authentication for your cluster to access Amazon S3 object on your behalf. You can provide either role-based authentication or a key-based authentication method. We recommend using a role-based authentication method.
For this step, you provide authentication by referencing the IAM role that you created and then attached to your cluster in earlier steps.
Note
If you don't have proper permissions to access Amazon S3, you receive the following error message when running the COPY command: S3ServiceException: Access Denied.
The COPY commands include a placeholder for the Amazon Resource Name (ARN) for the IAM role, your bucket name, and an AWS Region, as shown in the following example.
copy users from 's3://<myBucket>/tickit/allusers_pipe.txt' credentials 'aws_iam_role=<iam-role-arn>' delimiter '|' region '<aws-region>';
To authorize access using an IAM role, replace <iam-role-arn> in the CREDENTIALS parameter string with the role ARN for the IAM role that you created in Step 2 while creating the IAM Role.
Your COPY command looks similar to the following example.
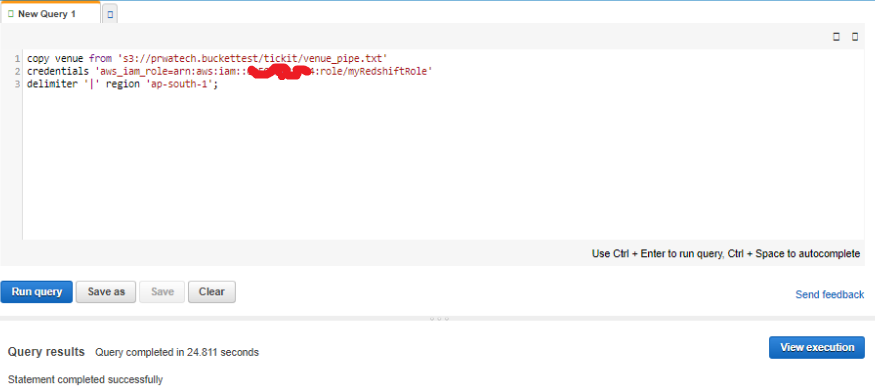
copy users from 's3://<myBucket>/tickit/allusers_pipe.txt' credentials 'aws_iam_role=arn:aws:iam::123456789012:role/myRedshiftRole' delimiter '|' region '<aws-region>'; To load the sample data, replace <myBucket>, <iam-role-arn>, and <aws-region> in the following COPY commands with your values. Then run the commands one by one in your SQL client tool. copy users from 's3://<myBucket>/tickit/allusers_pipe.txt' credentials 'aws_iam_role=<iam-role-arn>' delimiter '|' region '<aws-region>';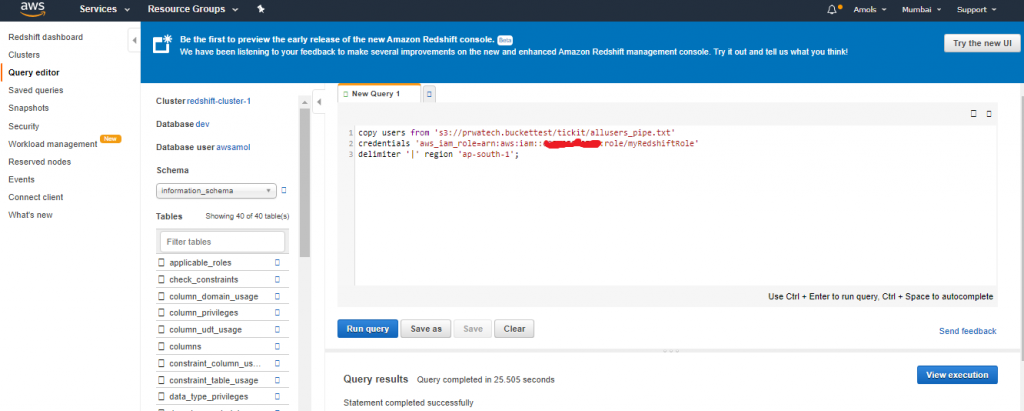 copy venue from 's3://<myBucket>/tickit/venue_pipe.txt' credentials 'aws_iam_role=<iam-role-arn>' delimiter '|' region '<aws-region>';
 copy category from 's3://<myBucket>/tickit/category_pipe.txt' credentials 'aws_iam_role=<iam-role-arn>' delimiter '|' region '<aws-region>';
copy date from 's3://<myBucket>/tickit/date2008_pipe.txt' credentials 'aws_iam_role=<iam-role-arn>' delimiter '|' region '<aws-region>';
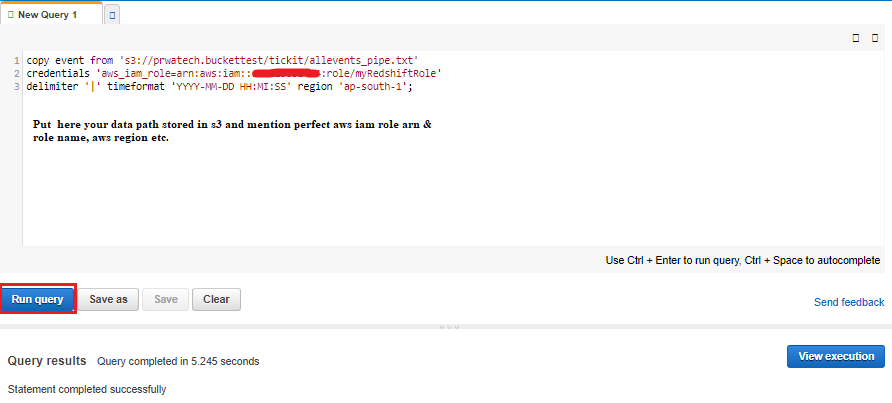
copy event from 's3://<myBucket>/tickit/allevents_pipe.txt' credentials 'aws_iam_role=<iam-role-arn>' delimiter '|' timeformat 'YYYY-MM-DD HH:MI:SS' region '<aws-region>';
copy category from 's3://<myBucket>/tickit/category_pipe.txt' credentials 'aws_iam_role=<iam-role-arn>' delimiter '|' region '<aws-region>';
copy date from 's3://<myBucket>/tickit/date2008_pipe.txt' credentials 'aws_iam_role=<iam-role-arn>' delimiter '|' region '<aws-region>';
copy event from 's3://<myBucket>/tickit/allevents_pipe.txt' credentials 'aws_iam_role=<iam-role-arn>' delimiter '|' timeformat 'YYYY-MM-DD HH:MI:SS' region '<aws-region>';
 copy listing from 's3://<myBucket>/tickit/listings_pipe.txt' credentials 'aws_iam_role=<iam-role-arn>' delimiter '|' region '<aws-region>';
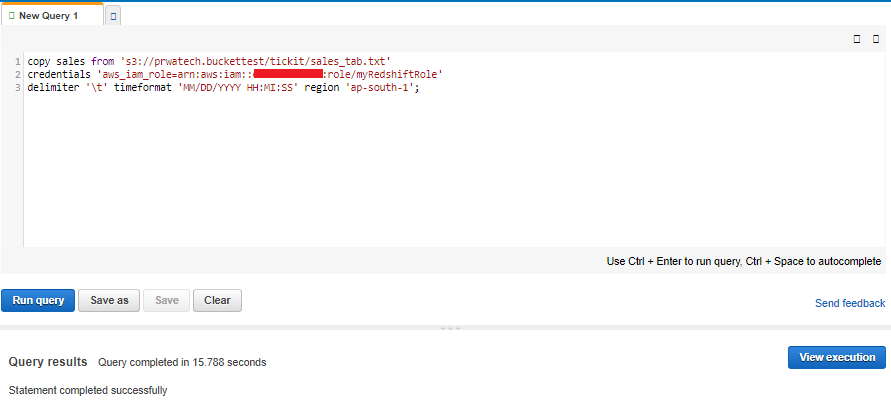
copy sales from 's3://<myBucket>/tickit/sales_tab.txt'credentials 'aws_iam_role=<iam-role-arn>'delimiter '\t' timeformat 'MM/DD/YYYY HH:MI:SS' region '<aws-region>';
copy listing from 's3://<myBucket>/tickit/listings_pipe.txt' credentials 'aws_iam_role=<iam-role-arn>' delimiter '|' region '<aws-region>';
copy sales from 's3://<myBucket>/tickit/sales_tab.txt'credentials 'aws_iam_role=<iam-role-arn>'delimiter '\t' timeformat 'MM/DD/YYYY HH:MI:SS' region '<aws-region>';
 Now try the example queries.
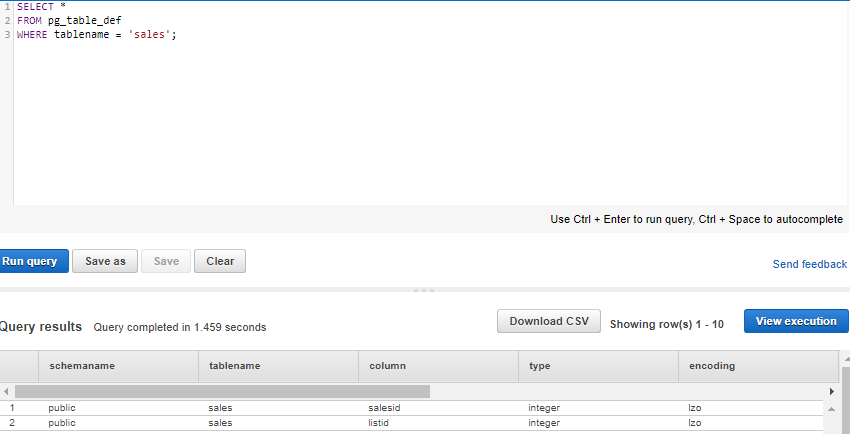
Get the definition for the sales table.
SELECT * FROM pg_table_def 7. WHERE tablename = 'sales';
Now try the example queries.
Get the definition for the sales table.
SELECT * FROM pg_table_def 7. WHERE tablename = 'sales';
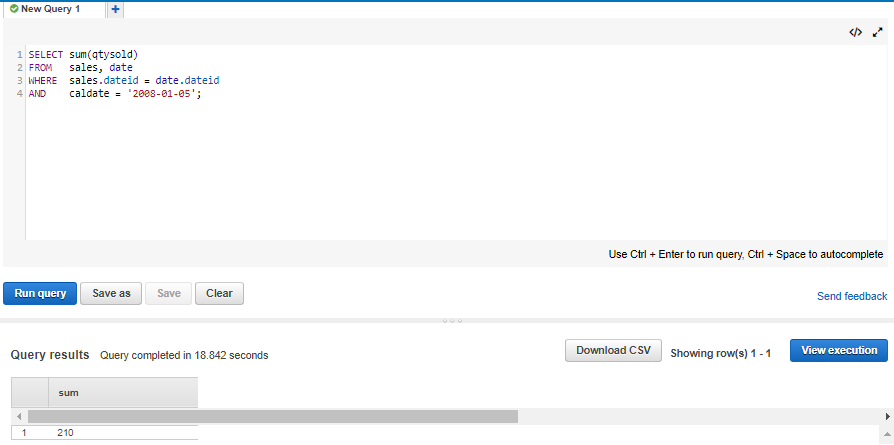
 Now Find total sales on a given calendar date.
SELECT sum(qtysold) FROM sales, date WHERE sales.dateid = date.dateid AND caldate = '2008-01-05';
Now Find total sales on a given calendar date.
SELECT sum(qtysold) FROM sales, date WHERE sales.dateid = date.dateid AND caldate = '2008-01-05';
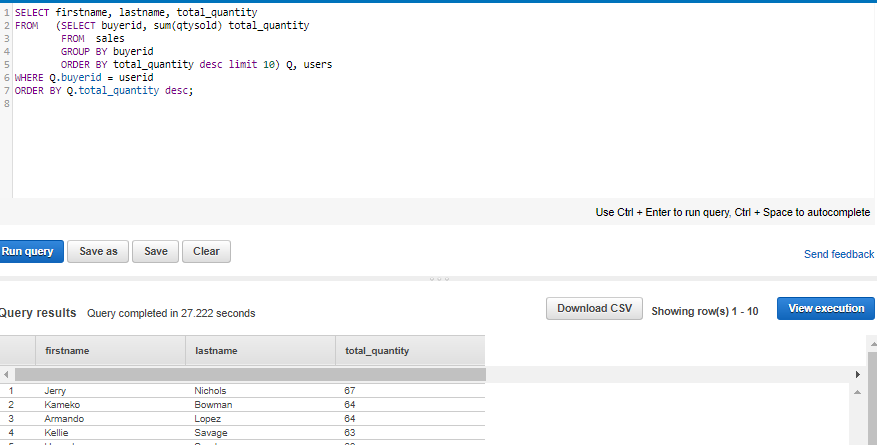
 Find top 10 buyers by quantity.
SELECT firstname, lastname, total_quantity FROM (SELECT buyerid, sum(qtysold) total_quantity FROM sale GROUP BY buyerid ORDER BY total_quantity desc limit 10) Q, users WHERE Q.buyerid = userid ORDER BY Q.total_quantity desc;
Find top 10 buyers by quantity.
SELECT firstname, lastname, total_quantity FROM (SELECT buyerid, sum(qtysold) total_quantity FROM sale GROUP BY buyerid ORDER BY total_quantity desc limit 10) Q, users WHERE Q.buyerid = userid ORDER BY Q.total_quantity desc;
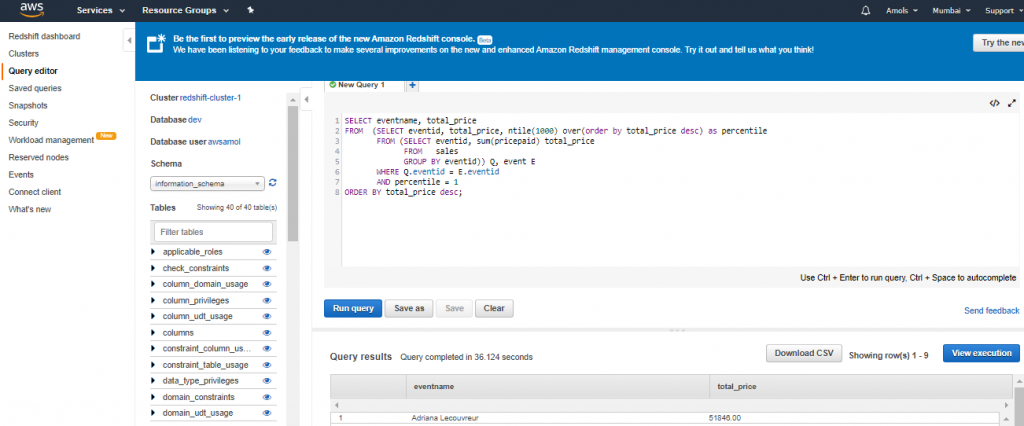
 Find events in the 99.9 percentile in terms of all time gross sales.
SELECT eventname, total_price FROM (SELECT eventid, total_price, ntile(1000) over(order by total_price desc) as percentile FROM (SELECT eventid, sum(pricepaid) total_price FROM sales GROUP BY eventid)) Q, event E WHERE Q.eventid = E.eventid AND percentile = 1 ORDER BY total_price desc;
Find events in the 99.9 percentile in terms of all time gross sales.
SELECT eventname, total_price FROM (SELECT eventid, total_price, ntile(1000) over(order by total_price desc) as percentile FROM (SELECT eventid, sum(pricepaid) total_price FROM sales GROUP BY eventid)) Q, event E WHERE Q.eventid = E.eventid AND percentile = 1 ORDER BY total_price desc;
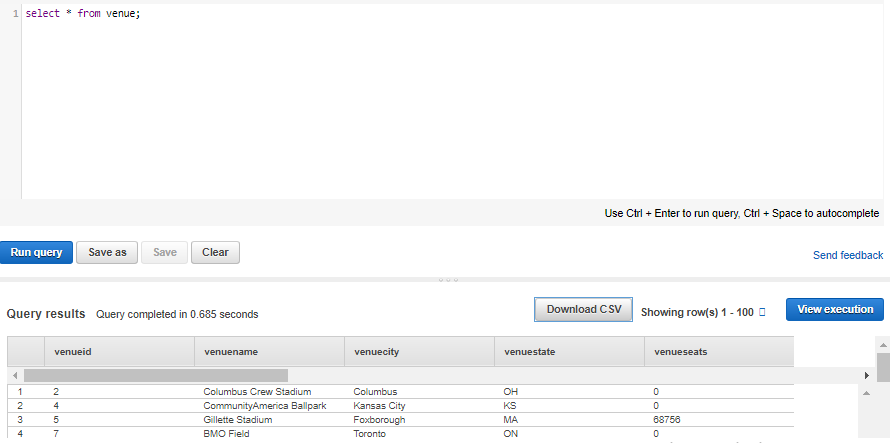
 Run the command given below for example:
Select * from venue;
Run the command given below for example:
Select * from venue;
Step 7: Find Additional Resources and Reset Your Cluster Environment
Once you have completed this tutorial, you can go to other Amazon Redshift resources to learn more about the concepts introduced in this guide. You can also reset your environment setup to the previous state. You might want to keep the sample cluster running if you want to try another tasks. However, remember that you continue to be charged for your cluster as long as it is running in your account. To avoid charges, revoke access to the cluster and delete it when you no longer need it. To avoid charges, take snapshot of your cluster, and then delete it if no longer in use. You can relaunch cluster it later from snapshot that you have taken.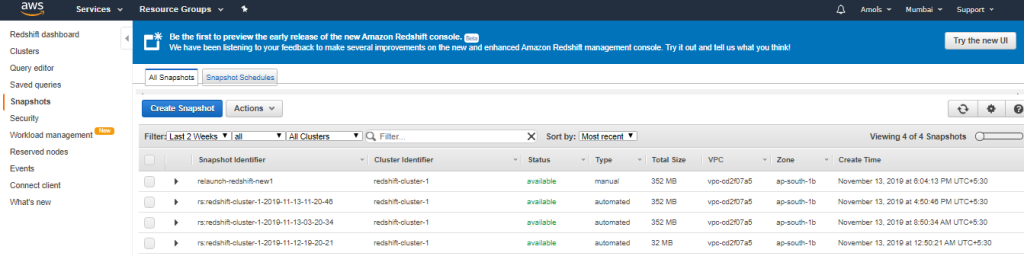 You can see Snapshot created in an image given below.

#Last but not least, always ask for help!

