Apache Sqoop Installation Tutorial
Prerequisites
Hardware requirements:
Local machine
ram 8 gb or above
Software requirements:
VMware Workstation:, Version :16 pro
Download the software from given link :- https://prwatech.in/blog/software-installation/vmware-workstation-installation/
Ubuntu , Version: 18.04
Download the software from given link : https://prwatech.in/blog/software-installation/vmware-workstation-installation/
Programming languages: Linux
Learn Linux : https://prwatech.in/blog/linux/linux-architecture/
1.Go to the below link and download sqoop-1.4.7.bin_hadoop-6.0.tar.gz
https://mirrors.estointernet.in/apache/sqoop/1.4.7/
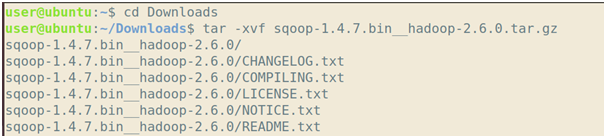
2.Open the terminal and go to the folder directory where sqoop has been downloaded and extract the file using the following command:
tar -xvf sqoop-1.4.7.bin_hadoop-2.6.0.tar.gz
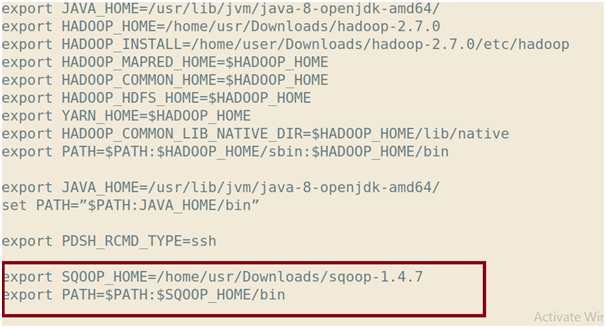
3.Edit the .bashrc file
nano ~/.bashrc

Note: you can edit the sqoop file name so that it will be easy , in my case i have renamed it to “sqoop-1.4.7” from “sqoop-1.4.7.bin_hadoop-2.6.0”
4. Enter the following commands below in bashrc file
5.Now save the bashrc file by source ~/.bashrc
source ~/.bashrc

6.Use this command to rename sqoop-env-template.sh to sqoop-env.sh
mv sqoop-env-template.sh sqoop-env.sh

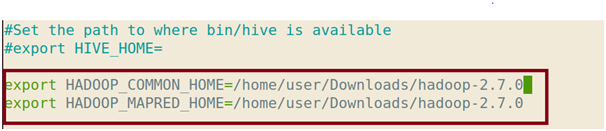
7.Edit the sqoop-env.sh
nano sqoop-env.sh

Add the following lines as follows
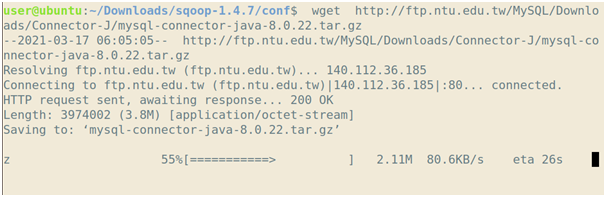
8. Now download the mysql connector from the following link in terminal
wget http://ftp.ntu.edu.tw/MySQL/Downloads/Connector-J/mysql-connector-java-8.0.22.tar.gz
9.Go to the downloaded file directory and untar by running the following command
tar -xvf mysql-connector-java-8.0.22.tar.

10. Move mysql connector to sqoop/lib
mv mysql-connector-java-8.0.22/mysql-connector-java-8.0.22.jar /home/user/Downloads/sqoop-1.4.7/lib

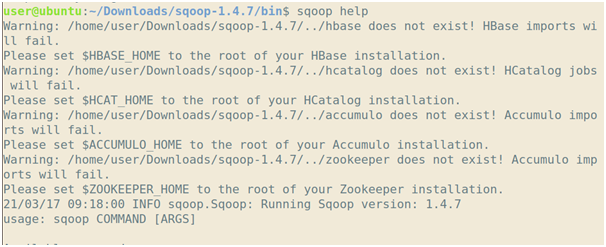
11.Check the version whether it is installed
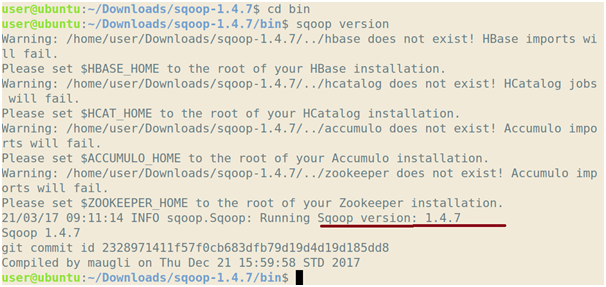
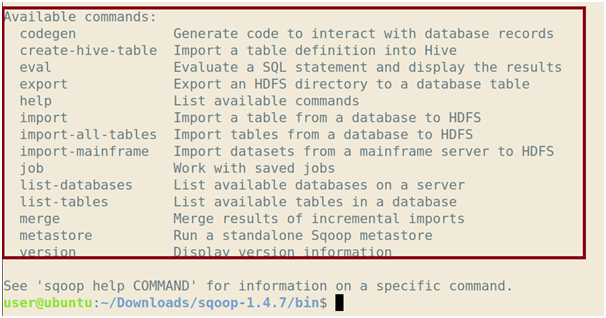
12.Type 'sqoop help' to know the sqoop commands