Dataproc Cluster Creation
Creating a Dataproc Cluster
Dataproc is Google Cloud’s managed service for running Apache Spark and Hadoop, sometimes labeled in current Google documentation as the Managed Service for Apache Spark, without you having to install or maintain the cluster software yourself. This walks through creating a cluster in the console from the very first click, since every other guide in this Dataproc series, the metastore, submitting a job through the console, and running Spark scripts directly over SSH, assumes a cluster already exists before it starts.
This covers every setting the creation wizard asks for, with the ones that genuinely change how the cluster works explained properly, cluster type, Component Gateway, and the tradeoffs around preemptible and spot worker nodes.
Step by Step Process of Creating a Dataproc Cluster
Step One: Open Dataproc
Open the console, then
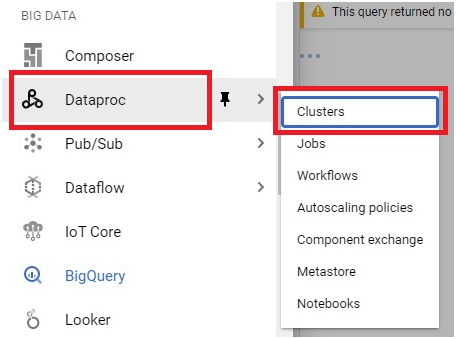
Open Menu > Dataproc > Clusters
Step Two: Enable the API
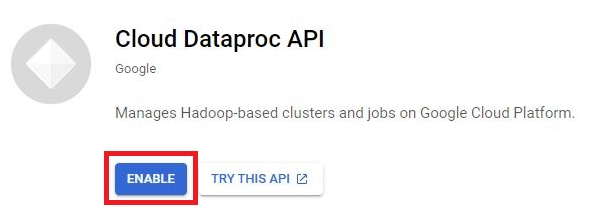
Click Enable.
Step Three: Create a Cluster
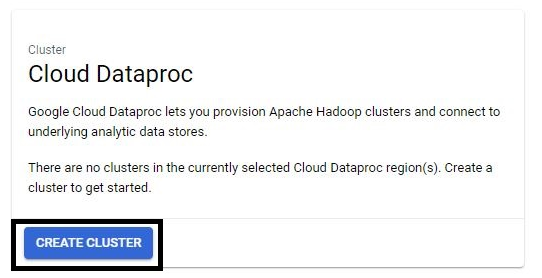
Click Create Cluster.
Step Four: Name the Cluster and Choose Its Type
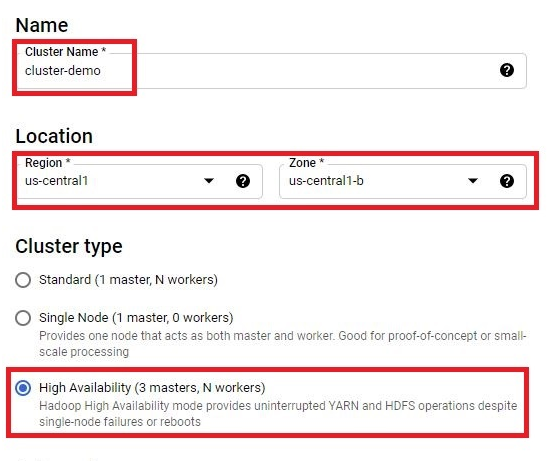
Give the cluster a name, choose a location and zone, and pick a cluster type.
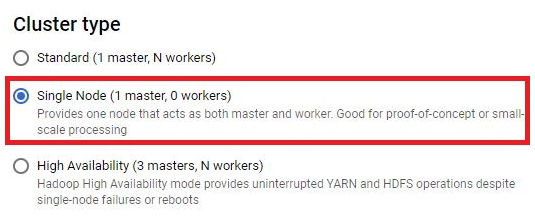
Cluster Types Explained
- Standard, one master node plus however many workers you configure. This is the typical choice for most jobs.
- Single Node, the master node also acts as the only worker. It is meant for small scale testing and learning, not for anything resource intensive, and it is also the option worth choosing if you are on a free trial account and a multi node cluster fails to create due to quota limits.
- High Availability, three master nodes instead of one, so the cluster can keep running through the loss of a single master. This costs more than Standard and is meant for production workloads that genuinely cannot tolerate a master node failure.
Step Five: Choose an Autoscaling Policy and OS
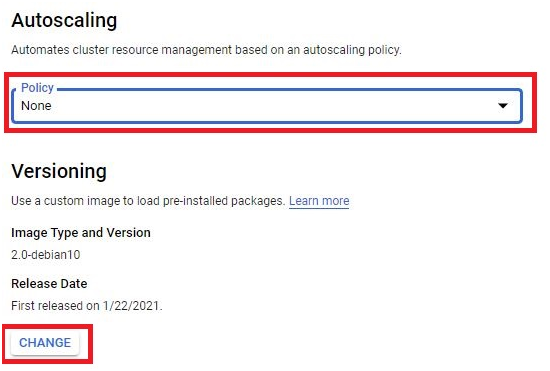
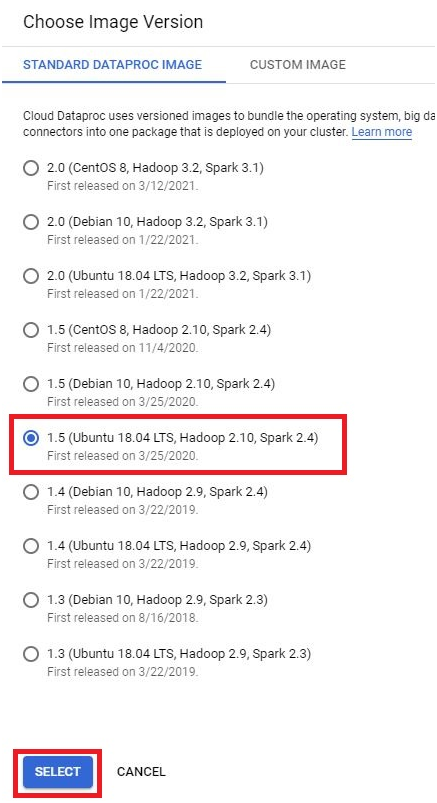
Select an autoscaling policy if you have one configured, otherwise leave it as None. Click Change if you want a different operating system.
Choose the OS you want, then click Select.
Step Six: Choose Components
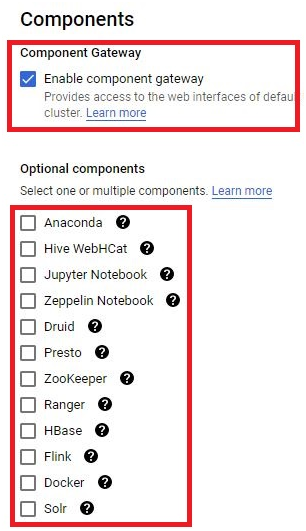
Tick Enable Component Gateway, and tick any optional components your jobs actually need, such as Jupyter or Zeppelin.
What Component Gateway Actually Unlocks?
Without it, reaching a tool like the Spark History Server, Jupyter, or the YARN resource manager UI running on your cluster means manually setting up an SSH tunnel first. Component Gateway removes that step entirely, giving you a direct, authenticated link to each enabled web interface right from the cluster’s page in the console. There is close to no reason to leave it off.
Step Seven: Open Node Configuration
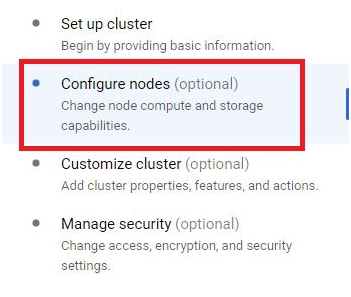
Click Configure Nodes.
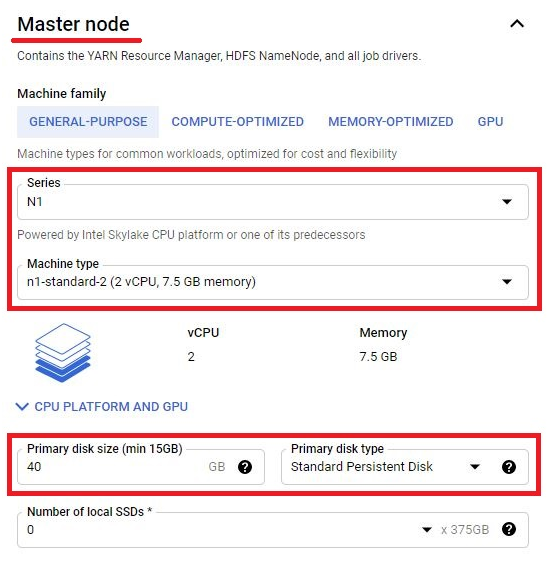
Step Eight: Configure the Master Node
Choose the machine specification, disk size, and disk type for the master node.
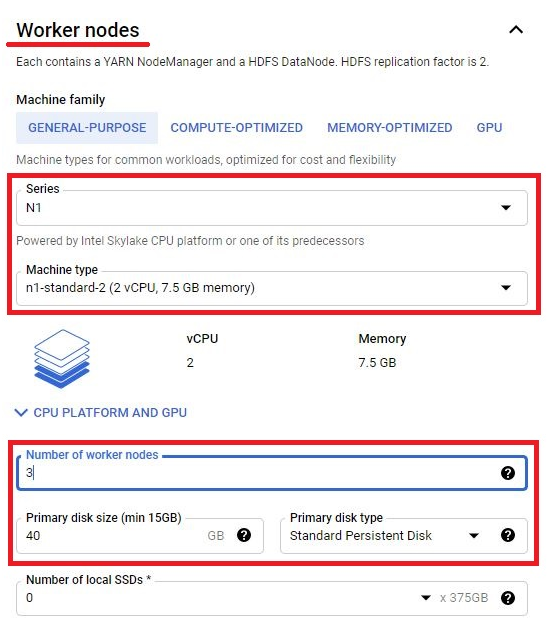
Step Nine: Configure Worker Nodes
Choose the machine specification, number of workers, and disk size and type.
Step Ten: Configure Secondary Worker Nodes
If you want secondary worker nodes, choose how many, their preemptibility, and their disk size and type.
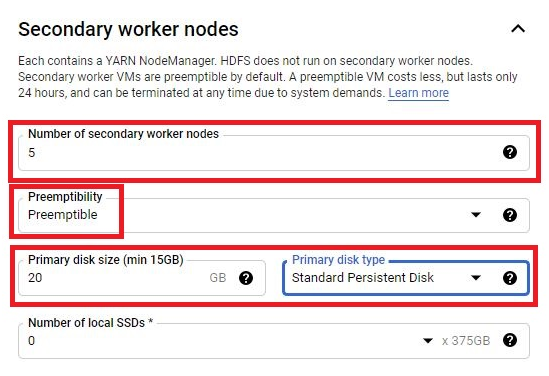
Preemptible and Spot Secondary Workers
Secondary workers add processing power without adding storage, and they come in three types. Standard preemptible is the default, a lower cost VM that Google can reclaim if it needs the capacity elsewhere, though it gets added back to your cluster once capacity frees up again. Spot is a newer variation on the same idea, also preemptible and similarly priced. Non-preemptible costs more but is never reclaimed. Since jobs running on preemptible workers see more transient task failures than jobs on stable workers, current guidance suggests keeping preemptible workers under half your total worker count, rather than relying on them for the majority of your cluster’s capacity.
Step Eleven: A Note for Free Tier Accounts
If you are using a free trial account, a multi node cluster will often fail to create due to resource quota limits on that tier. Choose Single Node in that case, covered above, instead of Standard or High Availability.
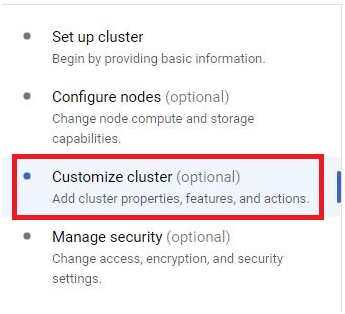
Step Twelve: Customize the Cluster
Select Customize Cluster to continue configuring the remaining options.
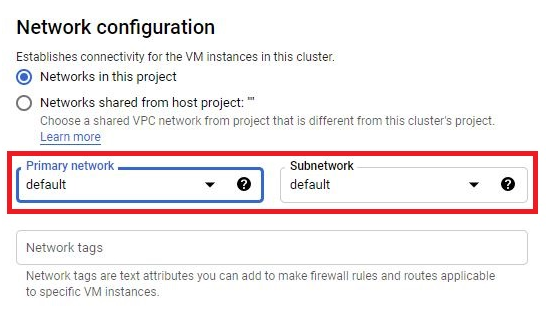
Step Thirteen: Choose a Network
Choose a network for the cluster. Use an existing VPC network if you have one, or leave it as default.
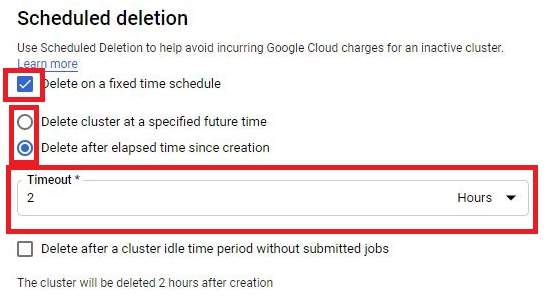
Step Fourteen: Set Scheduled Deletion
If you want the cluster to delete itself automatically after a period of inactivity or a fixed time, specify that timeout here.
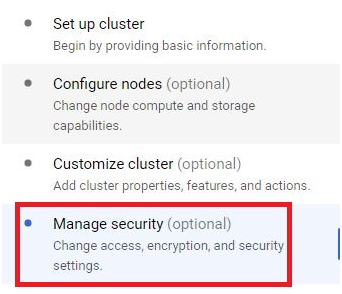
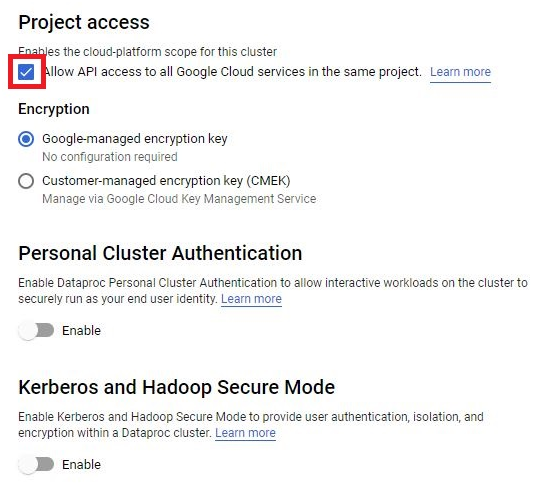
Step Fifteen: Manage Security
Open Manage Security.
Tick Allow API Access.
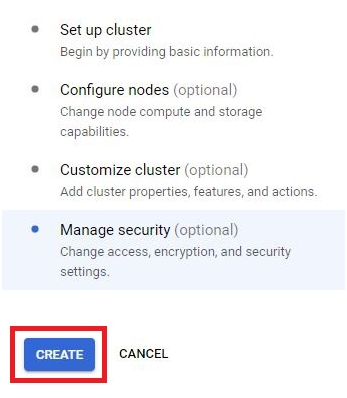
Step Sixteen: Create the Cluster
Click Create. This takes a few minutes.
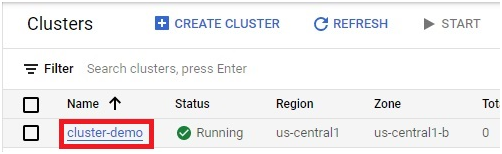
Step Seventeen: Open the Cluster
Once created, click the cluster to open it.
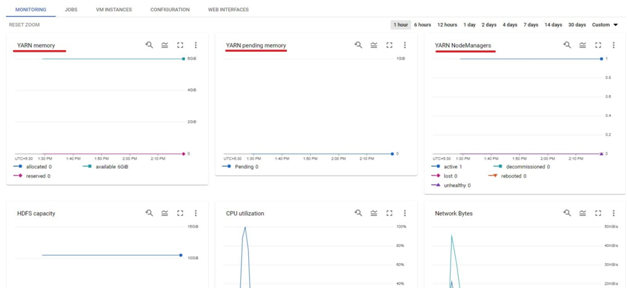
Step Eighteen: View YARN Monitoring
From here you can see the cluster’s YARN monitoring, useful for watching resource usage once jobs start running against it.
Where to Go From Here
With a cluster running, the rest of this series covers what to actually do with it:
- Working with Dataproc, which runs four Spark examples directly over SSH on the master node.
- Submitting a Spark Job Through the Dataproc Console, the same kind of job submitted through the console interface instead.
- Creating a Dataproc Metastore Service, for keeping table metadata alive independently of any one cluster.
Common Mistakes to Avoid
- Choosing Standard or High Availability on a free trial account and being confused when creation fails. Choose Single Node instead if you hit a quota limit.
- Leaving Component Gateway off, then setting up an SSH tunnel by hand to reach a web UI it would have given you directly.
- Relying heavily on preemptible or spot secondary workers for a job that cannot tolerate task failures. Keep them under half your total workers if job stability matters.
- Choosing High Availability for a quick test or learning exercise. It costs more than Standard for a benefit that only matters in production.
That covers creating a Dataproc cluster with every setting explained, ready for the rest of this series. To go further, explore Prwatech’s Google Cloud training program, which includes placement assistance.
