Cloud Composer and Airflow Integration
Prerequisites
GCP account
Open Console
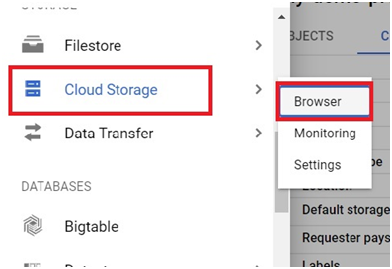
Open Menu > Cloud Storage > Browser
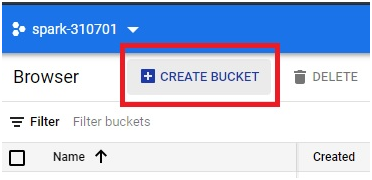
Click on Create Bucket
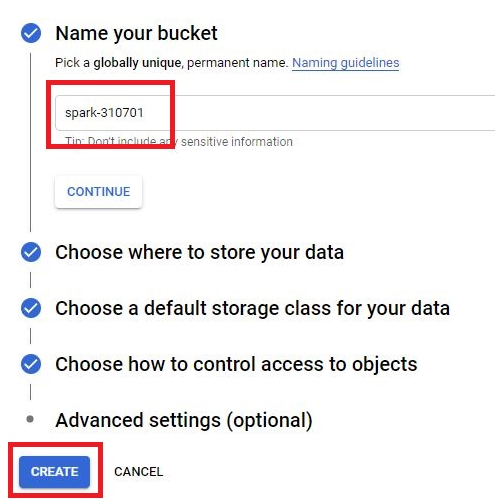
Create one bucket with same name as the project ID. Click create
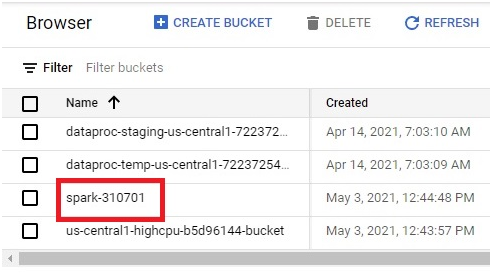
The bucket will be created.
In Composer, Click on Airflow
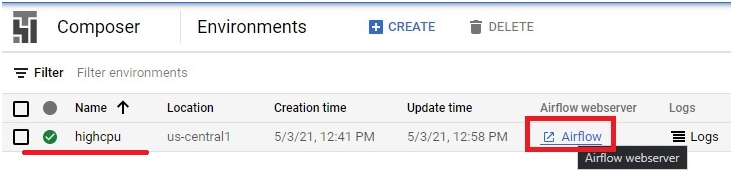
Choose the login

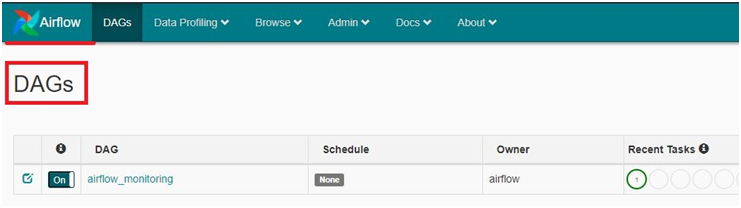
DAG Airflow will be opened.
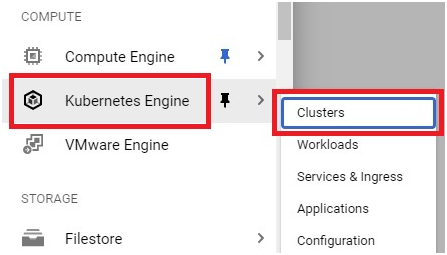
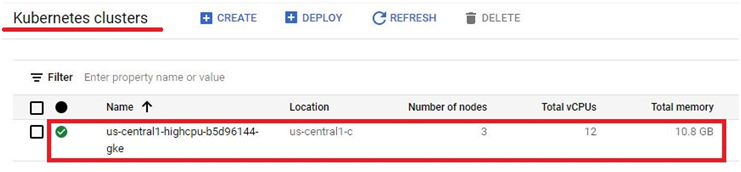
Go to Menu > Kubernetes Engine > Clusters
The cluster has been created.
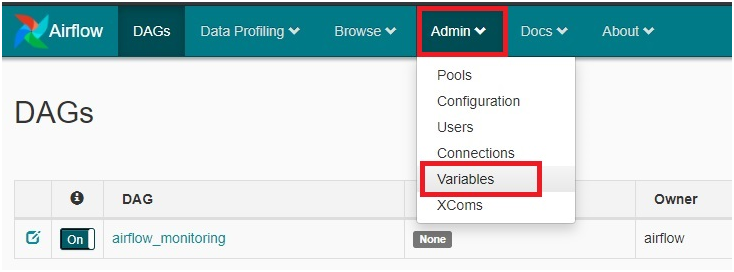
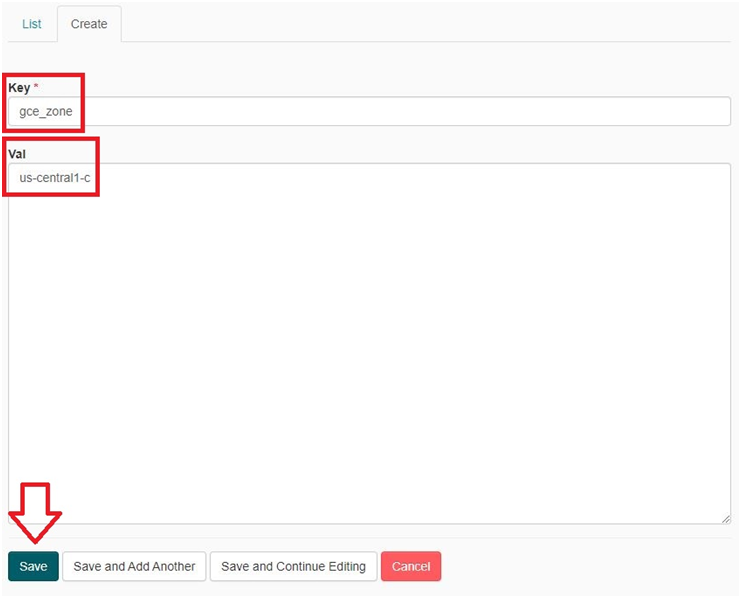
In Airflow, Go to Admin > Variables
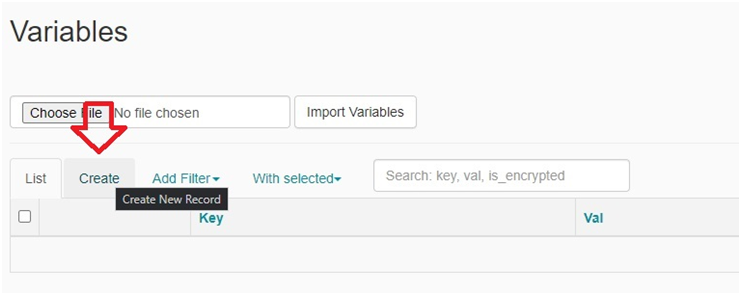
Click on Create.
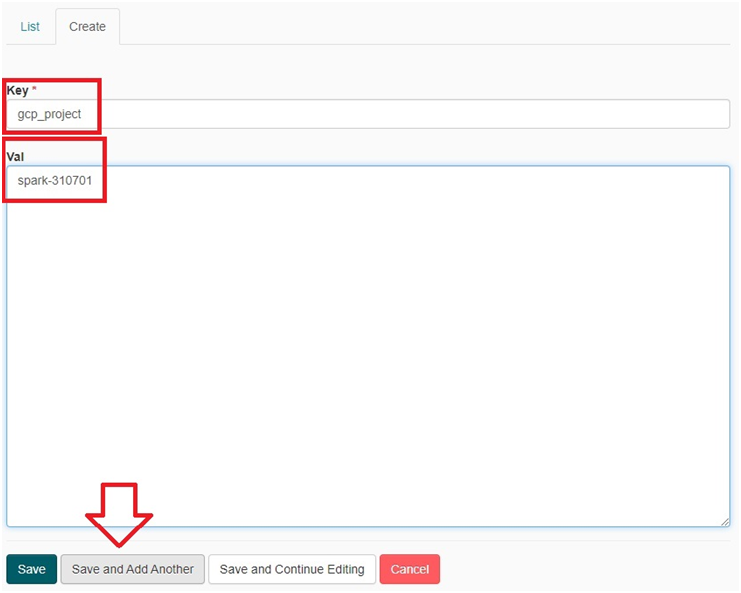
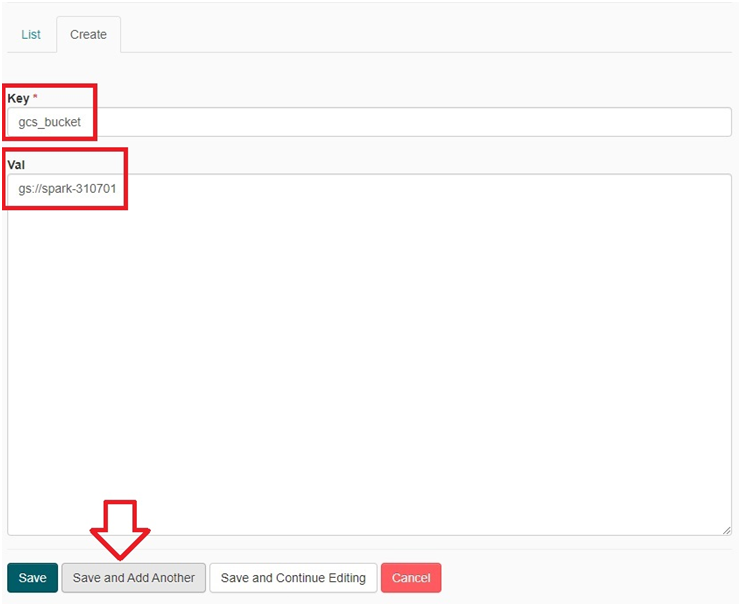
Key Val
gcp_project <project-ID>
gcs_bucket gs://<bucket-name>
gce_zone <zone of cluster>
Do these one by one in Key and Val. And press Save and Add Another
In last one Press save
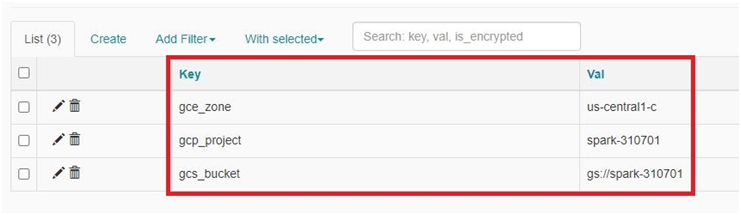
The key and Value will be added.
Open Composer.
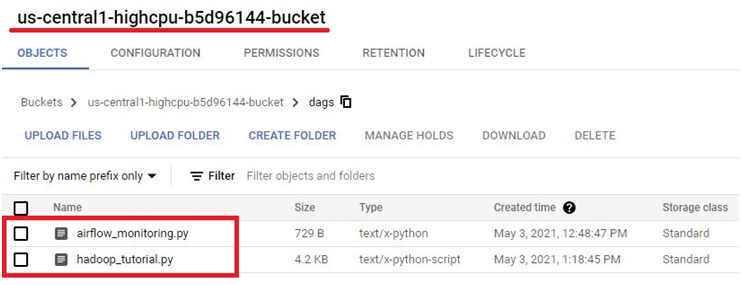
Click on DAGs Folder
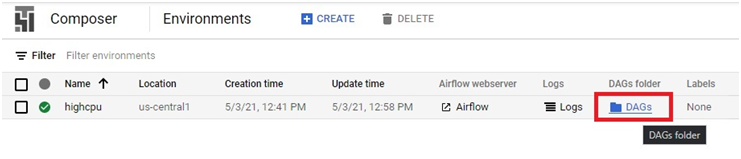
Copy the path.
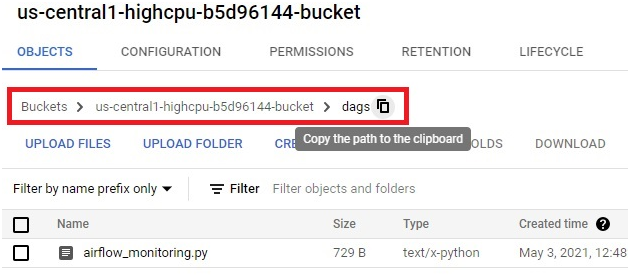
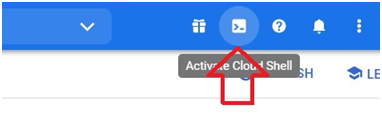
Click on Activate Cloud Shell
Paste the below code in shell. In DAG path paste the copied DAG path and press Enter
$ gsutil cp gs://cloud-training/datawarehousing/lab_assets/hadoop_tutorial.py gs://<paste the DAG path>
It will copy hadoop_tutorial.py into Cluster bucket

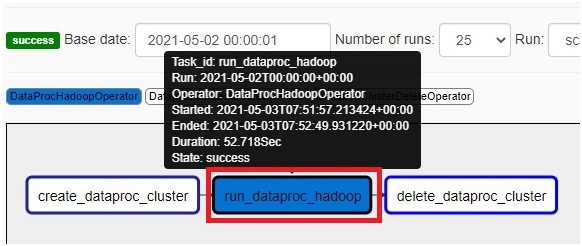
In Airflow, click on the DAG.


Hover the curser to each one. You can see the details.
Click any one of it.
Press View Log.
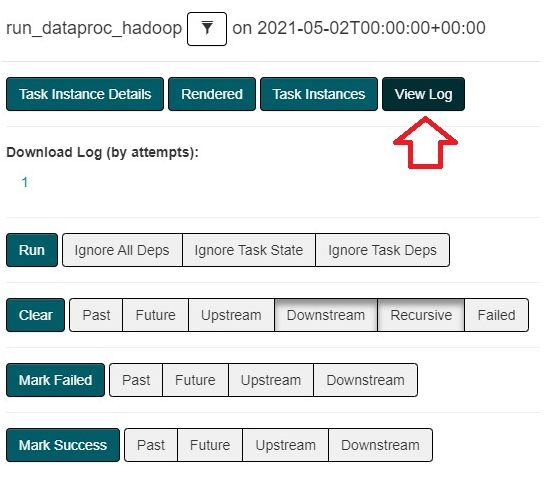
You can see the log for the Execution.

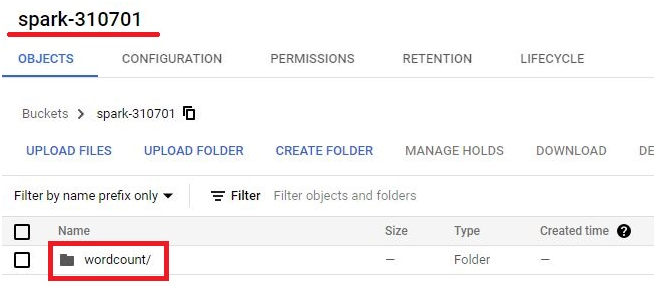
Go to Bucket. Open the Bucket which we created.

file saved.
If it is not Executed, Open the Airflow > composer_hadoop_tutorial.
Trigger DAG
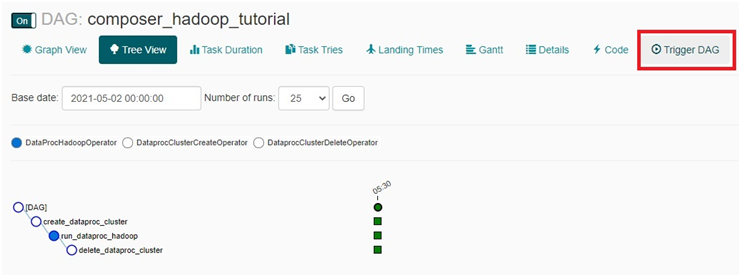
Trigger

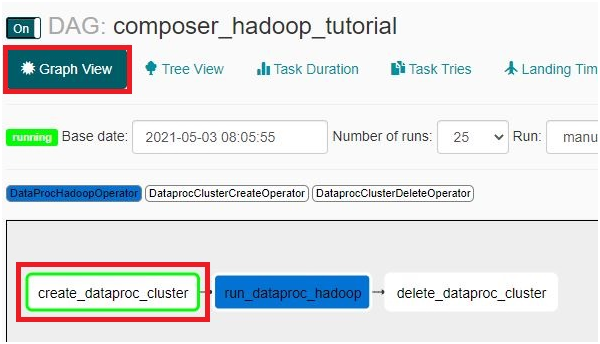
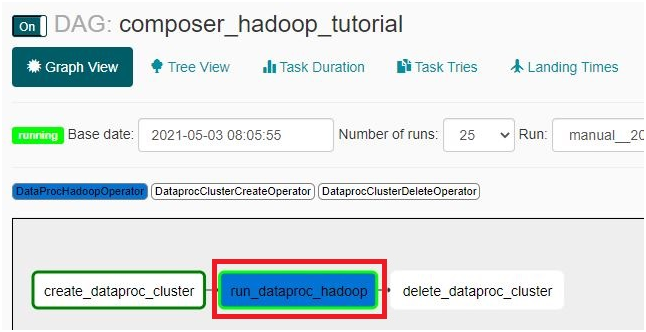
Graph view. Here you can see the execution.
The below colors shows the execution state.

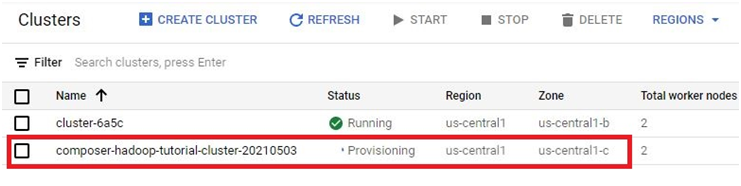
Its runnning create_dataproc_cluster.
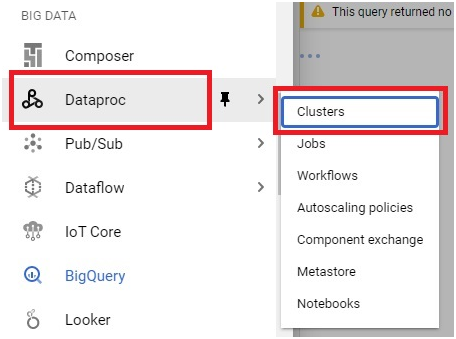
Open Menu > Dataproc > Clusters
cluster created.
Now the green border is on run_dataproc_hadoop. It is executing the content
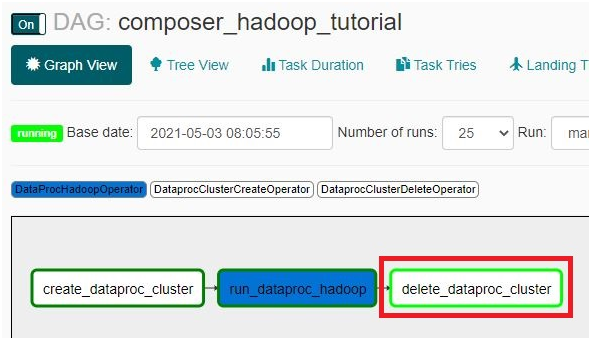
Then it changes to delete_dataproc_cluster. It will delete the cluster.
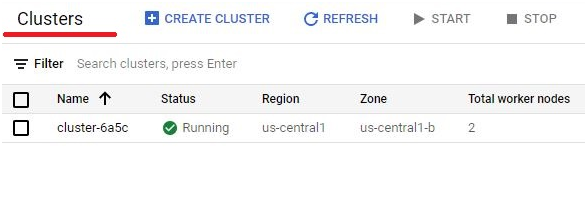
Check the cluster in dataproc. deleted.
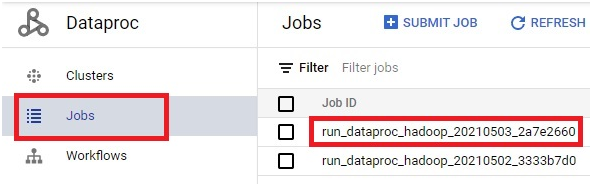
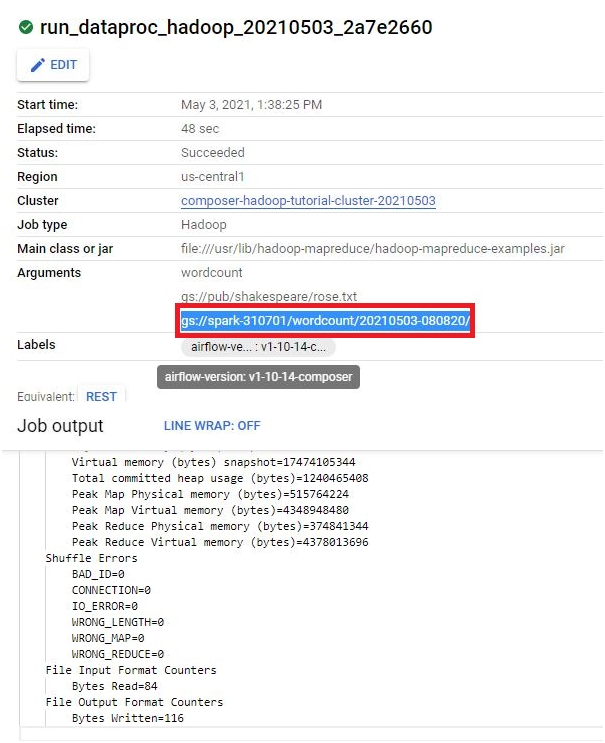
Open the Dataproc > jobs. Open the job.

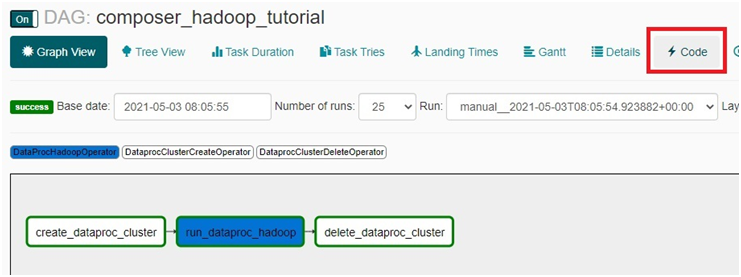
In Airflow click on Code.

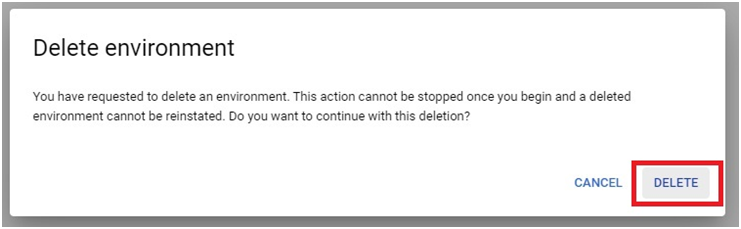
To delete the composer environment , Click on Delete.

Press Delete
Cloud Composer and Airflow Integration

