Cloud SQL Backup and Restore
Cloud SQL Backups, Scheduled Backups, and Restore
Cloud SQL gives you two distinct ways to back up an instance. An on demand backup is a single snapshot you trigger manually, whenever you want one. An automated backup runs on a recurring schedule you set once, without you needing to remember to trigger it again. Both protect against the same risks, accidental deletion, data corruption, or a bad update, but only one of them keeps protecting you after you stop thinking about it.
Prerequisites
- A Google Cloud Platform account
- An existing Cloud SQL instance
Step by Step Cloud SQL Backups Process
Step One: Open Your Instance
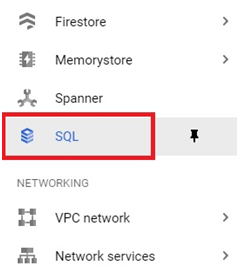
In the console, open the menu, then SQL.
Menu > SQL
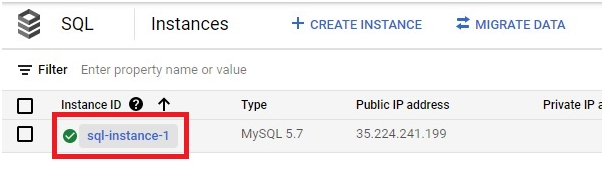
Select the instance you created.
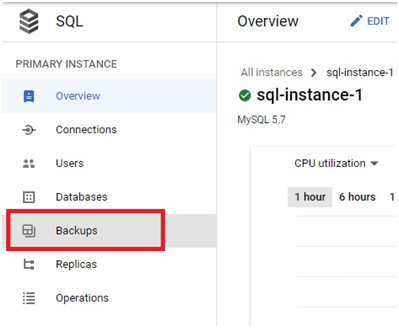
Click Backups.
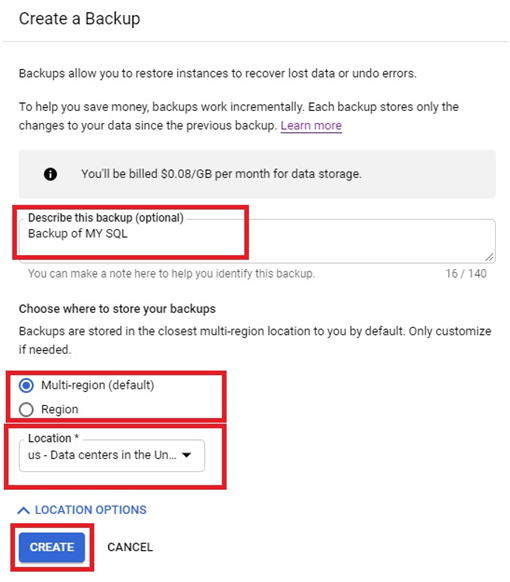
Click Create Backup.
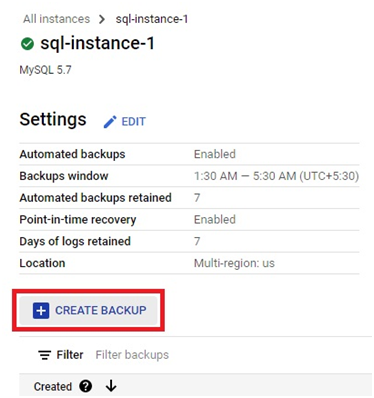
Add a description if you want one, choose the region and location, then click Create.
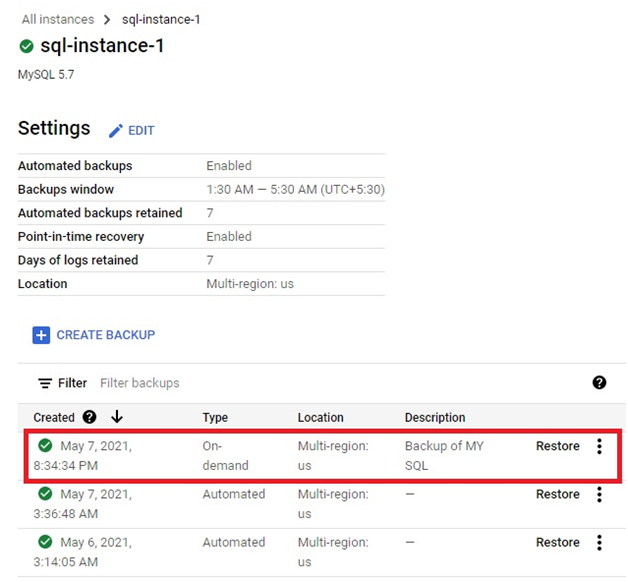
The backup is created and listed.
Setting Up Automated Backups
To stop relying on remembering to click Create Backup, turn on automated backups instead. Open your instance, click Edit, then expand the Data Protection section. Turn on Automated backups and choose a backup window, a time of day when your instance typically has the least activity, since Google’s own guidance recommends scheduling backups outside of peak load. Save your changes.
For a standard backup configuration, Cloud SQL takes a full backup daily during your chosen window, with later backups stored incrementally rather than as full copies each time. New instances created through the console typically have this turned on by default, so it is worth checking an existing instance’s settings if you are not sure whether it already has automated backups running.
Point in Time Recovery: Going Beyond a Single Backup
Automated backups protect you at whatever moments they actually ran. Point in time recovery, PITR, goes further, letting you recover your database to any specific second within a retention window, not just the moment of your last backup. This matters if something goes wrong between two scheduled backups, you are not stuck choosing between only the backup before the problem or losing everything after it.
PITR requires automated backups to already be enabled, plus transaction logging turned on for your database engine, binary logging for MySQL. You can enable it from the same Data Protection section, where you also set how many days of logs to retain, typically up to 7 days on standard editions and longer on higher tiers. Turning this on always creates a new instance from the recovered point in time, it does not modify your original instance.
Restoring a Backup Overwrites Your Current Data
This needs to be said plainly before the steps below. Restoring a backup into an existing instance permanently overwrites everything currently on that instance, including data created since the backup was taken, and this cannot be reversed. If there is any chance you need to check what is currently on the instance first, restore into a new, separate instance instead, so you can compare or recover anything you need before touching the original.
If your target instance has any read replicas, they need to be deleted before the restore runs, and recreated afterward, since a restore is not compatible with existing replicas.
Step Three: Restore a Backup
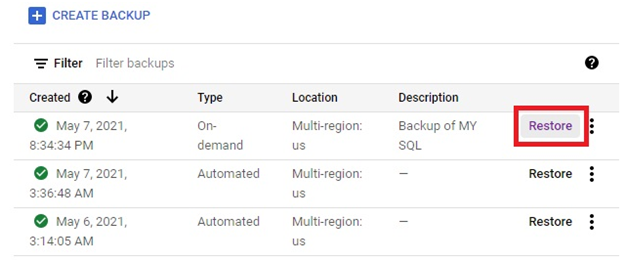
From the Backups list,
To restore the backup, Click on restore.
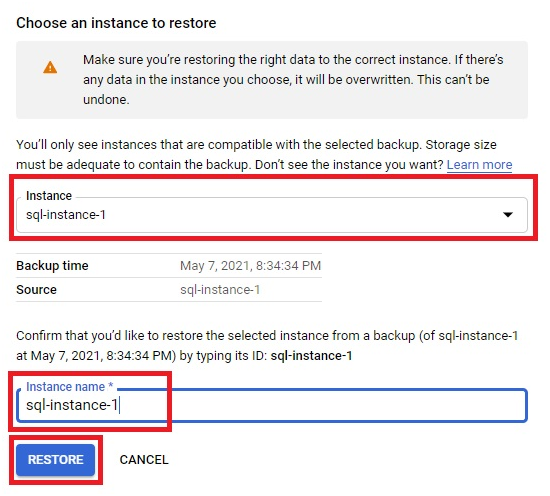
Choose the instance to restore into. You can create a new instance for this, which is the safer option if you want to verify the data first, or select an existing instance to overwrite it back to this backup’s state. Type the source instance name to confirm, then click Restore.
Common Mistakes to Avoid
- Relying only on on demand backups and forgetting to trigger one for weeks. Turn on automated backups so protection does not depend on remembering.
- Restoring directly into your production instance without first checking whether you actually need to preserve anything created since the backup. Once you click restore, that data is gone.
- Manually deleting old automated backups to save space. Google’s own guidance advises against this, since point in time recovery depends on those backups still being present.
- Forgetting that replicas block a restore into an existing instance. Delete them first, restore, then recreate them afterward.
That covers creating, scheduling, and restoring Cloud SQL backups, including the risk worth knowing before you restore one. To go further, explore Prwatech’s Google Cloud training program, which includes placement assistance.
