ETL Processing on Google Cloud Using Dataflow and Big Query
ETL Processing With Dataflow and BigQuery
Dataflow is Google Cloud’s managed service for running Apache Beam pipelines, code that reads data, transforms it, and writes it somewhere else, without you having to provision or manage the machines that actually do the work. You submit a pipeline, Dataflow spins up however many workers it needs, runs it, and shuts them down again once it finishes.
Pairing it with BigQuery is a common ETL pattern for a specific reason. BigQuery is excellent at querying data once it is already clean and structured, but not every transformation is easy to express as SQL, and raw source data is often messy before it gets anywhere near a table. Dataflow handles that in between step in Python, reshaping and enriching the data, then lands the result directly in BigQuery, ready to query.
This builds that pattern in three concrete stages, ingesting a raw CSV file, transforming it, then enriching it further, with each stage’s output landing in BigQuery before the next one runs.
Step by Step Process of ETL on Google Cloud With Dataflow and BigQuery
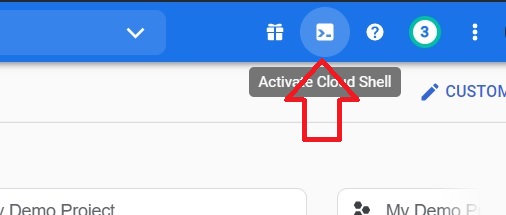
Step One: Activate Cloud Shell
Open the console and click Activate Cloud Shell.
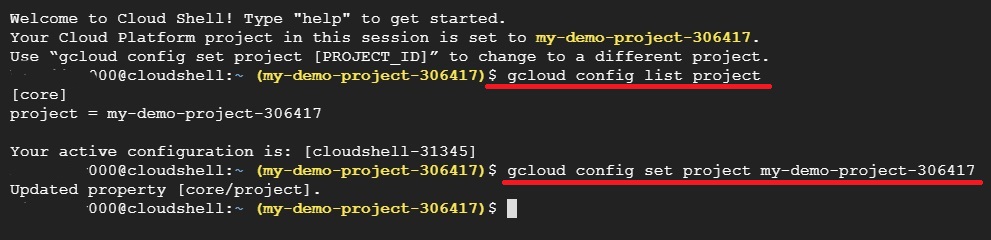
Step Two: Confirm and Set Your Project
gcloud config list project
gcloud config set project my-demo-project-306417
The first command lists your current project. The second sets the active project, replacing the example ID with your own.
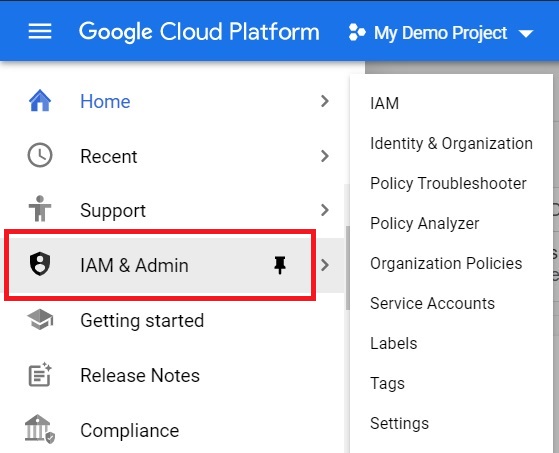
Step Three: Confirm the Compute Service Account
Open the menu, then IAM and Admin.
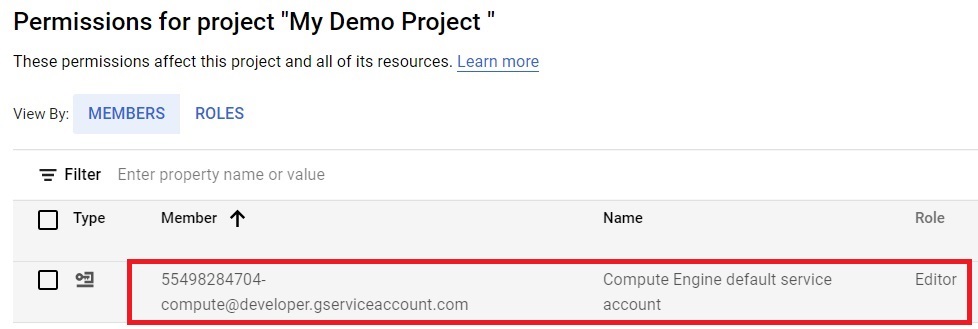
Confirm that the default compute Service Account is present and has the editor role assigned.
{project-number}-compute@developer.gserviceaccount.com
Step Four: Find Your Project Number
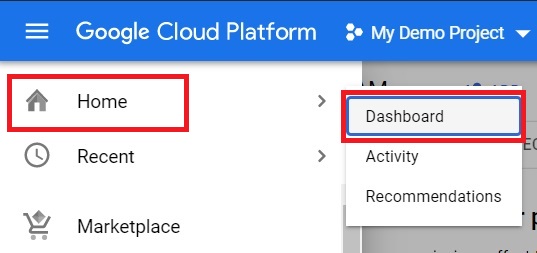
To check the project number, Go to Menu > Home > Dashboard
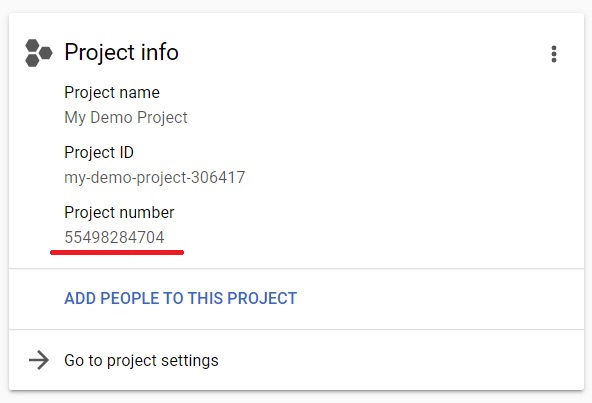
The project number is shown under Project Info.
Step Five: Copy the Sample Pipeline Code
gsutil -m cp -R gs://spls/gsp290/dataflow-python-examples .
This copies the sample Dataflow Python code from Google Cloud’s own training bucket into your Cloud Shell home directory.

Step Six: Set Your Project as an Environment Variable
export PROJECT=YOUR-PROJECT-ID
gcloud config set project $PROJECT
Replace YOUR-PROJECT-ID with your actual project ID. Do not change PROJECT itself once it is set, later commands rely on that exact variable name.

Step Seven: Create a Bucket
gsutil mb -c regional -l us-central1 gs://$PROJECT #To create new Bucket

Step Eight: Copy Sample Data Into the Bucket
gsutil cp gs://spls/gsp290/data_files/usa_names.csv gs://$PROJECT/data_files/

Step Nine: Create a BigQuery Dataset
bq mk lake
This creates a dataset named lake, which the pipeline will load results into.

Step Ten: Set Up a Python Virtual Environment
cd dataflow-python-examples/
python3 -m venv venv
source venv/bin/activate
pip install “apache-beam[gcp]”
Current Cloud Shell images include Python’s own venv module, so a plain python3 -m venv works without needing to separately install virtualenv or use sudo with pip, which current guidance advises against. Installing apache-beam without a version pin gets you the current supported release, rather than a six year old one that Google’s own documentation no longer recommends.
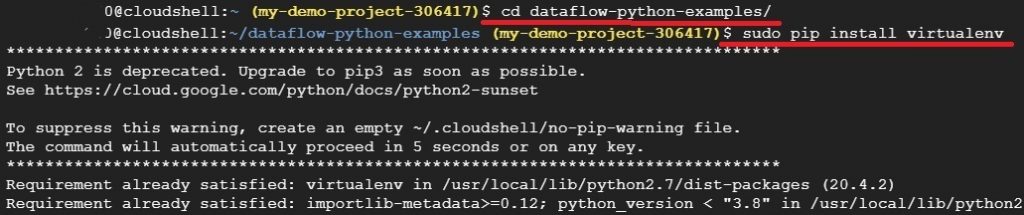
virtualenv -p python3 venv #Creating Virtual Environement

source venv/bin/activate #Activating Virtual Environment
pip install apache-beam[gcp]==2.24.0 #Installing Apache-beam

Step Eleven: Open the Cloud Shell Editor
In the Cloud Shell window, click Open Editor.

Step Twelve: Review the Sample Code
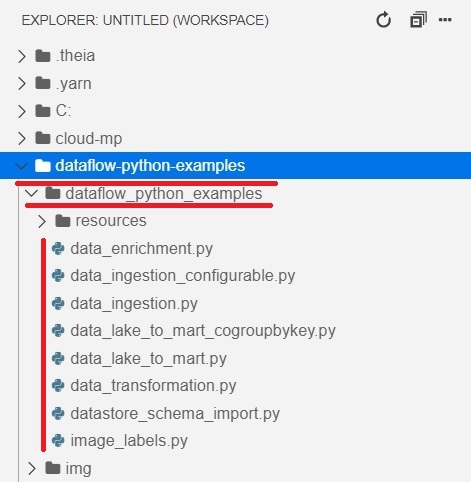
The dataflow-python-examples folder appears in the workspace. Take a moment to look through the Python files inside dataflow_python_examples before running anything.
Step Thirteen: Run the Data Ingestion Pipeline
python dataflow_python_examples/data_ingestion.py \
–project=$PROJECT \
–region=us-central1 \
–runner=DataflowRunner \
–staging_location=gs://$PROJECT/test \
–temp_location=gs://$PROJECT/test \
–input=gs://$PROJECT/data_files/usa_names.csv \
–save_main_session
This runs a pipeline that provisions its own workers, does the work, then shuts the workers down when finished. It takes a few minutes.

Step Fourteen: Check the Job Status
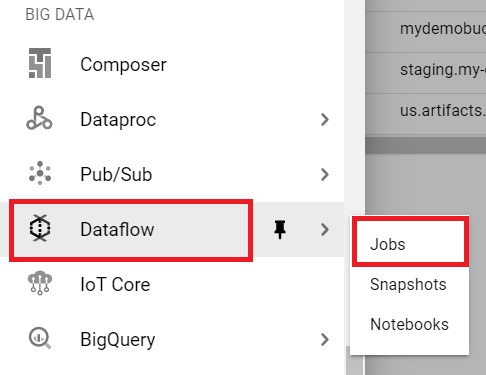
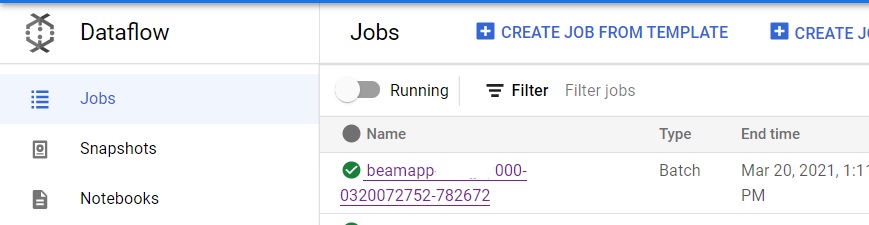
Open the console and click Menu > Dataflow > Jobs
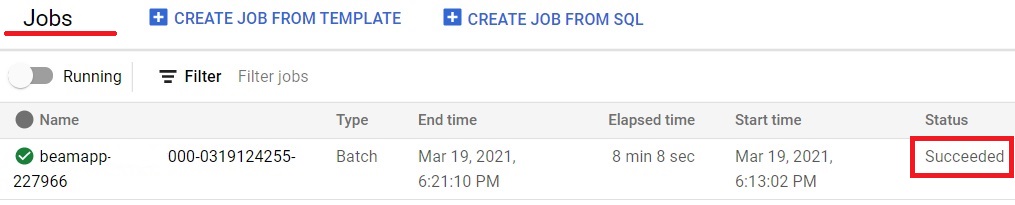
The job shows Running until it finishes, then Succeeded.
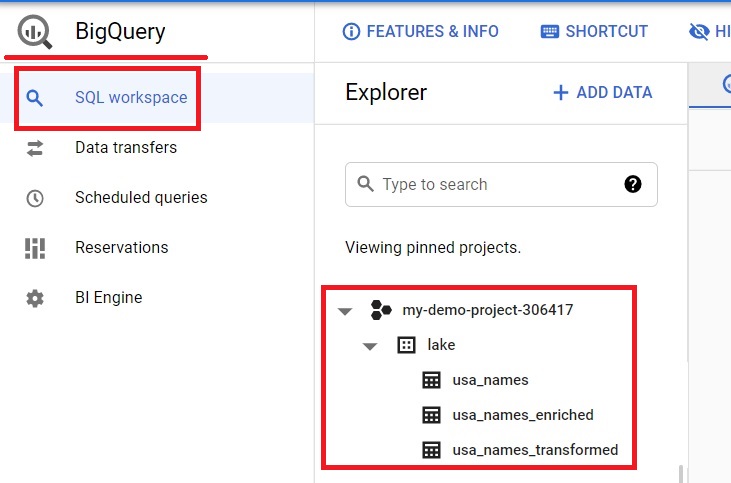
Step Fifteen: Confirm the Table in BigQuery
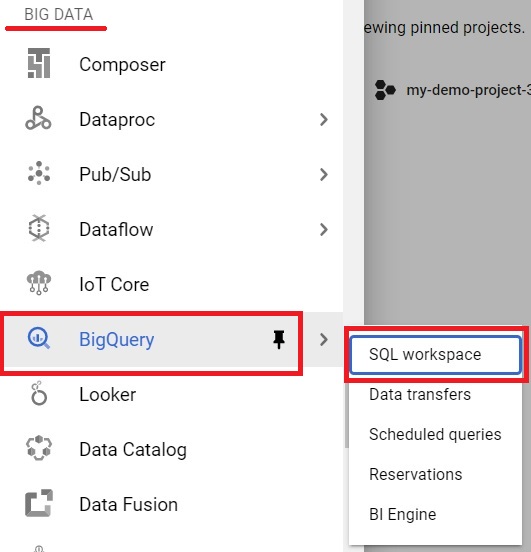
Big Query > SQL Workspace
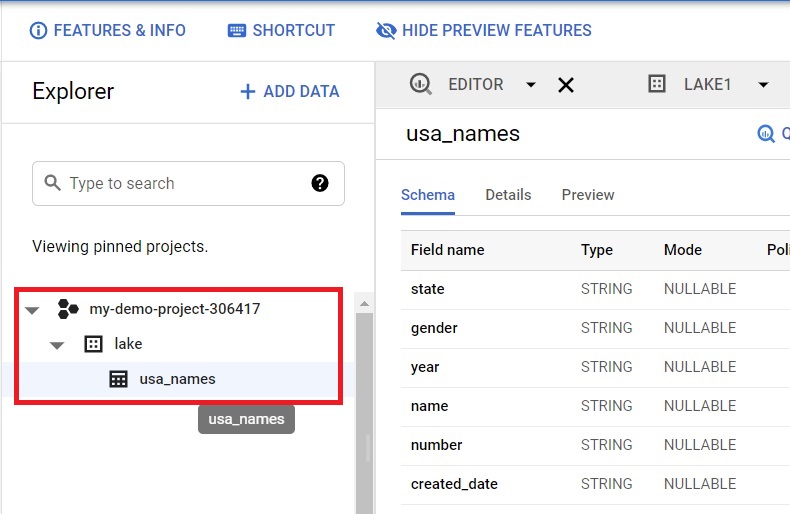
The usa_names table now appears under the lake dataset.
Step Sixteen: Run the Data Transformation Pipeline
python dataflow_python_examples/data_transformation.py \
–project=$PROJECT \
–region=us-central1 \
–runner=DataflowRunner \
–staging_location=gs://$PROJECT/test \
–temp_location=gs://$PROJECT/test \
–input=gs://$PROJECT/data_files/head_usa_names.csv \
–save_main_session
Same pattern as before, this pipeline provisions workers, transforms the data, and shuts down when done.

Step Seventeen: Edit the Data Enrichment Script
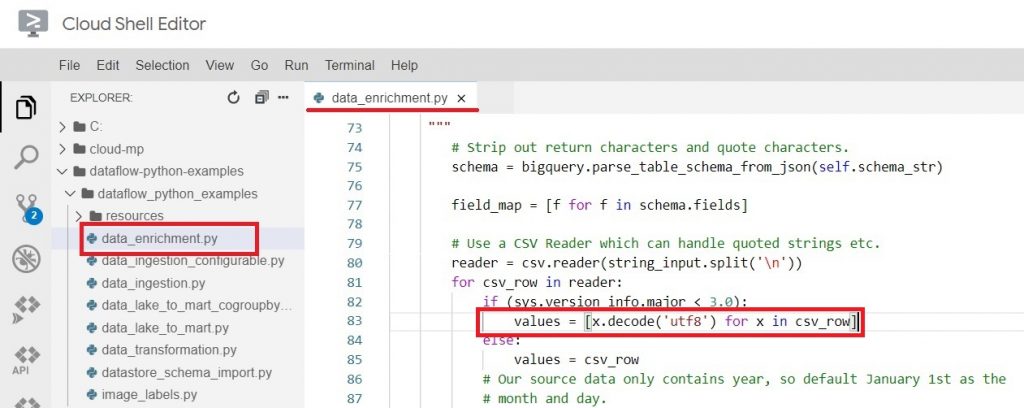
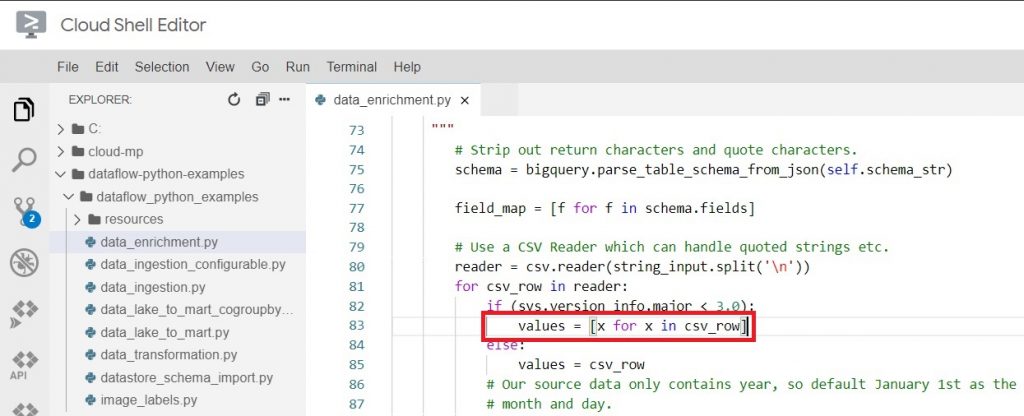
In the Cloud Shell editor, open dataflow-python-examples, then dataflow_python_examples, then data_enrichment.py. Find this line, around line 83:
values = [x.decode(‘utf8’) for x in csv_row]
Replace it with:
values = [x for x in csv_row]
This removes an old Python 2 style decode call that is not needed under Python 3, and lets the pipeline actually populate BigQuery. If you open this file and the line already looks like the replacement, the sample repository has already been updated upstream, and you can skip this step.
Step Eighteen: Run the Data Enrichment Pipeline
python dataflow_python_examples/data_enrichment.py \
–project=$PROJECT \
–region=us-central1 \
–runner=DataflowRunner \
–staging_location=gs://$PROJECT/test \
–temp_location=gs://$PROJECT/test \
–input=gs://$PROJECT/data_files/head_usa_names.csv \
–save_main_session

Step Nineteen: Confirm the Final Result
Open Menu > Big Query > SQL Workspace
It will show the populated dataset in lake.
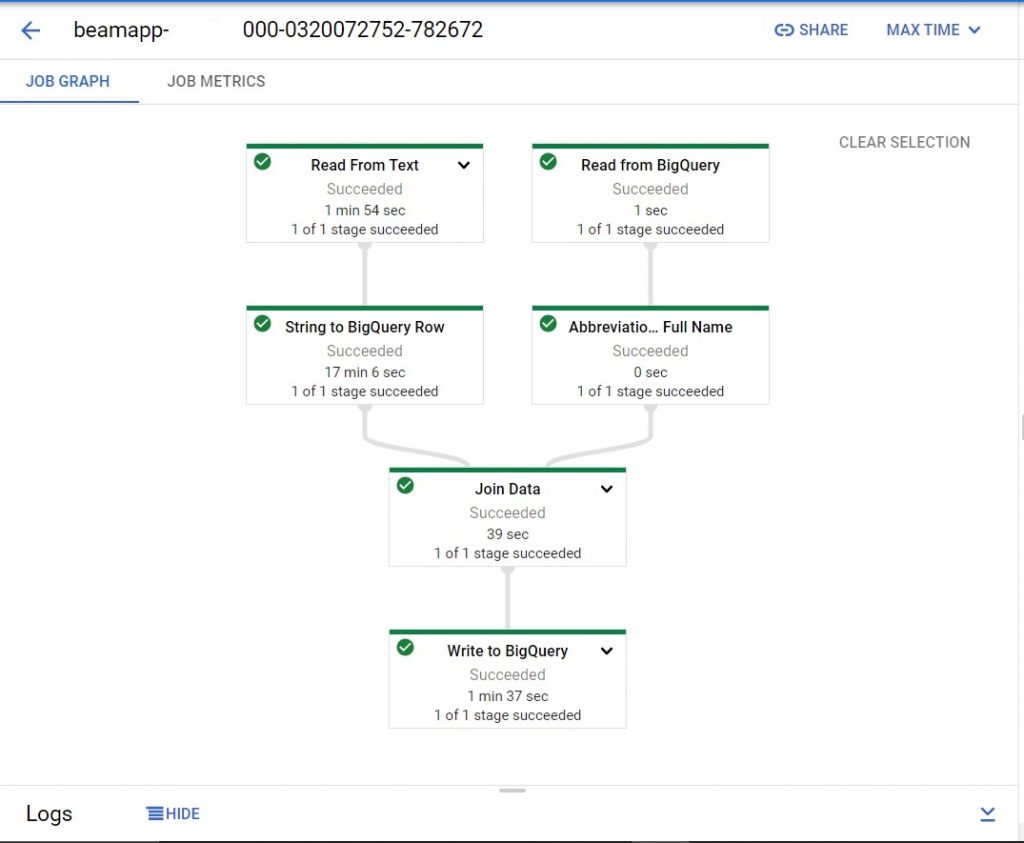
Step Twenty: Review the Pipeline Graph
Dataflow > Jobs.
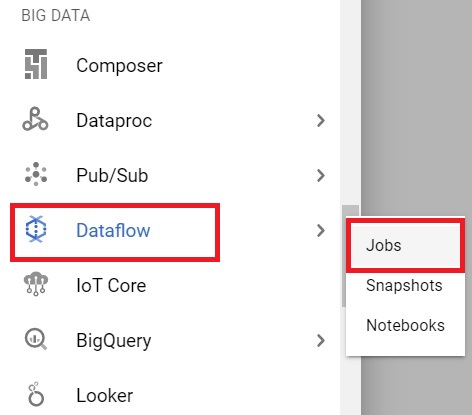
Click on the job which you have done.
It will show the Data Flow pipeline of the work.
Common Mistakes to Avoid
- Copying commands with en dashes instead of real double hyphens. Retype every flag if a Dataflow command fails immediately with an unrecognized argument error.
- Pinning apache-beam to an old specific version out of habit. Install without a version pin unless you have a specific, current reason to fix one, so you get a version Google actually still supports.
- Forgetting to reactivate the virtual environment in a new Cloud Shell session. Cloud Shell does not keep it active between sessions, so run source venv/bin/activate again each time you come back to this.
- Changing the PROJECT environment variable name in later commands. Every command after Step Six depends on that exact variable name to find your project, bucket, and files.
That covers building a three stage ETL pipeline with Dataflow and loading the result into BigQuery. To go further, explore Prwatech’s Google Cloud training program, which includes placement assistance.
