Load data in BigQuery table from Cloud Shell with bq load command
Loading data into a BigQuery table from Cloud Shell is a straightforward process that leverages the bq command-line tool provided by Google Cloud SDK. Follow these steps to load data into a BigQuery table:
-
Prepare your data: Ensure your data is stored in a supported file format such as CSV, JSON, Avro, or Parquet. If your data is not already in one of these formats, you may need to convert it beforehand.
-
Navigate to Cloud Shell: Open Google Cloud Shell from the Google Cloud Console. Cloud Shell provides a command-line interface with the Google Cloud SDK pre-installed, allowing you to interact with Google Cloud services directly from your browser.
Prerequisites
GCP account
Open Console.
Open the cloud shell.
Create a dataset
In Cloud Shell, use the bq mk command to create a dataset called “bq_load_codelab.”
$ bq mk mydataset_1

View dataset properties
Verify that you created the dataset by viewing the dataset’s properties with the bq show command.
$ bq show mydataset_1

Create a CSV file
In Cloud Shell, create an empty CSV file.
$ touch customer_transactions.csv
Open the CSV file in code editor in Cloud Shell which will open a new browser window with a code editor and Cloud Shell panel.
$ nano customer_transactions.csv

Paste the below code into customer_transactions.csv
ID,Zipcode,Timestamp,Amount,Feedback,SKU
c123,78757,2018-02-14 17:01:39Z,1.20,4.7,he4rt5
c456,10012,2018-03-14 15:09:26Z,53.60,3.1,ppiieee
c123,78741,2018-04-01 05:59:47Z,5.98,2.0,ch0c0
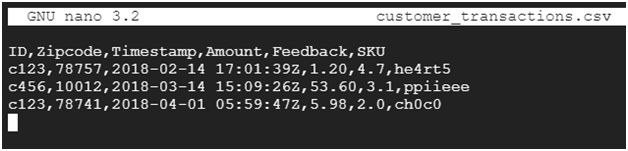
To exit from editor press ctrl + x then press y following enter.
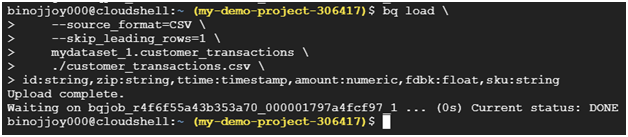
Use the bq load command to load your CSV file into a BigQuery table.
bq load \
–source_format=CSV \
–skip_leading_rows=1 \
mydataset_1.customer_transactions \
./customer_transactions.csv \
id:string,zip:string,ttime:timestamp,amount:numeric,fdbk:float,sku:string
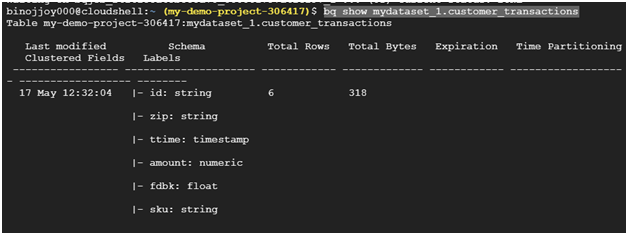
Get the table details
Verify that the table loaded by showing the table properties.
bq show mydataset_1.customer_transactions
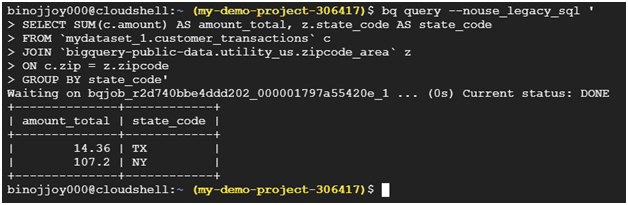
Query the data
bq query –nouse_legacy_sql ‘
SELECT SUM(c.amount) AS amount_total, z.state_code AS state_code
FROM `mydataset_1.customer_transactions` c
JOIN `bigquery-public-data.utility_us.zipcode_area` z
ON c.zip = z.zipcode
GROUP BY state_code’
Clean up
bq rm -r mydataset_1


