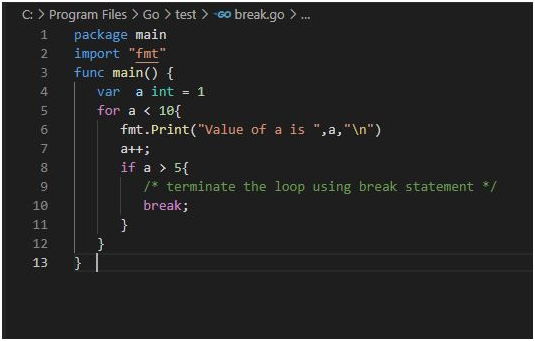
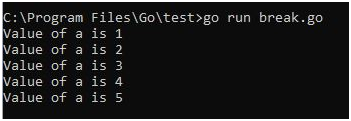
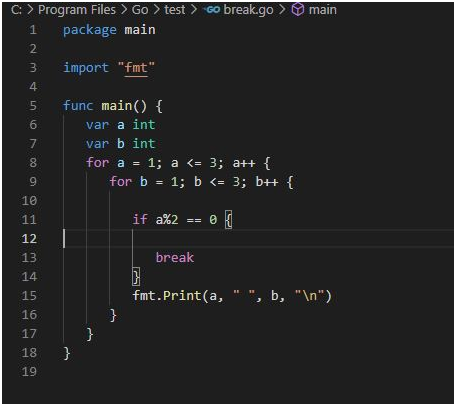
Breaking out of nested loops in Go involves using control flow mechanisms to exit from multiple nested loop levels prematurely based on certain conditions. Go does not have built-in support for labeled break statements like some other languages, but there are alternative approaches to achieve this.
One common technique is to use a boolean flag variable that controls the outer loop execution based on an inner loop condition. By setting the flag when the desired condition is met in the inner loop, the outer loop can check this flag and break out accordingly.
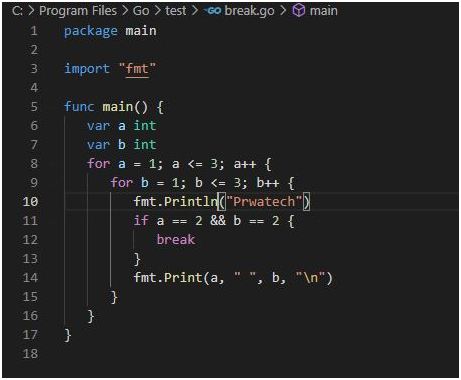
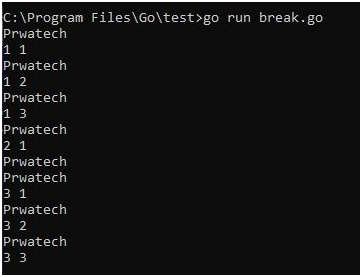
Another approach involves restructuring the nested loops into separate functions and using return statements to exit from the entire loop structure based on specific conditions.
A Map is a type of data structure, it is a collection of unorder pairs of key-value. With the help of map we can easily do retrieve, update and insert operations.
Syntax:
var mymap map[keytype]valuetype
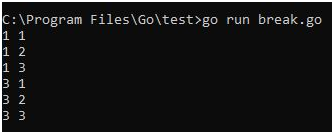
Use Case 1:
package main
import “fmt”
func main() {
var mymap map[int]int
if mymap == nil {
fmt.Println(“true”)
} else {
fmt.Println(“False”)
}
}
Output:
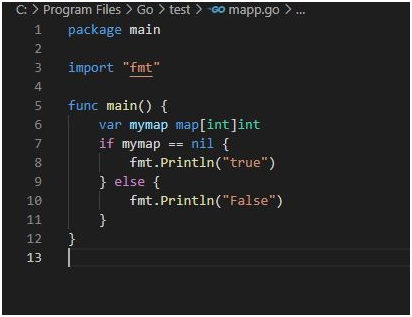
Use Case 2:
package main
import “fmt”
func main() {
var mymap map[int]int
if mymap == nil {
fmt.Println(“true”)
} else {
fmt.Println(“False”)
}
map2 := map[int]string{
10: “Prwatech”,11: “Bangalore”,
}
fmt.Println(“Map 2 value”, map2)
}
Output:
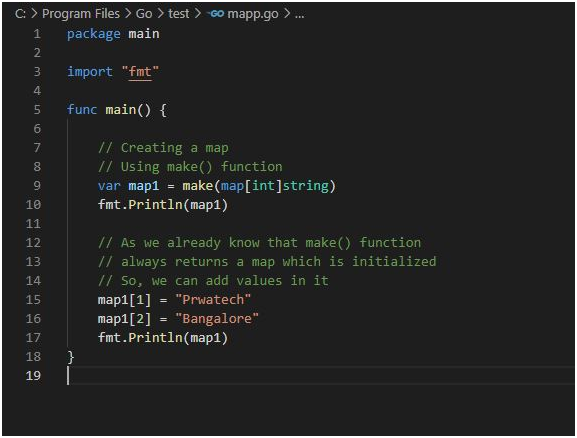
Use Case 3: Create a map using make() function.
package main
import “fmt”
func main() {
// Creating a map
// Using make() function
var map1 = make(map[int]string)
fmt.Println(map1)
// As we already know that make() function
/ always returns a map which is initialized
// So, we can add values in it
map1[1] = “Prwatech”
map1[2] = “Bangalore”
fmt.Println(map1)
}
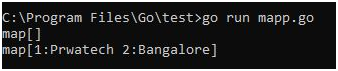
Output:
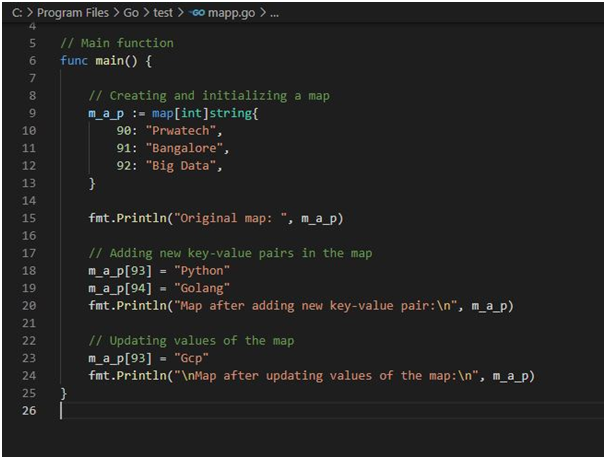
Use Case 4: Adding new key elements and update operation:
package main
import “fmt”
// Main function
func main() {
// Creating and initializing a map
m_a_p := map[int]string{
90: “Prwatech”,
91: “Bangalore”,
92: “Big Data”,
}
fmt.Println(“Original map: “, m_a_p)
// Adding new key-value pairs in the map
m_a_p[93] = “Python”
m_a_p[94] = “Golang”
fmt.Println(“Map after adding new key-value pair:\n”, m_a_p)
// Updating values of the map
m_a_p[93] = “Gcp”
fmt.Println(“\nMap after updating values of the map:\n”, m_a_p)
}
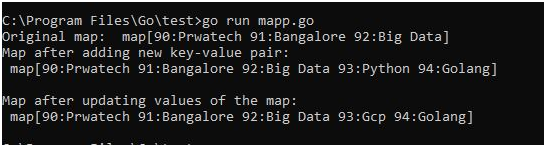
Output:
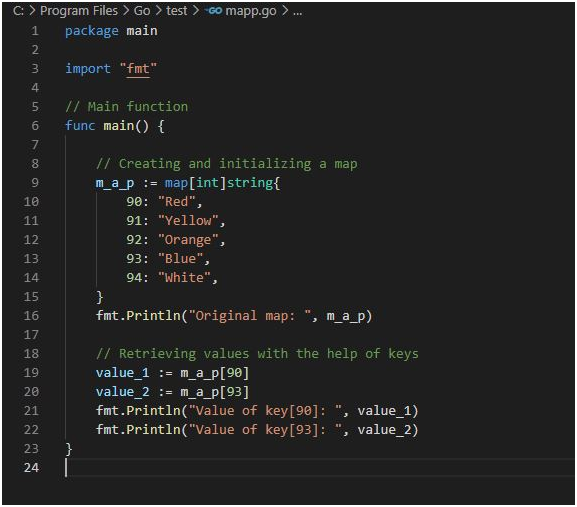
Use Case 5:Retrieving values with the help of keys:
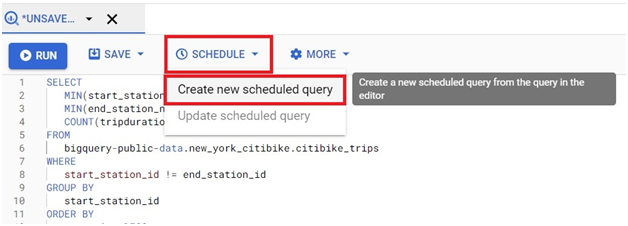
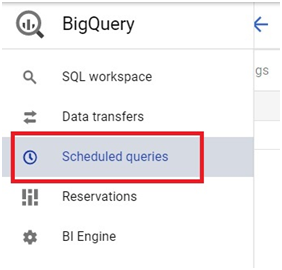
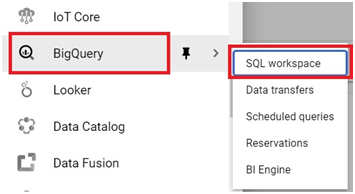
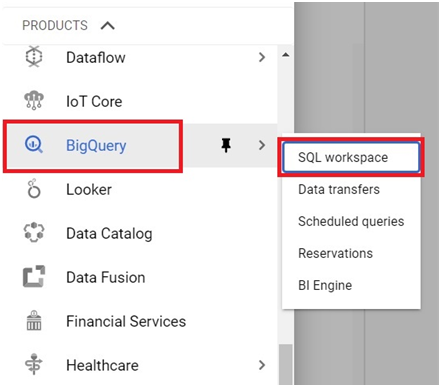
Scheduled queries in BigQuery represent a valuable feature for automating and optimizing recurring data processing tasks within Google’s cloud-based data warehouse platform. This introduction will delve into the fundamentals of creating scheduled queries in BigQuery, empowering users to leverage automation for seamless execution of data transformations, reports generation, and other periodic operations.
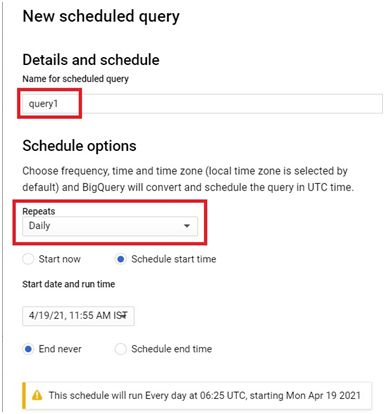
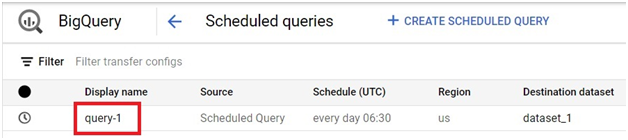
Scheduled queries enable users to define SQL queries or Data Definition Language (DDL) statements and schedule them to run at predefined intervals, ranging from minutes to months. This automation eliminates the need for manual intervention, ensuring timely execution of critical data tasks without the hassle of manual execution.
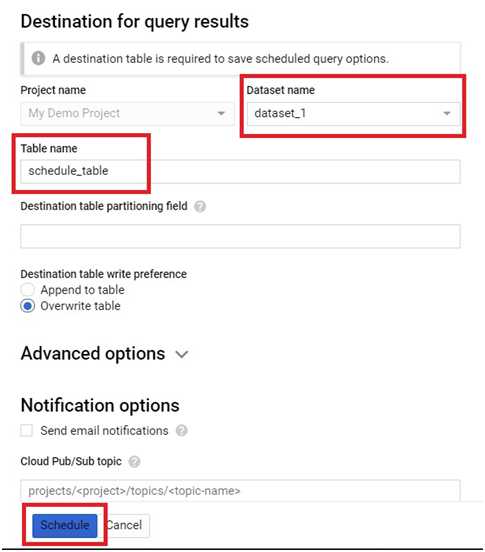
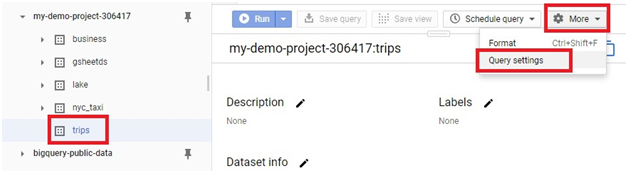
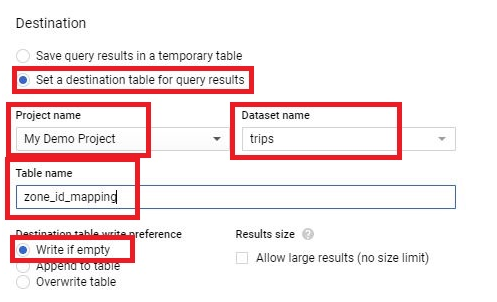
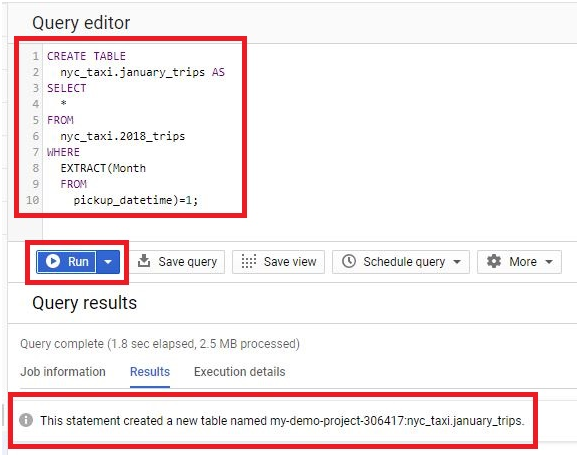
The process of creating a scheduled query involves specifying the SQL code to be executed, setting the desired execution schedule, and configuring optional parameters such as destination table for query results, notification preferences, and error handling mechanisms. This streamlined workflow enables users to define complex data processing pipelines with ease, streamlining operations and reducing overhead.
Scheduled queries in BigQuery offer several benefits, including improved operational efficiency, enhanced data timeliness, and simplified management of recurring tasks. Whether it’s generating daily reports, updating aggregations, or performing data validations, scheduled queries provide a robust mechanism for automating repetitive data workflows, freeing up valuable time and resources for more strategic endeavors. Join us as we explore the capabilities of scheduled queries in BigQuery and unlock new possibilities for automated data processing.
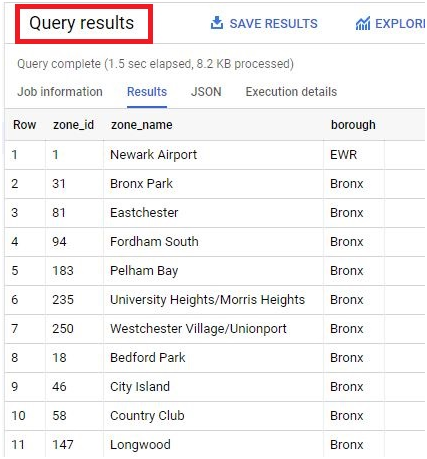
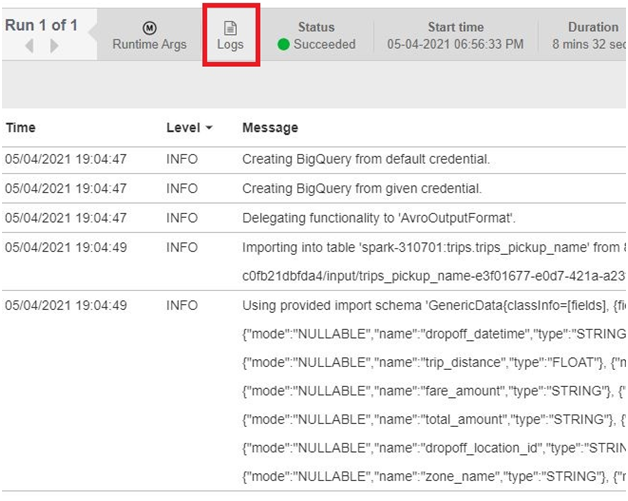
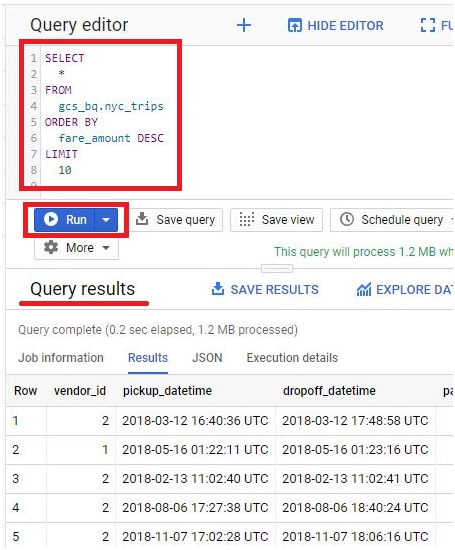
Accessing detailed error messages in BigQuery is essential for diagnosing and resolving issues encountered during query execution. This introduction elucidates the importance and methods of viewing detailed error messages in BigQuery, empowering users to troubleshoot effectively and optimize query performance.
BigQuery provides comprehensive error messages that offer insights into the root causes of query failures, syntax errors, and data processing issues. These messages often include specific error codes, contextual information, and suggested resolutions, facilitating efficient troubleshooting and resolution of query-related issues.
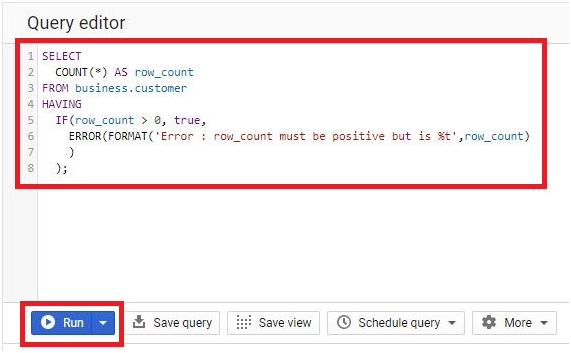
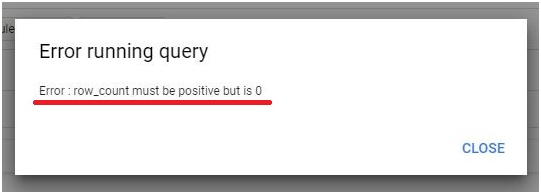
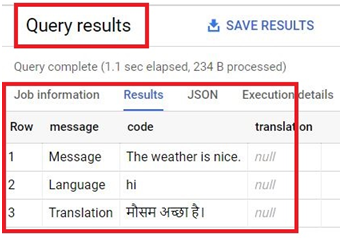
Users can access detailed error messages in several ways within the BigQuery interface. When a query encounters an error, BigQuery displays an error message directly in the query editor, highlighting the problematic section of the query and providing relevant details to aid in diagnosis. Additionally, users can review error messages in the query history or job logs, accessing a detailed record of query executions and associated errors.
You may face various error codes and error messages when working with BigQuery, including HTTP error codes, job errors, and Google Cloud Console error messages. You can give your own error messages.
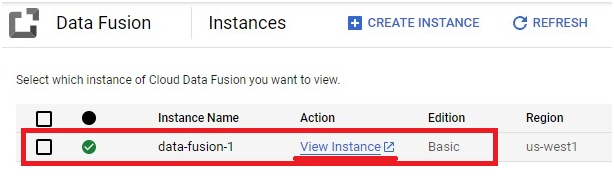
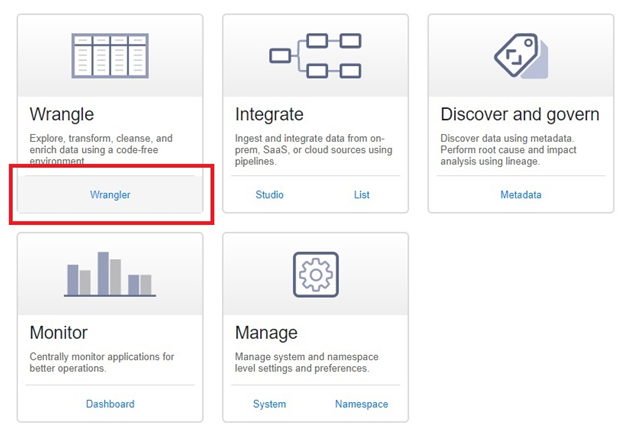
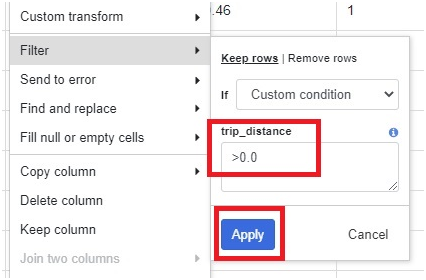
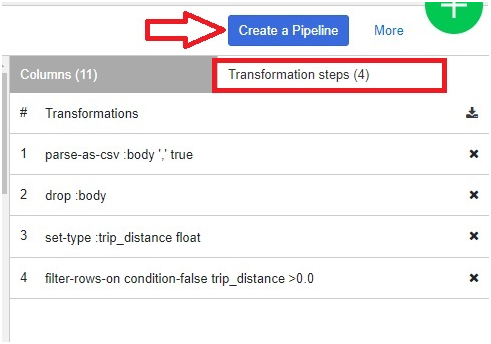
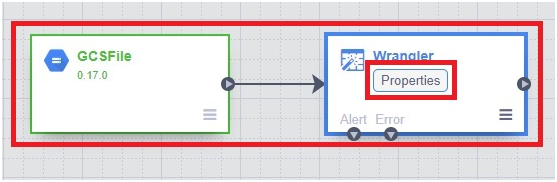
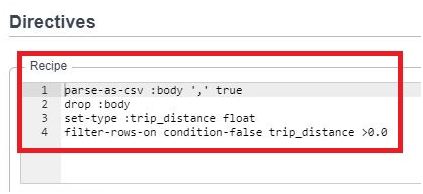
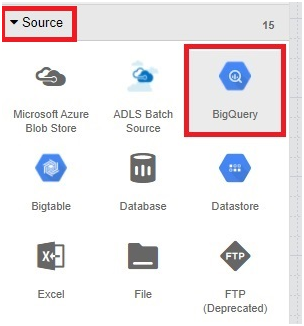
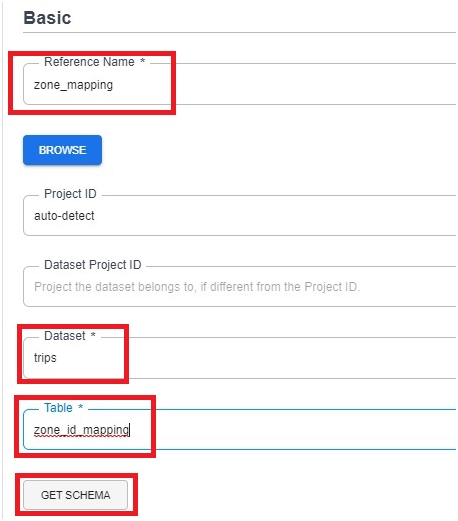
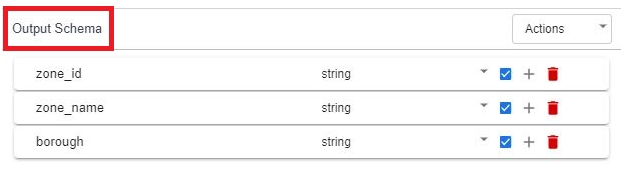
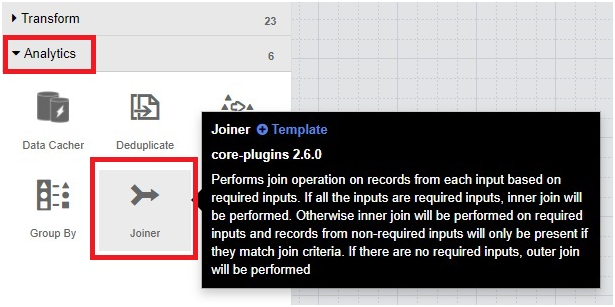
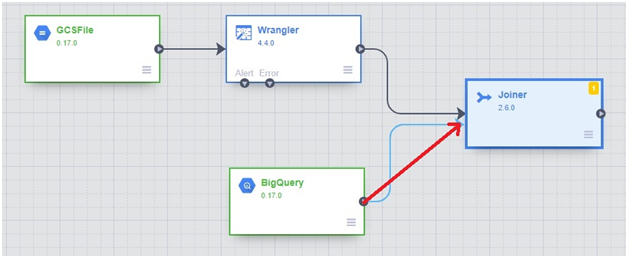
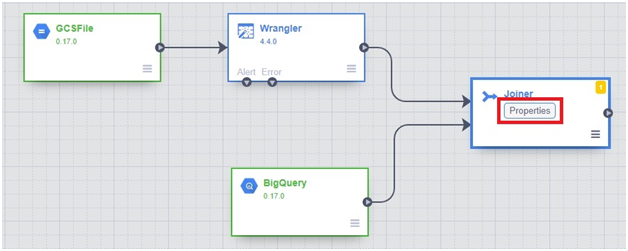
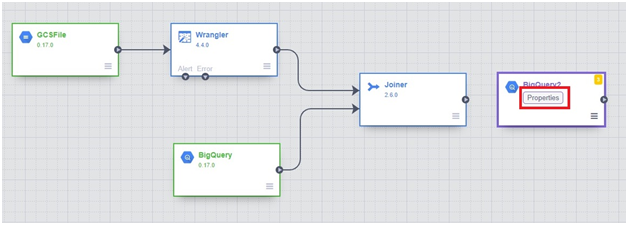
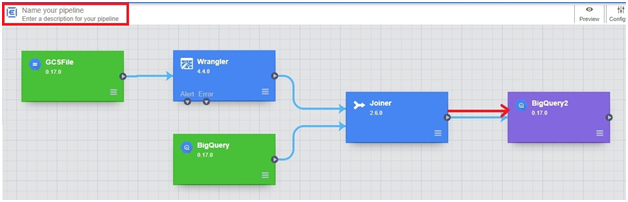
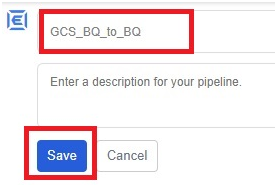
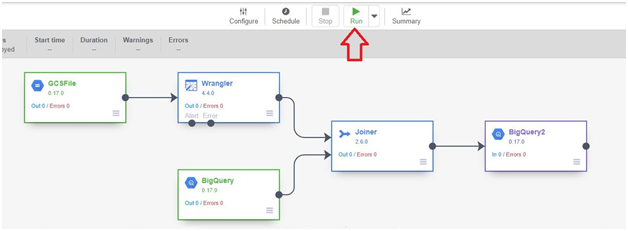
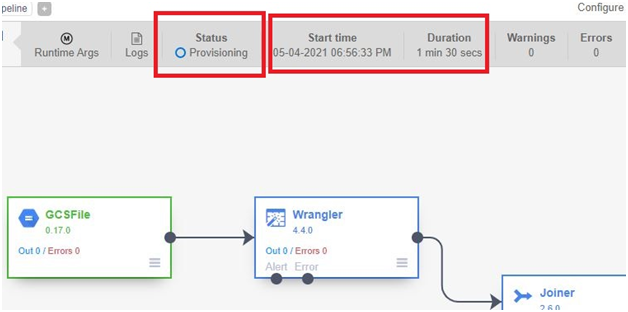
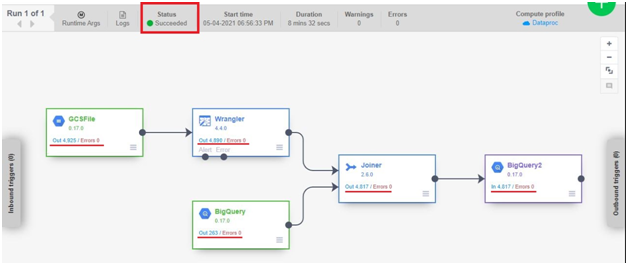
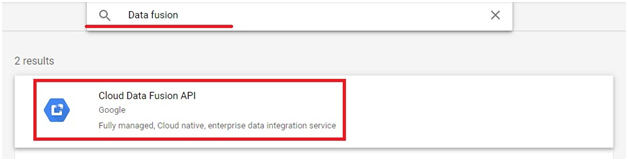
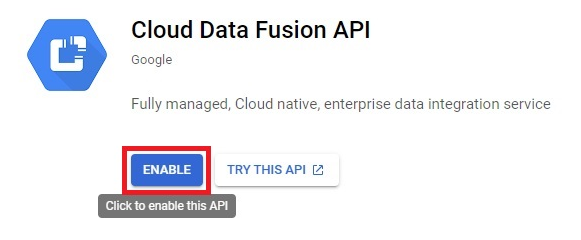
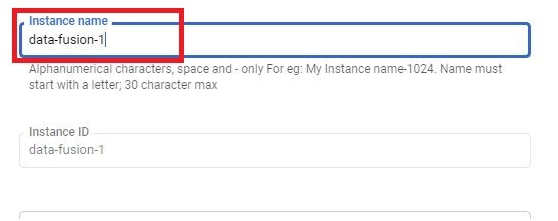
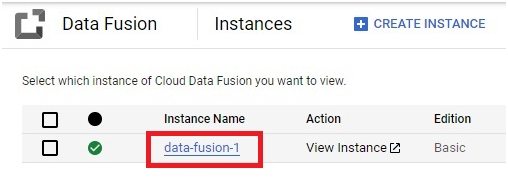
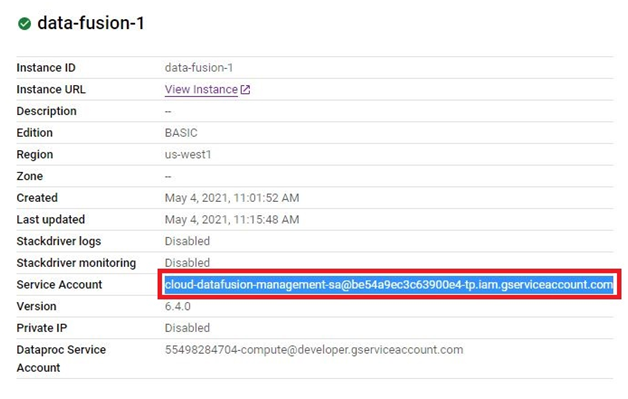
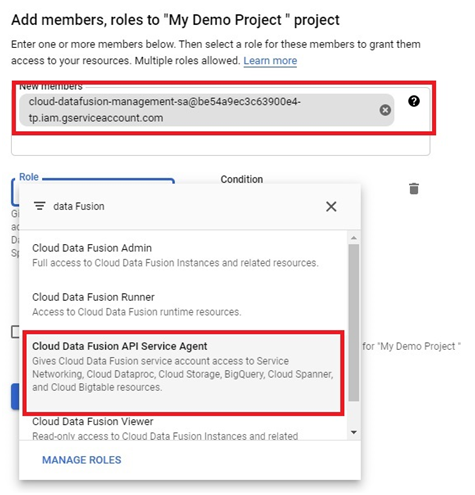
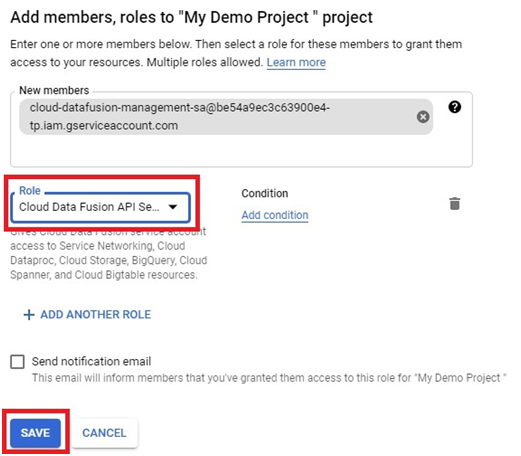
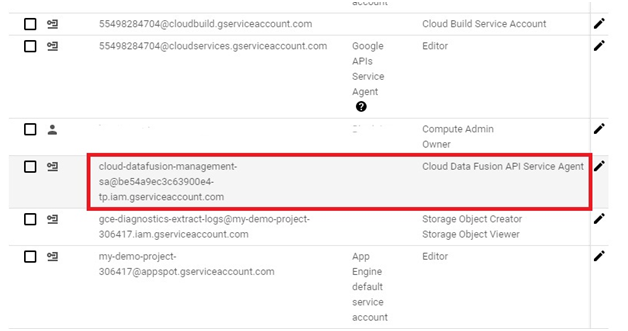
Creating a Cloud Data Fusion instance in Google Cloud Platform (GCP) enables users to build, deploy, and manage data integration pipelines for extracting, transforming, and loading (ETL) data from various sources into their data warehouses or analytics platforms. Cloud Data Fusion provides a visual interface and a managed service for building ETL pipelines without requiring users to manage infrastructure or write code.
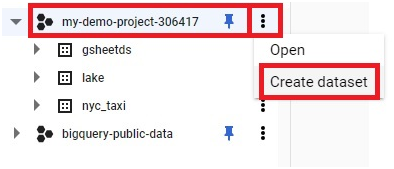
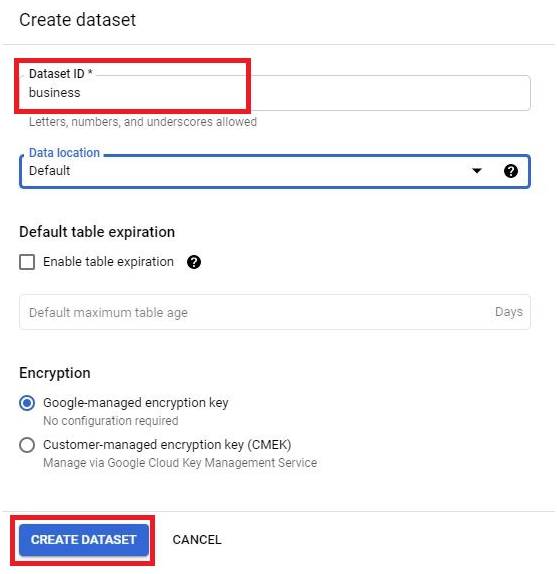
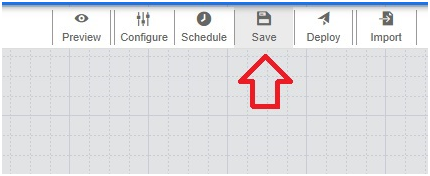
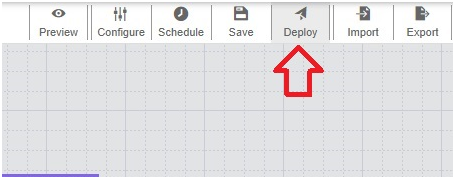
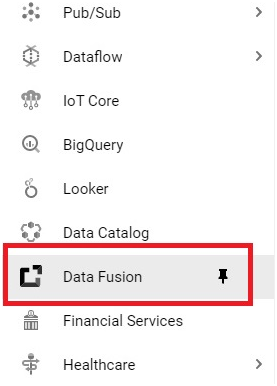
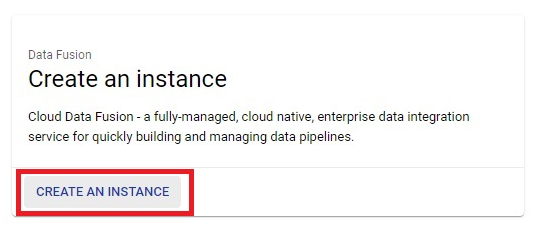
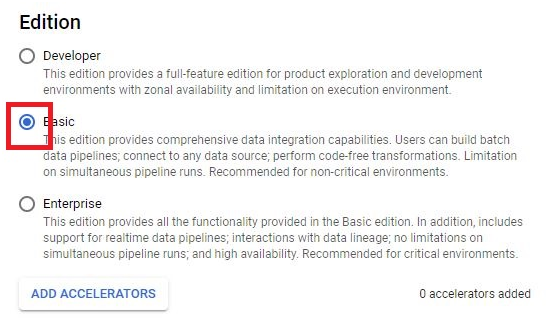
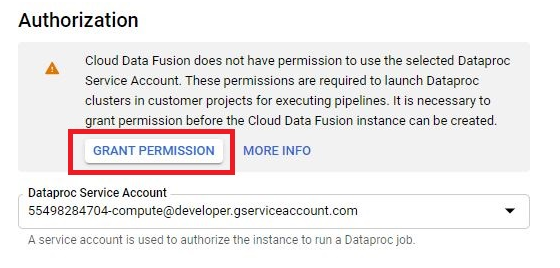
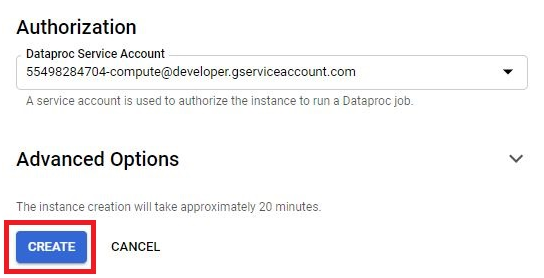
To create a Cloud Data Fusion instance, users can navigate to the Cloud Data Fusion section of the GCP Console and click on the “Create instance” button. From there, users can specify configuration details such as the instance name, location, and version of Cloud Data Fusion. Users can also choose the machine type, network settings, and other advanced options as needed.
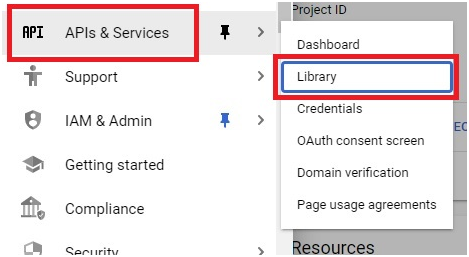
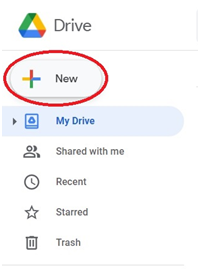
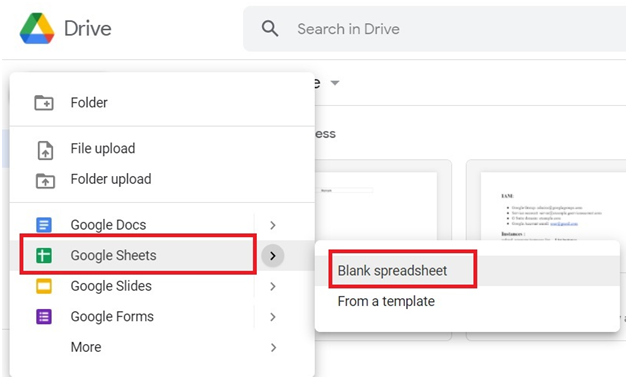
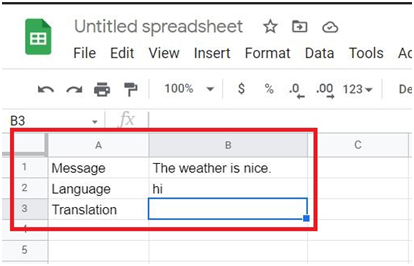
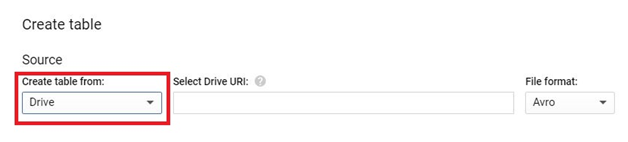
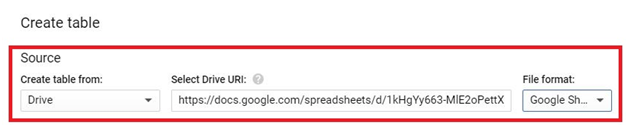
Incorporating files from Google Drive into BigQuery offers a streamlined pathway to leverage diverse data sources within Google’s comprehensive cloud ecosystem. This introduction elucidates the process of seamlessly integrating Drive files into BigQuery, highlighting the methods, considerations, and advantages inherent in this operation.
Google Drive serves as a robust cloud storage platform, facilitating collaboration and centralizing document management. BigQuery, on the other hand, is a powerful data analytics platform renowned for its scalability and performance. By bridging these platforms, users can harness the rich data stored in Drive for advanced analytics and insights generation.
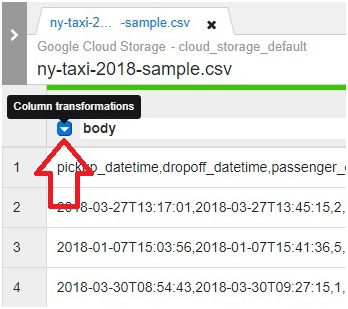
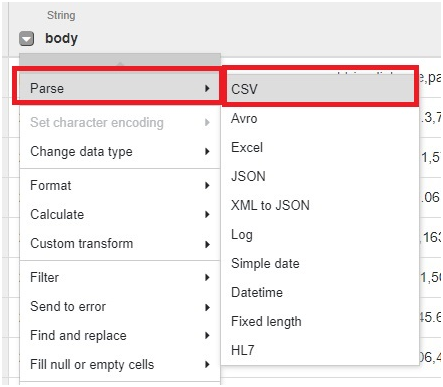
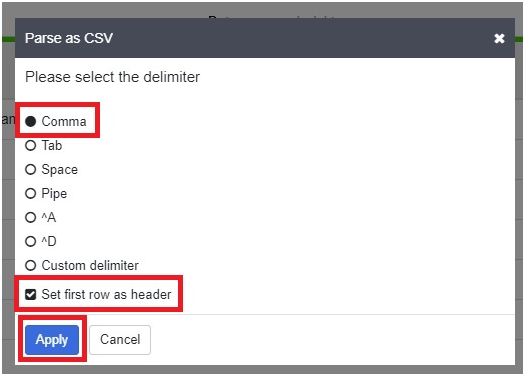
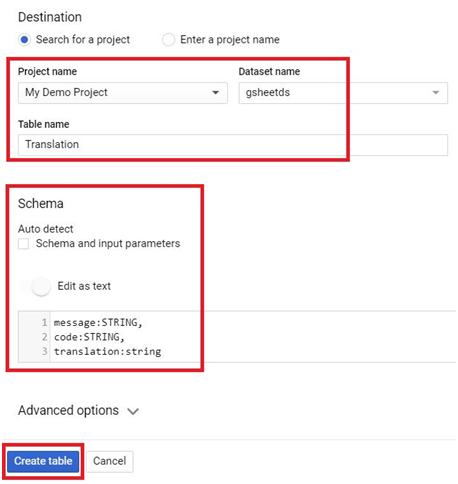
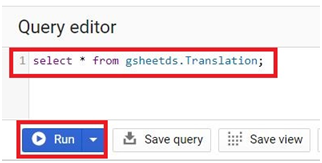
The process of adding Drive files into BigQuery typically involves exporting the desired files from Drive to Google Cloud Storage in a compatible format, such as CSV or JSON. Subsequently, users can leverage BigQuery’s native functionality to ingest the data from Cloud Storage into BigQuery tables, enabling seamless integration with existing datasets and analytical workflows.
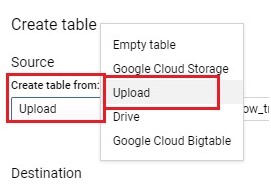
Integrating local files into BigQuery represents a vital aspect of expanding data accessibility and leveraging the platform’s analytical capabilities. This introduction will elucidate the process of seamlessly incorporating local files into BigQuery, elucidating the methods, considerations, and advantages inherent in this operation.
While BigQuery excels in processing vast datasets stored in Google Cloud Storage or other cloud-based repositories, there are scenarios where local files, residing within an organization’s infrastructure or on individual workstations, contain valuable data that warrants inclusion in analytical workflows.
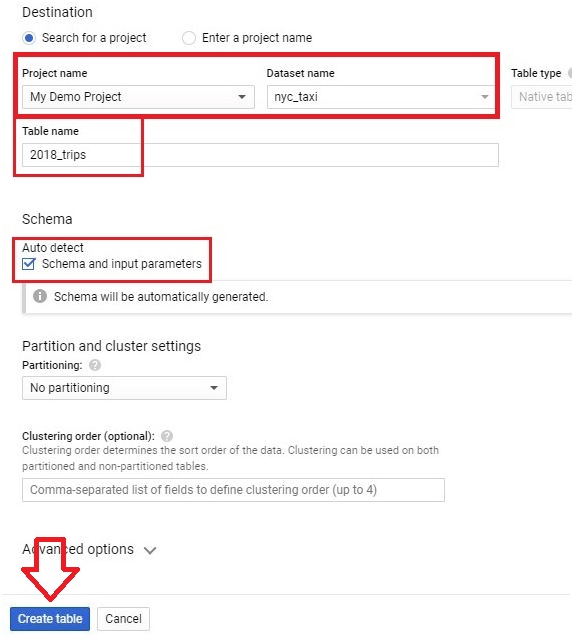
The process of adding local files into BigQuery involves a few essential steps, such as preparing the data in a compatible format, uploading it to Google Cloud Storage, and then utilizing BigQuery’s native capabilities to ingest the data into its tables. Supported file formats include CSV, JSON, Avro, Parquet, and more, ensuring flexibility and compatibility with various data sources.
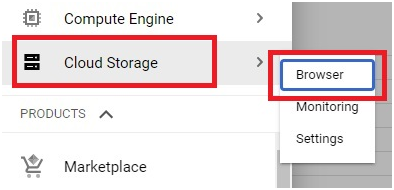
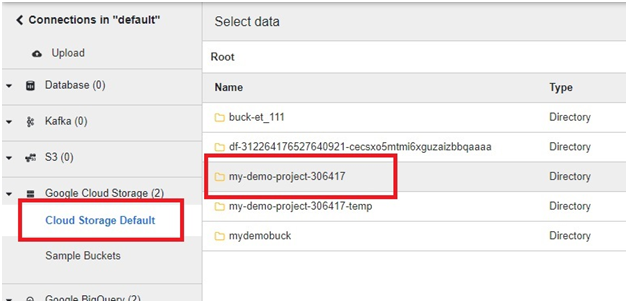
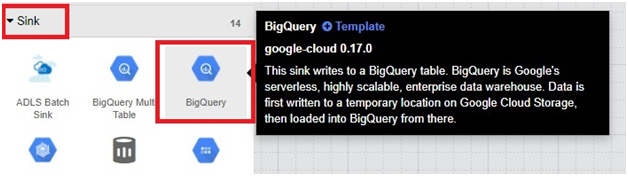
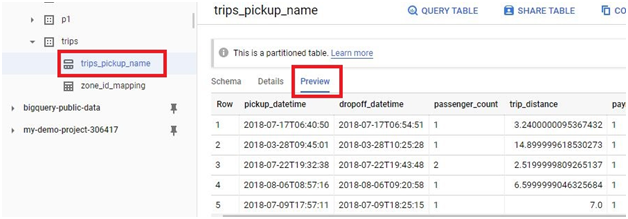
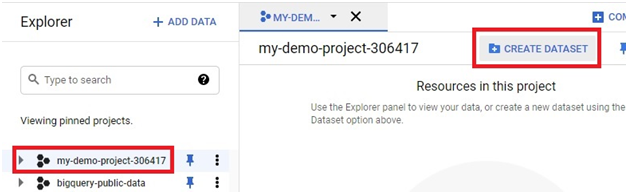
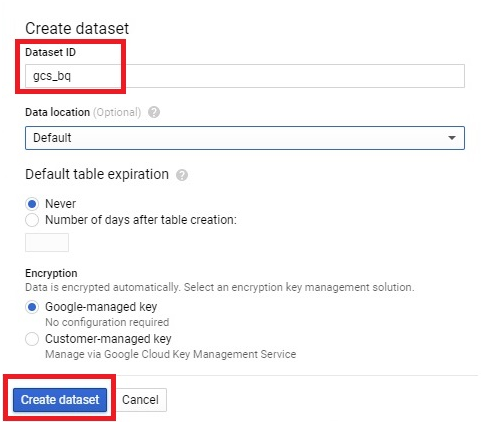
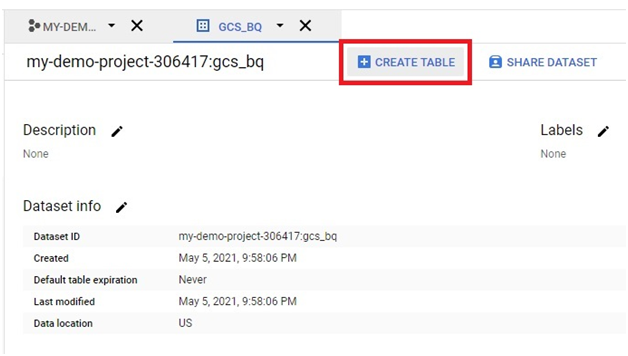
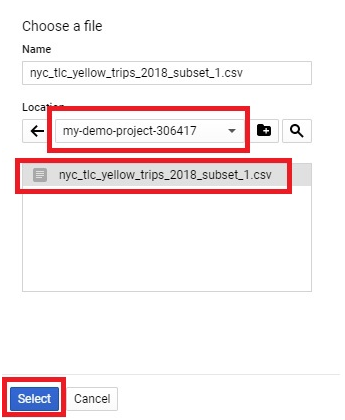
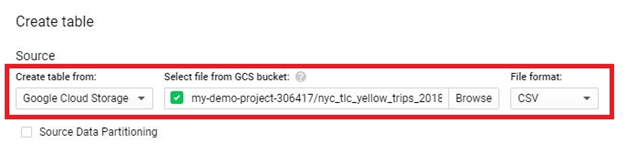
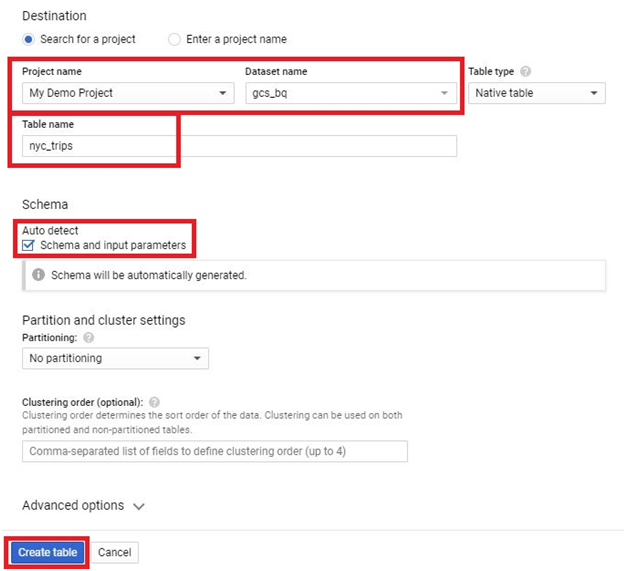
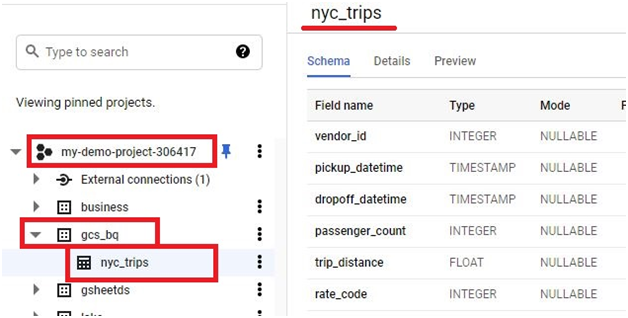
Loading data from Google Cloud Storage (GCS) into BigQuery is a fundamental process that forms the backbone of many data ingestion pipelines within Google’s comprehensive cloud ecosystem. This introduction will explore the intricacies of data loading from GCS to BigQuery, providing insights into the mechanisms, best practices, and benefits associated with this essential operation.
Google Cloud Storage serves as a scalable and durable object storage solution, ideal for storing a wide array of data types, including structured, semi-structured, and unstructured data. BigQuery, on the other hand, offers a powerful, fully managed data warehouse platform with lightning-fast SQL queries and built-in machine learning capabilities.
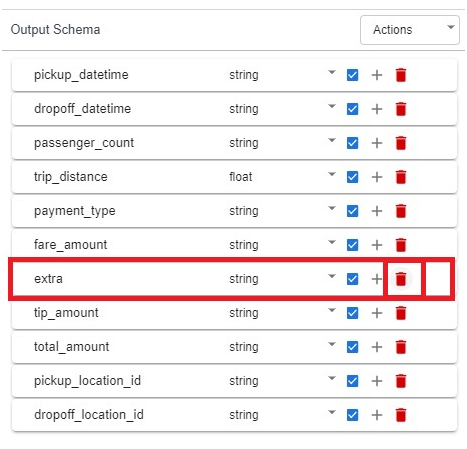
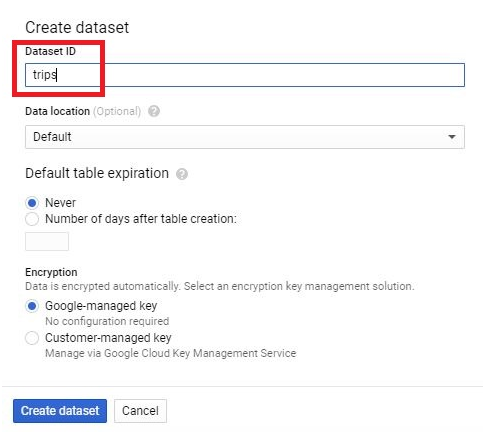
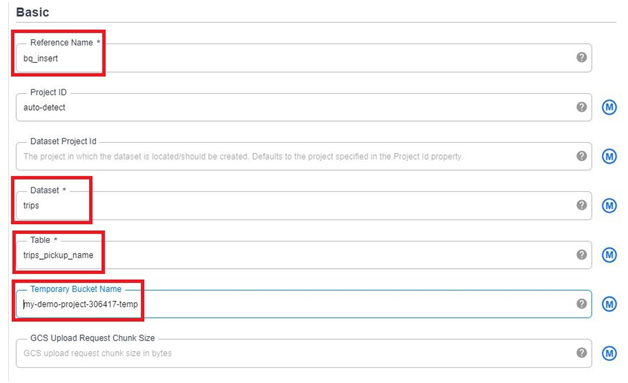
The process of loading data from GCS into BigQuery involves several steps, including defining the data schema, configuring the load job settings, and initiating the data transfer. Users can choose from a variety of file formats supported by both GCS and BigQuery, such as CSV, JSON, Avro, Parquet, and more, ensuring compatibility and flexibility in data loading operations.