Adding existing disk into a new machine
Adding an Existing Disk to a New VM
A Compute Engine persistent disk is network storage that lives separately from any VM. That is what makes this task possible. You can detach a data disk from one VM and attach it to another in the same zone, and the files on it come along. It is a common way to move data between machines, or to bring a disk back after the VM that used it has been deleted.
Three things decide whether it goes smoothly. The disk and the VM must be in the same zone. The attachment mode, read and write or read only, decides who can change the data. And the disk has to be mounted inside the VM before you can use it, but never formatted, since formatting would erase what you are trying to keep.
This walks through attaching an existing disk in the console, then mounting it safely, keeping it mounted after a reboot, and sharing it between VMs in read only mode.
Prerequisites:
- A Google Cloud account with billing enabled. The Enabling Billing guide in this series covers that.
- An existing disk with data on it, in the same zone as the VM you want to attach it to.
- Permission to attach disks to the VM and to use the disk.
Step by Step Process of Adding an Existing Disk
Step One: Open VM Instances
Open the Cloud Console
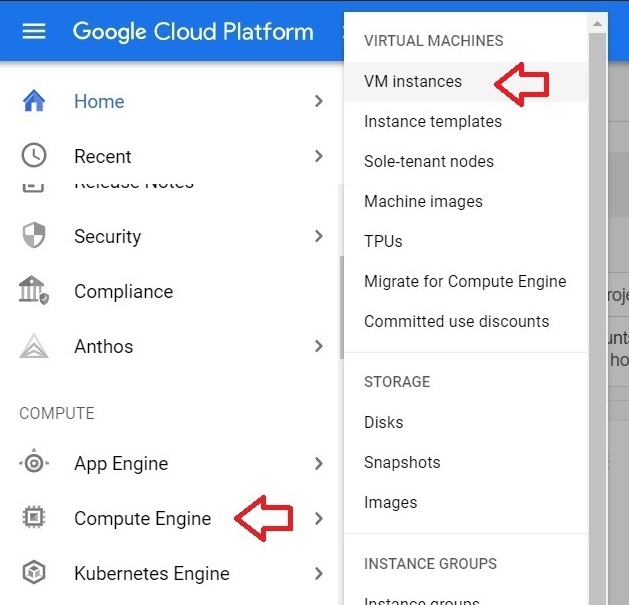
Click on Menu > Compute Engine > VM Instances.
Step Two: Open the VM You Want to Add the Disk To
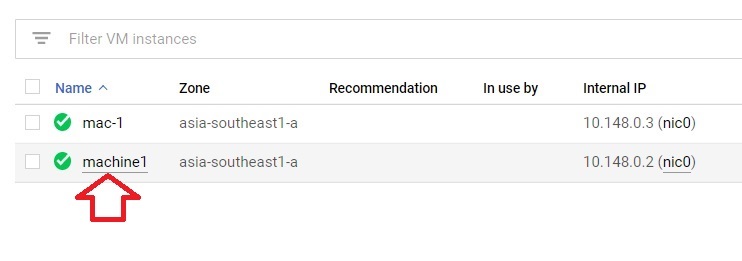
Click the instance. The disk and the VM must be in the same zone, so check the zone of both. Google also lets a VM have up to 127 secondary, non boot, zonal disks attached.
Step Three: Click Edit
Step Four: Click Attach Existing Disk
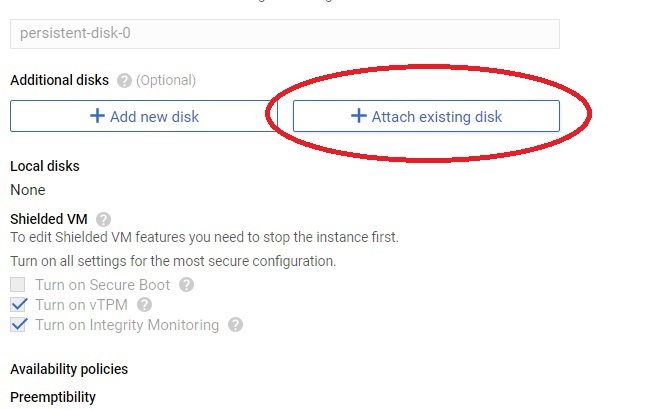
In the Additional disks section, click Attach existing disk.
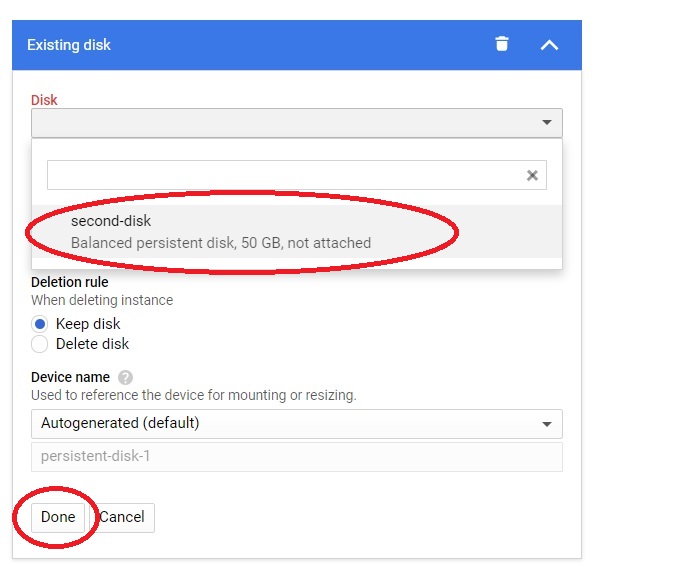
Step Five: Select the Disk and Choose the Mode
The list shows the disks available in that zone. Select yours. Choose the attachment mode, read and write if the VM should be able to change the data, or read only if it should only read it. Click Done.
Step Six: Save
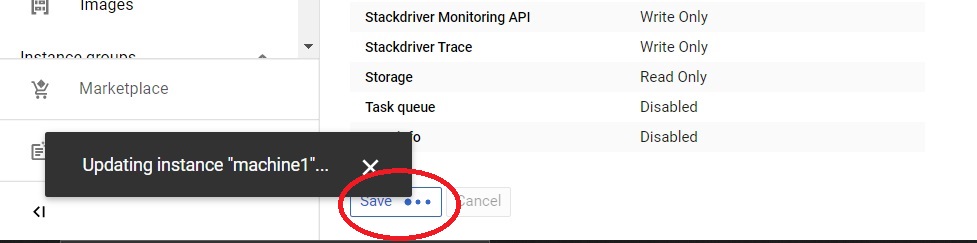
Click Save. The disk is now attached to this VM.
Step Seven: Check the Disks Tab
Open the Disks tab. The disk that belonged to one machine now shows against the new one.

Mount the Disk, Do Not Format It
Attaching only connects the disk. To use it, connect to the VM with SSH and mount it. Do not run the formatting command from the guide for new disks, because it erases the disk. First, find the disk’s device name:
lsblk
Create a folder to mount it on, then mount it, replacing the placeholders with your own values:
sudo mkdir -p /mnt/disks/MOUNT_DIR
sudo mount -o discard,defaults /dev/DEVICE_NAME /mnt/disks/MOUNT_DIR
Your files should now be in the mount folder. I have not tested these commands on your disk, so check the device name carefully before you run them.
Keep the Mount After a Reboot
A mount made this way is gone when the VM restarts. Google’s guide has you add the disk to the fstab file, using its UUID so it does not depend on the device name. First make a backup of the file, then list the disk’s UUID:
sudo cp /etc/fstab /etc/fstab.backup
sudo blkid /dev/DEVICE_NAME
Open the file in an editor and add a line with the UUID, the mount folder, and the filesystem type that blkid reported:
UUID=UUID_VALUE /mnt/disks/MOUNT_DIR FILESYSTEM_TYPE discard,defaults,nofail 0 2
The nofail option lets the VM still boot if the disk is ever unavailable. Without it, a missing disk can stop the VM from starting up normally.
Sharing a Disk Between VMs
A non boot disk can be attached to more than one VM in read only mode, which lets you share static data without copying it to separate disks. Every VM must use the same attachment mode for that disk. You cannot attach it read and write to one VM and read only to another. Google lists some limits as well, for example a balanced persistent disk in read only mode supports at most 10 instances.
When the Disk Is in the Wrong Zone
A zonal disk cannot be attached across zones. To move its data to a VM in another zone, the usual route is to take a snapshot of the disk and create a new disk from that snapshot in the zone you need.
Before You Detach Later
When you remove a disk from a Linux VM, Google says you must remove or comment out its entry in the fstab file first, even if you used nofail. The Removing Disks From Instances guide in this series covers detaching.
Common Mistakes to Avoid
- Formatting an existing disk. It erases the data. Mount it only.
- Choosing a disk in a different zone from the VM. It cannot be attached.
- Mixing attachment modes when sharing a disk. Every VM must use the same one.
- Putting the device name, not the UUID, in fstab. Device names can change after a reboot.
- Leaving out nofail. A missing disk can then stop the VM from booting normally.
That covers attaching an existing disk to a new VM, and mounting it without losing its data. To go further, explore Prwatech’s Google Cloud training program, which includes placement assistance.






