Adding and removing the disk using Cloud Shell.
Adding, Resizing, and Removing a Disk With Cloud Shell
A Compute Engine disk is separate from the VM that uses it, and that is what makes it flexible. You can create a disk, attach it to a VM, make it bigger when you run short of space, and detach it again, all with a handful of gcloud commands. Doing it by command rather than by clicking means you can repeat it exactly and put it in a script.
Each of the four commands is short, but each leaves something to do afterward. A new disk has to be formatted and mounted. A resized disk has to have its file system extended. And a detached disk still exists and still costs money. This guide covers the commands and the follow up steps that the commands do not do for you.
This walks through creating a disk, attaching it, resizing it, detaching it, and deleting it, from Cloud Shell.
Prerequisites:
- A Google Cloud account, a project with billing enabled, and a running VM. The Creating an Instance Using Cloud Shell guide in this series covers creating one.
- The disk and the VM must be in the same zone.
Complete Process of Adding, Resizing and Removing a Disk
Step One: Activate Cloud Shell
Open GCP Console.
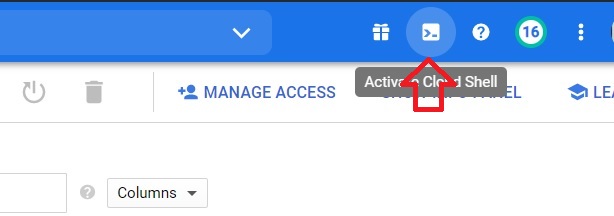
Click on Activate cloud shell.
Step Two: Create a Disk
Run this command, replacing the placeholders. The disk is created in the zone you name, and it can later be attached only to VMs in that zone:
gcloud compute disks create DISK_NAME –size=SIZE –type=DISK_TYPE –zone=ZONE
For example:
gcloud compute disks create data-disk-1 –size=100GB –type=pd-balanced –zone=us-central1-a
The original page wrote the flags with en dashes and square brackets, which makes the command fail. You pay for the size you provision, so start smaller than you think you need, since you can only increase a disk later. To see which disk types you can choose, run the command below.
gcloud compute disk-types list

Step Three: Authorize Cloud Shell
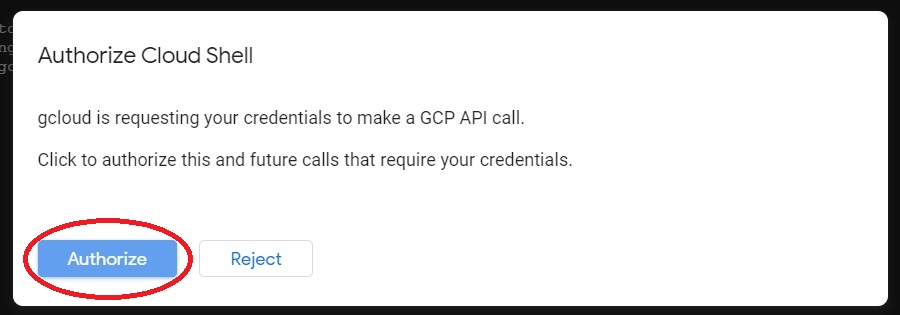
The first time you run a gcloud command in Cloud Shell, a window may ask you to authorize Cloud Shell to use your credentials to call Google Cloud. Click Authorize, and the command continues.
Step Four: Attach the Disk
gcloud compute instances attach-disk VM_NAME –disk=DISK_NAME –zone=ZONE
Google’s reference lists the options you can add. By default the disk is attached with read and write access. For read only access, add the mode flag with the value ro. You can also add a device name, which is the name the guest operating system sees, though Google notes it does not correspond to the mounted volume name.

After Attaching: Format and Mount a New Disk
Google’s reference is explicit that after you create and attach a new disk, you must format and mount it so the operating system can use the storage. The Adding Disks in GCP Instances guide in this series covers each step. If the disk already holds data, do not format it, because formatting erases it. The Adding an Existing Disk Into a New VM guide covers mounting without formatting.
An existing non boot disk can also be attached to more than one VM, which Google’s reference notes, but every VM has to use the same mode.
Step Five: Resize the Disk
gcloud compute disks resize DISK_NAME –size=NEW_SIZE –zone=ZONE
Type y when it asks you to confirm. If you give no unit, GB is assumed. Only increasing disk size is supported, so you cannot shrink a disk, as the original page also says. Google’s reference adds that a disk can be resized whether or not it is attached to a VM.
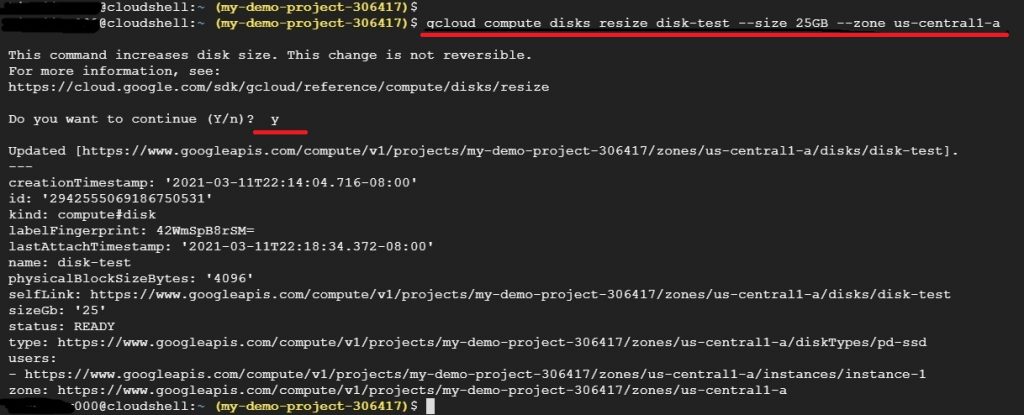
The new space is not usable straight away. The disk is bigger, but the file system inside the VM still thinks it is the old size. Connect to the VM and extend it, for example with the resize2fs command for an ext4 file system with no partition. If you made a partition, grow the partition first. It is commonly advised to take a snapshot before you resize, and I have not tested these commands, so check Google’s disk resize guide for your setup.
Step Six: Detach the Disk
Before you detach a disk that you mounted, connect to the VM, stop anything using it, unmount it, and remove its entry from the fstab file. The Removing Disks From Instances guide in this series covers this, including why you should never delete a partition to free a disk. Then detach it:
gcloud compute instances detach-disk VM_NAME –disk=DISK_NAME –zone=ZONE

Detaching Does Not Delete the Disk
The original page describes this command as removing the disk. It only disconnects it. The disk stays in your project with its data and keeps billing for its size. You can attach it to another VM in the same zone, or delete it when you are certain you no longer need it. To see your disks and check what is attached:
gcloud compute disks list
To delete a disk, which cannot be undone, check the name and zone, and take a snapshot first if there is any doubt:
gcloud compute disks delete DISK_NAME –zone=ZONE
Avoiding the Zone Prompt
Every command above names the zone. If you leave it out and no default zone is set, gcloud may ask you to choose one. To set a default zone once, use the gcloud config set command for the compute zone property. The gcloud Commands for Working With Google Cloud guide in this series covers defaults.
Common Mistakes to Avoid
- Writing flags with en dashes or square brackets. Use two real hyphens, and your own values in place of the placeholders.
- Stopping after attach. A new disk still has to be formatted and mounted.
- Formatting a disk that already has data. Mount it only.
- Resizing a disk and forgetting to extend the file system inside the VM.
- Detaching without unmounting and removing the fstab entry first.
- Assuming detach deletes the disk. It does not, and the disk keeps costing money.
That covers creating, attaching, resizing, and detaching a disk with gcloud, and the steps the commands leave to you. To go further, explore Prwatech’s Google Cloud training program, which includes placement assistance.






