Removing Disks from Instances
Removing a Data Disk From a VM, Safely
Sometimes an extra disk needs to leave a VM, so that another VM in the same zone can use it, or because the VM no longer needs it. The safe version of this task has three parts, stop using the disk inside the VM, tell the operating system to forget it, and only then detach it in Compute Engine. Skipping the first two can leave a VM that stalls at boot, or applications that lose files mid write.
It is also worth being clear about what detaching is not. It does not erase the data, and it does not delete the disk. The disk stays in your project with its contents intact, ready to attach somewhere else, and you keep paying for it until you delete it deliberately.
This walks through unmounting a data disk, removing its fstab entry, and detaching it in the console, then covers the boot disk difference and what to do with the disk afterward.
Data Disks Compared With Boot Disks
- A data disk, is an extra disk you attached for storage. You unmount it inside the VM first, and the VM can stay running.
- A boot disk, holds the operating system. Google’s guide for boot disks says you can only detach one from a stopped VM, and that you do not need to unmount it. It is used for repairing a VM or swapping its operating system disk.
This page covers data disks.
Prerequisites:
- A Google Cloud account with billing enabled. The Enabling Billing guide in this series covers that.
- A Linux VM with an extra disk attached and mounted. The Adding Disks in GCP Instances guide in this series covers that.
- Permission to detach disks from the VM.
Step by Step Process of Removing a Data Disk From a VM
Step One: Open the VM’s SSH Session
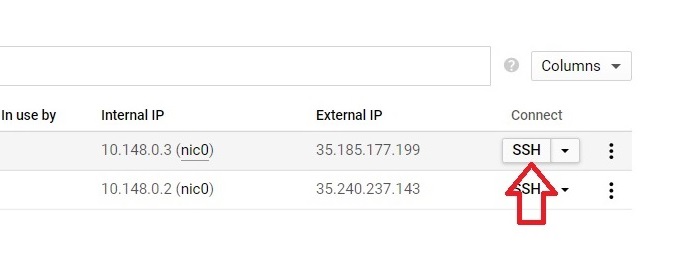
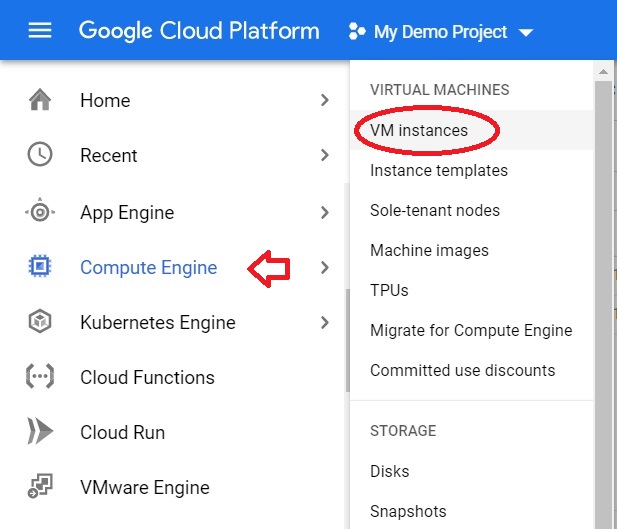
Open the console, then the menu, then Compute Engine, then open VM instances from the Menu > Compute Engine > VM instances.
Open the SSH of instance from which you want to remove the extra disk.
Step Two: List the Disks
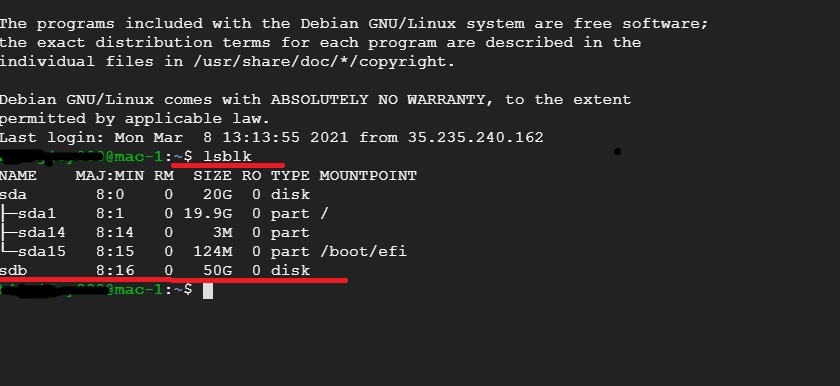
lsblk
This lists the block devices, the disks, and shows where each is mounted. Find the disk you want to remove, and note its device name and its mount folder.
Step Three: Unmount the Disk
Stop any program that is using the disk first. Then unmount it, using the mount folder shown by lsblk, which is the safest thing to name:
sudo umount /mnt/disks/MOUNT_DIR
If the command says the target is busy, something is still using the disk. Find it, for example with the lsof command, close it, and try again.
Then make a backup of the fstab file and open it:
sudo cp /etc/fstab /etc/fstab.backup
sudo vi /etc/fstab

Step Four: Remove the Disk’s Entry From fstab
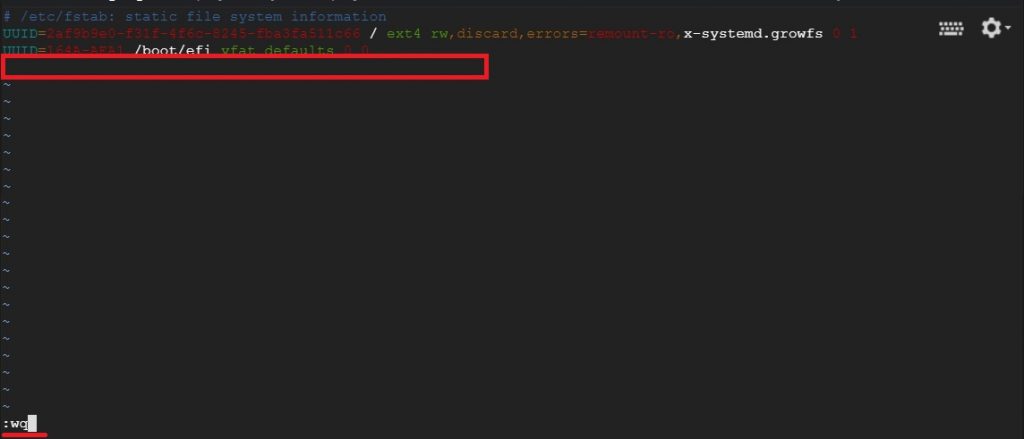
Delete the whole line for this disk, the one that names its mount folder. In vi, press escape, then type a colon, then wq, then press Enter to save and quit. Google’s guide says to remove the entry before you detach a disk, even if the entry uses the nofail option, so the VM is not left looking for a disk that is gone.
Step Five: Confirm the Disk is Unmounted
Run the listing command again and check that the disk no longer shows a mount folder:
lsblk
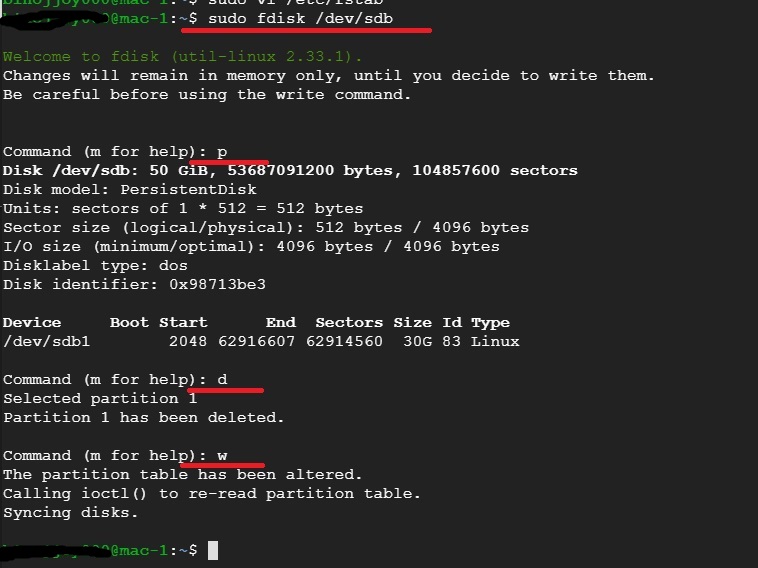
The original page used this spot for a screenshot of the fdisk command, which deletes a partition. Do not run that command. It is not needed to detach a disk, it makes the disk’s data unreachable, and it is exactly what you do not want if another VM is going to use the disk. I recommend replacing this screenshot with one of the lsblk output above, showing no mount folder.
Step Six: Open VM Instances in the Console
Back in the console, open Compute Engine, then VM instances.
Step Seven: Open the VM
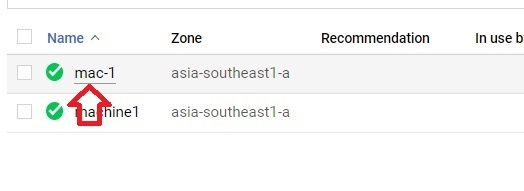
Click the instance that has the disk attached.
Step Eight: Click Edit
Step Nine: Remove the Disk From Additional Disks
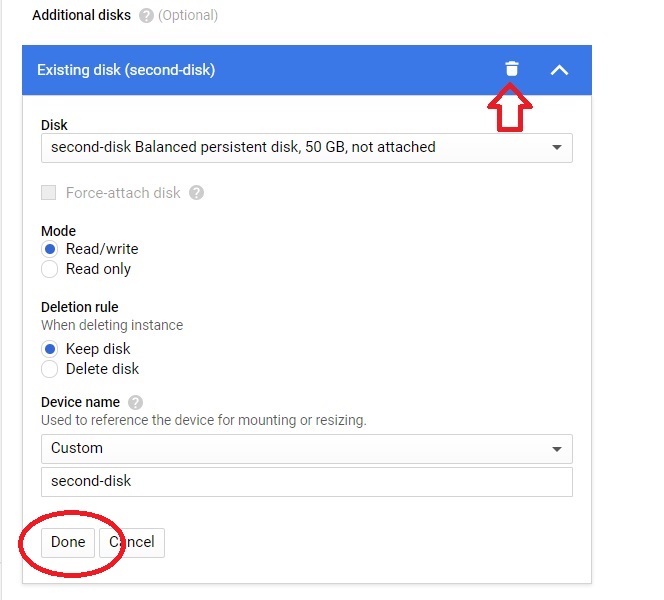
In the Additional disks section, find the disk you unmounted and click the button next to it that removes it. The original page calls this delete. It removes the disk from this VM, which is detaching, and the disk itself is not deleted.
Step Ten: Click Done and Save
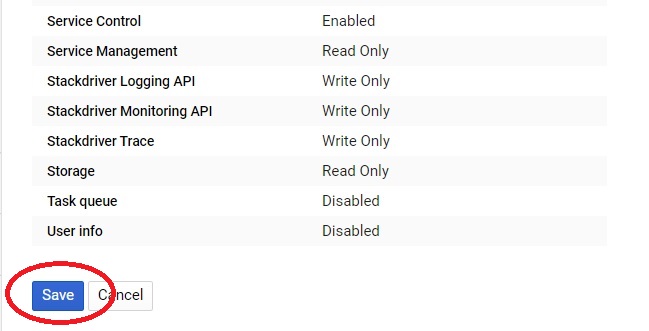
Click Done, then Save. The disk is now detached from the instance.
Detaching From the Command Line
The gcloud command for detaching a disk from a VM looks like this. I have not tested it, so check the names carefully:
gcloud compute instances detach-disk VM_NAME –disk=DISK_NAME –zone=ZONE
After You Detach: Keep, Reattach, or Delete
- To use it on another VM, attach it there. The disk must be in the same zone as that VM, and you mount it without formatting. The Adding an Existing Disk Into a New VM guide in this series covers that.
- To keep it, leave it. It stays in your project and keeps costing money for as long as it exists.
- To delete it, do that separately from the Disks page in Compute Engine. A disk can only be deleted when no VM is using it. Deleting is permanent, so take a snapshot first if there is any chance you will need the data.
Common Mistakes to Avoid
- Running fdisk to delete a partition before detaching. It is not needed and makes the data unreachable.
- Leaving the fstab entry in place. The VM will keep looking for a disk that is no longer there.
- Detaching a disk while an application is still writing to it.
- Assuming detaching deletes the disk. It does not, and the disk still costs money.
- Following these steps for a boot disk. Boot disks need a stopped VM and no unmounting.
That covers removing a data disk from a VM safely, and what to do with it afterward. To go further, explore Prwatech’s Google Cloud training program, which includes placement assistance.






