Editing Filestore instance
Editing a Filestore Instance
Filestore is Google Cloud’s managed file server, and an instance is the server that holds your file share. Once an instance exists, you will usually need to change it at some point, because the share needs more room, a team needs different access, or the workload needs more performance than you first bought.
Editing is simple in the console, but what you are allowed to change depends on the instance’s service tier. Capacity can always grow, though it can shrink on only some tiers. Performance can be set directly on some tiers and follows capacity on others. And access rules can lock out clients if they are changed carelessly.
This walks through opening the Edit page and saving a change, then explains each setting you can change, the capacity rules by tier, how performance works, and how IP based access rules are built.
Step by Step Process of Editing a Filestore Instance
Step 1: Open the Instance
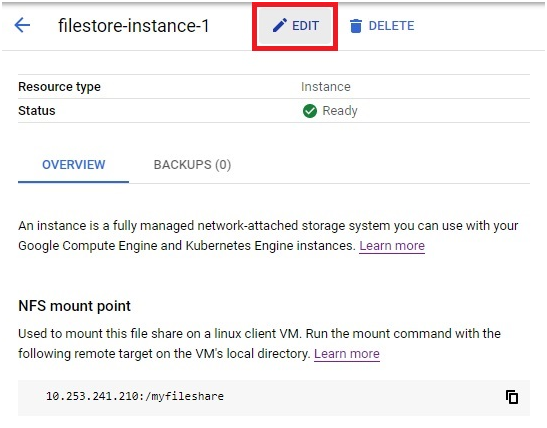
Open the console, then the menu, then Filestore, and click the instance you want to change.

Step 2: Click Edit
On the Instance details page, click Edit to open the Edit instance page.
Step 3: Change What You Need and Save
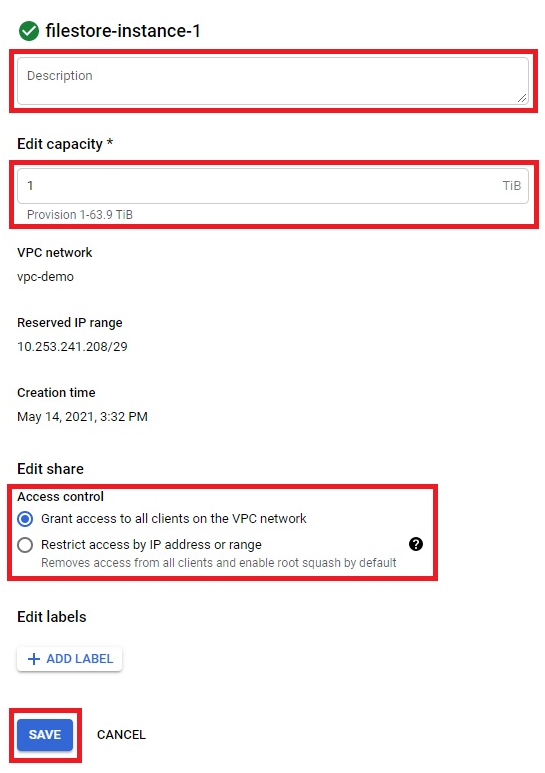
On the Edit instance page you can change the description, the capacity, and the IP based access control rules, and the original page also lists labels among the changes. Make your changes, then click Save.
What You Can Change?
- A note about what the instance is for. Changing it affects nothing else.
- Always possible to increase. Decreasing depends on the tier, covered below.
- Set directly on the Zonal and Regional tiers through custom performance. Other tiers follow capacity.
- IP based access control rules. Decide which client addresses can reach the share and how.
- Tags for organizing and billing, which the original page lists among the edits. The Creating Labels guide in this series explains them.
Capacity Rules by Tier
Capacity can be increased on every tier. Each tier also has its own minimum and maximum, which limits how far you can scale in either direction:
| Service tier | Minimum capacity | Maximum capacity |
|---|---|---|
| Basic HDD | 1 TiB | 63.9 TiB |
| Basic SSD | 2.5 TiB | 63.9 TiB |
| Zonal, lower capacity range | 1 TiB | 9.75 TiB |
| Zonal, higher capacity range | 10 TiB | 100 TiB |
| Enterprise | 1 TiB | 10 TiB |
Decreasing capacity is not available everywhere. Google lists the Enterprise tier as one that can be scaled down, and High Scale SSD, the old name for the Zonal tier, is another. You also cannot scale an Enterprise or Zonal instance below what its existing file data and metadata need. Capacity changes on these tiers happen in steps, 256 GiB on the lower ranges and 2.5 TiB from 10 TiB upward on Zonal.
How Performance is Set?
On the Basic tiers and on Enterprise, performance is set by the tier and the capacity you provision rather than by a separate setting, and on Enterprise more capacity means more throughput. On the Zonal and Regional tiers there is a second option called custom performance, which lets you set performance independently of capacity. You can set an IOPS per TiB ratio, where IOPS grow in line with capacity, or a fixed IOPS rate that stays the same however large the instance is. In the console, custom performance is the default way to configure these two tiers.
For small capacity instances, the IOPS per TiB ratio has to fall between 4,000 and 17,000, and the calculated IOPS cannot be lower than 2,000. Because instances with custom performance are billed according to the IOPS you purchase, raising it raises your bill.
How IP Based Access Rules Work?
An access rule combines a few settings and applies them to clients whose IP address falls within a range you give.
- Access mode, either read only or read write.
- Squash mode, either root squash or no root squash. Root squash maps a client’s root user to an unprivileged user, so root on a client machine does not get root level control of the share.
- Anonymous user and group IDs, which set the identity that squashed requests are mapped to.
You can have several rules, for example a read only rule for one range of addresses and a read write rule for another. If you edit rules from the command line instead of the console, Google notes you must supply them in a JSON configuration file. Before saving a change, check that the VMs you rely on still fall inside a range that allows what they need. The Mounting Filestore File Share on Compute Engine Clients guide in this series covers how those VMs connect.
Think About Cost Before You Save
Filestore pricing depends on the tier and on what you provision. Raising capacity, or purchasing more IOPS on a tier with custom performance, increases what the instance costs, so check Filestore pricing for your tier before you scale up. Scaling down, where your tier allows it, is how you stop paying for room you do not use.
Common Mistakes to Avoid
- Expecting to tune IOPS and throughput on every tier. That is only possible with custom performance on Zonal and Regional instances.
- Assuming capacity can always be reduced. It depends on the tier, and never goes below what the data needs.
- Changing access rules without checking which client addresses they cover, which can cut off VMs that were working.
- Scaling up capacity or IOPS for a quick test and forgetting to scale back down.
- Following older guides that call the Zonal tier High Scale SSD. It is the same tier under its old name.
That covers editing a Filestore instance and what each setting really does on your tier. To go further, explore Prwatech’s Google Cloud training program, which includes placement assistance.






