Adding files into instance disk using WinSCP
Uploading Files to a Google Cloud VM With WinSCP
WinSCP is a free Windows program for moving files between your computer and a remote server over SFTP or SCP, with a two pane window where you drag and drop. It lets you upload scripts, data, and configuration files to a Compute Engine VM without typing any commands.
The connection uses an SSH key pair rather than a password. You create the pair, put the public half on the VM, and give WinSCP the private half. Failed attempts commonly come down to one of four problems, the wrong username, a private key in the wrong format, a public key that never reached the VM, or a network path that is closed. This guide covers each one.
This walks through connecting WinSCP to a VM with an SSH key and uploading files, then covers where uploaded files go, what to do if you cannot connect, and the command line alternative.
Prerequisites:
- A running Linux VM with an external IP address, in a network with a firewall rule that allows SSH on port 22. The Creating an Instance Using Developers Console guide in this series covers creating the VM.
- An SSH key pair made with PuTTYgen. WinSCP needs the private key in .ppk format, which is what PuTTYgen produces by default.
- The public key added to the project’s metadata or the VM’s metadata, with the username you want to log in as. The Creation of SSH Key Using PuTTY guide in this series covers this.
- WinSCP installed on your Windows computer.
Step by Step Process of Uploading Files to Instance Disk
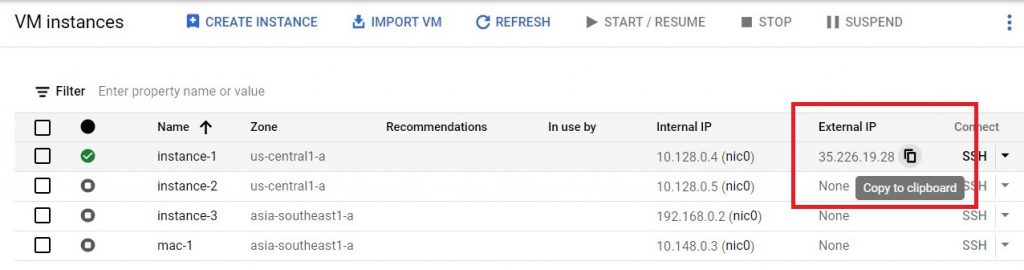
Step One: Copy the VM’s External IP Address
Open the console, then the open Menu > Compute > VM Instances
Copy the External IP
Step Two: Enter the Connection Details in WinSCP
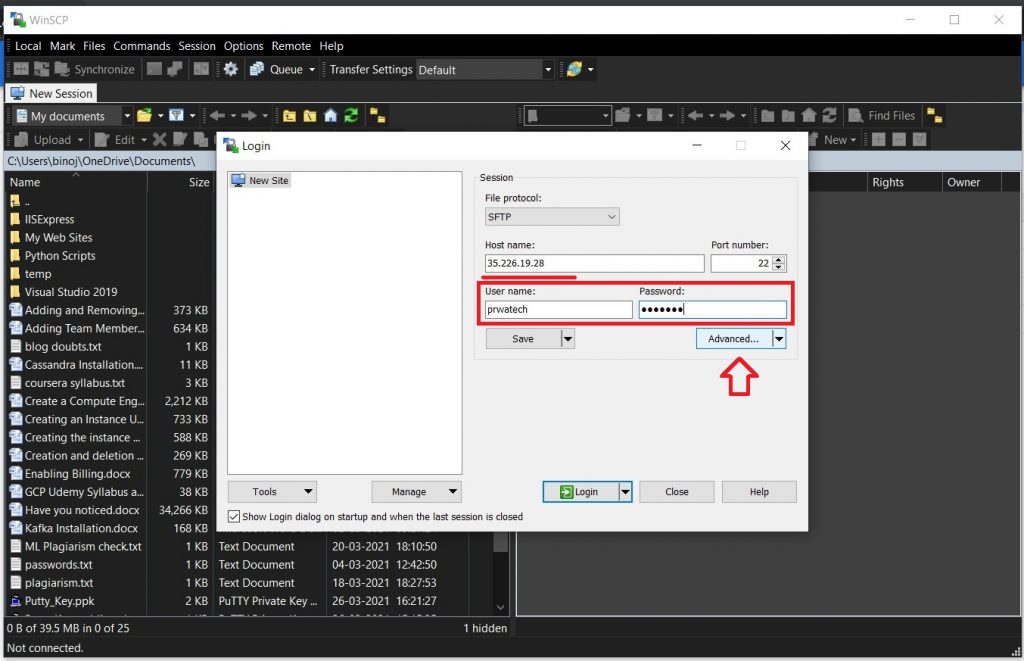
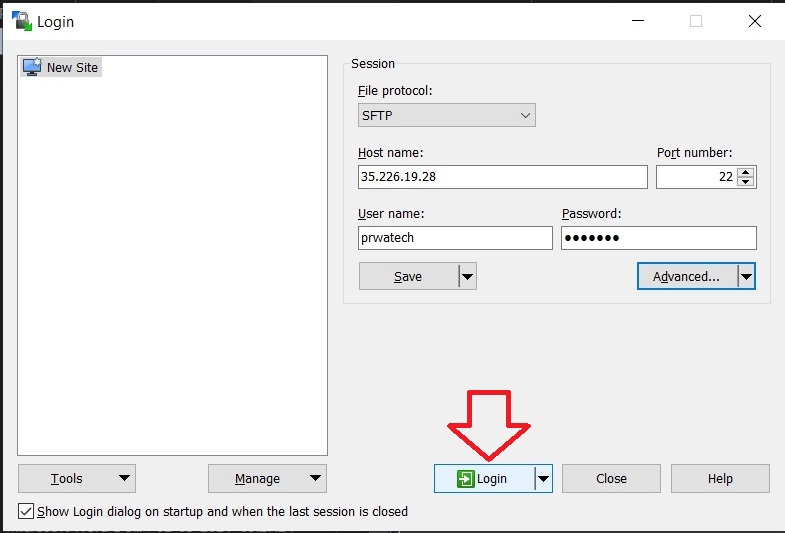
Open WinSCP and paste the external IP address into the Host name field. Leave the file protocol as SFTP and the port as 22. In the User name field, enter the username that belongs to your SSH key, not any name you like. Leave the password blank, since the key is used instead. Then click Advanced.
Step Three: Open SSH Authentication
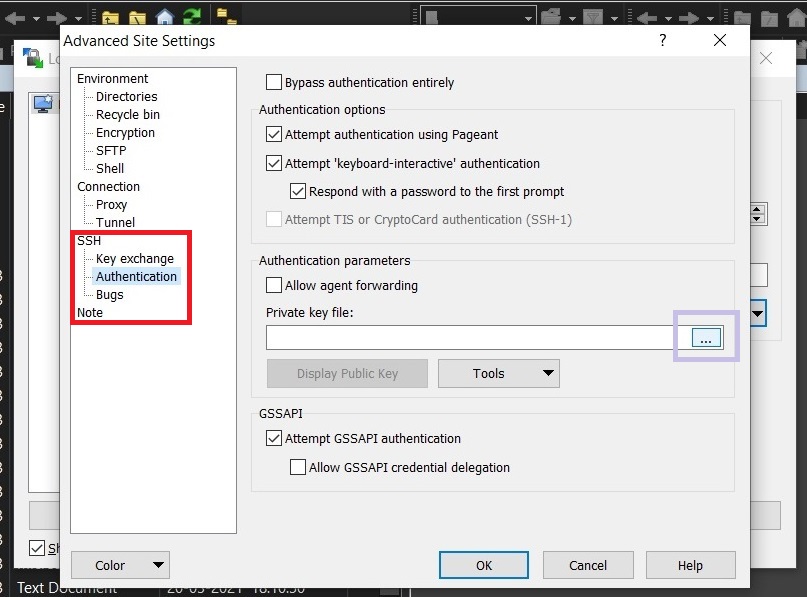
In the Advanced settings, go to SSH, then Authentication. Click the button with three dots next to the private key file field.
Step Four: Select Your Private Key
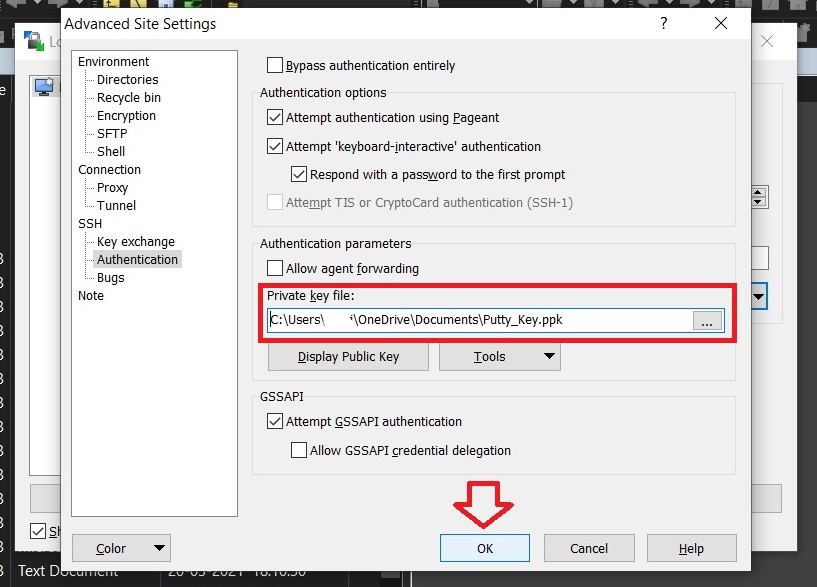
Choose the private key file you saved, which must be a .ppk file, then click OK.
Step Five: Click Login
Click Login. The first time you connect, WinSCP shows the server’s host key and asks you to confirm it. To be sure you are talking to your own VM, compare the fingerprint with one you obtain securely through the console’s browser SSH window, as WinSCP’s own Google Cloud guide suggests, rather than clicking through without looking.
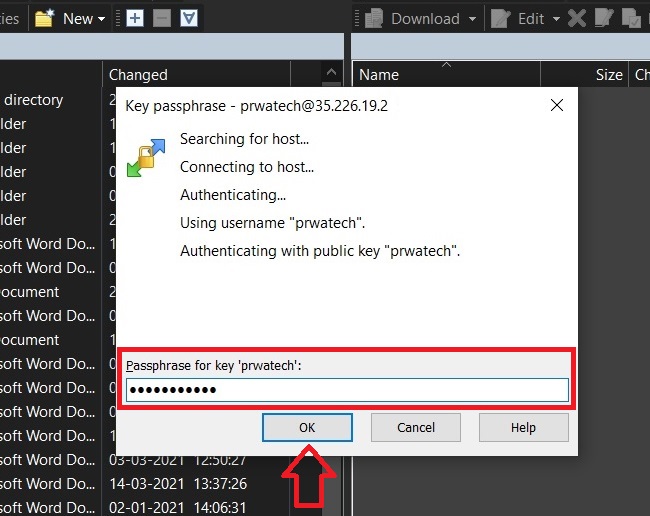
Step Six: Enter the Key’s Passphrase
If you protected the key with a passphrase, enter it and click OK.
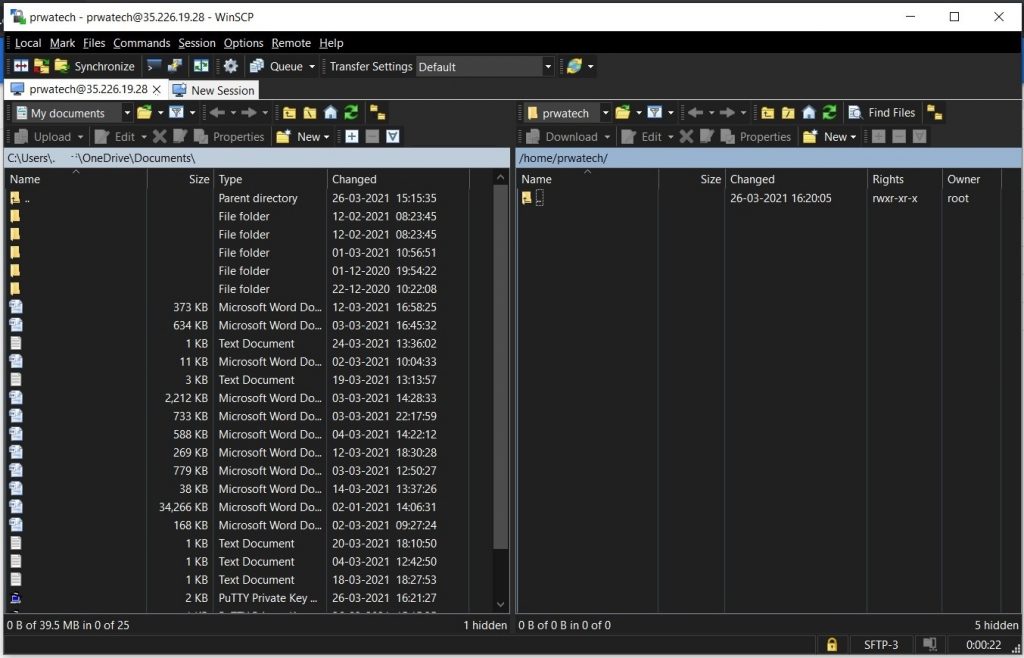
Step Seven: Browse and Transfer Files
You can now see the VM’s files in the right pane. Drag files from your computer on the left into the folder you want.
Where Uploaded Files Go?
You are logged in as a normal user, so uploads land in that user’s home directory, and you can only write where that user has permission. To put a file in a protected folder, upload it to your home directory first, then move it into place from an SSH session using sudo.
If You Cannot Connect
- Permission denied. Check the username matches the key, the public key is in metadata, and the key file is the matching .ppk. If OS Login is enabled on your project, the VM does not accept SSH keys stored in metadata, so use your OS Login username and key instead.
- Connection timed out or refused. Check that a firewall rule allows SSH on port 22 for your network, and that the VM actually has an external IP.
- It worked yesterday. A VM’s external IP is usually ephemeral, meaning it can change when the VM is stopped and started. Copy the current address again, or reserve a static address if you need it to stay the same. The External IP Address in GCP guide in this series covers that.
- No external IP. A VM without one cannot be reached directly this way. Google describes using Identity Aware Proxy tunneling for SSH to internal only VMs.
A Command Line Alternative
If you have the gcloud command line installed, gcloud compute scp copies files and manages SSH keys for you, which avoids most of the key problems above. A basic upload looks like this, though I have not tested it:
gcloud compute scp LOCAL_FILE VM_NAME:~ –zone=ZONE
The Adding Files to Instance Disks Using SSH guide in this series covers the command line route in more detail.
Keeping the Connection Safe
- Protect the private key with a passphrase and keep it off shared computers. Anyone who has it can log in as that user.
- Check the host key fingerprint on your first connection.
- Where you can, narrow the firewall rule so SSH is only allowed from the addresses you actually use.
Common Mistakes to Avoid
- Typing any username into WinSCP. It has to match the username on the SSH key.
- Using a private key that is not in .ppk format.
- Forgetting to add the public key to metadata before connecting.
- Reusing an old external IP address after restarting the VM.
- Trying a metadata key on a project that has OS Login enabled.
That covers connecting WinSCP to a Google Cloud VM and uploading files safely. To go further, explore Prwatech’s Google Cloud training program, which includes placement assistance.
