Cloud SDK Installation [Windows]
Installing the Google Cloud CLI on Windows
The Google Cloud CLI, whose main command is gcloud, lets you create and manage Google Cloud resources by typing commands on your own computer. It is the same set of actions you can take in the console, but repeatable and scriptable. It used to be called the Cloud SDK, and that name still appears in many guides and in the installer’s file name.
Installing it on Windows takes a few minutes, and the installer handles the awkward parts for you, including bringing the version of Python the tool needs and adding gcloud to your path. What is worth getting right is the first sign in, because that is where your computer is linked to your Google account and project.
This walks through downloading the installer, running it, signing in, and choosing your default project, region, and zone, then checking that it works.
Prerequisites:
- A Google account, and ideally a Google Cloud project to connect to.
- Windows 8.1 or later, or Windows Server 2012 or later, which is what Google lists as the minimum.
- An internet connection. The installer downloads components as it goes.
Step by Step Process of Installing the Google Cloud CLI on Windows
Step One: Get the Installer
Download the Google Cloud CLI installer from Google’s install page, which also covers other operating systems. Or, to do it from a PowerShell terminal, run these two commands. The first downloads the installer, and the second runs it:
(New-Object Net.WebClient).DownloadFile(“https://dl.google.com/dl/cloudsdk/channels/rapid/GoogleCloudSDKInstaller.exe”, “$env:Temp\GoogleCloudSDKInstaller.exe”)
& $env:Temp\GoogleCloudSDKInstaller.exe
The original page wrote New-ObjectNet.WebClient and used curly quotation marks, which PowerShell rejects. If you copy a command from a web page and it fails, check for curly quotes.
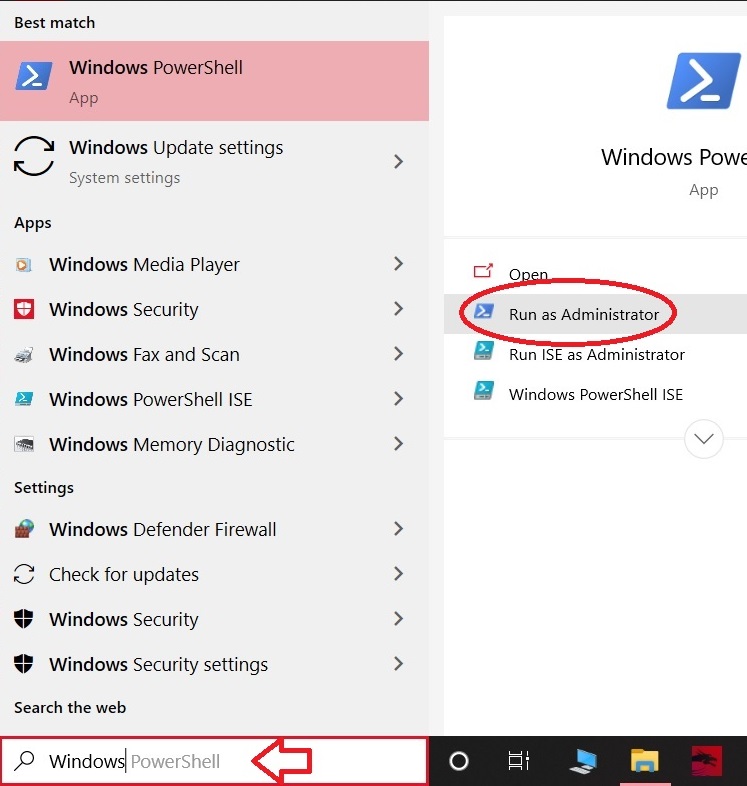
Step Two: Start the Installer
The Google Cloud CLI setup window opens. Click Next.
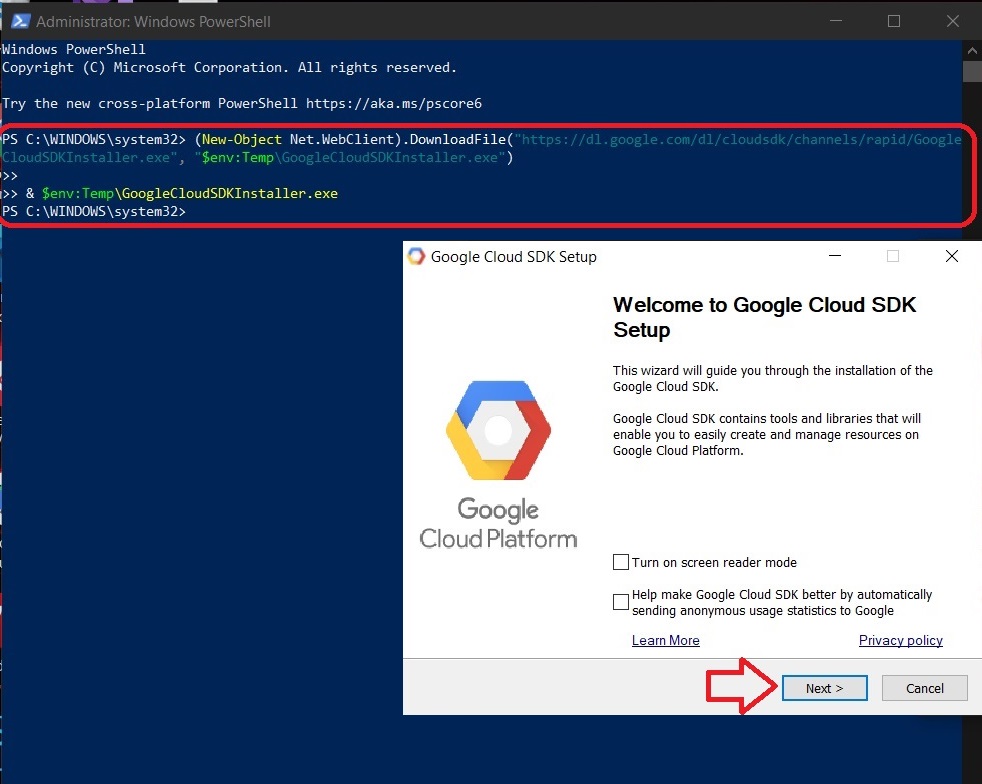
Step Three: Agree to the Licence
Click I Agree.
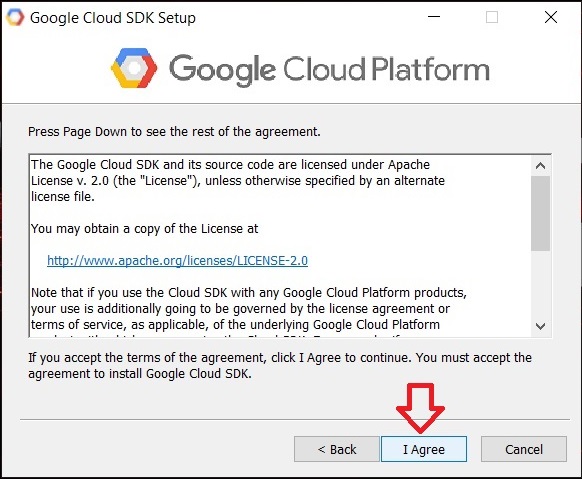
Step Four: Choose the Destination Folder
Choose the folder to install into, then click Next. The default is fine for most people.
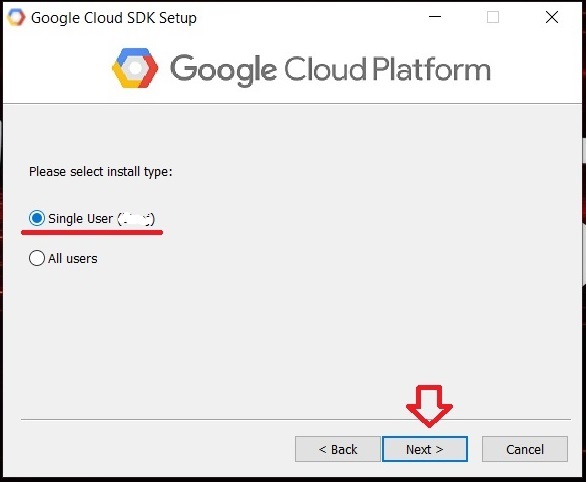
Step Five: Choose Who It is Installed For
Choose the user type, which decides whether the tool is installed just for your account or for everyone who uses the computer. Choosing everyone is likely to need administrator rights. Click Next.
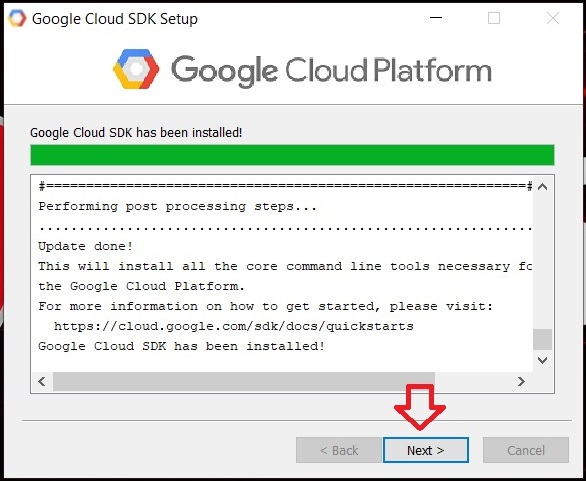
Step Six: Continue Through the Setup
Click Next to continue.
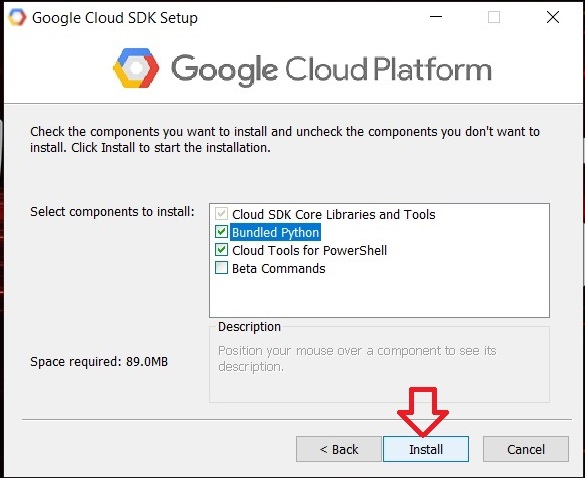
Step Seven: Choose the Components
Select which components to install, then click Install. The installer includes the core libraries and the gcloud tools, and by default it also installs a bundled copy of Python 3. Leave that option ticked unless you already have a supported Python and want to use it. Google lists Python 3.10 to 3.15 as supported.
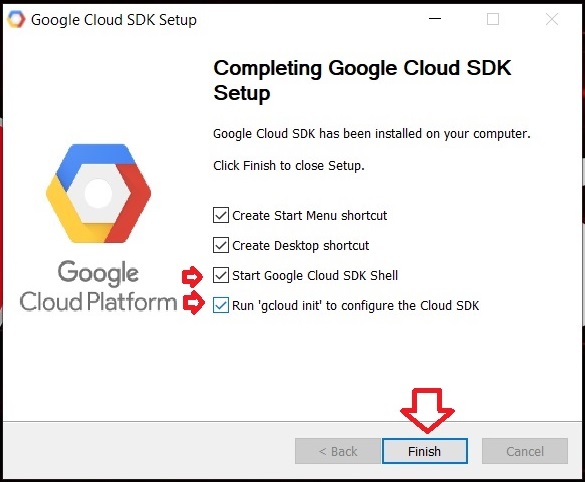
Step Eight: Choose What Happens After the Install
When the install finishes, the last window offers options, such as creating shortcuts and starting the Google Cloud CLI shell. Your screenshot shows the marked options. Leaving the option to start the shell and configure the installation ticked opens a terminal and runs gcloud init for you, which is the easiest path. Google’s newer quickstart instead says to untick the shell option and run gcloud init yourself in the next step. Both end up in the same place. Click Finish.
Step Nine: Sign In
A terminal for the Google Cloud CLI opens and asks whether you want to log in. Type y and press Enter. If it did not open, open a new terminal and run:
gcloud init
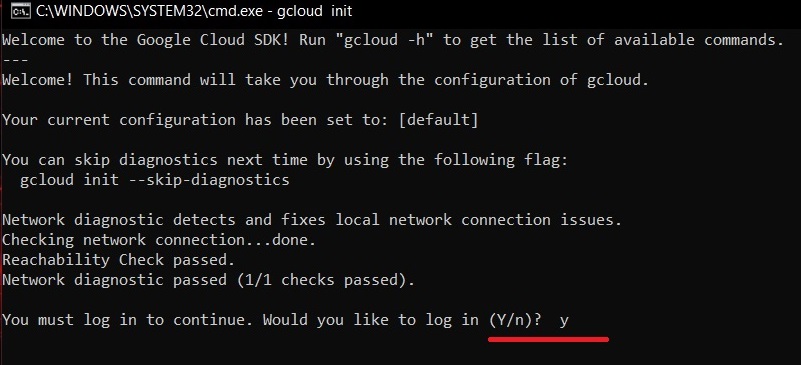
Step Ten: Choose a Browser
Choose the browser you want to sign in with, then click OK. Do not close the command prompt, because it is waiting for you to finish signing in.
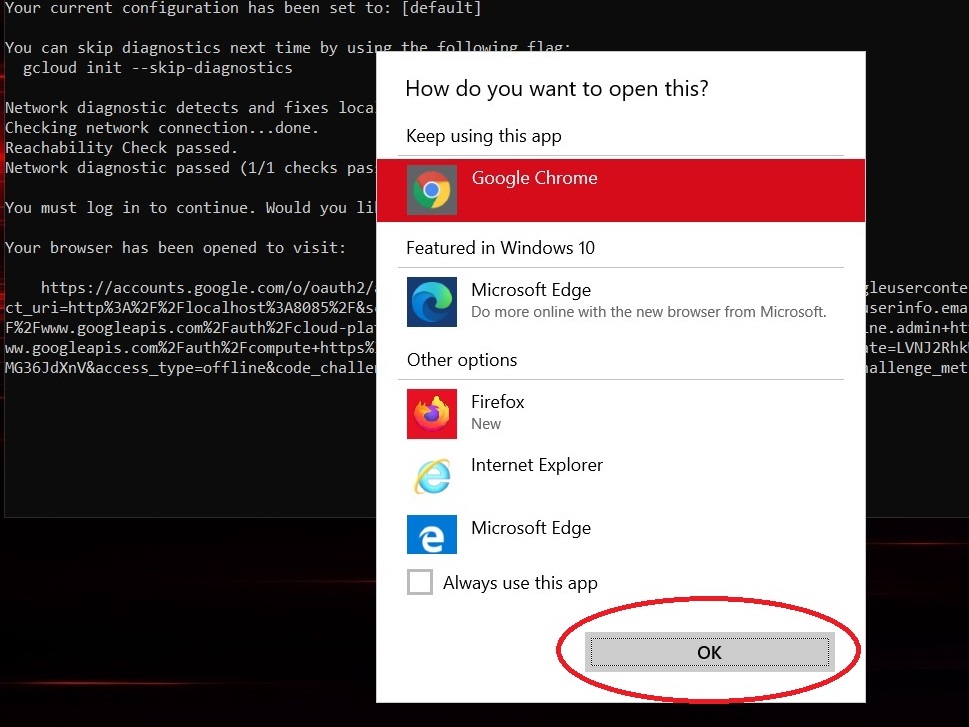
Step Eleven: Allow Access
Sign in to your Google account in the browser, then click Allow.
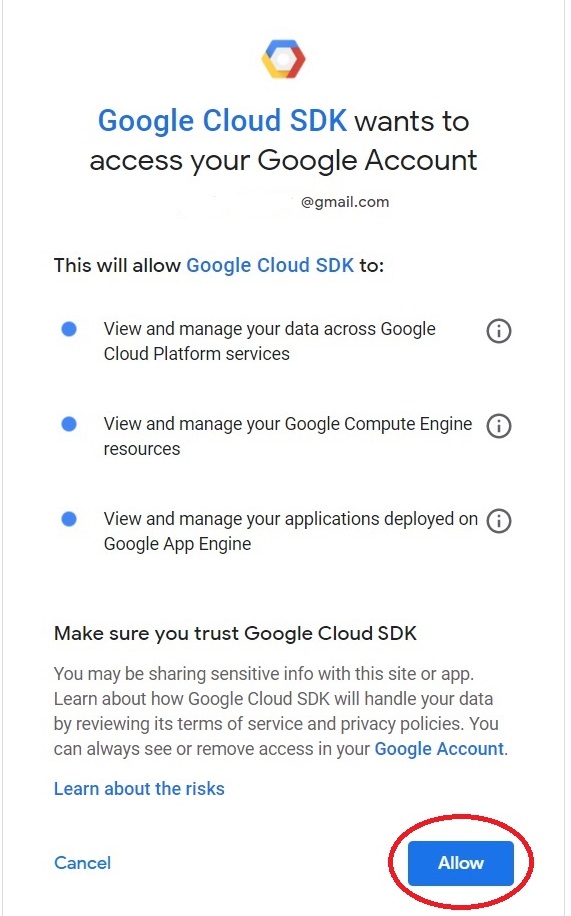
Step Twelve: Confirm You are Signed In
The browser shows a page saying you have authenticated with the Google Cloud CLI.
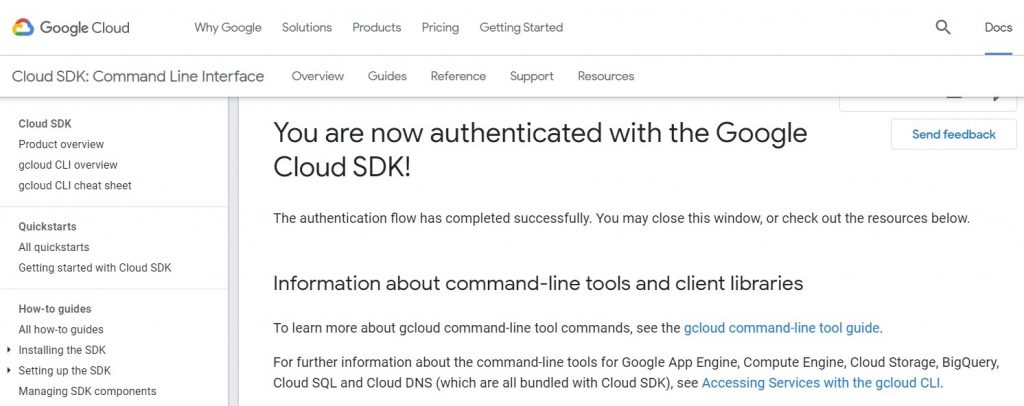
Step Thirteen: Choose Your Project
Go back to the command prompt. It confirms you are signed in, then lists your projects. Type the number of the project you want to work with. The Google Cloud Platform and Project Creation guide in this series explains projects. It then asks whether to configure a default region and zone. Type y to choose them, or n to skip.
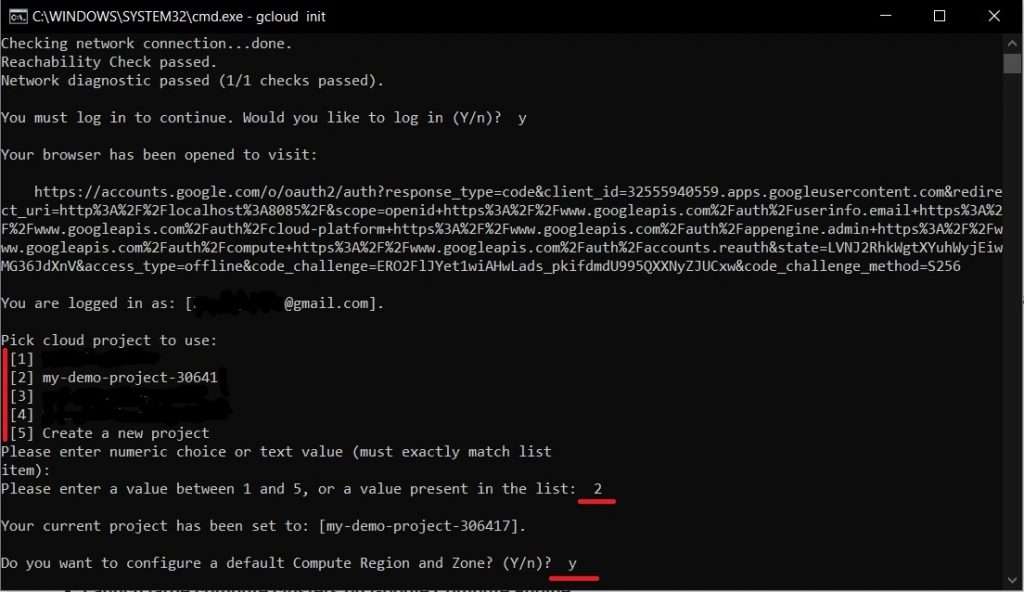
Step Fourteen: Choose a Region and Zone
Choose the region and the zone by typing the number next to each.
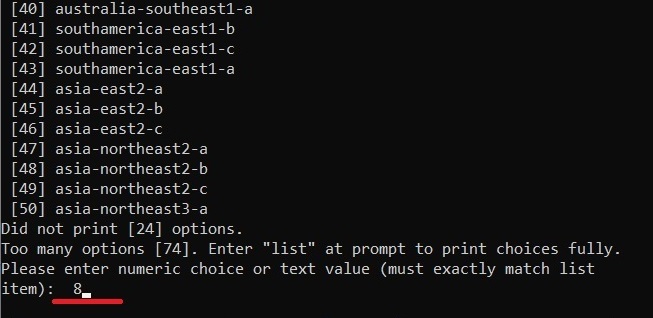
Step Fifteen: Check That It Works
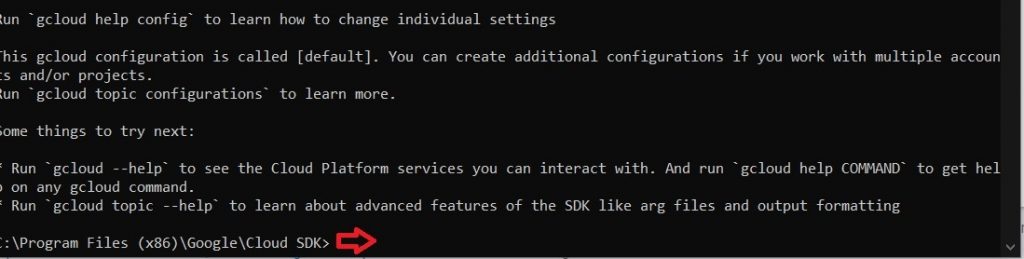
The setup finishes and tells you that you are ready to use the Google Cloud CLI. To check, open a terminal and run the version command, then list your projects:
gcloud version
gcloud projects list
After the Install: Signing In Again and Keeping It Updated
- Signing in again. To sign in with a different account later, run gcloud auth login. To check which account is active, run gcloud auth list.
- Run gcloud components update to bring your tools up to date. This works because you used the installer. The component commands are disabled on installs made with a package manager.
- Changing defaults. To change your default project, region, or zone later, use gcloud config set rather than running the whole setup again. The Codes to Work With Google Cloud SDK guide in this series covers these commands.
Common Mistakes to Avoid
- Copying the PowerShell command with curly quotes or a missing space. It will fail, so retype the quotes and check the spacing.
- Closing the command prompt while the browser sign in is open. The prompt is waiting for the sign in to finish.
- Thinking the CLI replaces the console. They are two ways to manage the same resources.
- Unticking the bundled Python without having a supported version installed.
- Skipping the version check, then discovering later that gcloud is not on your path.
That covers installing the Google Cloud CLI on Windows, signing in, and checking that it works. To go further, explore Prwatech’s Google Cloud training program, which includes placement assistance.






