Creation of SSH key using puTTY for GCP
Creating an SSH Key With PuTTY for Google Cloud
Linux VMs on Google Cloud do not use passwords for SSH. They use a key pair, a private key that stays on your computer and a public key that you put on the VM. When you connect, the two prove you are who you say you are. Everything in this guide is about creating that pair, putting the public half in the right place, and connecting with the private half.
On Windows, three pieces are involved. PuTTYgen creates the key pair. Compute Engine metadata holds the public key. PuTTY is the program that connects, using the private key. And one detail ties them together, the username. The comment you attach to the key becomes the username on the VM, and you must use that same username every time you connect.
This walks through creating a key with PuTTYgen, adding it to metadata, and connecting with PuTTY, then covers the faster route on Windows 10 or later, how project and instance keys differ, and how to remove or expire a key.
Which Tool Does What?
- PuTTYgen, creates the key pair and saves the private key as a .ppk file.
- PuTTY, connects to the VM using that private key.
- Compute Engine metadata, stores the public key so the VM accepts it.
Prerequisites:
- A Google Cloud account and a running Linux VM with an external IP address. The Creating an Instance Using Developers Console guide in this series covers that.
- PuTTY and PuTTYgen installed on your Windows computer.
Step by Step Process of Creating an SSH Key With PuTTY
Step One: Create the Key and Set the Username
Open PuTTYgen and choose the RSA key type. Google’s own example creates an RSA key pair. Click Generate and move the mouse over the blank area until the key appears. Then fill in two fields. In Key comment, type the username you want on the VM. In Key passphrase and Confirm passphrase, type a passphrase and remember it, since it protects the private key.
Set the comment before you copy the public key. The text in the public key box includes the comment, so if you change it afterward, you have to copy the key again.
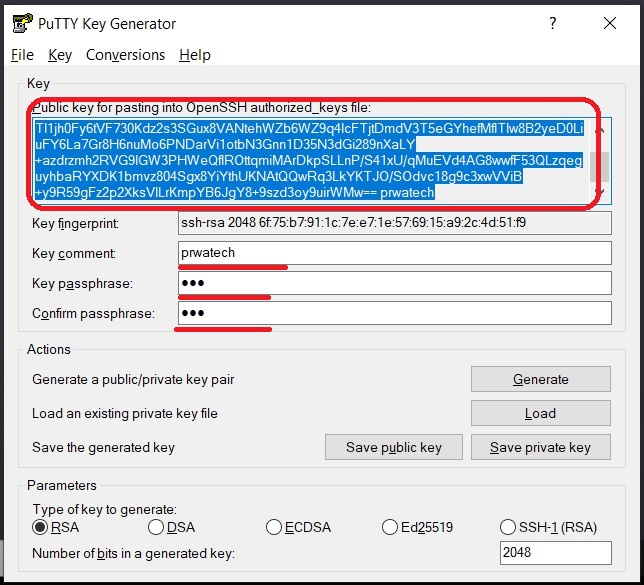
Step Two: Open the Metadata Page
Leave PuTTYgen open. In the console, open Compute Engine, then Metadata. The original page wrote this path backwards.
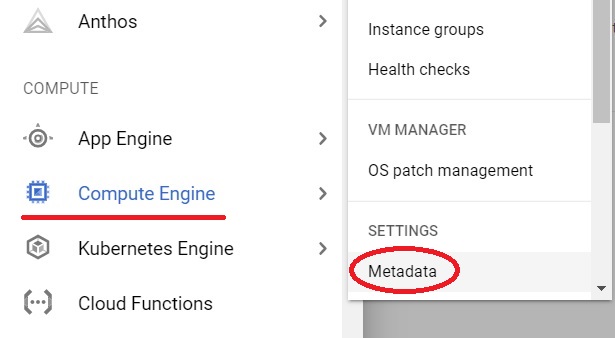
Step Three: Find the SSH Keys Settings
On the Metadata page, find the SSH keys area.
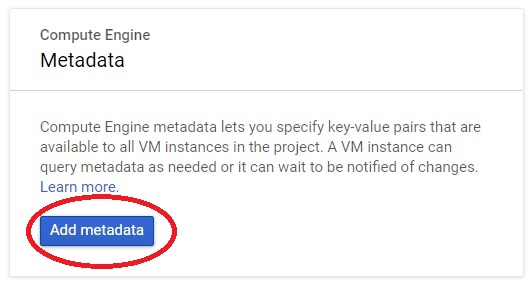
Step Four: Click SSH Keys, Then Edit
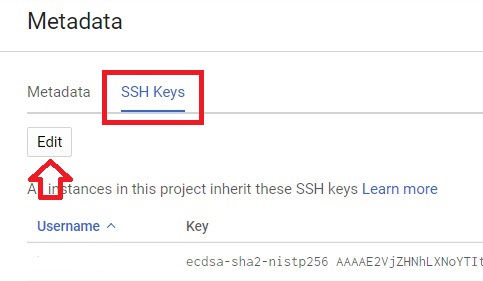
Step Five: Add the Public Key
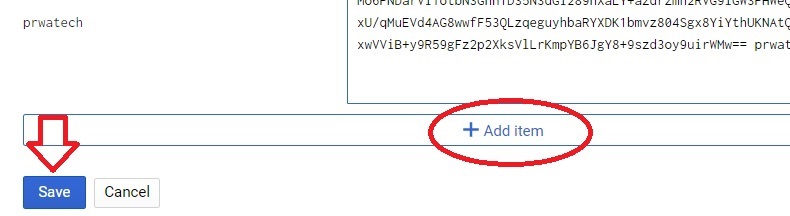
Click Add item, then paste in the key. Copy it from the field in PuTTYgen labelled Public key for pasting into OpenSSH authorized_keys file, and not from a public key file you saved, which uses a different format. The pasted line should be the key followed by your username. Click Save.
Step Six: Save the Private Key
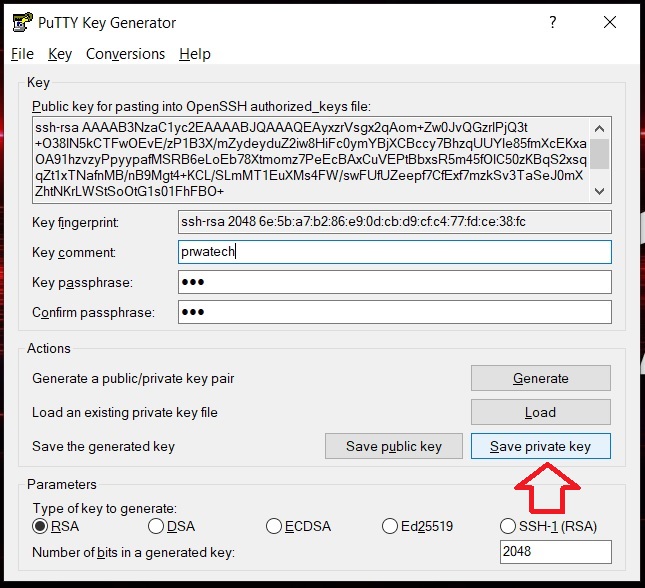
Go back to PuTTYgen and click Save private key. Choose a safe location and save it. PuTTYgen writes the private key with a .ppk extension. You can then close PuTTYgen.
Step Seven: Copy the External IP Address
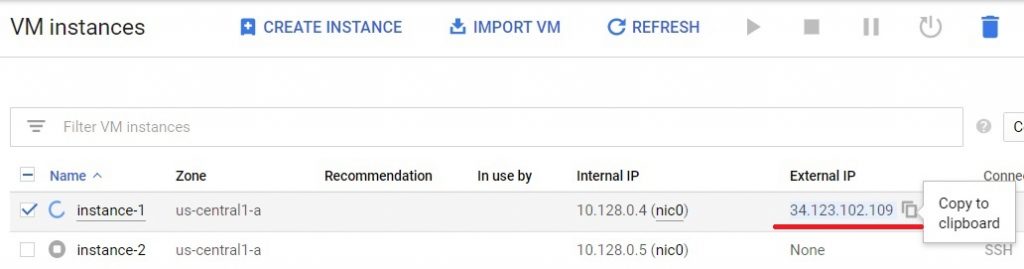
Open VM instances in the console and copy the External IP of your VM.
Step Eight: Enter the Host Name in PuTTY
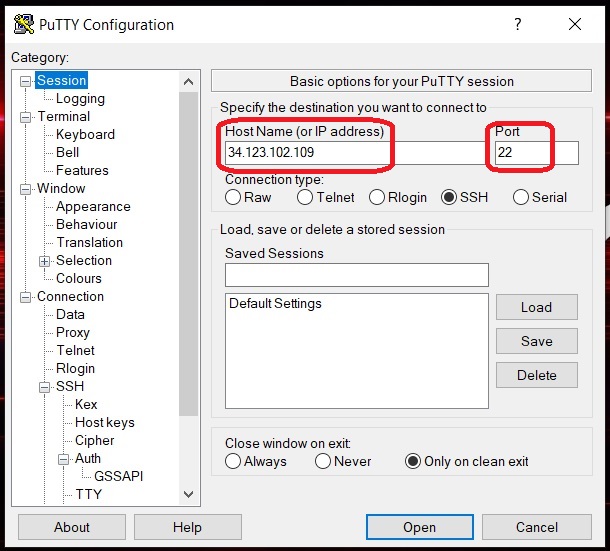
Open PuTTY. In the Host Name field, enter your username and the external IP address, written as the username, then the at sign, then the address. The port is selected automatically. Putting the username here means PuTTY will not ask for it later.
Step Nine: Point PuTTY at Your Private Key
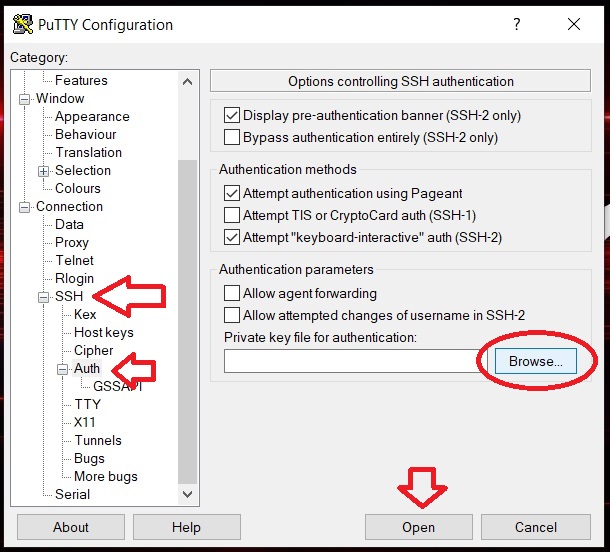
In the left menu, go to Connection, then SSH, then Auth. In some newer versions of PuTTY, the key field sits under a Credentials page inside Auth. Click Browse, select the .ppk file you saved, and click Open.
Step Ten: Accept the Host Key Alert
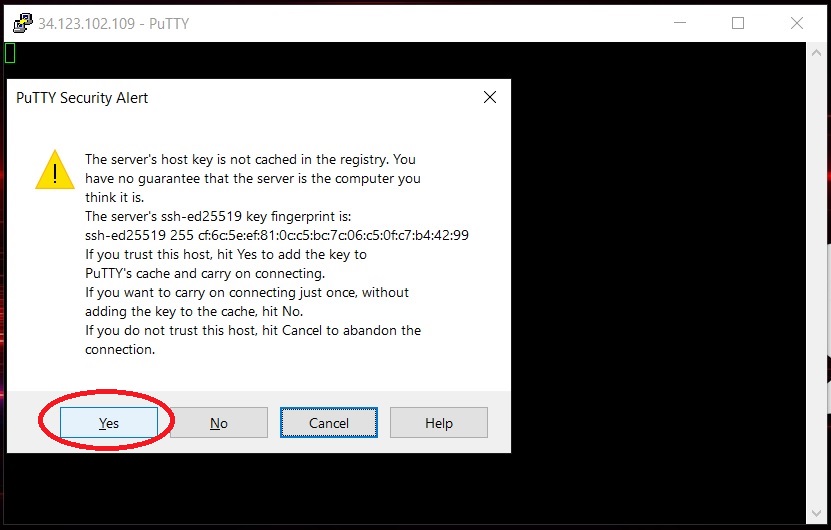
The first time you connect, PuTTY shows a security alert. This is PuTTY asking whether you trust the server’s host key, which identifies your VM. Clicking Yes stores it so PuTTY can warn you if it ever changes. Ideally, compare the fingerprint with one you get securely through the console’s browser SSH window before you click Yes.
Step Eleven: Log In
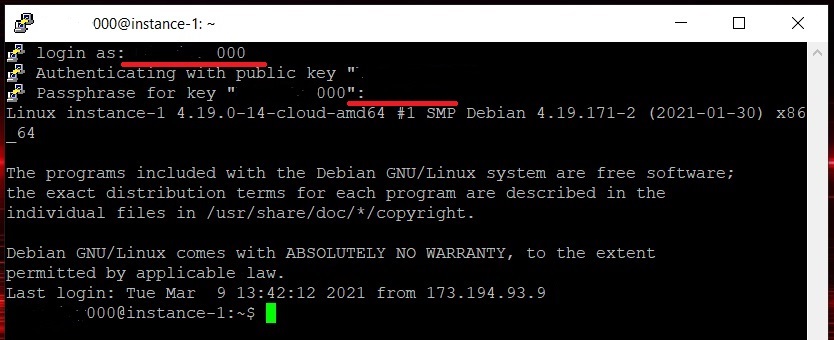
If you did not put the username in the Host Name field, PuTTY asks for it. It then asks for the passphrase you set for the key. This is not a password for the VM, and nothing shows on screen as you type it. Press Enter. You are now connected to the VM.
A Faster Way on Windows 10 or Later
Google’s guide on creating SSH keys says that on Windows 10 or later you can use the built in OpenSSH tools, and that PuTTYgen is for Windows 8 or earlier. In a terminal, this creates a key pair, with the username after the C flag. Replace the placeholders with your own values:
ssh-keygen -t rsa -f C:\Users\WINDOWS_USER\.ssh\KEY_FILENAME -C USERNAME -b 2048
Add the contents of the new public key file to metadata, as in Step Five, then connect with the private key. I have not tested the exact command, so check it against Google’s guide:
ssh -i PATH_TO_PRIVATE_KEY USERNAME@EXTERNAL_IP
Project Keys, Instance Keys, and Removing Them
- Project metadata. A key added here, as in this guide, can access all VMs in the project, except VMs that block project wide keys.
- Instance metadata. A key added to one VM’s settings works only for that VM, which is safer when you do not need broad access.
- Blocking project keys. On a VM, tick Block project wide SSH keys so only that VM’s own keys are accepted.
- Removing a key. Delete the line from project or instance metadata, using the console, gcloud, or the API. Do this when someone leaves.
- Expiring a key. Google supports adding an expiry to a metadata key. The key line is written as the key value, then google-ssh, then a small block of text giving the username and an expiry time. Check Google’s guide for the exact format.
If Your Project Uses OS Login
VMs that use OS Login accept SSH keys that are associated with your Google Account, and a VM with OS Login enabled does not accept keys stored in metadata. If you add a key to metadata and still get permission denied, check whether OS Login is on for the project or the VM.
Keeping Your Key Safe
- Protect the private key with a passphrase, and keep the .ppk file private.
- Never paste the private key into metadata. Only the public key goes there.
- Remove keys from metadata when they are no longer needed.
Common Mistakes to Avoid
- Using a different username to connect than the one in the key comment. The username has to match.
- Copying the public key from a saved file instead of the OpenSSH field in PuTTYgen.
- Typing the VM’s password at the prompt. The prompt wants the key’s passphrase.
- Adding a key to project metadata when only one VM needs it.
- Forgetting that OS Login ignores metadata keys.
That covers creating an SSH key for a Google Cloud VM and connecting with it. To go further, explore Prwatech’s Google Cloud training program, which includes placement assistance.






