Creating an Instance using cloud shell
Creating a VM Instance Using Cloud Shell
Cloud Shell is a terminal that runs in your browser, with the Google Cloud CLI already installed and already signed in as your account. That means you can create a VM by typing one command, with nothing to download and no setup on your own computer.
The command itself is short, but each part of it is a decision. The name identifies the VM, the machine type sets its power and price, the disk size sets its storage, and the zone sets where it runs. If you do not choose these, gcloud fills them in with defaults that may not be what you wanted, so it is worth knowing which defaults you are accepting.
This walks through opening Cloud Shell and creating a VM with one command, then covers how to choose the zone and image yourself, how to create several VMs at once, how to connect, and how to delete the VM.
Prerequisites:
- A Google Cloud account, a project, and billing enabled on it. The Enabling Billing guide in this series covers that.
Step by Step Process of Creating an Instance using cloud shell
Step One: Activate Cloud Shell
Open Cloud Console.
Click on Activate Cloud Shell.
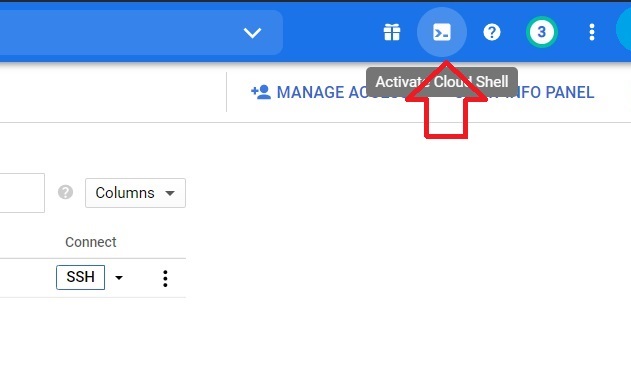
Step Two: Click Continue
The first time you open it, Cloud Shell asks you to continue. Click Continue and wait for the terminal to start.
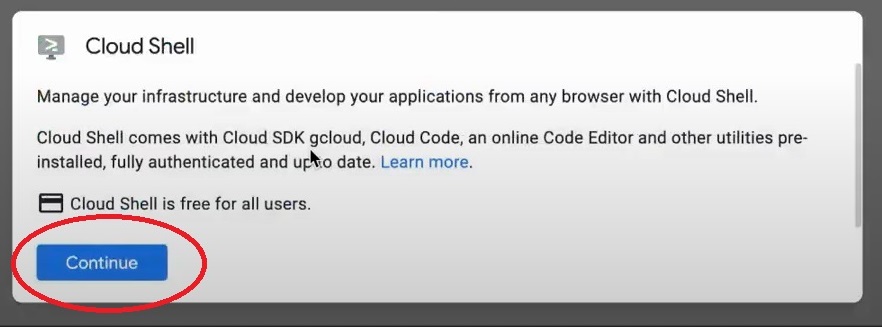
Step Three: Run the Create Command
Type this command, replacing the placeholders with your own values. The flags have two hyphens, and no space after the equals sign:
gcloud compute instances create VM_NAME –zone=ZONE –machine-type=MACHINE_TYPE –boot-disk-size=DISK_SIZE
For example:
gcloud compute instances create my-vm –zone=us-central1-a –machine-type=e2-medium –boot-disk-size=20GB
The original page wrote the flags with an en dash and angle brackets, which does not work. Giving the zone yourself skips the question below. If you leave it out, gcloud proposes a zone and asks Did you mean that zone. Press y to accept it, or n to choose another from a numbered list.

Naming Rules
A VM name can use lowercase letters, numbers, and hyphens only. No capital letters and no other symbols, as the original page says. The name also has to begin with a lowercase letter. Google applies the RFC1035 rules to instance names.
Choosing the Machine Type, Disk, and Operating System
- Machine type. If you leave it out, Google’s reference says the default is n1-standard-1. Always set it yourself, since it decides the price. Run gcloud compute machine-types list to see the options.
- Boot disk size. A whole number followed by a unit such as 20GB. It must be a multiple of 1 GB. If you leave it out, the size of the image is used.
- Operating system. Choose an image with an image family and an image project, for example a Debian image from the debian cloud project:
gcloud compute instances create my-vm –zone=us-central1-a –machine-type=e2-medium –image-family=debian-12 –image-project=debian-cloud –boot-disk-size=20GB
To see which images exist, run gcloud compute images list. The gcloud Commands for Working With Google Cloud guide in this series shows how to narrow that long list.
Creating Several VMs at Once
Give more than one name in the same command and gcloud creates them all with the same settings, as in Google’s reference example:
gcloud compute instances create vm-1 vm-2 vm-3 –zone=us-central1-a
Remember that each VM bills separately, so three VMs cost three times as much.
Step Four: Check That the VM Exists
After the command finishes, it prints a line for your VM showing its name, zone, machine type, addresses, and status. Back in the console, open Compute Engine, then VM instances, and press the refresh button. The VM you created is listed. You can also check from Cloud Shell:
gcloud compute instances list
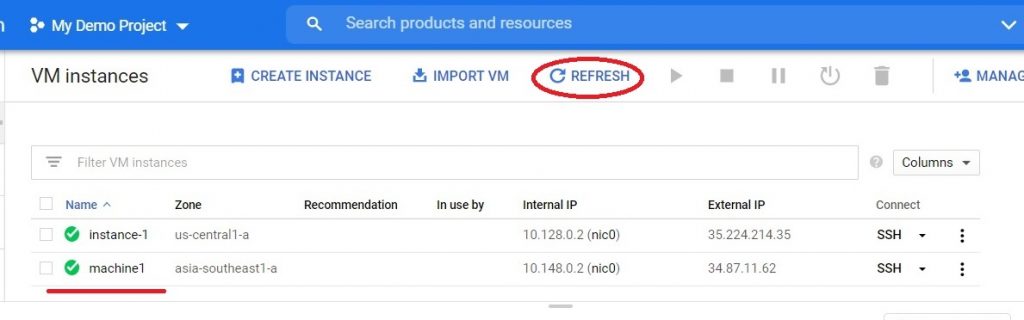
Connecting to the VM
From Cloud Shell, you can open an SSH session with one command, and gcloud sets up the SSH keys for you, which avoids the key problems described in the Creation of SSH Key Using PuTTY guide in this series:
gcloud compute ssh VM_NAME –zone=ZONE
Cost and Cleanup
A VM bills from the moment it is created. A stopped VM generally stops billing for compute, but its disk still costs money, and a deleted VM stops billing for both, since its boot disk is deleted with it by default. When you finish practising, delete the VM:
gcloud compute instances delete VM_NAME –zone=ZONE
Check the name and zone before you confirm, because deleting cannot be undone. The Deleting an Instance Using the Developers Console guide in this series shows the console route.
Common Mistakes to Avoid
- Writing flags with an en dash or leaving a space after the equals sign. Use two real hyphens and no spaces.
- Accepting the suggested zone without checking it. State the zone in the command.
- Leaving out the machine type and getting the default, which may cost more or less than you intended.
- Using capital letters or underscores in the VM name. Use lowercase letters, numbers, and hyphens.
- Leaving a practice VM running after you finish.
That covers creating a VM from Cloud Shell, with the broken command fixed and the defaults explained. To go further, explore Prwatech’s Google Cloud training program, which includes placement assistance.






