Cloud SDK Installation [Windows]
Windows Cloud SDK installation guide
Prerequisites
Hardware : GCP
Google account
There’s another method to access the GCP cloud console. We can access it through our local machine also. Cloud SDK are used for it.
Click on the link below to download the cloud SDK for windows.
https://dl.google.com/dl/cloudsdk/channels/rapid/GoogleCloudSDKInstaller.exe
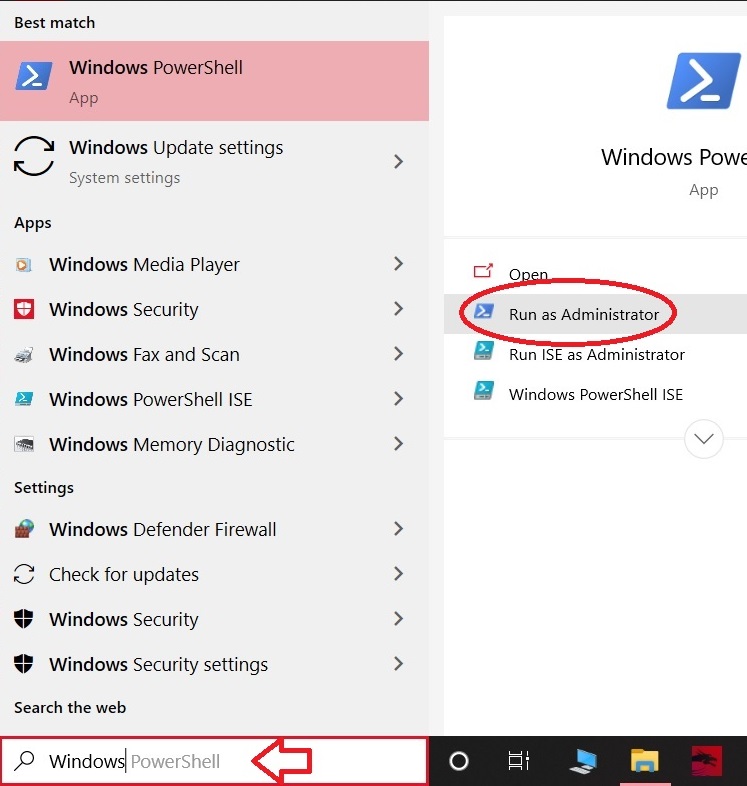
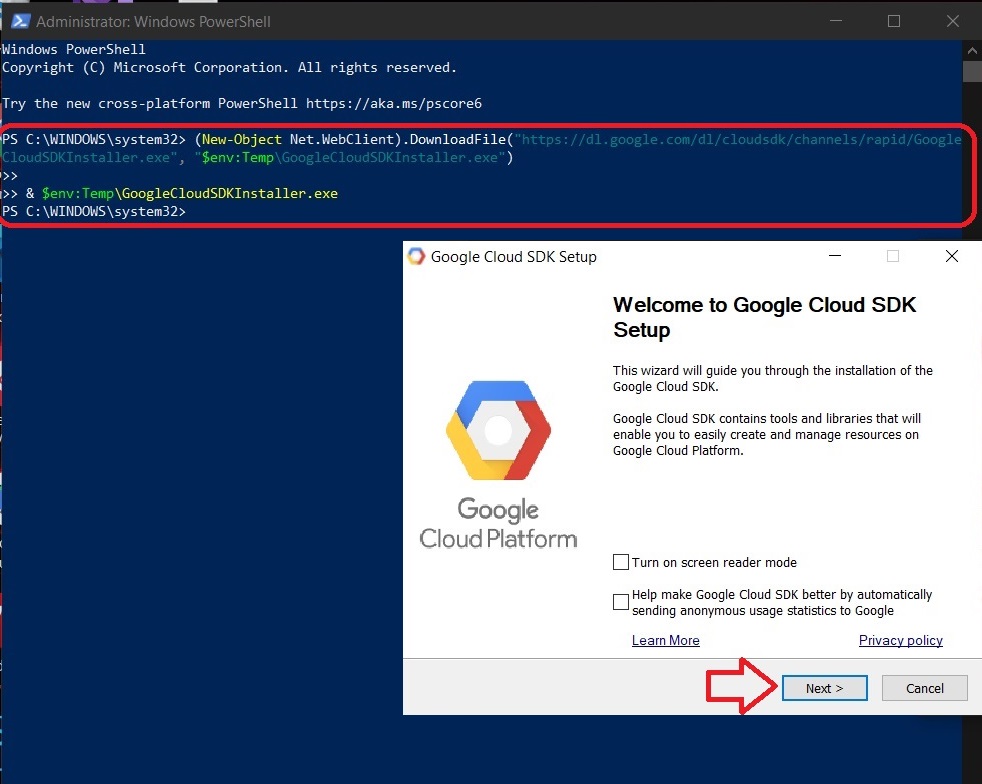
Or open the PowerShell >Run as administrator. Copy the below code.
(New-ObjectNet.WebClient).DownloadFile(“https://dl.google.com/dl/cloudsdk/channels/rapid/GoogleCloudSDKInstaller.exe”, “$env:Temp\GoogleCloudSDKInstaller.exe”)
&$env:Temp\GoogleCloudSDKInstaller.exe
For other Operating System click the below link.
https://cloud.google.com/sdk/docs/quickstart
It will open Google Cloud SDK. Click next for Installation.
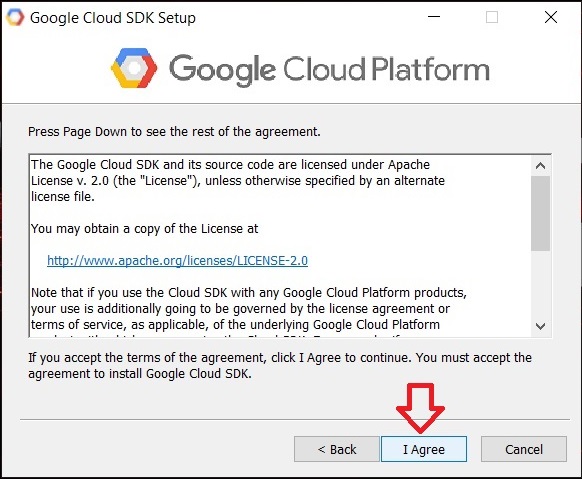
Click on I agree.
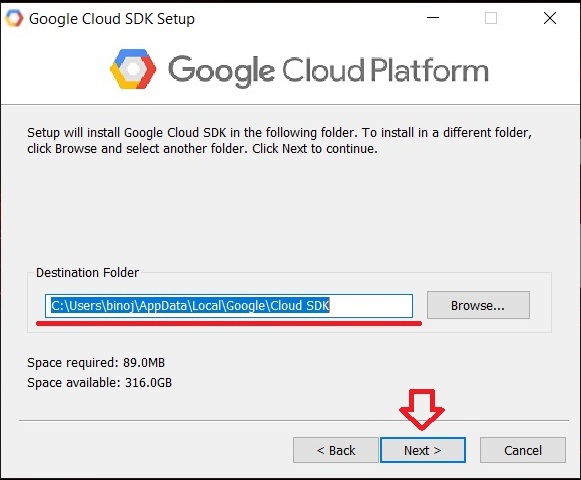
Choose the destination folder where you want to install and click next.
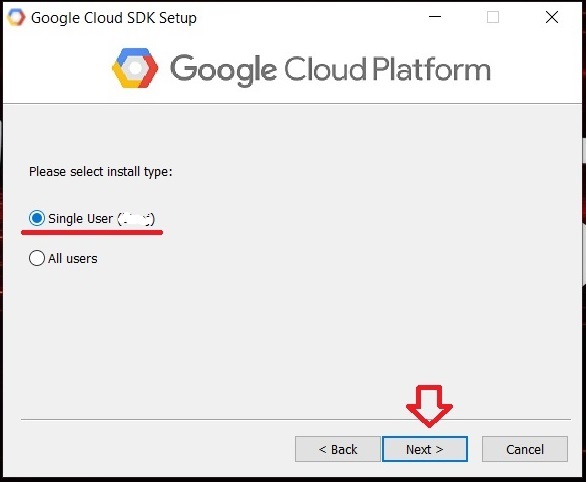
Choose the user type accordingly and click next.
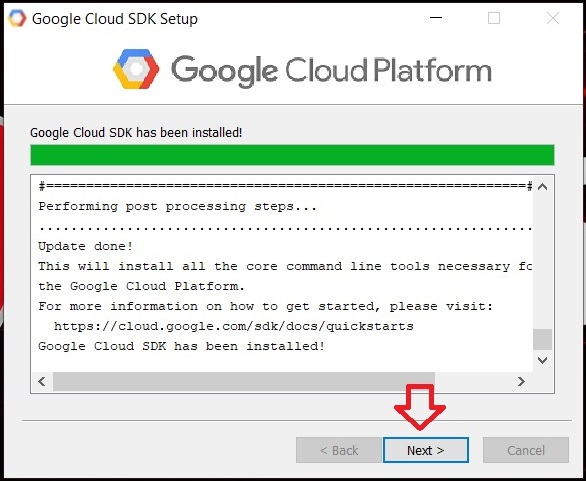
After installation click next.
Select which components you want to install. Click install to continue.

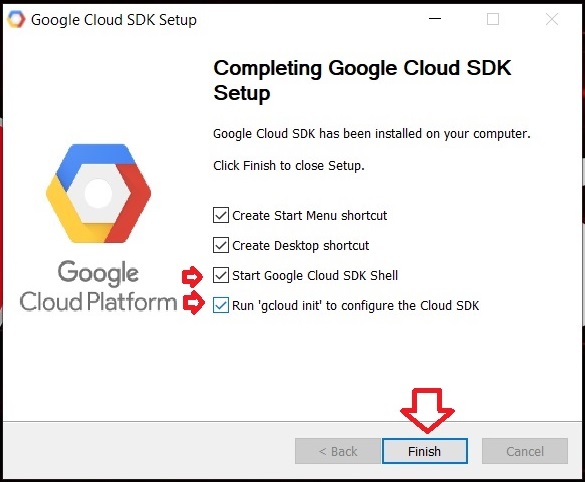
After installation it will open the below window. Make sure to choose the marked ones and click finish.
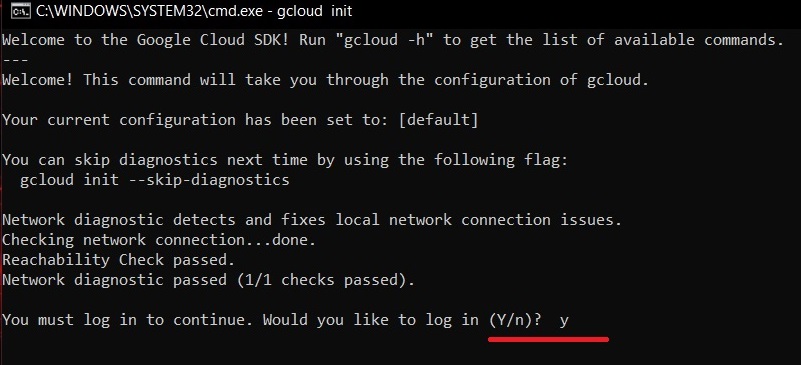
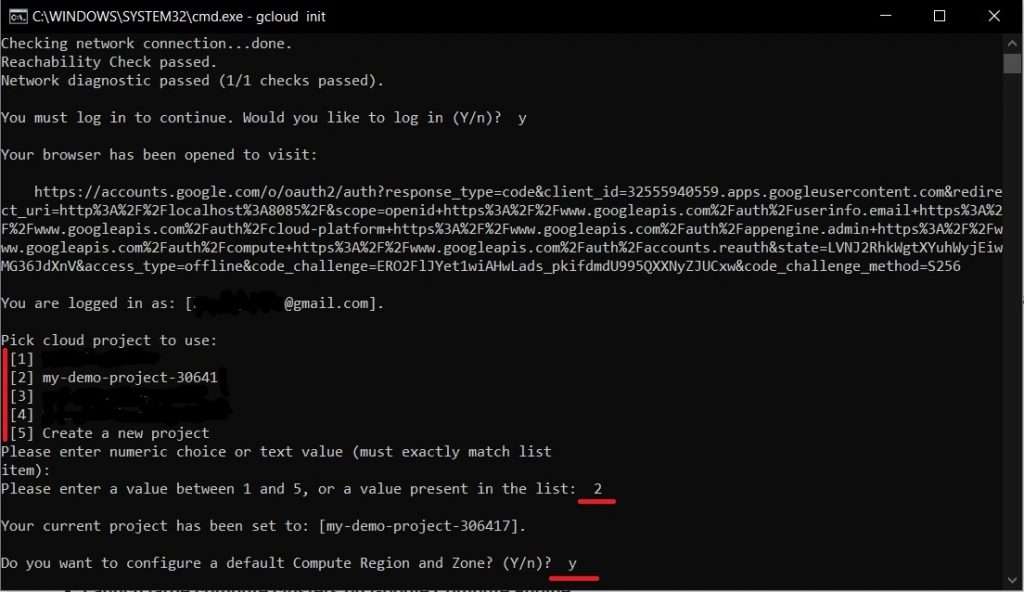
It will open the terminal for Google Cloud SDK. Type “y” to login and press enter.
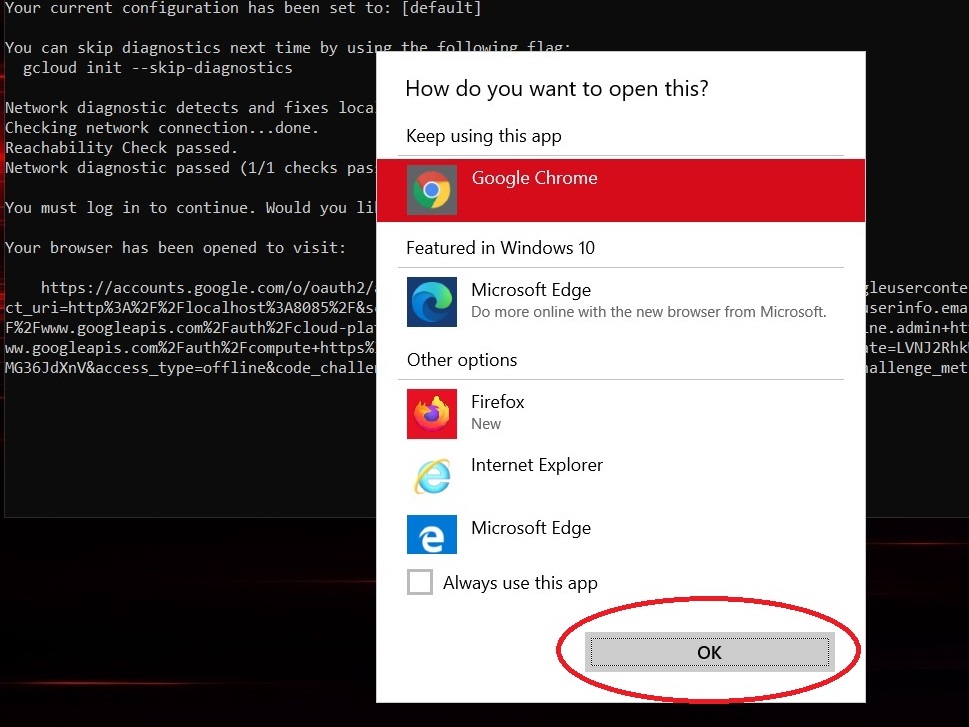
Choose the browser you want and press OK.
NB: Don’t close the Command prompt.
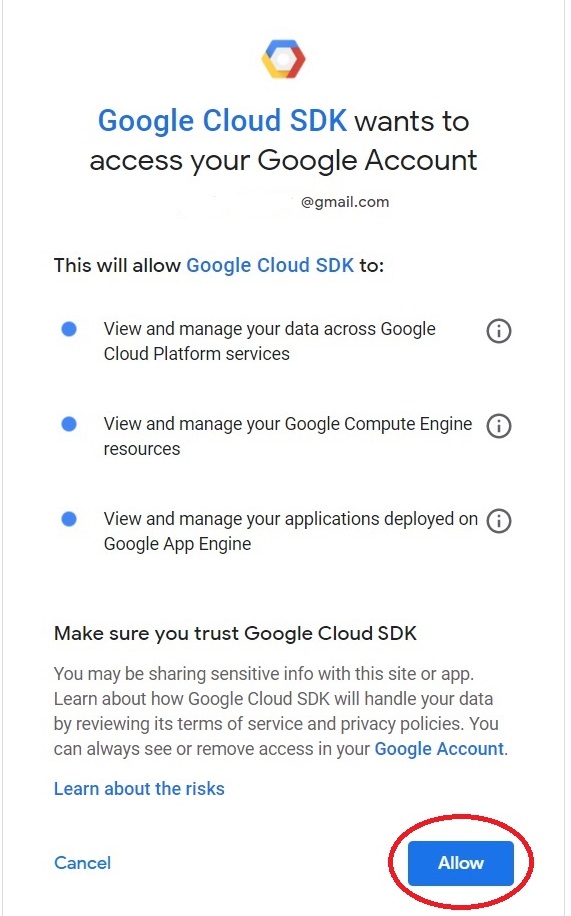
Login to your account and press Allow.
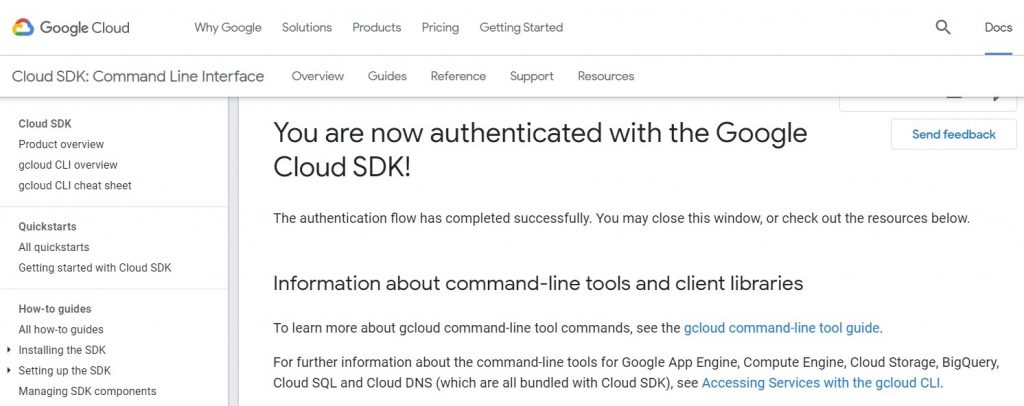
It will open the window showing you successfully authenticated with Google Cloud SDK.
Go back to the command prompt and it will show that you are logged in successfully. Choose the project which you want to work. Type the corresponding number. You can configure the new default Region and zone by typing “y”. “n” to choose default region and zone.
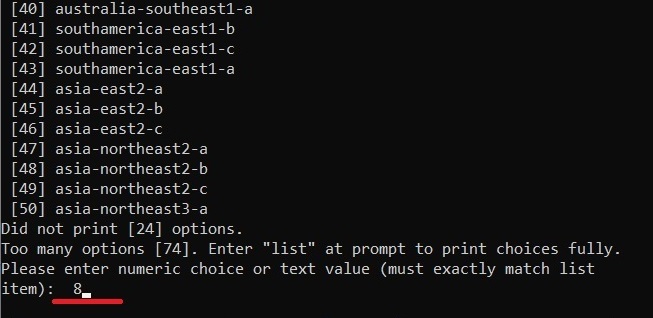
Choose the region and the zone by typing the corresponding number.
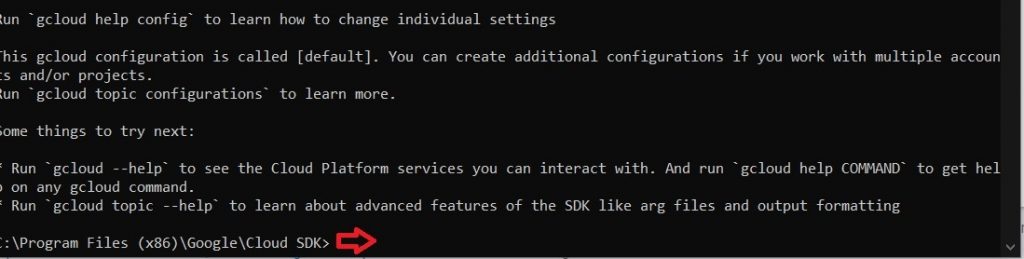
And Boom! Now you can use Google Cloud SDK.