Google Cloud Platform & Project creation
Creating, Deleting, and Restoring a Google Cloud Project
In Google Cloud, a project is the container for everything you create. Virtual machines, storage buckets, and datasets all belong to a project, and so do billing, access permissions, enabled APIs, and quotas. Many of the other guides in this series assume you already have a project selected, which is why creating one correctly is the first real step.
Every project has three identifiers, and two of them matter the moment you create it. The project name is a label for people and can be changed later. The project ID is globally unique and cannot be changed once the project exists, so a careless choice means starting a new project. And a deleted project is only recoverable for 30 days, so it helps to know how shutdown and restore work before you need them.
This walks through signing up and starting the free trial, creating a project and choosing its name and ID, then shutting a project down and restoring it.
Step by Step Process of Creating, Deleting, and Restoring a Google Cloud Project
Step One: Start at Google Cloud
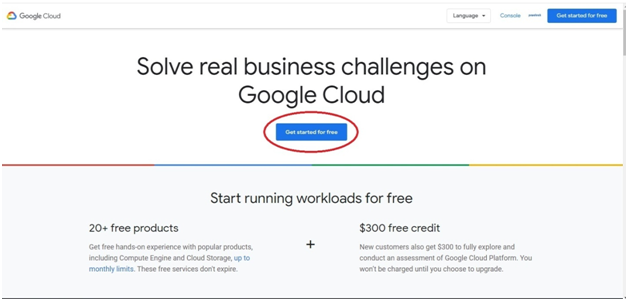
Go to cloud.google.com and choose the option to get started for free.
Step Two: Sign In With a Google Account
Sign in with the email address and password of your Google Account. If this is for business use, use your work account. A Gmail address is not required, since a Google Account can be created with an existing email address.
Step Three: Accept the Terms and Start the Free Trial
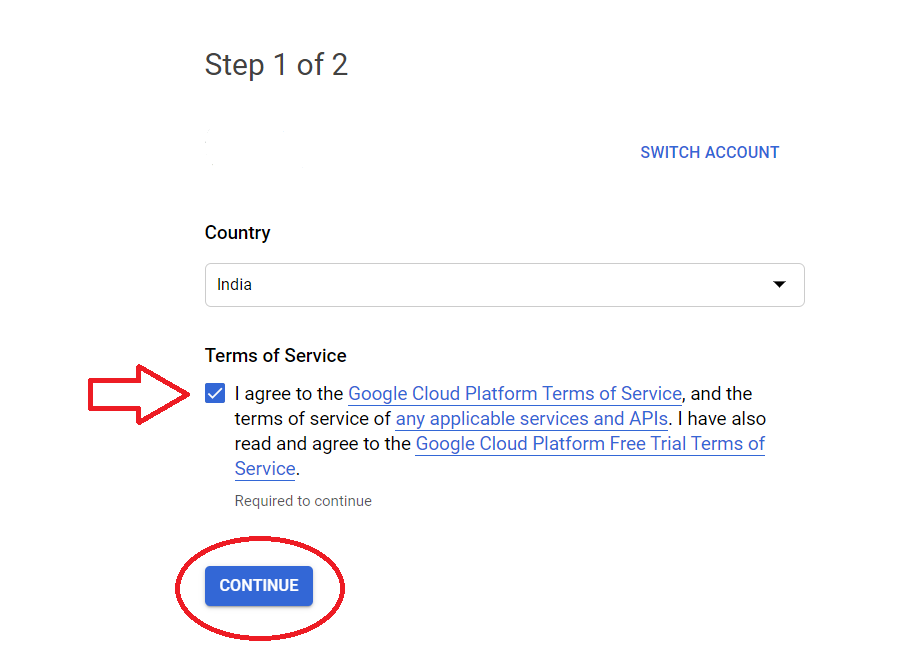
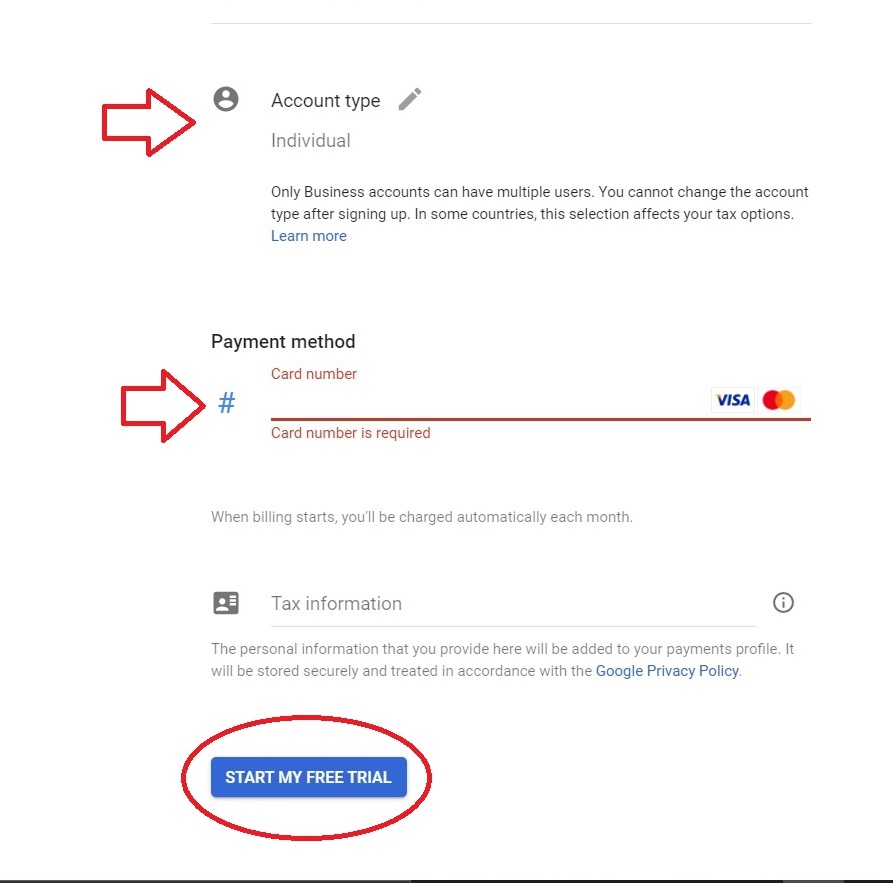
Accept the terms of service and click Continue, then choose the account type and start the free trial. The Enabling Billing guide in this series explains what the free trial includes and what happens when it ends.
Project Name, Project ID, and Project Number
- Project name, a human readable label. It must be 4 to 30 characters long and can contain letters, numbers, single quotes, hyphens, spaces, and exclamation points. Google APIs do not use it, and you can change it later.
- Project ID, a globally unique identifier that is permanent once the project is created. It must be 6 to 30 characters long, start with a lowercase letter, contain only lowercase letters, digits, and hyphens, and not end with a hyphen. It also cannot be one that is already in use or has been used before, and that includes deleted projects.
- Project number, a number Google generates automatically. You do not choose it.
Project names and IDs can appear in logs and billing records, so avoid putting sensitive information in them.
Step Four: Select a Project
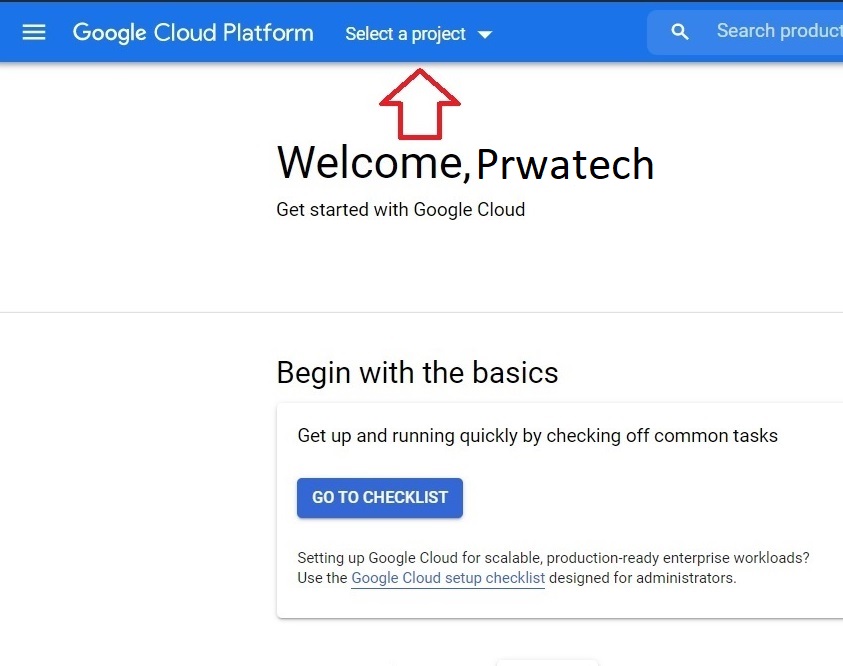
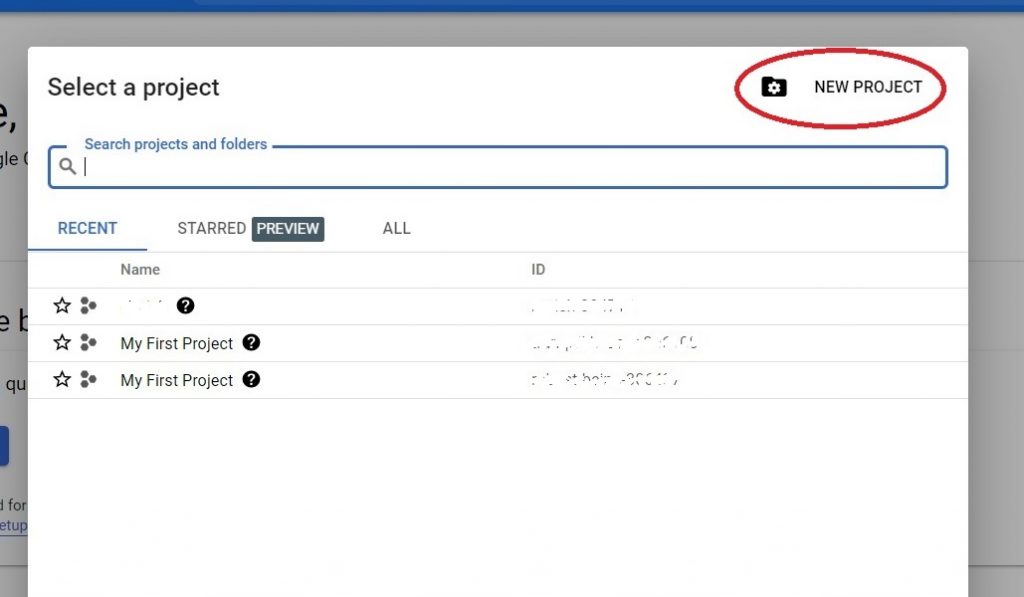
To create a new project, click Select a project.
Step Five: Click New Project
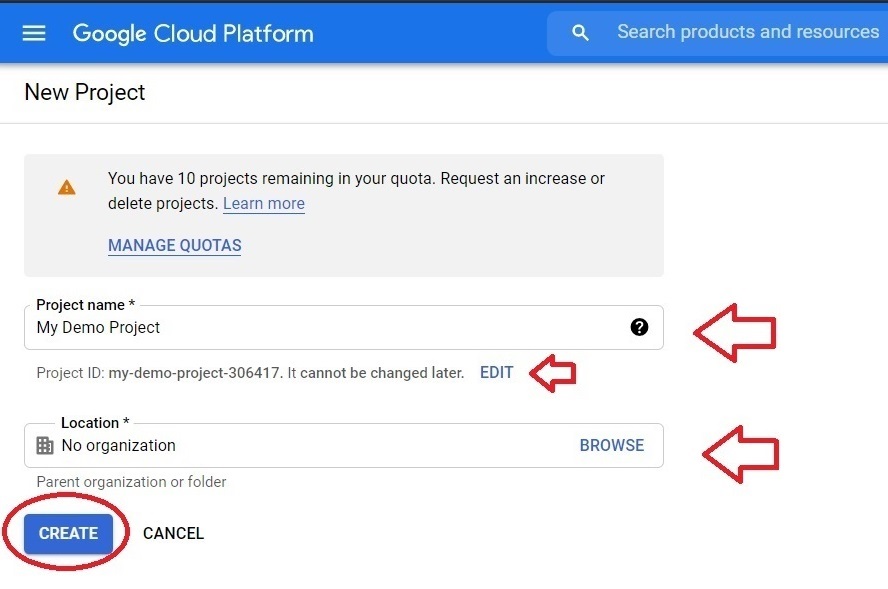
Step Six: Enter the Name and the Project ID
Give the project a name. A project ID is generated for you automatically from the name, and you can click Edit to change it. Check it now, because the name can be edited later but the ID cannot.
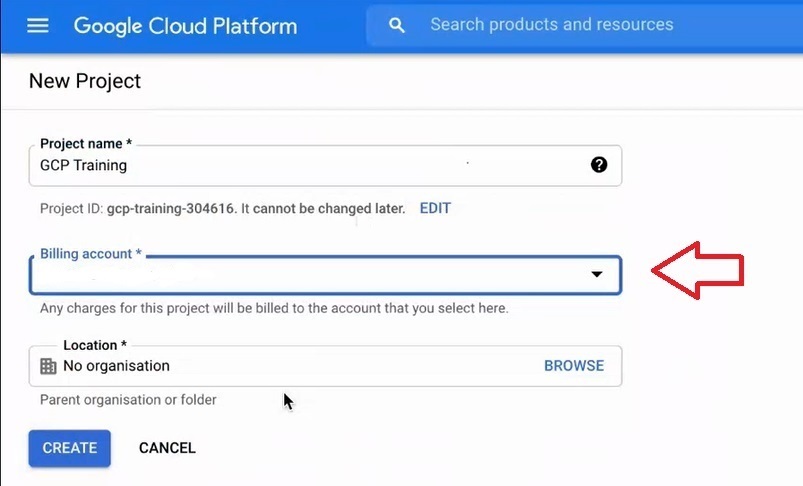
Step Seven: Choose a Billing Account
If the dialog asks for a billing account, choose the one that should pay for this project. A project has to be linked to an active billing account before it can use Google Cloud resources. The Enabling Billing guide in this series covers setting one up.
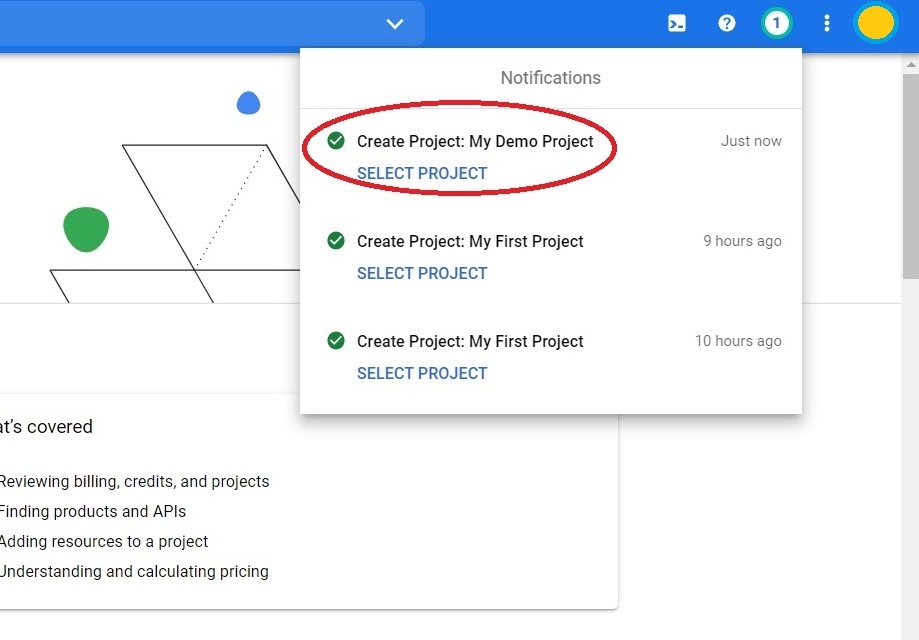
Step Eight: Create the Project
Click Create. When it finishes, click Select project, and the new project is now your active project.
Step Nine: Open Project Settings
To remove a project, go to Project settings in the project info panel.
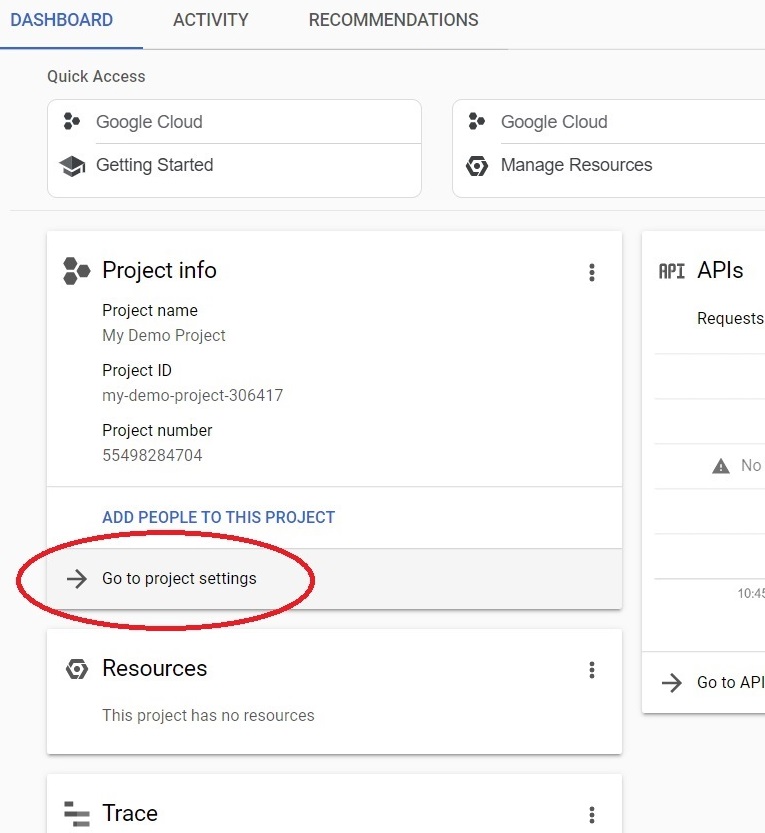
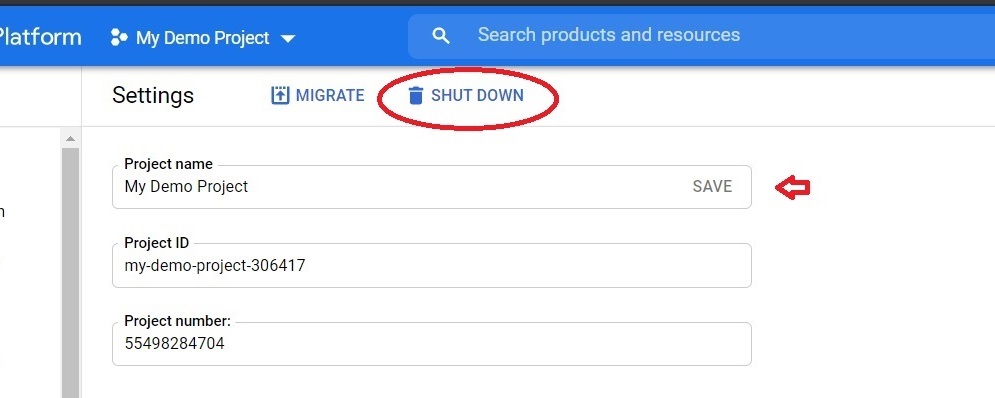
Step Ten: Click Shut Down
Click Shut down. This option only appears for users who have permission to delete the project.
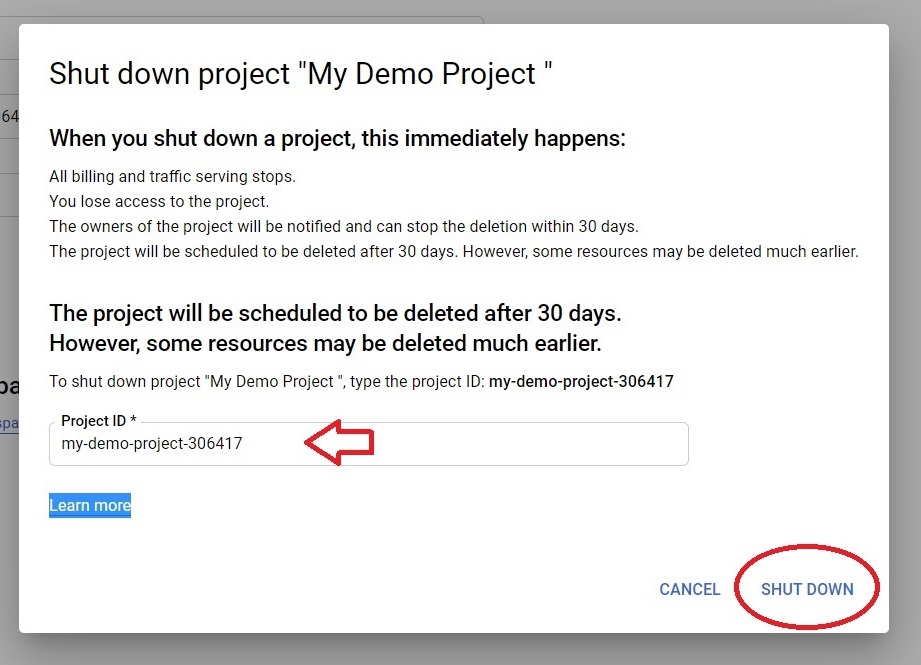
Step Eleven: Enter the Project ID to Confirm
Enter the project ID of the project you are shutting down, then confirm.
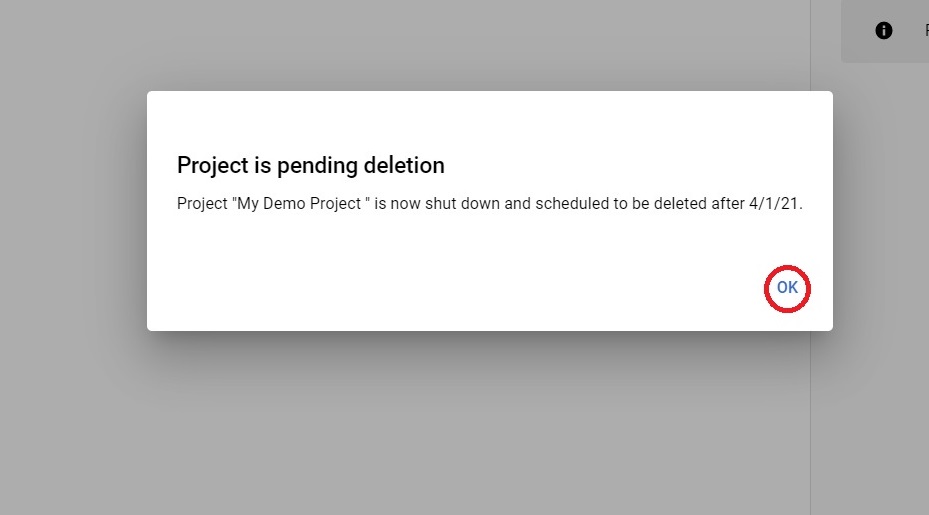
Step Twelve: The Project Leaves Your Active List
The project is removed from your active projects.
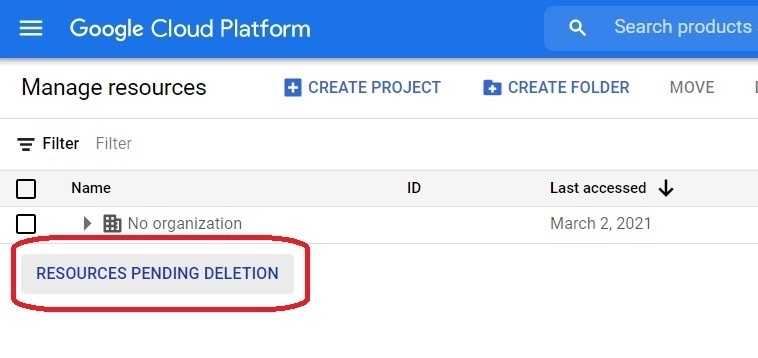
Step Thirteen: Open Resources Pending Deletion
To bring a deleted project back, click Resources pending deletion.
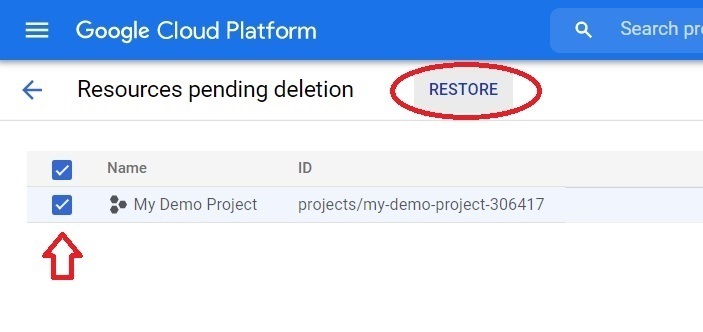
Step Fourteen: Restore the Project
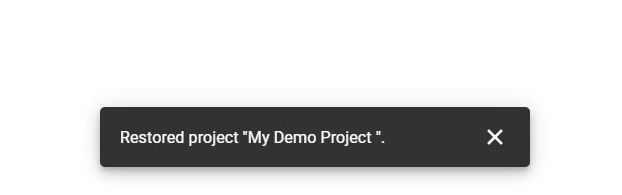
Select the project you want to recover and click Restore, then confirm.
What Happens When You Shut Down a Project
- The project moves into a pending deletion state for 30 days. During that time it can be restored.
- After 30 days the project and all its resources are permanently deleted and cannot be recovered.
- Billing is disabled on the project from the moment it is shut down.
- Most resources can be recovered if you restore within the 30 days, but you should not count on every one of them coming back.
- Only a project that is currently active can be shut down, and project owners are the ones who can restore it.
Keeping a Project ID for Later
Project IDs cannot be reused, even after a project is deleted. If you want to hold on to a particular ID for future use, Google’s guidance is to delete the resources inside the project instead of shutting the project itself down.
Common Mistakes to Avoid
- Accepting the suggested project ID without reading it. The name can be edited later, but the ID is permanent.
- Assuming a Gmail address is required. Any Google Account works, including one created with an existing email address.
- Shutting down a project and expecting to restore it months later. After 30 days it is gone for good.
- Planning to reuse a deleted project’s ID. A deleted project’s ID can never be used again.
- Creating a project without a billing account and wondering why resources will not start. Billing has to be enabled on the project first.
That covers creating a Google Cloud project with the right name and ID, and shutting one down or bringing it back. To go further, explore Prwatech’s Google Cloud training program, which includes placement assistance.






