Administering GKE clusters
Managing GKE Clusters: Maintenance, Autoscaling, Logging, and Node Repair
Once a Google Kubernetes Engine cluster is running, four settings decide how well it looks after itself. The maintenance window controls when Google is allowed to upgrade and repair it. The cluster autoscaler controls how many machines it runs, and so what it costs. Logging and monitoring decide whether you can see what is happening inside it. And node auto repair decides whether broken machines are fixed without you noticing.
None of these is hard to set, but each has a default that may not suit you, and each can cause trouble if switched off carelessly. A cluster that upgrades in the middle of your busiest hour, scales down too eagerly, or has no logs when something breaks is a cluster you will wish you had configured sooner.
This walks through each setting in the console and with gcloud, with the commands updated to what Google documents today.
Prerequisites:
- A running GKE Standard cluster. The Creating Standard GKE Cluster guide in this series covers that. Some of these settings work differently, or are managed for you, on Autopilot clusters, which the Creating Autopilot GKE Cluster guide covers.
- Permission to change the cluster’s settings.
Step by Step Process of Managing GKE Clusters
Part One: Configure a Maintenance Window
GKE upgrades clusters and repairs nodes automatically, and a maintenance window tells it when it is allowed to do that. Without one, maintenance can happen at any time.
Open the console,
Open menu > Kubernetes > Clusters
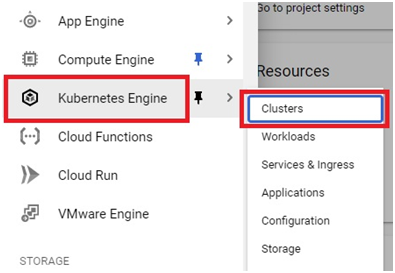
Click your cluster to open it.
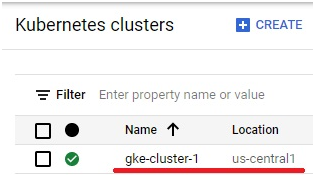
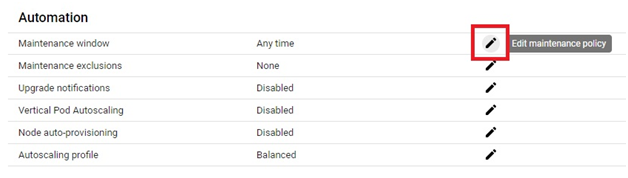
Set the Window in the Console
In the Automation section, click the pencil icon next to Maintenance window.
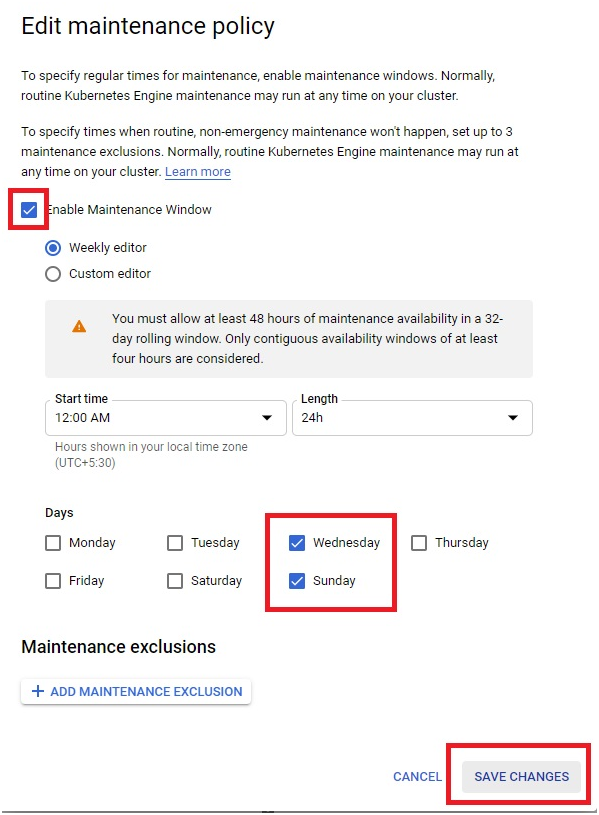
Tick Enable maintenance window, choose the time and the days, then click Save changes. To turn a window off later, untick Enable maintenance window.
The Rules for a Window
- Each window must be at least 4 hours long.
- Across a rolling 92 day period, your windows must add up to at least 48 hours of maintenance availability. Only windows of at least four contiguous hours count.
- If you do not give a time zone in the start time, Google uses the local time set in your account, so it is safer to write the time in UTC, with a Z at the end.
Set the Window With a Command
This sets a six hour window every Saturday and Sunday, in UTC. The start and end times only anchor the pattern, and the recurrence repeats it. Replace the placeholders and use your cluster’s zone, which has a letter on the end, such as us-central1-c:
gcloud container clusters update CLUSTER_NAME –zone=ZONE –maintenance-window-start=2026-11-14T02:00:00Z –maintenance-window-end=2026-11-14T08:00:00Z –maintenance-window-recurrence=’FREQ=WEEKLY;BYDAY=SA,SU’
The original page wrote the flags with en dashes, used a region where a zone belongs, and set a window that ran for five days. Google’s documentation gives many examples of this form. For a regional cluster, use the region flag instead of the zone flag.

Remove the Window
gcloud container clusters update CLUSTER_NAME –zone=ZONE –clear-maintenance-window
Part Two: The Cluster Autoscaler
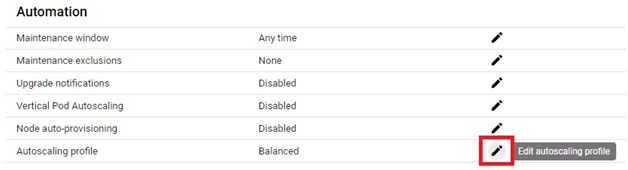
GKE’s cluster autoscaler resizes your node pools to match what your workloads need. You set a minimum and maximum size for each pool, and it adds or removes machines within those limits, so you do not have to add machines by hand or keep spare ones running. The autoscaling profile decides how readily it removes machines.
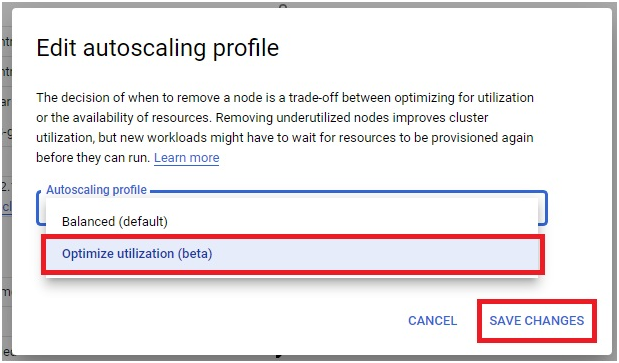
- Balanced, is the default. It is not available on Autopilot clusters.
- Optimize utilization, puts more weight on using machines fully than on keeping spare room, so the autoscaler scales the cluster down more aggressively. It saves money, with a smaller buffer for sudden demand.
Choose the Profile in the Console
In the cluster, click the pencil icon next to Autoscaling profile.
Choose Optimize utilization and click Save changes.
Choose the Profile With a Command
gcloud container clusters update CLUSTER_NAME –zone=ZONE –autoscaling-profile=optimize-utilization
The original page used the beta command group, but Google’s current documentation shows this in the standard group. To go back to the default, use the value balanced. The profile only has an effect on node pools that have autoscaling switched on, as the Configuring and Expanding GKE Clusters guide in this series shows.

Part Three: Logging and Monitoring
GKE can send your cluster’s logs to Cloud Logging and its metrics to Cloud Monitoring, which is how you find out what went wrong when something does. The original page calls this Cloud Operations for GKE, which is an old product name, and uses a command Google has deprecated.
Google’s reference says the enable stackdriver kubernetes flag is deprecated and will be removed, and tells you to use the logging and monitoring flags. This sends system logs and workload logs, and system metrics:
gcloud container clusters update CLUSTER_NAME –zone=ZONE –logging=SYSTEM,WORKLOAD –monitoring=SYSTEM

The original page also shows a command for Legacy Logging and Monitoring. Google says that Legacy Logging and Monitoring is deprecated, and I would not use it for anything new. If you meet a cluster that still uses it, plan to move it to the logging and monitoring flags above.

To turn logging and monitoring off, set the components to NONE. I have not tested this, and I would be careful, since a cluster with no logs is very hard to troubleshoot:
gcloud container clusters update CLUSTER_NAME –zone=ZONE –logging=NONE –monitoring=NONE
Part Four: Node Auto Repair
Node auto repair watches the health of the machines in a node pool and repairs ones that fail, so a bad machine is replaced without you having to notice it first. It is almost always worth leaving on.
Turn It On With a Command
gcloud container node-pools update POOL_NAME –cluster=CLUSTER_NAME –zone=ZONE –enable-autorepair

Turn It Off With a Command
gcloud container node-pools update POOL_NAME –cluster=CLUSTER_NAME –zone=ZONE –no-enable-autorepair
Turn it off only if you have a specific reason, such as investigating a problem on a node you do not want replaced.

If You See an Error
The original page says that an error may arise and shows a fix. It does not show the error text. Google’s reference notes that node auto upgrade is enabled by default for clusters in a release channel. The most likely cause is that GKE will not let you switch off node settings on a cluster that is enrolled in one. The fix on the original page is to open Cluster basics, click the pencil icon next to Release channel, change it to a static version, and save.
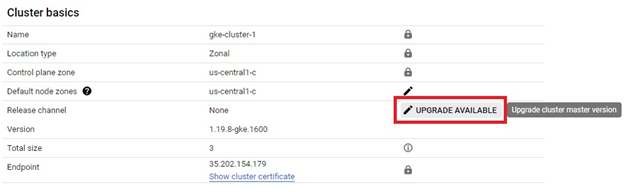
Think before you do this. A release channel is how GKE keeps your cluster up to date, and leaving it means you take on upgrades yourself. Check the exact error you get, and if you only wanted auto repair on, you do not need to change the channel at all.
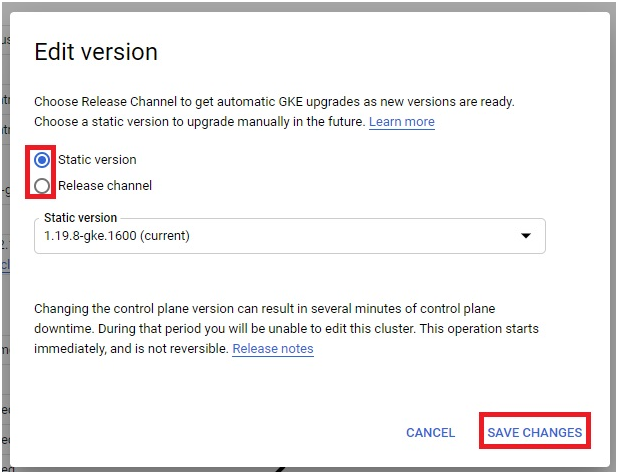
Turn It On in the Console
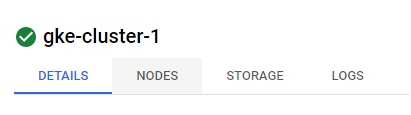
In the cluster, click Nodes.
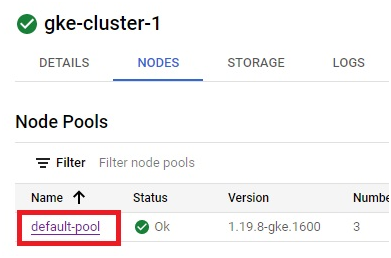
Open the node pool you want to change.
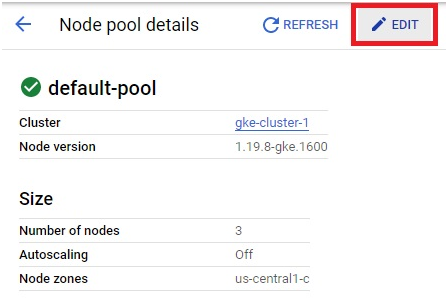
Click Edit.
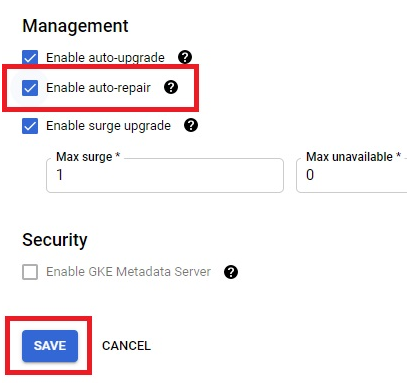
Tick the Enable Auto Repair and Click Save.
Common Mistakes to Avoid
- Writing flags with en dashes. Use two real hyphens.
- Using a region where a zone is needed, or the other way round. A zone ends in a letter.
- Setting a maintenance window shorter than four hours, or too little of it overall, and having the change rejected.
- Using the deprecated stackdriver flag or Legacy Logging and Monitoring on a new cluster.
- Switching off logging, then having nothing to look at when something breaks.
- Disabling auto repair, or leaving a release channel, to get past an error without understanding it.
That covers the four settings that decide how a GKE cluster looks after itself, with the commands brought up to date. To go further, explore Prwatech’s Google Cloud training program, which includes placement assistance.






