Working with cloud SQL
Loading and Querying Real Data in Cloud SQL
This picks up with an existing Cloud SQL for MySQL instance and puts it to actual use, creating a database, loading a real dataset of New York taxi trips into it from two CSV files, then running a series of analytical queries against it directly from the mysql command line client. If you do not have an instance running yet, the Creating Cloud SQL Instance Using Cloud Shell guide covers that first step.
Doing this through the mysql client instead of a graphical tool keeps everything in one place, the same Cloud Shell session that created the instance, and every command here is something you could drop directly into a script later. It is also simply a fast way to get comfortable with real SQL against a real, imperfect dataset, complete with the zero fare rows and zero distance trips you will filter out along the way.
This walks through creating the database and its table, importing both CSV files into it, then running six queries that explore what is actually in the data.
Step by Step Process of Loading and Querying Real Data in Cloud SQL
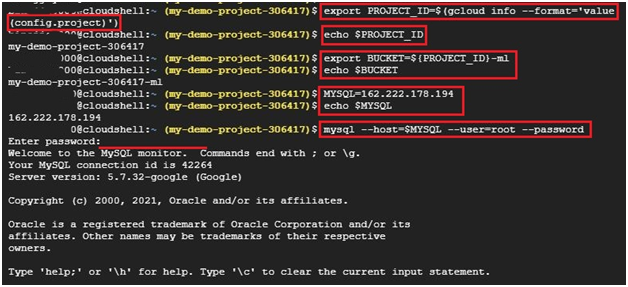
Step One: Set Your Variables
Paste these one at a time, replacing the IP address placeholder with your actual instance’s IP address:
export PROJECT_ID=$(gcloud info –format=”value(config.project)”)
echo $PROJECT_ID
export BUCKET=${PROJECT_ID}-ml
echo $BUCKET
MYSQL=IP_ADDRESS
echo $MYSQL
Each export line saves a value into a variable, and each echo line prints it back so you can confirm it is correct before moving on.
Step Two: Connect to MySQL
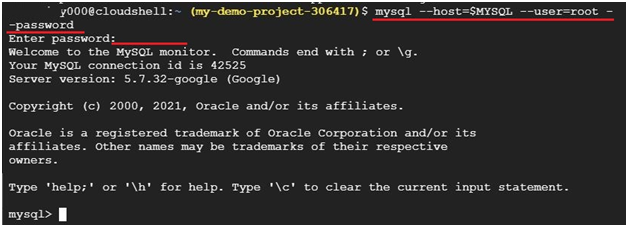
mysql –host=$MYSQL –user=root –password
Enter your password when prompted. It will not show on screen as you type it, this is normal.
Step Three: Create a Database
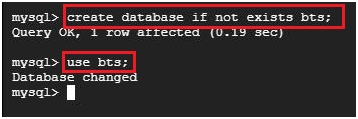
create database if not exists bts;
use bts;
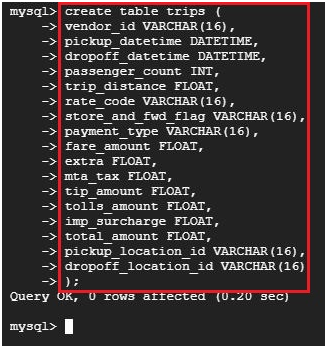
Step Four: Create the Trips Table
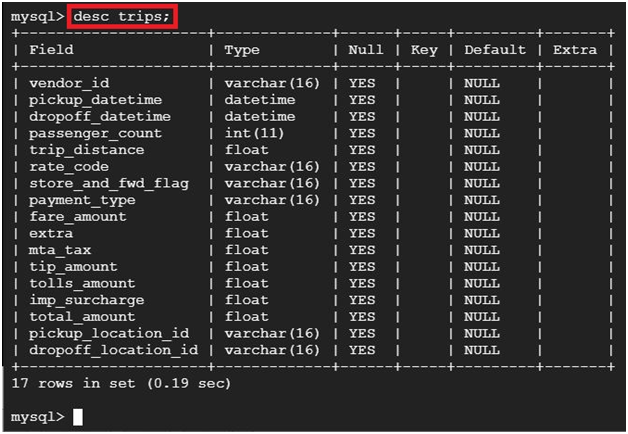
create table trips (
vendor_id VARCHAR(16),
pickup_datetime DATETIME,
dropoff_datetime DATETIME,
passenger_count INT,
trip_distance FLOAT,
rate_code VARCHAR(16),
store_and_fwd_flag VARCHAR(16),
payment_type VARCHAR(16),
fare_amount FLOAT,
extra FLOAT,
mta_tax FLOAT,
tip_amount FLOAT,
tolls_amount FLOAT,
imp_surcharge FLOAT,
total_amount FLOAT,
pickup_location_id VARCHAR(16),
dropoff_location_id VARCHAR(16)
);
Exit the mysql client to go back to the plain Cloud Shell prompt:
exit
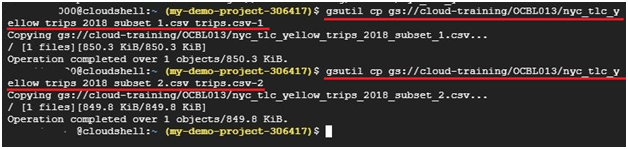
Step Five: Copy the Sample Data Files
gsutil cp gs://cloud-training/OCBL013/nyc_tlc_yellow_trips_2018_subset_1.csv trips.csv-1
gsutil cp gs://cloud-training/OCBL013/nyc_tlc_yellow_trips_2018_subset_2.csv trips.csv-2
This copies two CSV files of sample taxi trip data from a public training bucket into your Cloud Shell home directory.
Step Six: Check Both Files
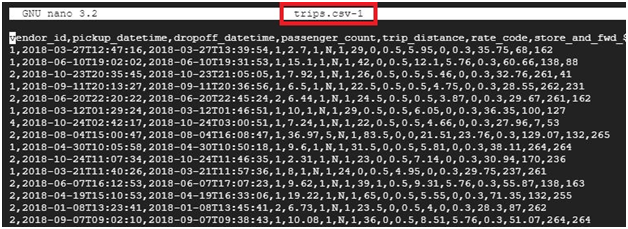
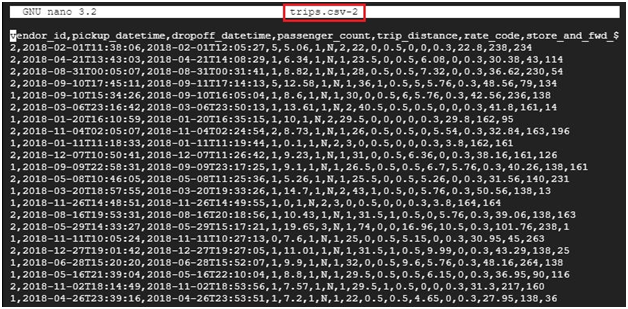
Open the first file in the nano editor to confirm it copied correctly. Press control x to close it.
nano trips.csv-1

Do the same for the second file:
nano trips.csv-2

Step Seven: Import Both Files Into the Table
mysqlimport –local –host=$MYSQL –user=root –password –ignore-lines=1 –fields-terminated-by=’,’ bts trips.csv-*
The ignore lines flag skips each file’s header row, and the wildcard at the end tells mysqlimport to pick up both trips.csv-1 and trips.csv-2 in one command rather than importing them separately.

Step Eight: Reconnect and Select the Database
mysql –host=$MYSQL –user=root –password
use bts;

Step Nine: Explore the Data
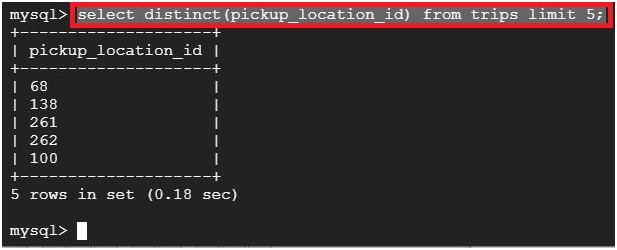
A first look at which pickup locations actually appear in the data:
select distinct(pickup_location_id) from trips limit 5;
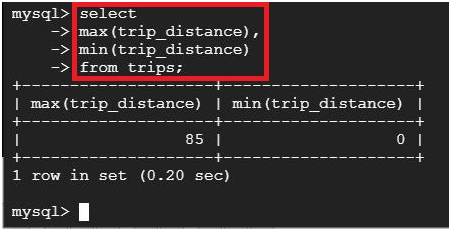
The shortest and longest trip distances in the dataset:
select
max(trip_distance),
min(trip_distance)
from trips;
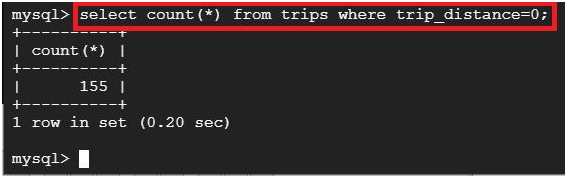
How many trips are recorded with zero distance, which is worth knowing before trusting any distance based analysis on this data:
select count(*) from trips where trip_distance=0;
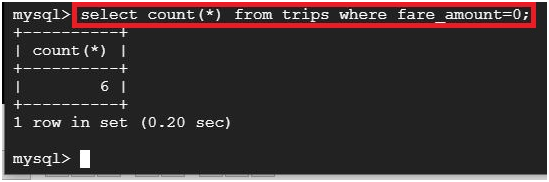
The same check for zero fare trips:
select count(*) from trips where fare_amount=0;
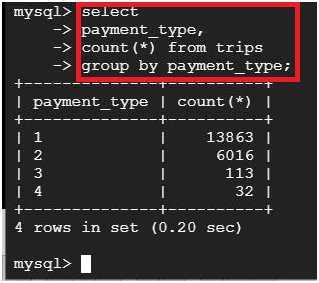
A breakdown of how many trips used each payment type:
select
payment_type,
count(*) from trips
group by payment_type;
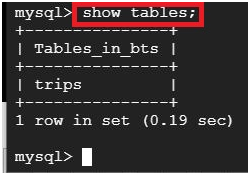
Confirming the table exists in the database:
show tables;
The table’s full column structure:
desc trips;
Common Mistakes to Avoid
- Skipping the zero distance and zero fare checks before running further analysis. Real world data almost always has rows like this, and ignoring them can quietly skew an average or a total.
- Copying commands with the wrong dash character. If a command fails with an unrecognized flag, retype the flags rather than assuming the command is wrong.
- Forgetting the wildcard when importing multiple files. Without trips.csv-* at the end, mysqlimport only picks up a single file, not both.
- Running these commands without an instance’s IP address on hand. Get that from the Creating Cloud SQL Instance Using Cloud Shell guide first if you have not already.
That covers loading a real dataset into Cloud SQL and querying it directly with the mysql client. To go further, explore Prwatech’s Google Cloud training program, which includes placement assistance.






