Retention Policy and life cycle in Bucket.
Cloud Storage Retention Policies and Lifecycle Rules
Retention policies and lifecycle rules both act on objects in a bucket automatically over time, but they do opposite jobs. A retention policy stops objects from being deleted or overwritten until a set amount of time has passed, which is what compliance and legal requirements usually call for. A lifecycle rule does the reverse, automatically deleting objects or moving them to cheaper storage once they reach a certain age, which is what you want for routine cost management rather than legal protection.
This covers setting a retention policy on a bucket, testing that it actually blocks deletion, and creating a lifecycle rule to automate what happens to objects as they age.
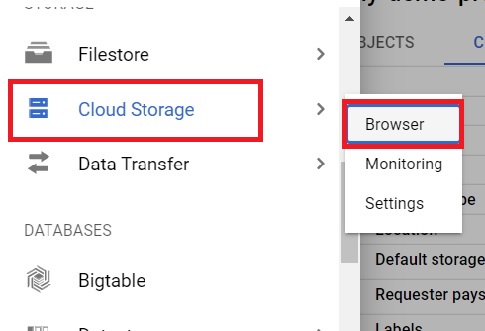
Step 1: Open the Bucket Browser
Open the console, then
Click Menu > Google Cloud Storage > Click on Browser
Step 2: Select a Project
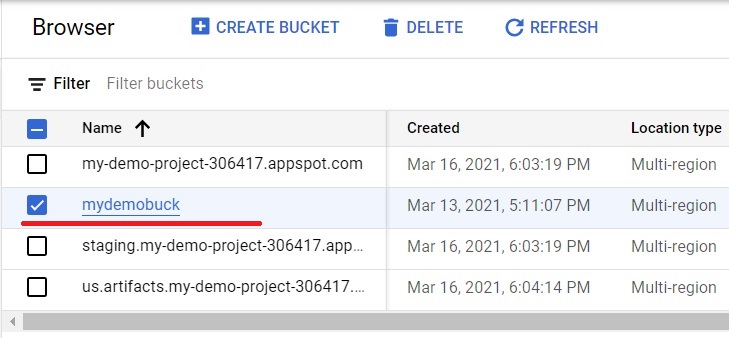
Step 3: Open Retention Settings
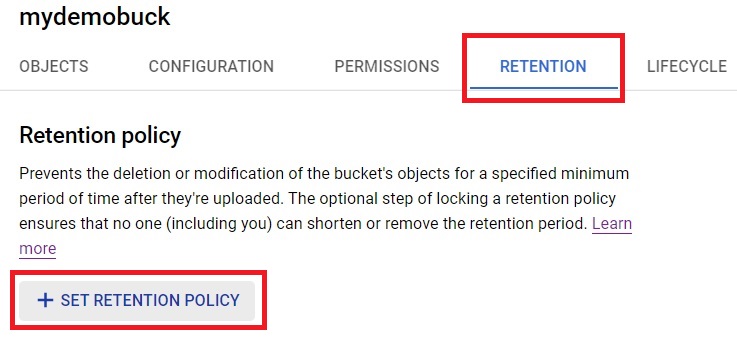
Open your bucket, then
Click on Retention > Set Retention Policy.
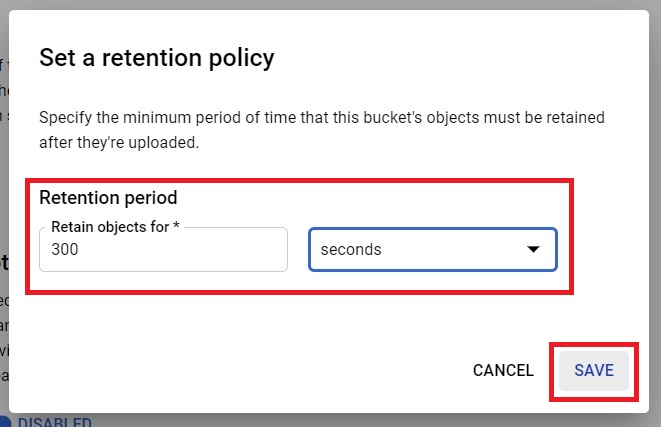
Step 4: Set the Retention Period
Give the retention period, in seconds, days, months, or years, then click Save.
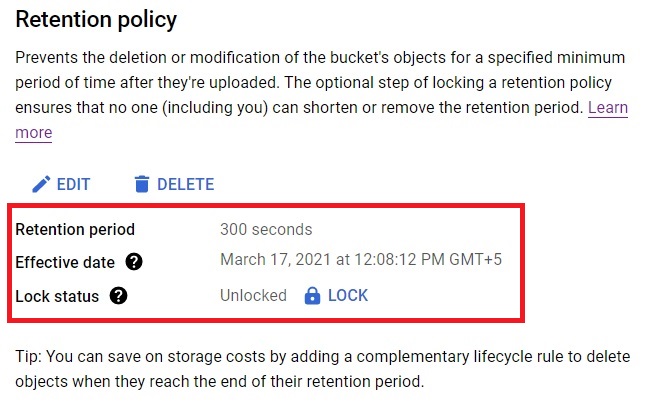
Step 5: Confirm the Policy is Active
The retention policy now applies to the bucket. At this point it is unlocked, meaning it can still be shortened or removed entirely by anyone with the right permission.
Step 6: Test the Policy
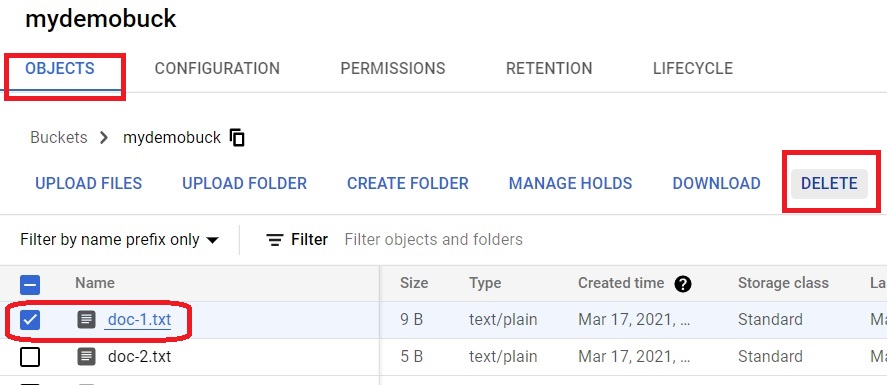
Select a file in the bucket and try to delete it.

Locking a Retention Policy Is Permanent
Locking is a separate, optional step from simply setting a policy, and it is not something to do casually. Once locked, the retention period can only be increased, never reduced or removed, by anyone, for any reason. The bucket itself cannot be deleted until every object inside it has already outlived the retention period, which could mean years of mandatory storage with zero ability to delete anything, even by mistake. This exists specifically for regulatory situations, such as financial or healthcare recordkeeping, where the whole point is that nobody, not even an administrator, should be able to tamper with the data early. Do not lock a policy unless you are certain the retention period is exactly right first.
Step 7 : Add a Lifecycle Rule
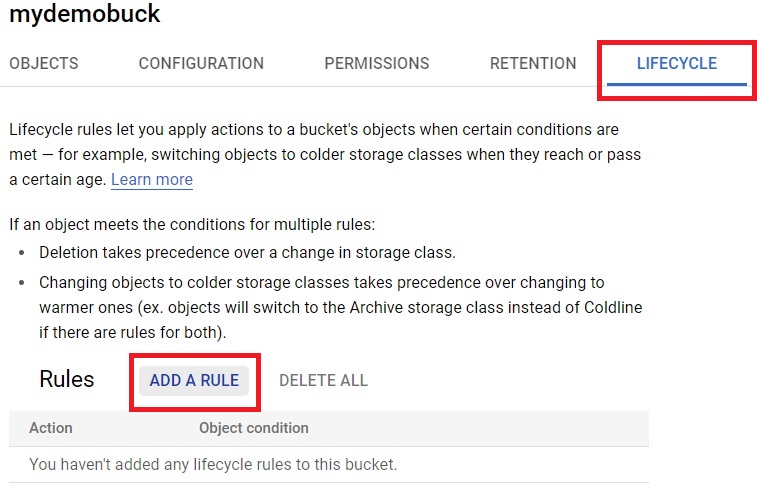
Click Lifecycle, then Add a Rule.
Step 8: Choose an Action
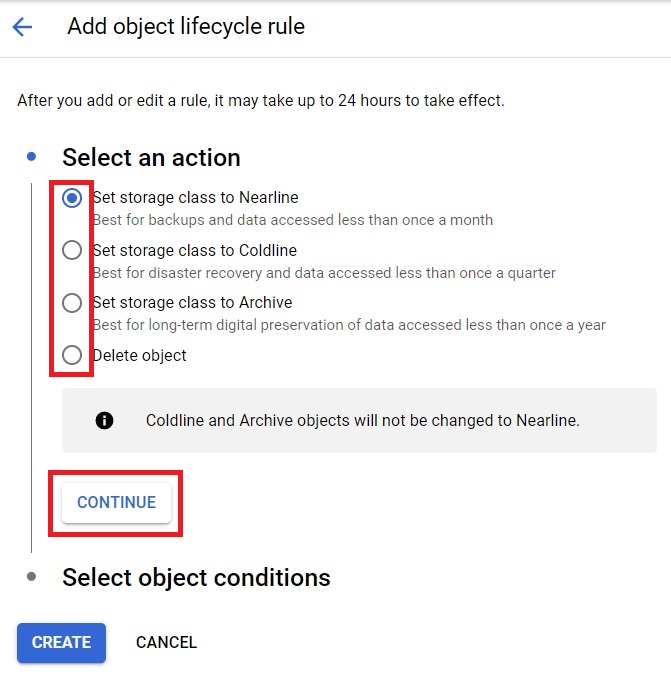
A lifecycle rule can do one of two things to a matching object. It can delete the object outright, or it can change the object’s storage class to a cheaper tier, such as moving infrequently accessed data to Nearline or Coldline storage. Choose whichever fits, then click Continue.
Step 9: Set Conditions and Create the Rule
Set the conditions that decide when this action applies, most commonly an object’s age, then click Create.
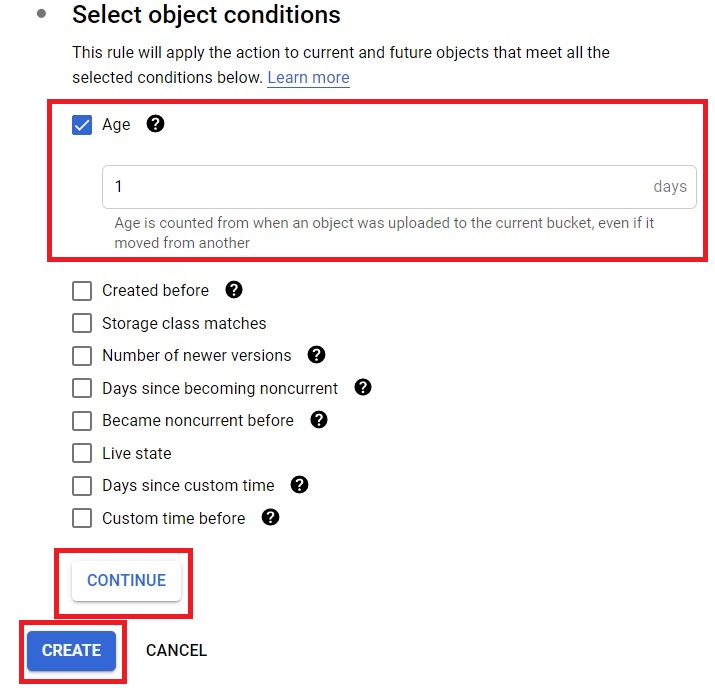
The rule now applies to the bucket, though a change to a lifecycle configuration can take up to a day to actually start taking effect.
Common Mistakes to Avoid
- Locking a retention policy before you are fully certain about the period. There is no correcting this decision afterward, only increasing the period further.
- Assuming a lifecycle rule can only change storage class. It can also delete objects outright, so double check which action you actually selected before creating a rule.
- Forgetting that retained objects still cost money. A retention policy does not pause billing, you pay for that storage for the entire retention period regardless of whether anyone ever needs the data again.
- Expecting a lifecycle change to apply instantly. Give it up to 24 hours before assuming a rule is not working.
That covers setting a retention policy, understanding what locking one actually means, and automating object lifecycle rules. To go further, explore Prwatech’s Google Cloud training program, which includes placement assistance.






