Creating Data Fusion Instance
Create Cloud Data Fusion instance
Creating a Cloud Data Fusion instance in Google Cloud Platform (GCP) enables users to build, deploy, and manage data integration pipelines for extracting, transforming, and loading (ETL) data from various sources into their data warehouses or analytics platforms. Cloud Data Fusion provides a visual interface and a managed service for building ETL pipelines without requiring users to manage infrastructure or write code.
To create a Cloud Data Fusion instance, users can navigate to the Cloud Data Fusion section of the GCP Console and click on the “Create instance” button. From there, users can specify configuration details such as the instance name, location, and version of Cloud Data Fusion. Users can also choose the machine type, network settings, and other advanced options as needed.
Prerequisites
GCP account
Open Console.
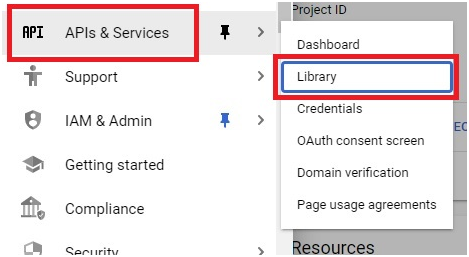
Open Menu > API services > Library
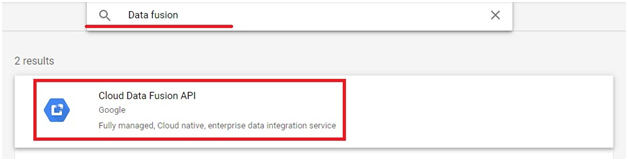
Search Data Fusion API
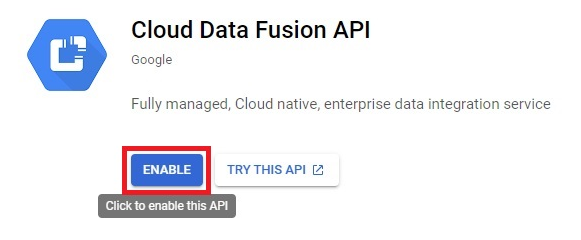
Select Cloud Data Fusion API
Click Enable API
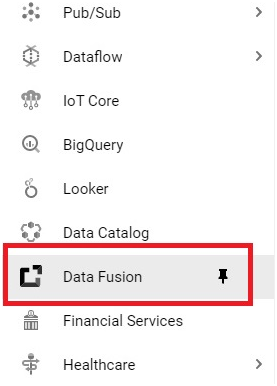
Open Menu > Data Fusion
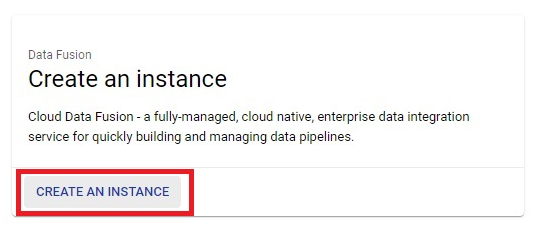
Click on create an instance
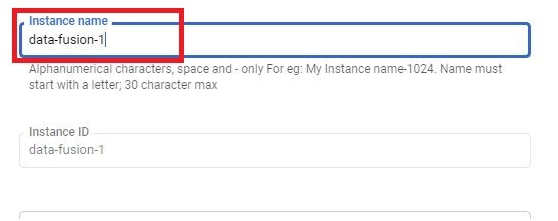
Give name
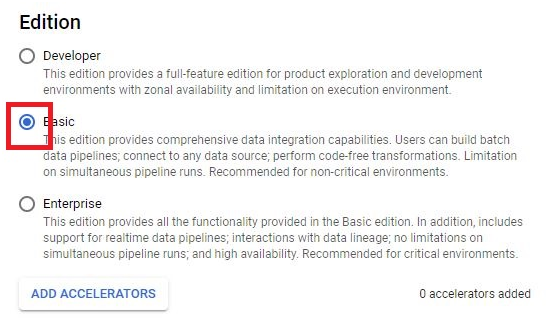
Choose Edition as Basic
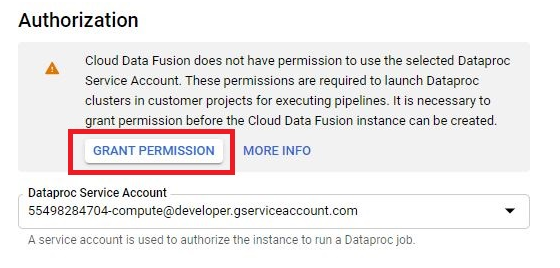
In Authorization, click on Grant Permission
Click Create.
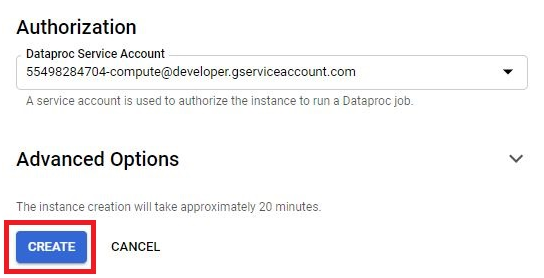
The instance will be created. It will create 10-15 minutes.
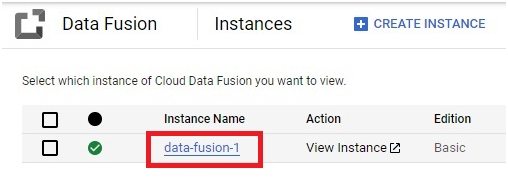
Click on Instance.
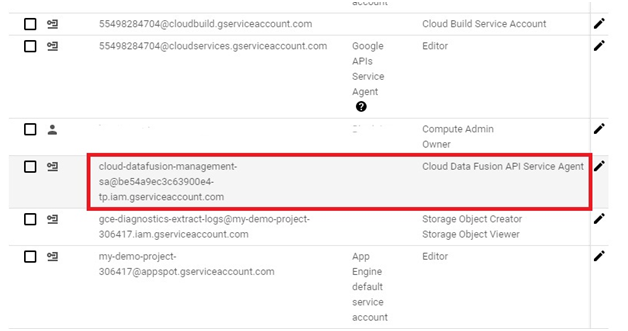
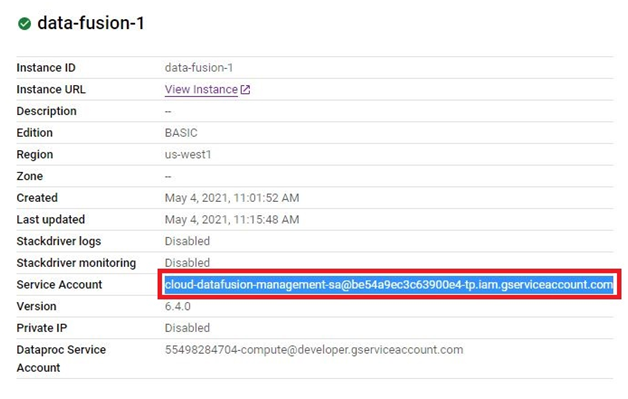
Copy the service account.
Go to IAM & Admin to add permission.
Click Add

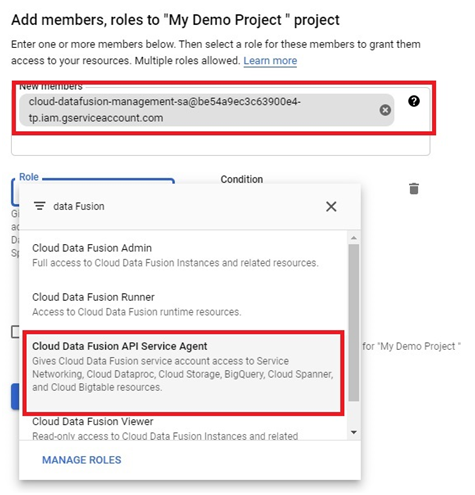
Paste the service account.
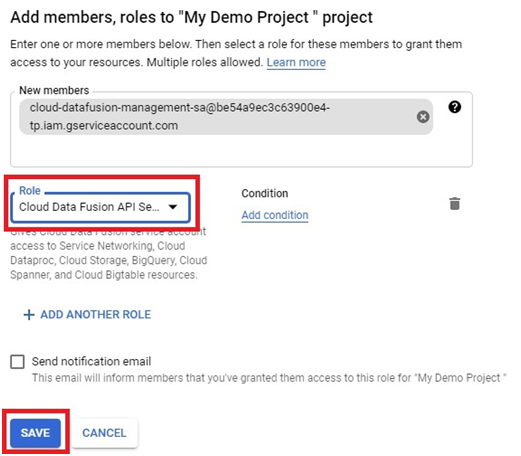
Give role as Cloud Data Fusion API service Agent.
NB : Sometimes you may have to give Cloud Data Fusion Admin access also.
Click Save.
The Service account will be saved with the given role.