Working with Dataproc
Working With Dataproc: Four Spark Examples Over SSH
This runs four small Spark jobs directly on a Dataproc cluster’s master node over SSH, each a bit more involved than the last, counting movie ratings, totaling customer spending, finding the single most popular movie, then finding the top ten with their actual names attached. It complements the Submitting a Spark Job Through the Dataproc Console guide in this series, which shows the same kind of job submitted through the console interface instead of run directly on the cluster.
This assumes a Dataproc cluster is already running. This walks through connecting to it, confirming Spark and Hive are available, then working through all four examples in order, since each introduces one new idea on top of the last.
Complete Process of Working With Dataproc
Step 1: Connect to Your Cluster
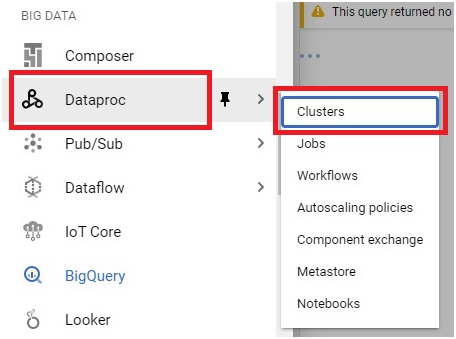
Open the console, then
Open Menu > Dataproc > Clusters
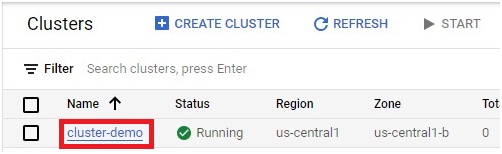
Click your cluster.
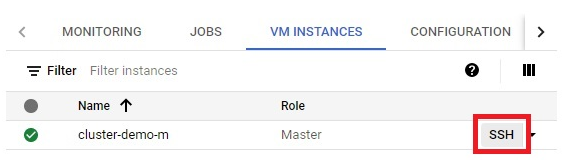
Click VM Instances.

Click SSH next to the master node.
Step 2: Confirm Spark and Hive Are Available
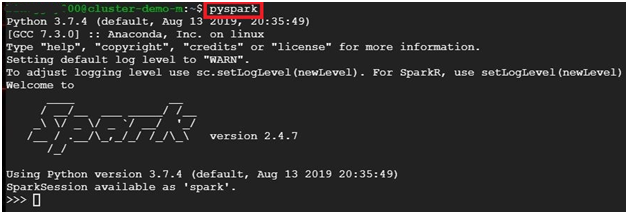
pyspark
This opens the PySpark shell if it is installed. Exit with control + d.
Confirms Hive is available the same way. Exit with control d.

python -V

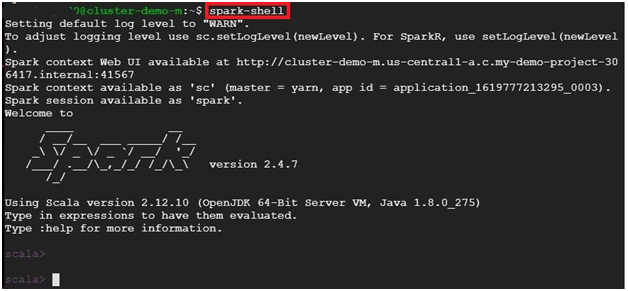
spark-shell
Opens the Spark shell. Exit with control d.
Example One: Counting Ratings
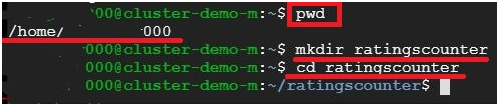
pwd
mkdir ratingscounter
cd ratingscounter
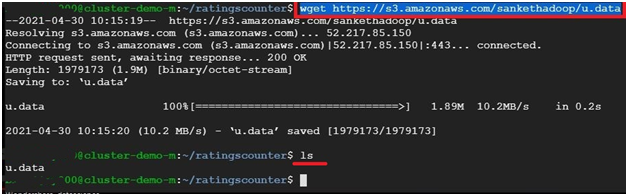
wget https://s3.amazonaws.com/sankethadoop/u.data
ls
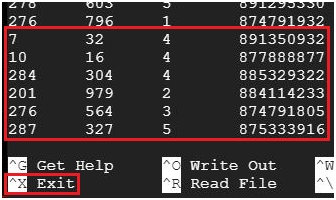
nano u.data

The file’s contents are shown. Exit with control x.
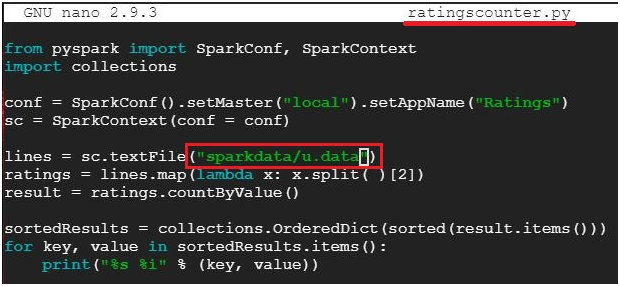
nano ratingscounter.py

Paste in the following, which counts how many ratings fall into each score:
from pyspark import SparkConf, SparkContext
import collections
conf = SparkConf().setMaster(“local”).setAppName(“Ratings”)
sc = SparkContext(conf = conf)
lines = sc.textFile(“sparkdata/u.data”)
ratings = lines.map(lambda x: x.split()[2])
result = ratings.countByValue()
sortedResults = collections.OrderedDict(sorted(result.items()))
for key, value in sortedResults.items():
print(“%s %i” % (key, value))
If you rename the directory or file, update the path inside the script to match. Save and exit with control x, then y, then enter.
Create Schema structure
$ hadoop fs -mkdir /user/<userid>/sparkdata #To create directory named sparkdata
$ hadoop fs -put u.data sparkdata #To copy u.data file into sparkdata
$ hadoop fs -ls sparkdata # to check the file is saved or not

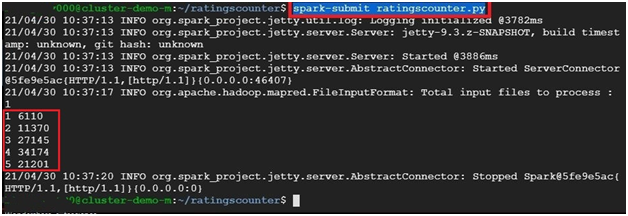
spark-submit ratingscounter.py
Example Two: Total Spend by Customer
cd
mkdir totalspendbycustomer
cd totalspendbycustomer

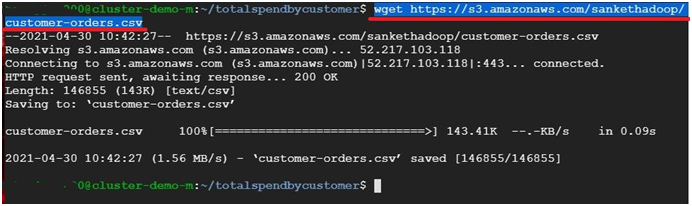
wget https://s3.amazonaws.com/sankethadoop/customer-orders.csv
ls
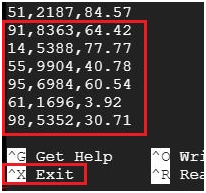
nano customer-orders.csv
Confirm the file’s contents, then exit with control x.

Opens the file.
To exit press ctrl +x
$ pwd #Displays the path

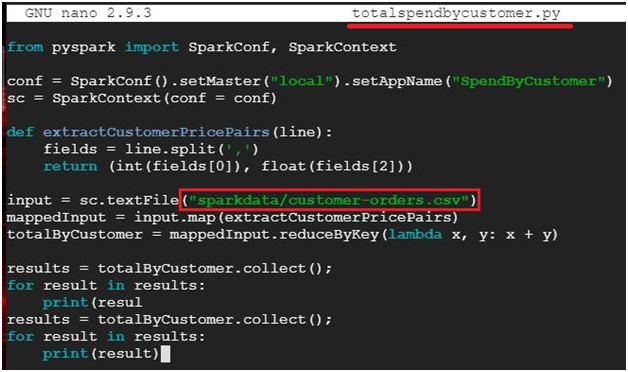
$ nano totalspendbycustomer.py #creates and opens file totalspendbycustomer.py

Paste in the following, which totals how much each customer spent:
from pyspark import SparkConf, SparkContext
conf = SparkConf().setMaster(“local”).setAppName(“SpendByCustomer”)
sc = SparkContext(conf = conf)
def extractCustomerPricePairs(line):
fields = line.split(“,”)
return (int(fields[0]), float(fields[2]))
input = sc.textFile(“sparkdata/customer-orders.csv”)
mappedInput = input.map(extractCustomerPricePairs)
totalByCustomer = mappedInput.reduceByKey(lambda x, y: x + y)
results = totalByCustomer.collect()
for result in results:
print(result)
Save and exit the same way as before.
hadoop fs -put customer-orders.csv sparkdata
hadoop fs -ls sparkdata
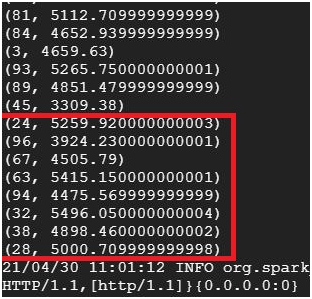
spark-submit totalspendbycustomer.py

Each customer’s ID and total spend is displayed.
Example Three: The Single Most Popular Movie
cd
mkdir popularmovies
cd popularmovies

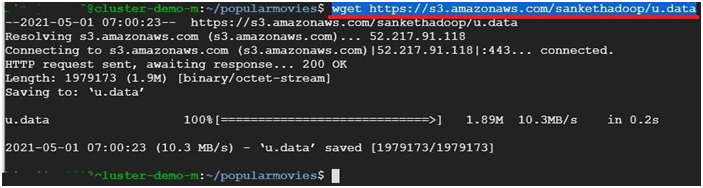
$ wget https://s3.amazonaws.com/sankethadoop/u.data #To copy file to disk
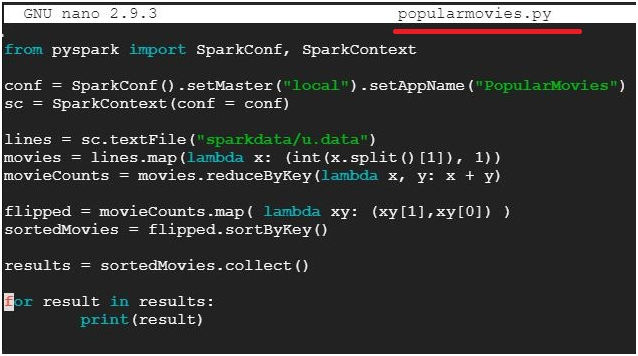
$ nano popularmovies.py #Open file popularmovies.py

Paste in the following, which counts votes per movie and sorts by popularity:
from pyspark import SparkConf, SparkContext
conf = SparkConf().setMaster(“local”).setAppName(“PopularMovies”)
sc = SparkContext(conf = conf)
lines = sc.textFile(“sparkdata/u.data”)
movies = lines.map(lambda x: (int(x.split()[1]), 1))
movieCounts = movies.reduceByKey(lambda x, y: x + y)
flipped = movieCounts.map(lambda xy: (xy[1], xy[0]))
sortedMovies = flipped.sortByKey()
results = sortedMovies.collect()
for result in results:
print(result)
Save and exit, then load the data and run it:
hadoop fs -put u.data sparkdata
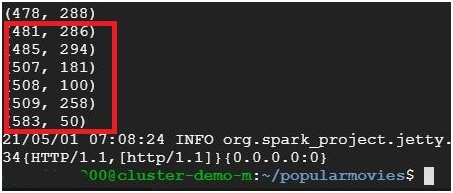
spark-submit popularmovies.py
It will show the most popular movie ID and most number of votes.
Example Four: The Top Ten Popular Movies, With Names
cd
mkdir 10popularmovies
cd 10popularmovies

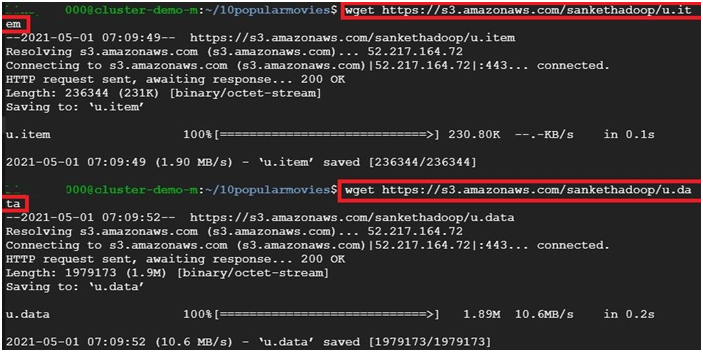
wget https://s3.amazonaws.com/sankethadoop/u.item
wget https://s3.amazonaws.com/sankethadoop/u.data
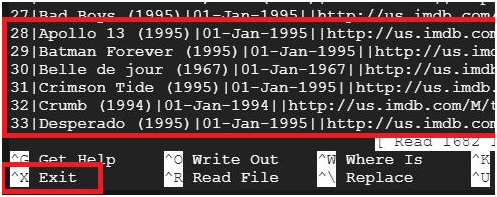
u.item maps each movie ID to its actual title, which the earlier examples never used.
$ nano u.item #To open the file content

To exit press ctrl+ x
$ nano 10popular.py Create and open the file 10popular.py
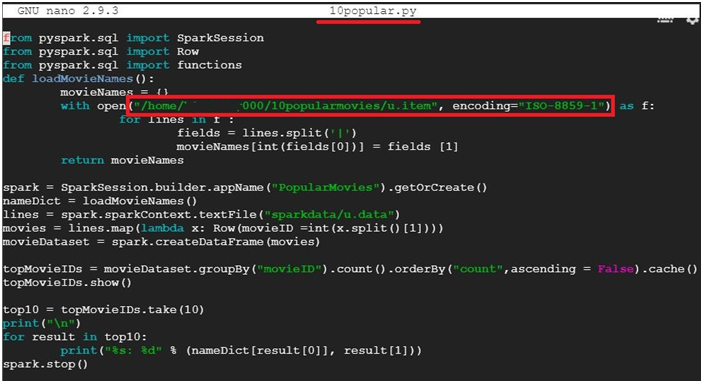
Paste the below code.
from pyspark.sql import SparkSession
from pyspark.sql import Row
from pyspark.sql import functions
def loadMovieNames():
movieNames = {}
with open(“/home/<userid>/10popularmovies/u.item“, encoding=”ISO-8859-1”) as f:
for line in f:
fields = line.split(‘|’)
movieNames[int(fields[0])] = fields [1]
return movieNames
spark = SparkSession.builder.appName(“PopularMovies”).getOrCreate()
nameDict = loadMovieNames()
lines = spark.sparkContext.textFile(“sparkdata/u.data”)
movies = lines.map(lambda x: Row(movieID =int(x.split()[1])))
movieDataset = spark.createDataFrame(movies)
topMovieIDs = movieDataset.groupBy(“movieID”).count().orderBy(“count”,ascending = False).cache()
topMovieIDs.show()
top10 = topMovieIDs.take(10)
print(“\n”)
for result in top10:
print(“%s: %d” % (nameDict[result[0]], result[1]))
spark.stop()
Change the highlighted area as your directory
$ hadoop fs -put u.data sparkdata #To copy u.data file into sparkdata
$ hadoop fs -ls sparkdata #To display the content
$ spark-submit 10popular.py #To execute the 10popular.py file

It will display the most popular 10 movies.
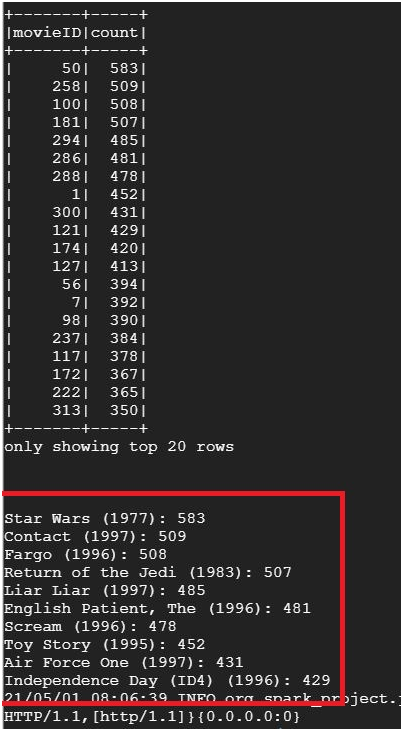
How These Four Examples Build on Each Other
Each example adds exactly one new idea rather than starting from scratch. The first counts values directly. The second maps each line into a key and value pair before combining them. The third flips a result to sort by count instead of by key. The fourth brings in a second file entirely, joining an ID based result against a lookup table to show real names instead of raw numbers, using the newer DataFrame API rather than plain RDDs. Working through them in order is worth more than jumping straight to the last one.
Common Mistakes to Avoid
- Copying a script with curly quotation marks left in. Every string and dictionary key needs straight quotes to run.
- Forgetting to load each new file into HDFS before running its script. A script fails immediately if the data it expects is not there yet.
- Leaving the placeholder username in example four’s file path. It has to match your actual username exactly to find u.item.
- Relying on the personal S3 links here for anything beyond a one time exercise. Switch to the official GroupLens source if you are building something you plan to keep using.
That covers four progressively more advanced Spark examples run directly on a Dataproc cluster. To go further, explore Prwatech’s Google Cloud training program, which includes placement assistance.






