Creating Cloud SQL Instance using cloud shell
Creating a Cloud SQL Instance With gcloud
Cloud SQL is Google Cloud’s managed relational database service, running MySQL, PostgreSQL, or SQL Server without you having to patch, back up, or maintain the underlying server yourself. Everything shown in the console, creating an instance, setting a password, opening network access, has an equivalent gcloud command, and that command line path is what this walks through.
Doing this through Cloud Shell instead of clicking through the console matters once you go beyond a single, one time setup. A command you have already written can be rerun exactly, copied into a script, or handed to a teammate, none of which a sequence of console clicks gives you. It is also simply faster once you know the commands, since creating an instance, setting its password, and opening it up for a connection are three commands here instead of three separate screens.
This creates a Cloud SQL for MySQL instance entirely from Cloud Shell, sets a password for it, opens network access to it, then connects directly using the mysql client, the same end result as using the console, reached a different way.
Step by Step Process of Creating a Cloud SQL
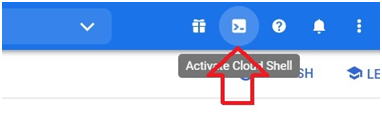
Step One: Activate Cloud Shell
Open the console and click Activate Cloud Shell.
Step Two: Set Your Project ID as a Variable
export PROJECT_ID=$(gcloud info –format=”value(config.project)”)
echo $PROJECT_ID
The first line saves your current project ID into a variable. The second prints it back, so you can confirm it picked up the right one.

Step Three: Name a Bucket Variable
export BUCKET=${PROJECT_ID}-ml
echo $BUCKET
This saves a bucket name based on your project ID into a variable, then prints it. This does not create the bucket itself, it just prepares the name for later use.

Step Four: Create the Instance
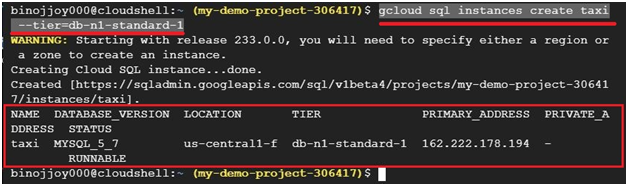
$ gcloud sql instances create taxi –tier=db-n1-standard-1
It will create a sql instance with name taxi.
It will take a little bit time to create.
Accessing the Instance:
Step Five: Set a Password
gcloud sql users set-password root –host % –instance INSTANCE_NAME –password
Leave off the password value itself here, and just add –password with nothing after it. gcloud will prompt you to type it interactively instead, which keeps it out of your shell history, unlike typing the actual password directly into the command.

Step Six: Authorize a Network
gcloud sql instances patch INSTANCE_NAME –authorized-networks 0.0.0.0/0
Press y to confirm.
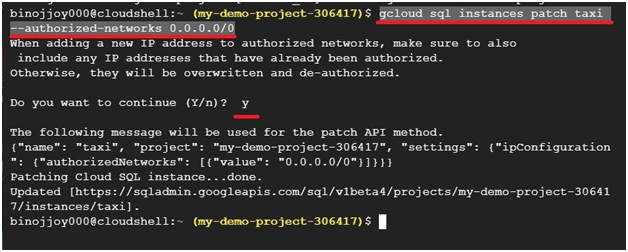
As covered above, this specific range opens the instance to the entire internet, which is fine for a five minute throwaway test and a genuinely bad idea for anything real. If you know the specific IP address you will be connecting from, authorize just that address instead, for example replacing 0.0.0.0/0 with YOUR_IP_ADDRESS followed by /32. The section below covers a better option than authorized networks entirely.
Step Seven: Find the Instance’s IP Address
Open the console, then the menu, then SQL.
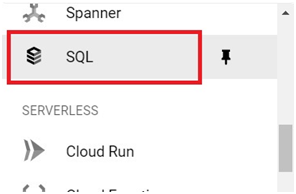
Copy the instance’s IP address.

Step Eight: Save the IP Address as a Variable
MYSQL=IP_ADDRESS
echo $MYSQL

Step Nine: Connect With the MySQL Client
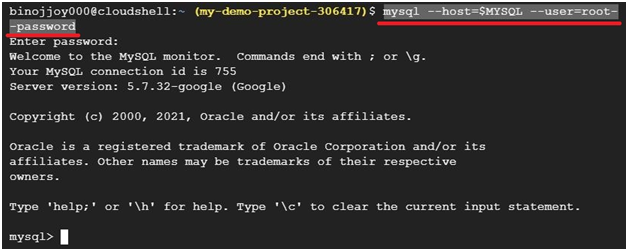
mysql –host=$MYSQL –user=root –password
Enter the password you set earlier when prompted. It will not be shown on screen as you type it, this is normal, just press enter once you are done.
Step Ten: Run a Test Command
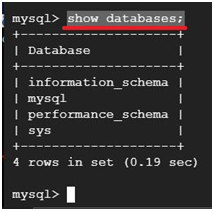
show databases;
This lists the databases currently on the instance.
Step Eleven: Exit
exit
This closes the mysql console and returns you to Cloud Shell.

A Safer Way to Connect Than Authorized Networks
Rather than opening a public IP to a wide range of addresses, Google’s own recommended approach is the Cloud SQL Auth Proxy. It runs alongside your application or on your own machine, handles authentication through IAM permissions instead of a password sitting in a connection string, and encrypts the connection automatically, all without needing to add any address to authorized networks at all. For anything beyond a quick, disposable test, this is the option worth reaching for instead of widening authorized networks.
Common Mistakes to Avoid
- Leaving 0.0.0.0/0 in authorized networks past a quick test. Narrow it to a specific address, or switch to the Cloud SQL Auth Proxy, before this instance holds anything you actually care about.
- Typing a real password directly into a command. It stays in your shell history in plain text. Use the interactive prompt instead by leaving the password flag empty.
- Copying commands with the wrong dash character. If a command fails with an unrecognized flag error, check that every flag uses two real hyphen characters.
That covers creating and connecting to a Cloud SQL instance from Cloud Shell, and the safer way to handle its network access. To go further, explore Prwatech’s Google Cloud training program, which includes placement assistance.






