Adding Local File into Big Query
Uploading a Local File Into BigQuery
BigQuery lets you upload a file straight from your computer and turn it into a table in one step, without touching Cloud Storage first, as long as the file is small enough. This walks through uploading a sample CSV this way and querying the result.
Integrating local files into BigQuery represents a vital aspect of expanding data accessibility and leveraging the platform’s analytical capabilities. This introduction will elucidate the process of seamlessly incorporating local files into BigQuery, elucidating the methods, considerations, and advantages inherent in this operation.
While BigQuery excels in processing vast datasets stored in Google Cloud Storage or other cloud-based repositories, there are scenarios where local files, residing within an organization’s infrastructure or on individual workstations, contain valuable data that warrants inclusion in analytical workflows.
Step by Step Process of Adding Local Files into BigQuery
The process of adding local files into BigQuery involves a few essential steps, such as preparing the data in a compatible format, uploading it to Google Cloud Storage, and then utilizing BigQuery’s native capabilities to ingest the data into its tables. Supported file formats include CSV, JSON, Avro, Parquet, and more, ensuring flexibility and compatibility with various data sources.
Step One: Open BigQuery
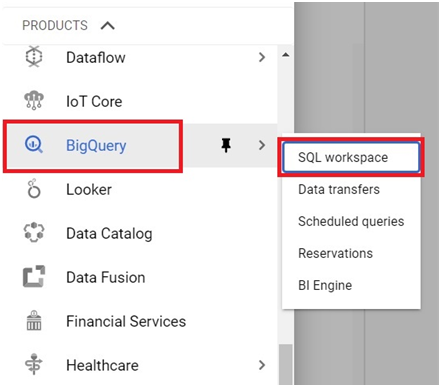
Open the console, then go to BigQuery, then SQL Workspace.
Open Menu > Bigquery > SQL Workspace
Step Two: Select Your Project
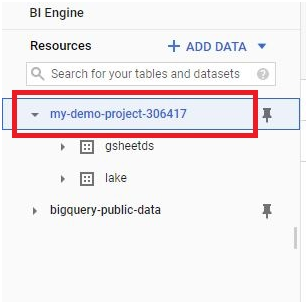
In Resources, select your project.
Step Three: Create a Dataset
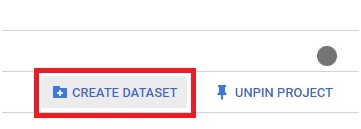
Click Create Dataset.
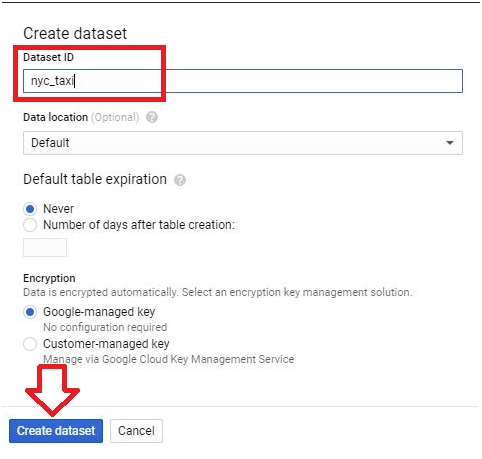
Give it a name. The default settings are fine for this. Click Create Dataset.
Step Four: Download a Sample File
Download this sample CSV, a small subset of New York taxi trip data:
https://storage.googleapis.com/cloud-training/OCBL013/nyc_tlc_yellow_trips_2018_subset_1.csv
In the created dataset, click create Table.
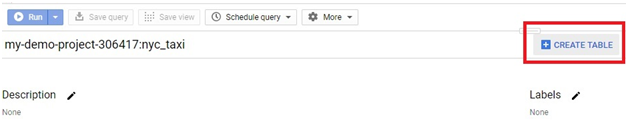
Step Five: Upload the File as a New Table
In your new dataset, click Create Table.
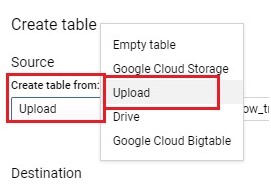
Choose Upload as the source.

Click Browse and select the downloaded file. BigQuery will usually detect the file format automatically. If it does not, set it to CSV manually.
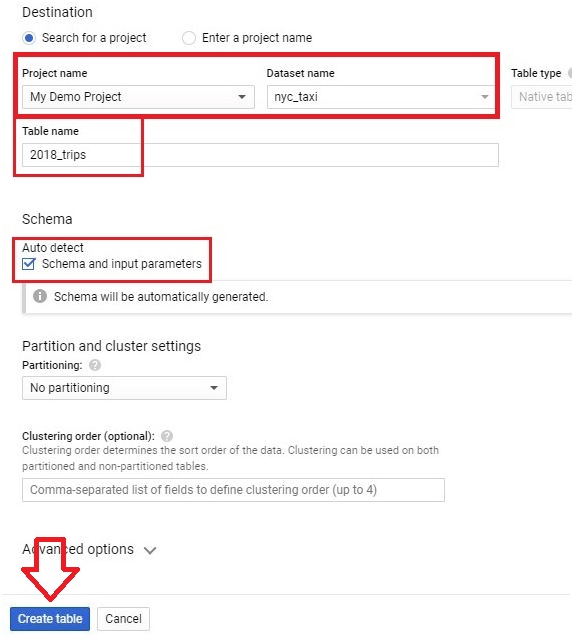
The project and dataset fields are normally filled in for you already. Give the table a name, tick Auto Detect Schema, and click Create Table.
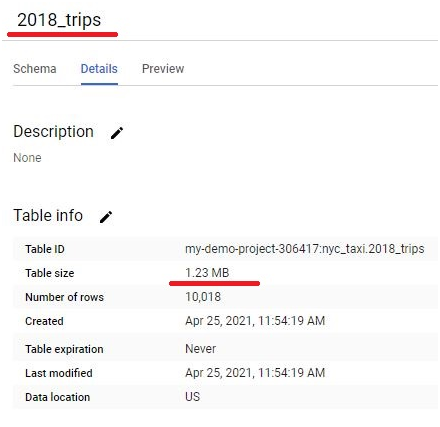
The table is created with the uploaded file’s contents.
Step Six: Query the Table
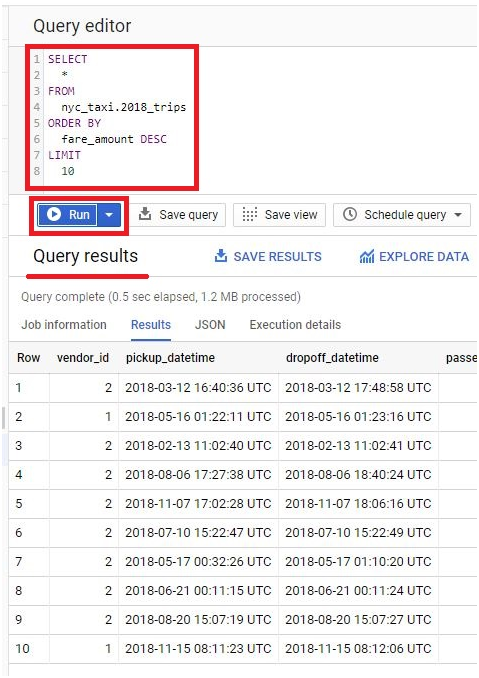
In the query editor, replace the dataset and table names below with whatever you actually named yours, then run it:
SELECT
*
FROM
your_dataset.your_table_name
ORDER BY
fare_amount DESC
LIMIT
10
This returns the ten highest fares in the sample, most to least expensive.
The 10 MB Limit on Direct Upload
Uploading a file straight from your computer through the console only works up to 10 MB for an uncompressed file. This is a hard limit on the direct upload path specifically, separate from the much larger limits that apply when loading data through Cloud Storage or the bq command line tool, which can handle files up into the terabytes.
Once a file is too large for direct upload, the actual fix is exactly what the introduction of the live page was describing, just as a specific threshold rather than a rule that applies to every local file: upload the file to a Cloud Storage bucket first, then load it into BigQuery from there.
Common Mistakes to Avoid
- Trying to directly upload a file larger than 10 MB and assuming BigQuery is broken when it fails. Check the file size first, and route anything larger through Cloud Storage instead.
- Running a query against a dataset and table name copied from an example rather than the one you actually created. Always match the query to your own dataset and table names exactly.
- Skipping Auto Detect Schema on a file with an unfamiliar structure. It saves you from typing out a schema manually, and you can always adjust individual column types afterward if it gets one wrong.
That covers uploading a local file into BigQuery, and the size limit that decides whether Cloud Storage needs to be part of the process. To go further, explore Prwatech’s Google Cloud training program, which includes placement assistance.






